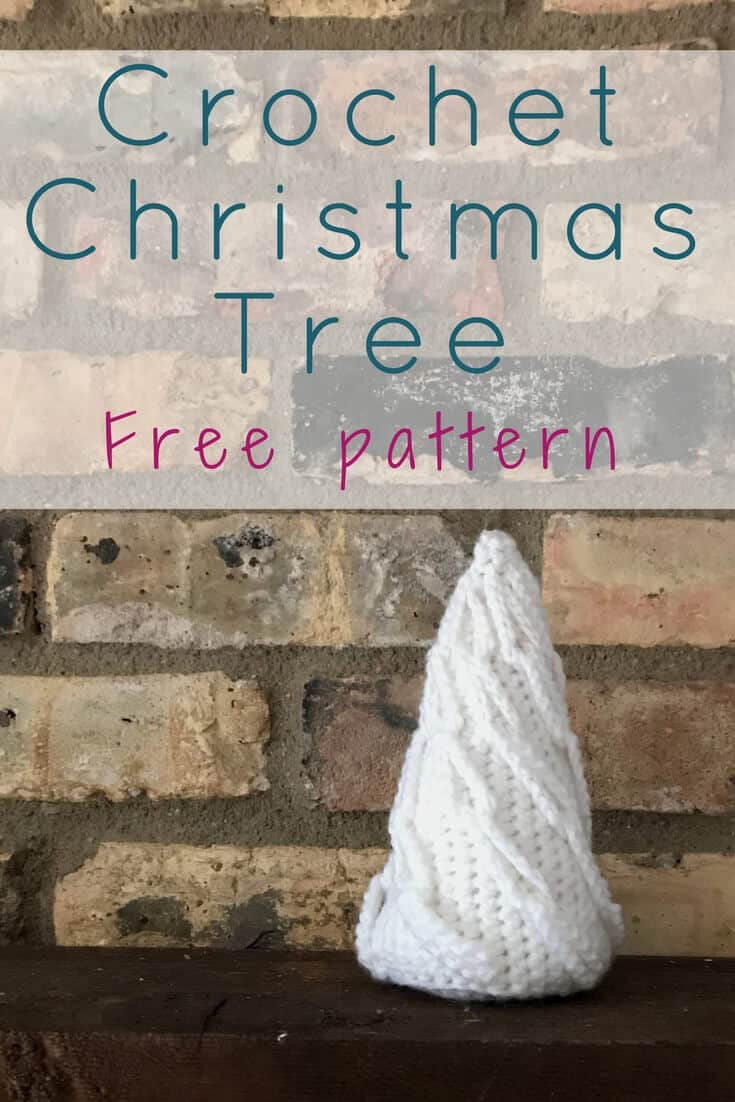
Cabled Crochet Christmas Trees
Disclosure: This post may contain affiliate links. As an Amazon Associate, I earn from qualifying purchases. Please visit my Privacy Policy for disclosures and more information.
Since you are visiting a blog post about cabled crochet Christmas trees I am guessing that you might feel like I do about Christmas! It is such a wonderful and happy season. Since I live in freezing Minnesota, I won’t go as far as saying it’s the most wonderful time of the year, especially when there are subzero temperatures, but it comes pretty darn close to the best!
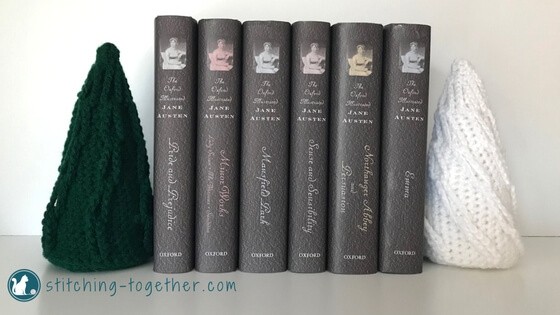
I love decorating for Christmas and making our home look festive. This year I want to incorporate more crocheted items into our Christmas décor.
The idea to use cables came from this hat by Jess at Makeanddocrew. It is amazing how simple it is to create faux cables and there is a video that will show you how to loop the cables if you are having trouble figuring it out just by my words.
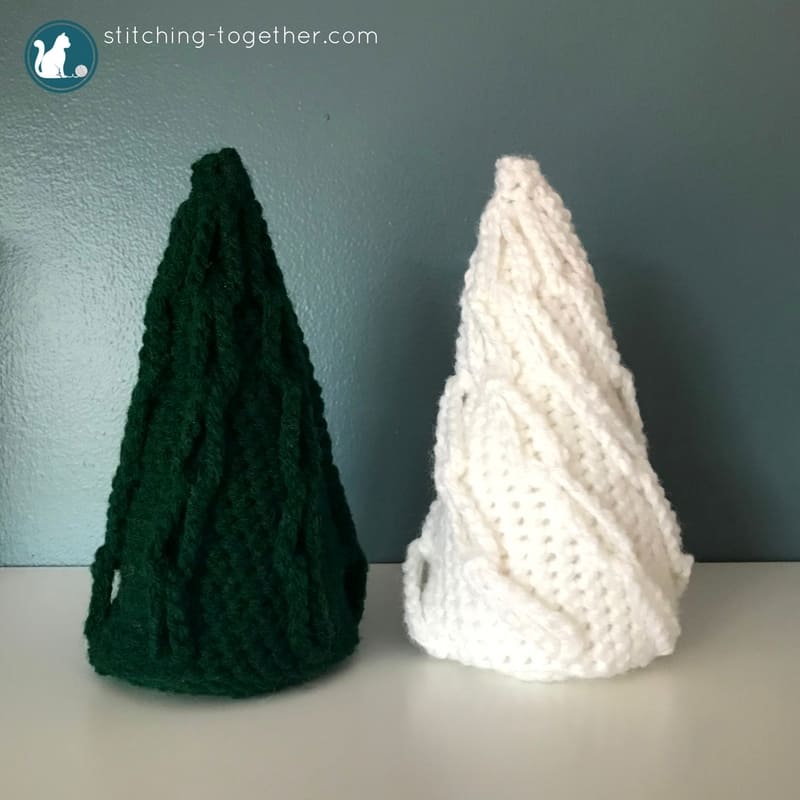
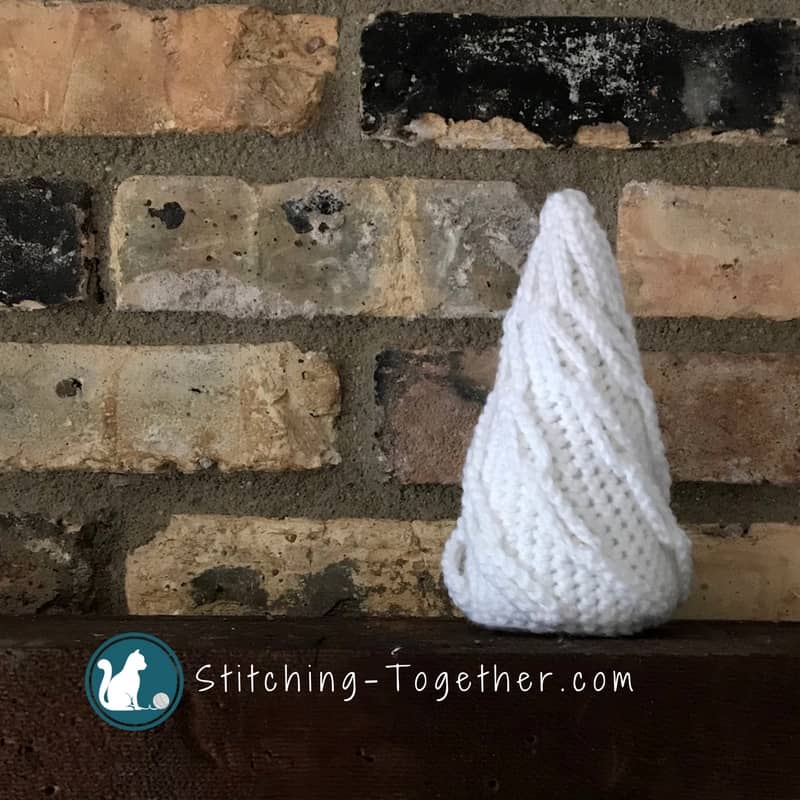
The cables can either be placed straight up and down or run diagonally. I happen to prefer the diagonal tree since the straight one isn’t completely straight. The increasing rows don’t throw the straight line off too much, but enough to bug me!
If your stitches are looking too lose where the stuffing will show through, you might want to go down a hook size.
Cabled Crochet Christmas Trees
Skill Level: Easy
Materials:
US-Size H/8 Crochet Hook or desired hook size (I love these ergonomic and affordable hooks)
Worsted weight yarn less than 5 oz/230yds (I used RHSS in White and Hunter Green)
Large Eye Tapestry Needle
Stuffing
Stitch markers
Abbreviations:
sc – single crochet
sl st – slip stitch
st – stitch
ch – chain
sc2tog – single crochet 2 stitches together
Gauge:
Gauge is not critical for this project – finished tree stands approx. 7” tall
Notes:
Each round will be joined with the sl st to the first st of the round. Be sure not to join in the ch 1. It is easy to count the sl st of the previous row as a st and sc into it, but the sl st should be skipped over. The first sc of each round should go into the sc directly below which will be the same sc you slip stitched into. (Stitch Markers are your friends!)
To close the base of the tree you will be working in a spiral and not joining each round with a slip stitch.
Please tag me on social using #stitchingtog for a chance to have your finished project featured!
Instructions:
Start with a magic circle
Round 1: 6 sc in the circle. Join with sl st to 1st st (6)
Round 2: ch 1, sc in each st around. Join with sl st to 1st st (6)
Round 3: ch 1, *sc, ch 16. Repeat from *. Join with sl st to 1st st (6 sc with 6 chain loops)
Round 4: ch 1, *2 sc in next st, 1 sc in next 2 sts. Repeat from *. Join with sl st to 1st st (8)
Round 5: ch 1, sc in each st around. Join with sl st to 1st st (8)
Round 6: ch 1, *2 sc in next st, 1 sc in next 3 sts. Repeat from *. Join with sl st to 1st st (10)
Round 7: ch 1, sc in each st around. Join with sl st to 1st st (10)
Round 8: ch 1, *2 sc in next st, 1 sc in next 4 sts. Repeat from *. Join with sl st to 1st st (12)
Round 9: ch 1, *sc, ch 16, sc. Repeat from *. Join with sl st to 1st st (12 sc with 6 chain loops)
Round 10: ch 1, *2 sc in next st, 1 sc in next 5 sts. Repeat from *. Join with sl st to 1st st (14)
Round 11: ch 1, sc in each st around. Join with sl st to 1st st (14)
Round 12: ch 1, *2 sc in next st, 1 sc in next 6 sts. Repeat from *. Join with sl st to 1st st (16)
Round 13: ch 1, sc in each st around. Join with sl st to 1st st (16)
Round 14: ch 1, *2 sc in next st, 1 sc in next 7 sts. Repeat from *. Join with sl st to 1st st (18)
Round 15: ch 1, *sc, ch 16, sc in next 2 sts. Repeat from *. Join with sl st to 1st st (18 sc with 6 chain loops)
Round 16: ch 1, *2 sc in next st, 1 sc in next 8 sts. Repeat from *. Join with sl st to 1st st (20)
Round 17: ch 1, sc in each st around. Join with sl st to 1st st (20)
Round 18: ch 1, *2 sc in next st, 1 sc in next 9 sts. Repeat from *. Join with sl st to 1st st (22)
Round 19: ch 1, sc in each st around. Join with sl st to 1st st (22)
Round 20: ch 1, *2 sc in next st, 1 sc in next 10 sts. Repeat from *. Join with sl st to 1st st (24)
Round 21: ch 1, *sc, ch 16, sc in next 3 sts. Repeat from *. Join with sl st to 1st st (24 sc with 6 chain loops)
Round 22: ch 1, *2 sc in next st, 1 sc in next 11 sts. Repeat from *. Join with sl st to 1st st (26)
Round 23: ch 1, sc in each st around. Join with sl st to 1st st (26)
Round 24: ch 1, *2 sc in next st, 1 sc in next 12 sts. Repeat from *. Join with sl st to 1st st (28)
Round 25: ch 1, sc in each st around. Join with sl st to 1st st (28)
Round 26: ch 1, *2 sc in next st, 1 sc in next 13 sts. Repeat from *. Join with sl st to 1st st (30)
Round 27: ch 1, *sc, ch 16, sc in next 4 sts. Repeat from *. Join with sl st to 1st st (30 sc with 6 chain loops)
Round 28: ch 1, *2 sc in next st, 1 sc in next 14 sts. Repeat from *. Join with sl st to 1st st (32)
Round 29: ch 1, sc in each st around. Join with sl st to 1st st (32)
Round 30: ch 1, *2 sc in next st, 1 sc in next 15 sts. Repeat from *. Join with sl st to 1st st (34)
Round 31: ch 1, sc in each st around. Join with sl st to 1st st (34)
Round 32: ch 1, *2 sc in next st, 1 sc in next 16 sts. Repeat from *. Join with sl st to 1st st (36)
Starting with one of the chain loops in Round 9, slide the chain loop through the loop directly above it to make your cables vertical or use the loop diagonally above to create diagonal cables. Continue looping the loops, all the way down until all loops are looped (feeling loopy?)
Round 33: Ch1, sc in each st around. SC through the bottom of each loop from Round 27 to secure the loop. (The loops should be secured every 6 stitches) (36)
Stuff about 2/3rds of the tree.
Bottom:
Round 34: working in the front loop only, *sc2tog, sc in next 7. Repeat from *. (32)
Round 35: *sc2tog, sc in next 2. Repeat from *. (23) Stuff the rest of the tree.
Round 36: **sc2tog, sc2tog, sc, Repeat from *. (13)
Finish by sc2tog each stitch until the hole closes. Tuck or weave in ends.
If you are looking for another simple, quick project which can be used for Christmas decorations, check out these Simple Stars. You can also upgrade your Christmas lights with this easy idea.