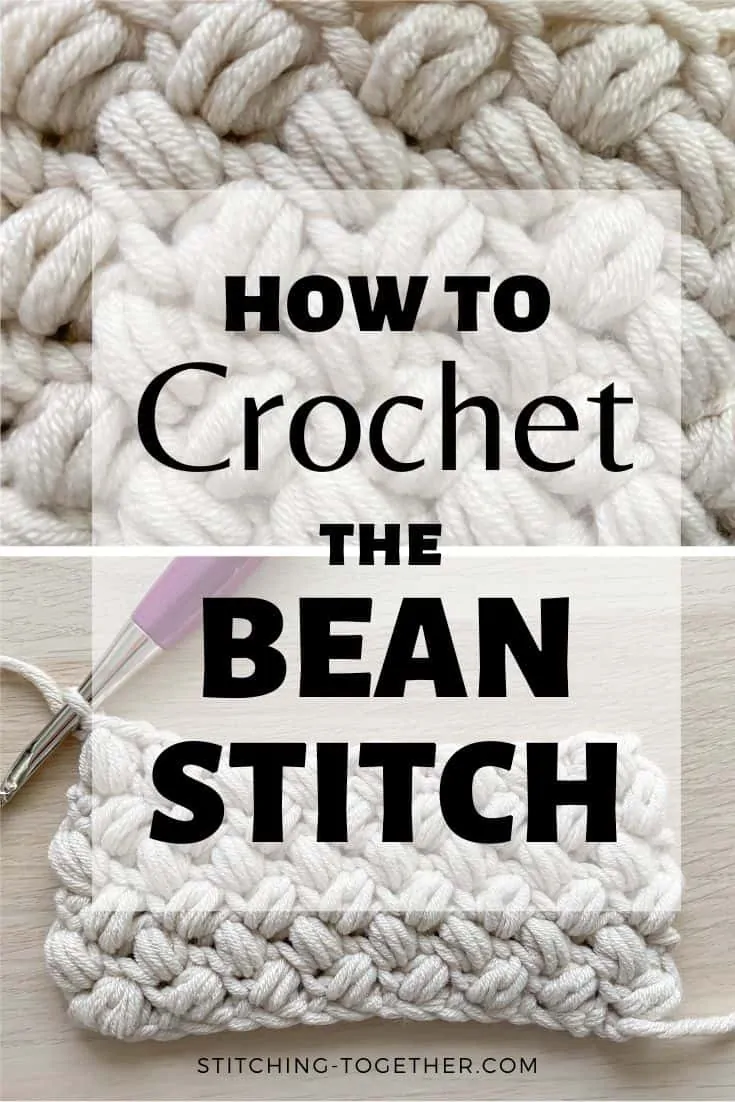
Crochet Bean Stitch Tutorial
Disclosure: This post may contain affiliate links. As an Amazon Associate, I earn from qualifying purchases. Please visit my Privacy Policy for disclosures and more information.
You’ve been there, scrolling through Pinterest, when you come across some bit of crochet magic that catches your eye and stops the scroll.
As your fingers twitch with excitement, your eyes try to devour every detail but it starts to look….. complicated. How’d they get the stitches to zig-zag like that and are those bobbles? Which way is up?
Can I really learn such a complicated looking stitch?
You can!
Most complicated-looking stitches are quite simple once you break them down step by step.
The bean stitch is one of those stitch patterns that’s simple once you know what you are doing, and it’s time you learn it with this bean stitch tutorial.
We’ll walk through, step by step, how to master this gorgeous stitch pattern and use it in your next favorite crochet project.
Before we move on, don’t forget to save this tutorial on Pinterest so you can come back to it whenever you need to.
How do you Crochet a Bean Stitch?
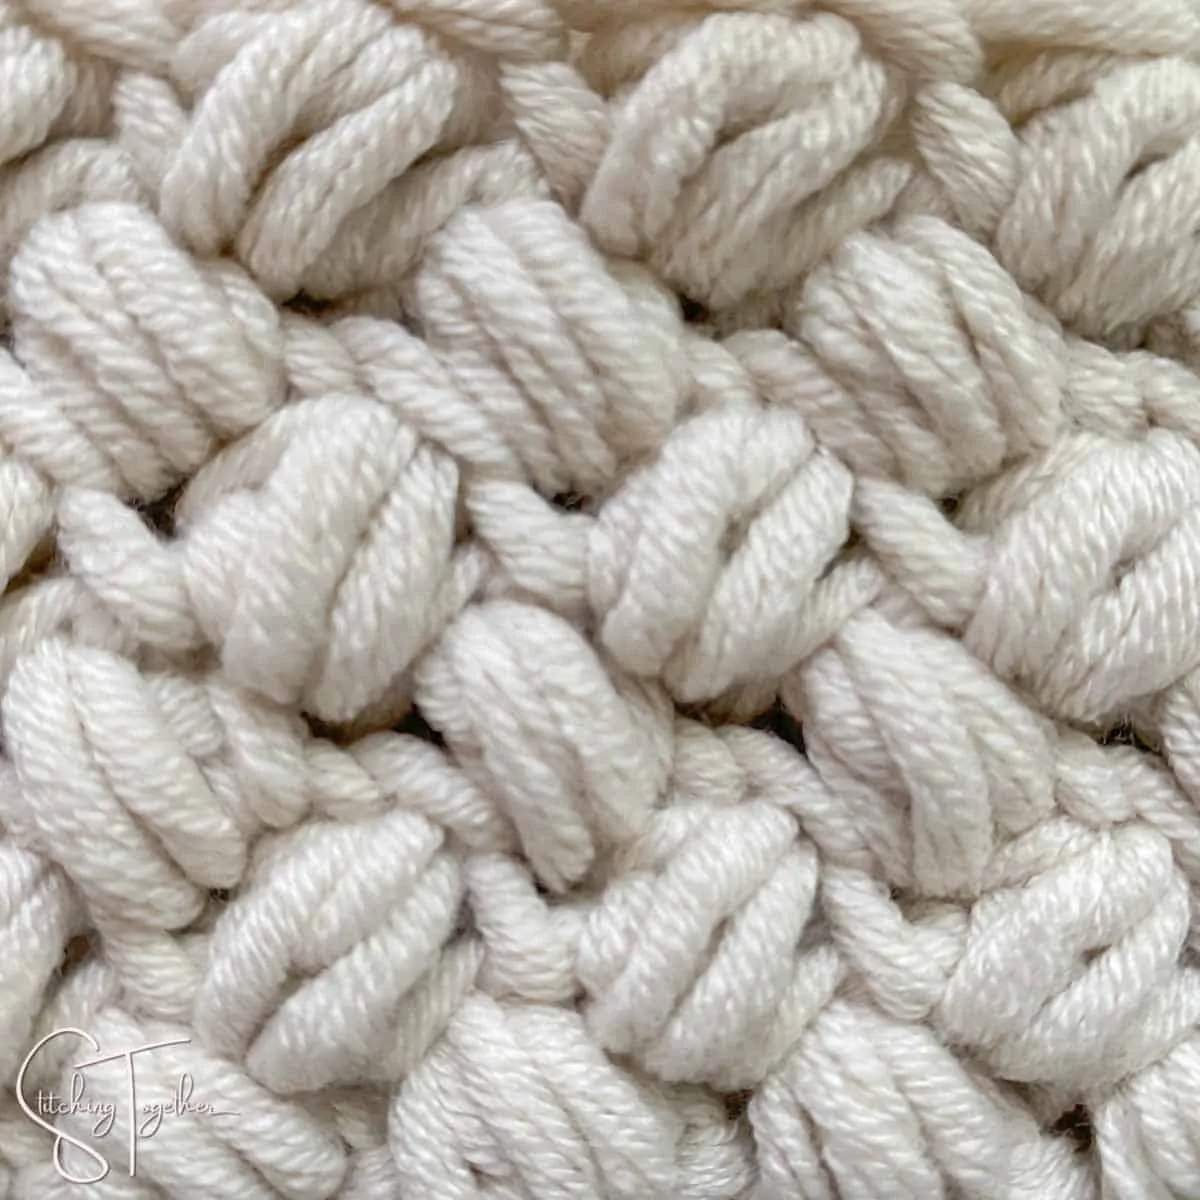
In simple terms, the bean stitch pattern is a series of puff stitches worked in such a way that they push the puffs in the row below off to the side. You get a cute zig-zag pattern that looks like little beans scattered across your fabric.
Let’s first walk through the written instructions for the bean stitch and then you can keep reading to learn about working the bean stitch in the round or head down to the photo tutorial.
To crochet the bean stitch:
- Start with a chain that is an odd number.
- Insert your hook into the 3rd chain from the hook and pull up a loop (2 loops on the hook).
- Yarn over, insert your hook into the same stitch and pull up a loop (4 loops on the hook).
- Yarn over, insert your hook into the same stitch and pull up a loop (6 loops on the hook).
- Yarn over and pull through all six loops on the hook.
- Chain 1 to secure the stitch.
There are the basics for making a bean stitch, but you don’t want to make just one, do you? Let’s keep going:
- Skip the next chain and work into the next stitch following steps 2-6 above. Continue working bean stitches in every other chain to the end of the row.
- To start row 2, you’ll chain 1 (you already chained 1 to secure the last bean stitch – so technically you’ll chain 2 to start the next row) and turn.
- Skip the first stitch (the chain which secured the bean) and work in the next stitch which is the first bean stitch of the row below.
- Continue skipping the chain stitches and working in each bean stitch to the end of the row.
What do you think? Not too hard, but if you’re still a bit lost, there’s a full bean stitch photo tutorial for both left and right handed crocheters after we talk about how to bean stitch in the round.
Bean Stitch in the Round
There are two ways to work the bean stitch in the round: continuous rounds or join and turn.
Either way, you’ll want to start with an even-numbered chain and join it with a slip stitch to form a ring.
When you work in continuous rounds, the stitch you work in is at the beginning of each bean stitch (on the right for right-handed crocheters or on the left for lefties) instead of on the far side of the stitch.
This causes the little beans to line up in a diagonal pattern which is really beautiful.
But what if you want those cute scattered beans like when you work in rows? We can make that happen too!
At the end of each round, you’ll join the round using a slip stitch to the top of the 1st bean stitch of the row then ch 2 and turn.
The placement of your stitches is exactly the same as if you were working in rows and you get that zig-zag bean look.
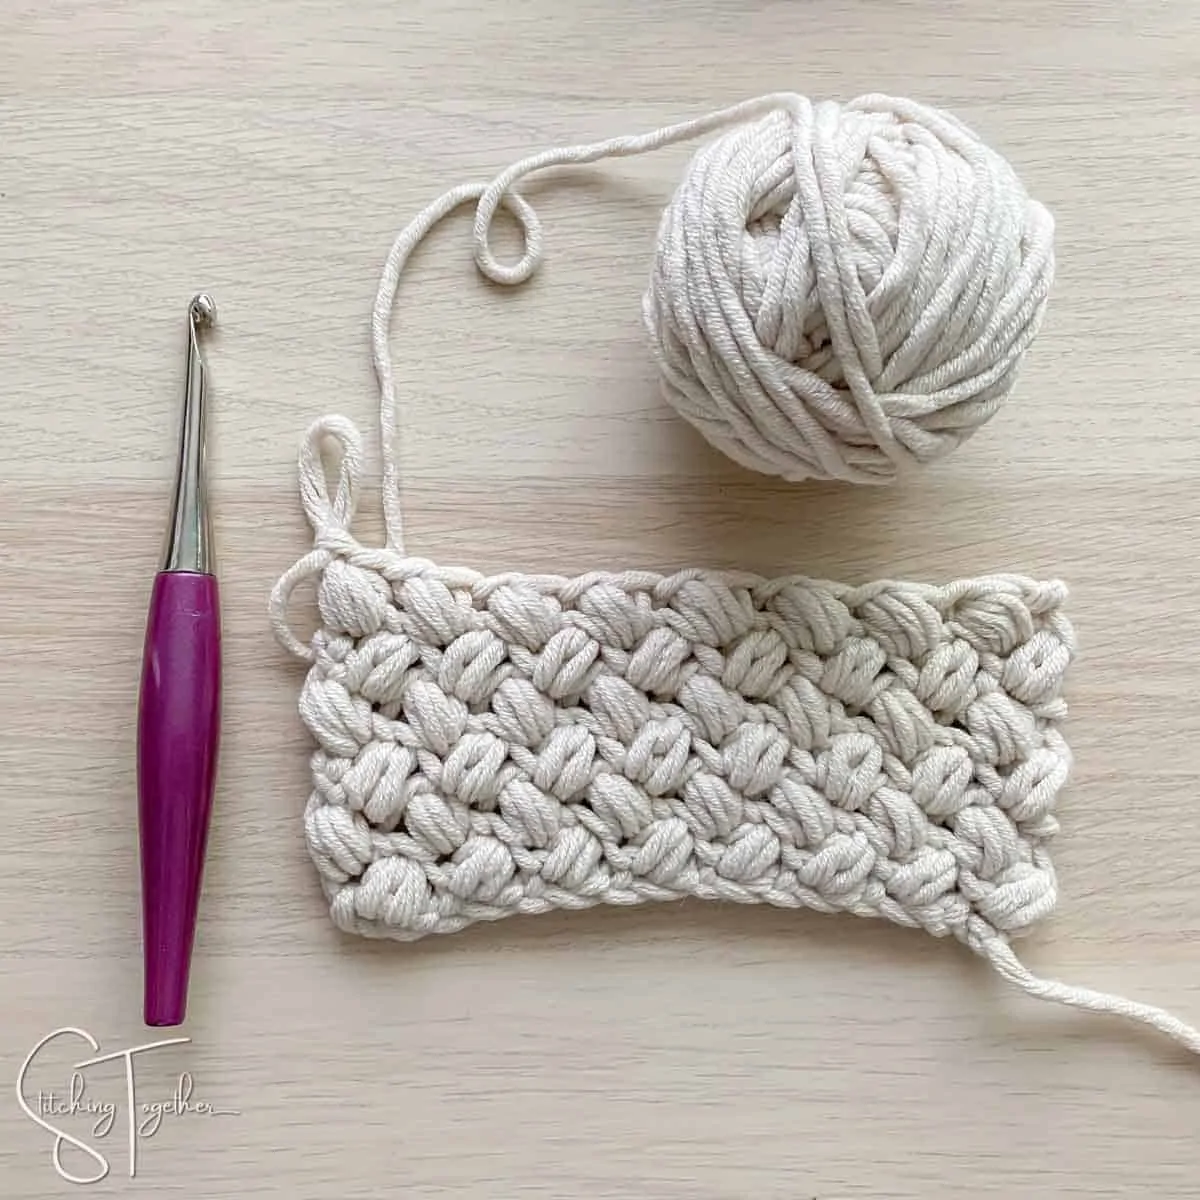
Bean Stitch Step by Step
All you need to get started is some practice yarn and a corresponding hook. For this tutorial, I used Bernat Beyond Yarn and my Furls Odyssey Hook.
Bean Stitch Tutorial – Right Handed
Start with an odd numbered chain.
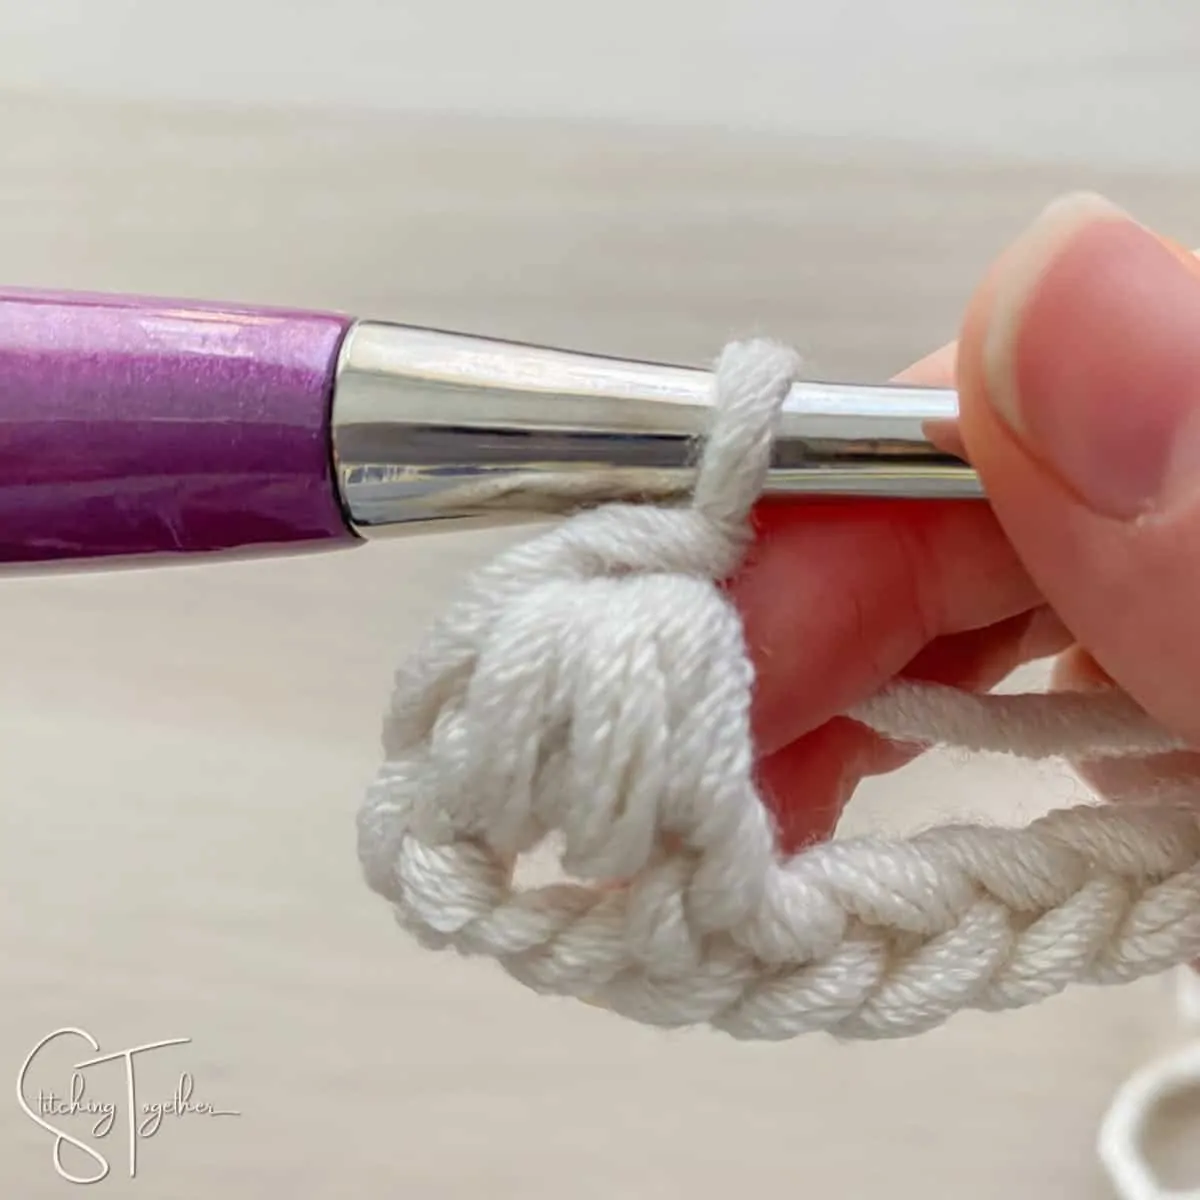
Insert hook into the 3rd ch from the hook and pull up a loop (2 loops on the hook).
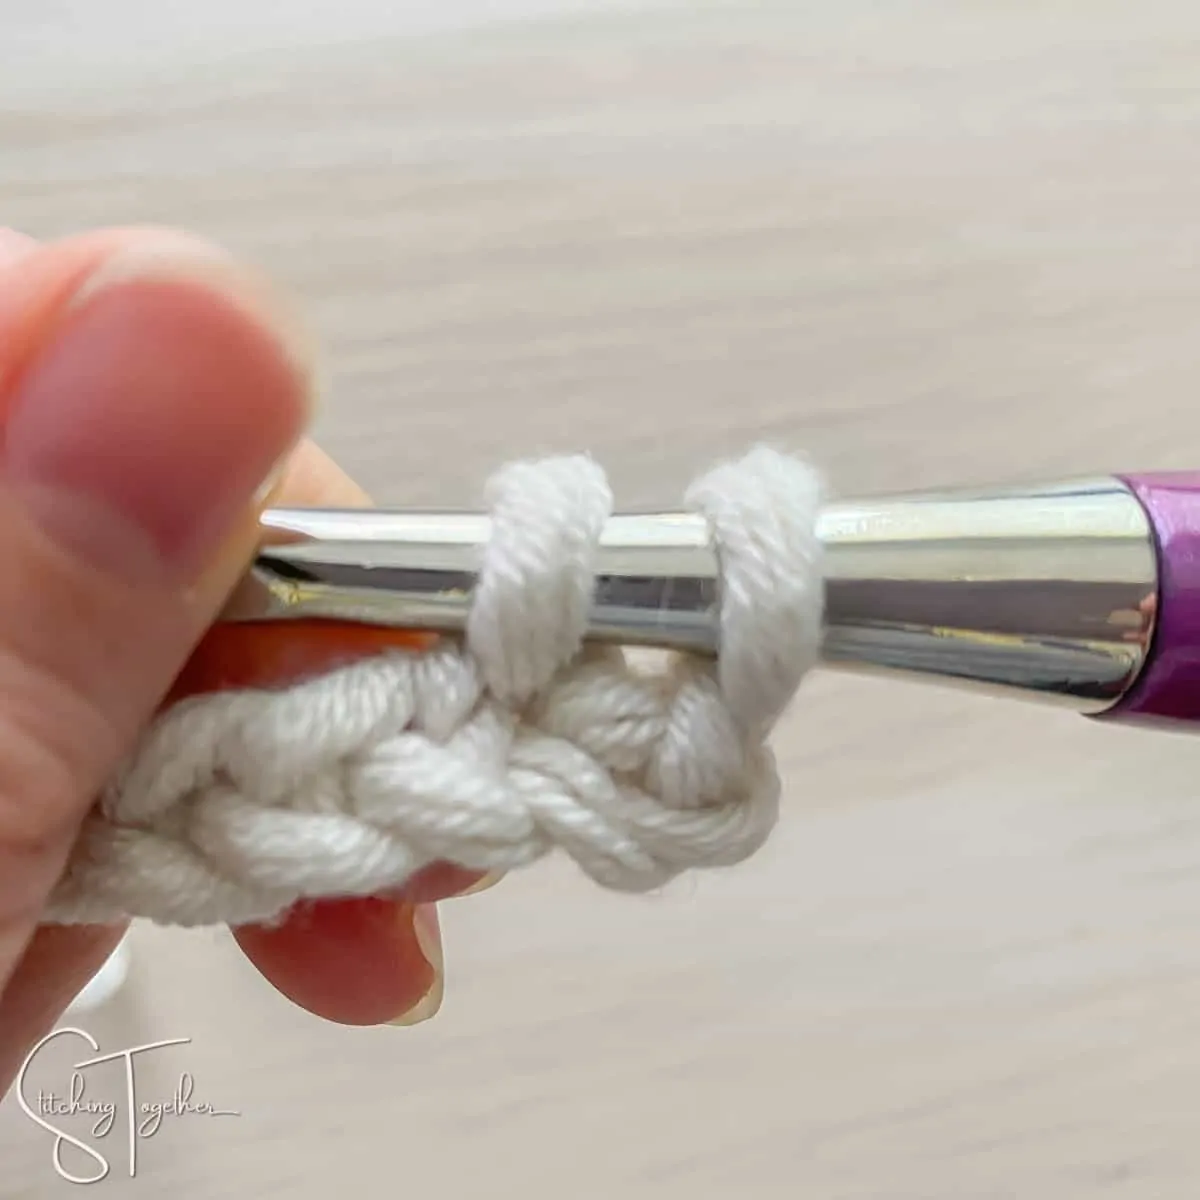
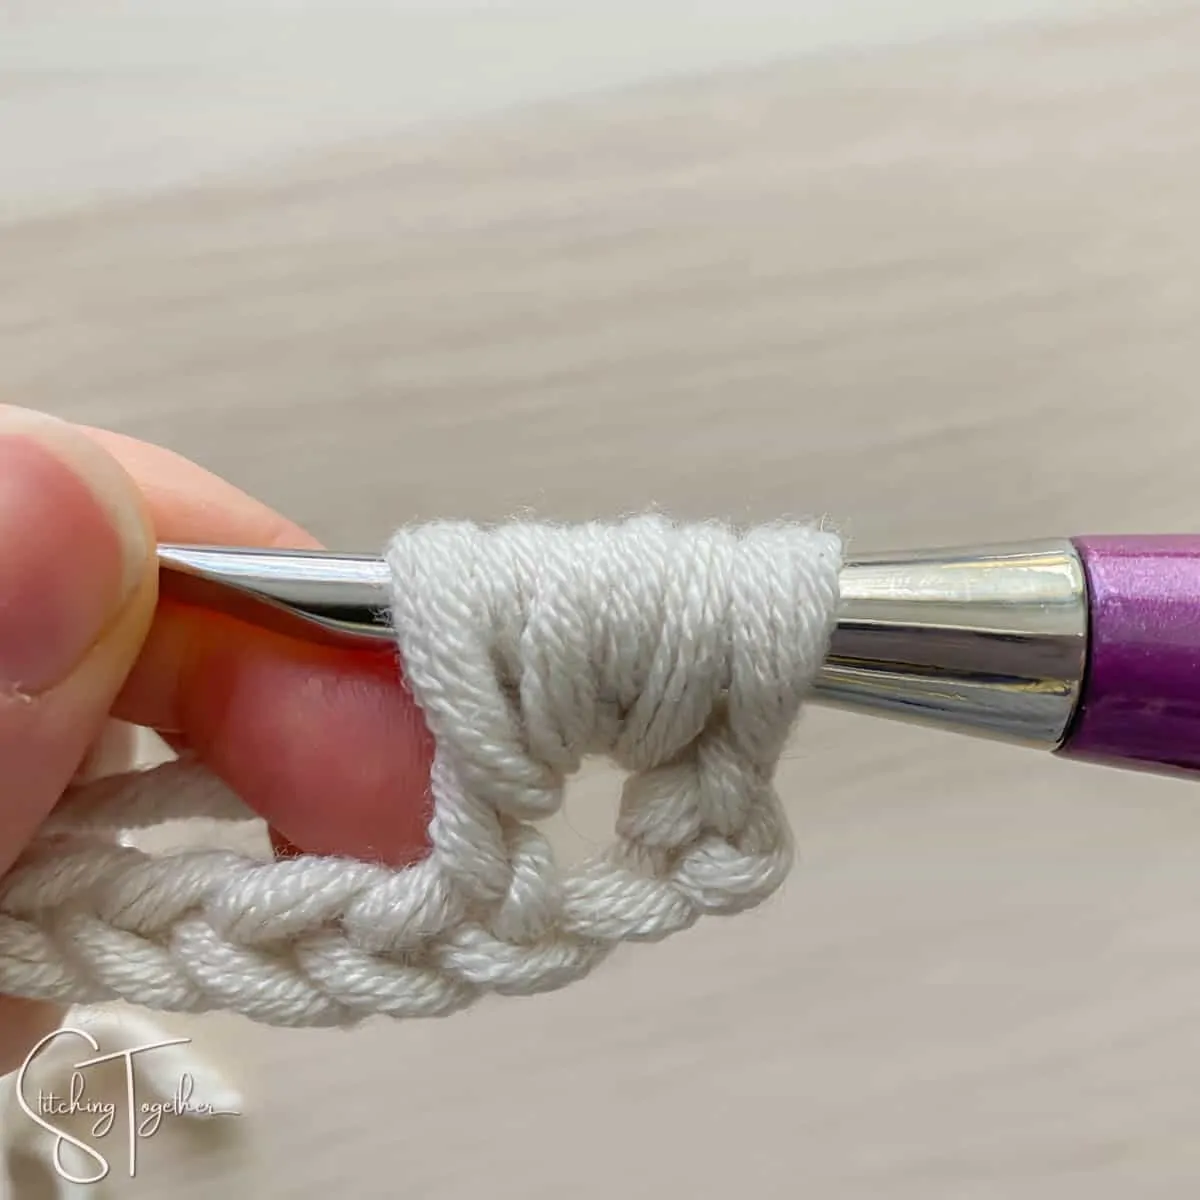
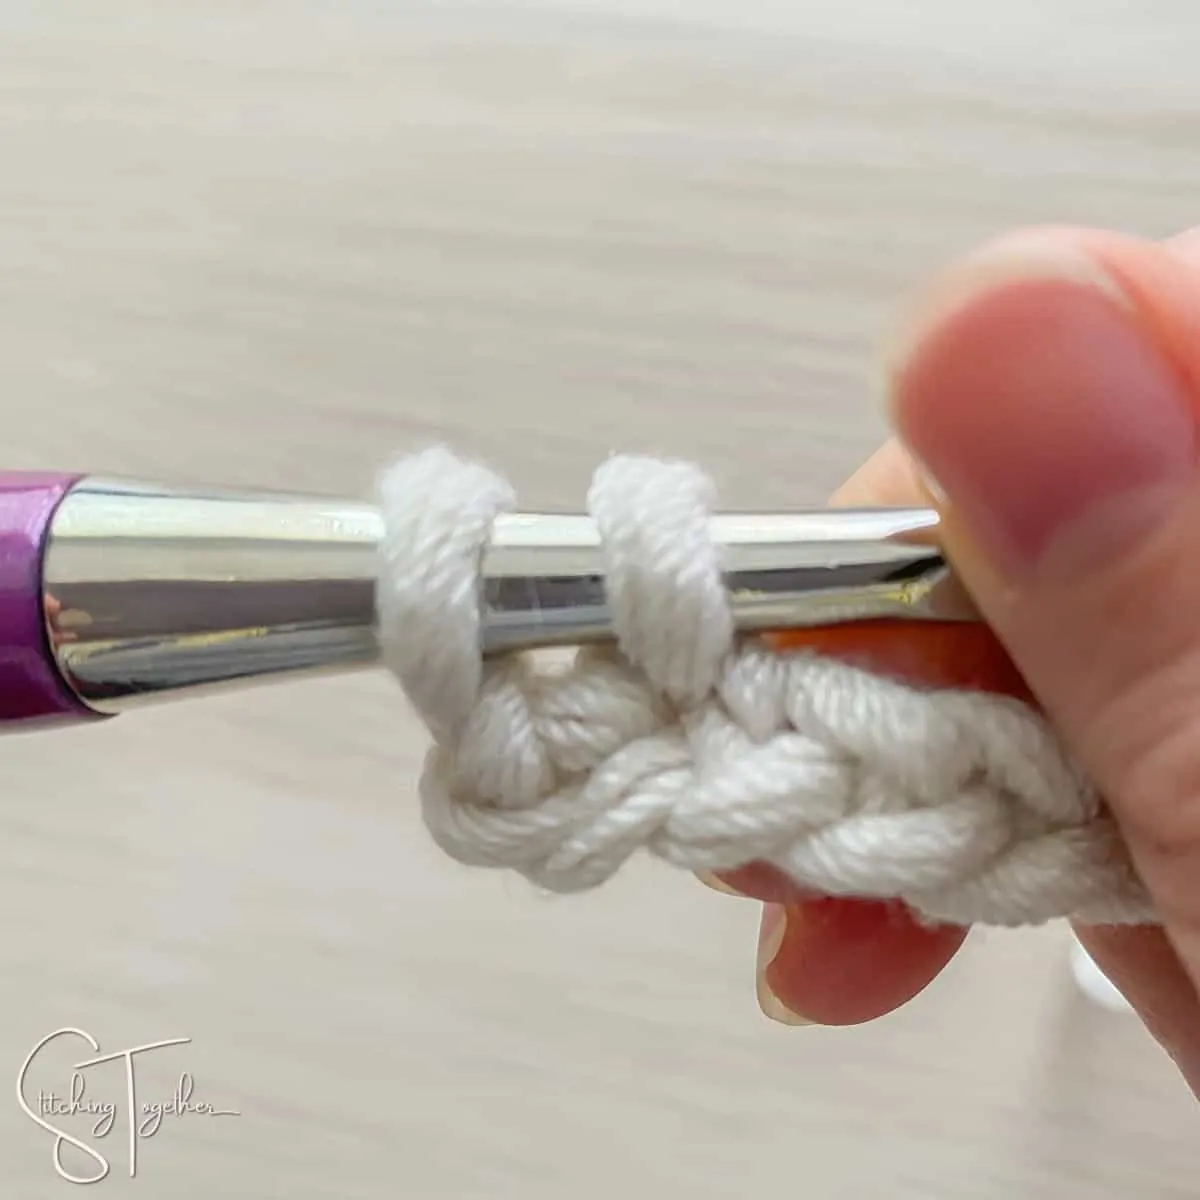
Yarn over, insert hook into the same stitch, and pull up a loop (4 loops on the hook)
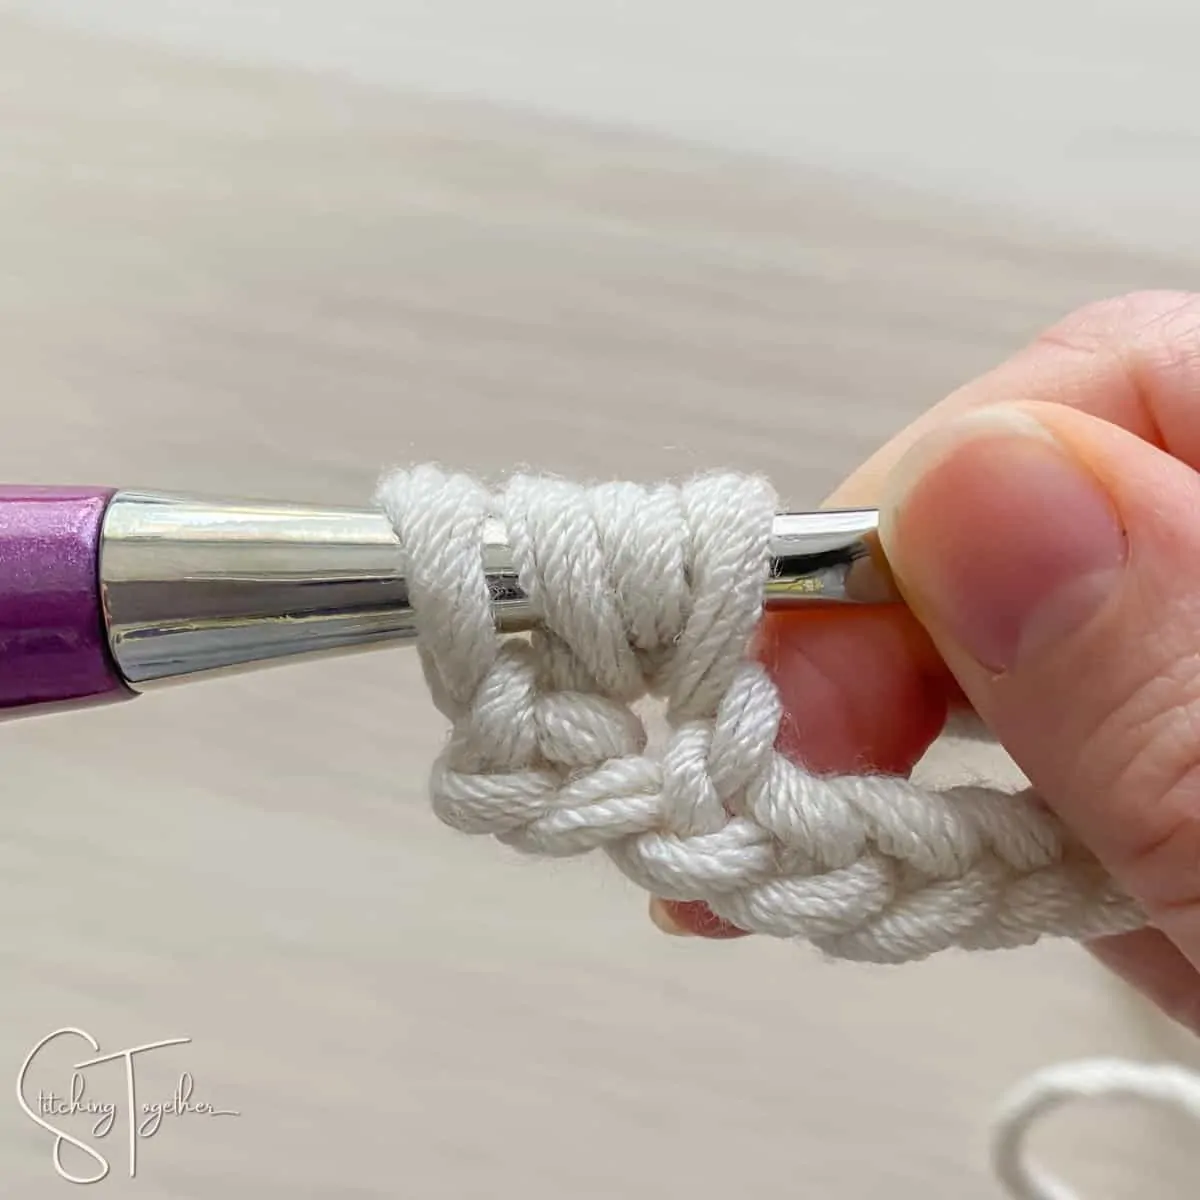
Next, yarn over, insert hook into the same stitch, and pull up a loop (6 loops on the hook)
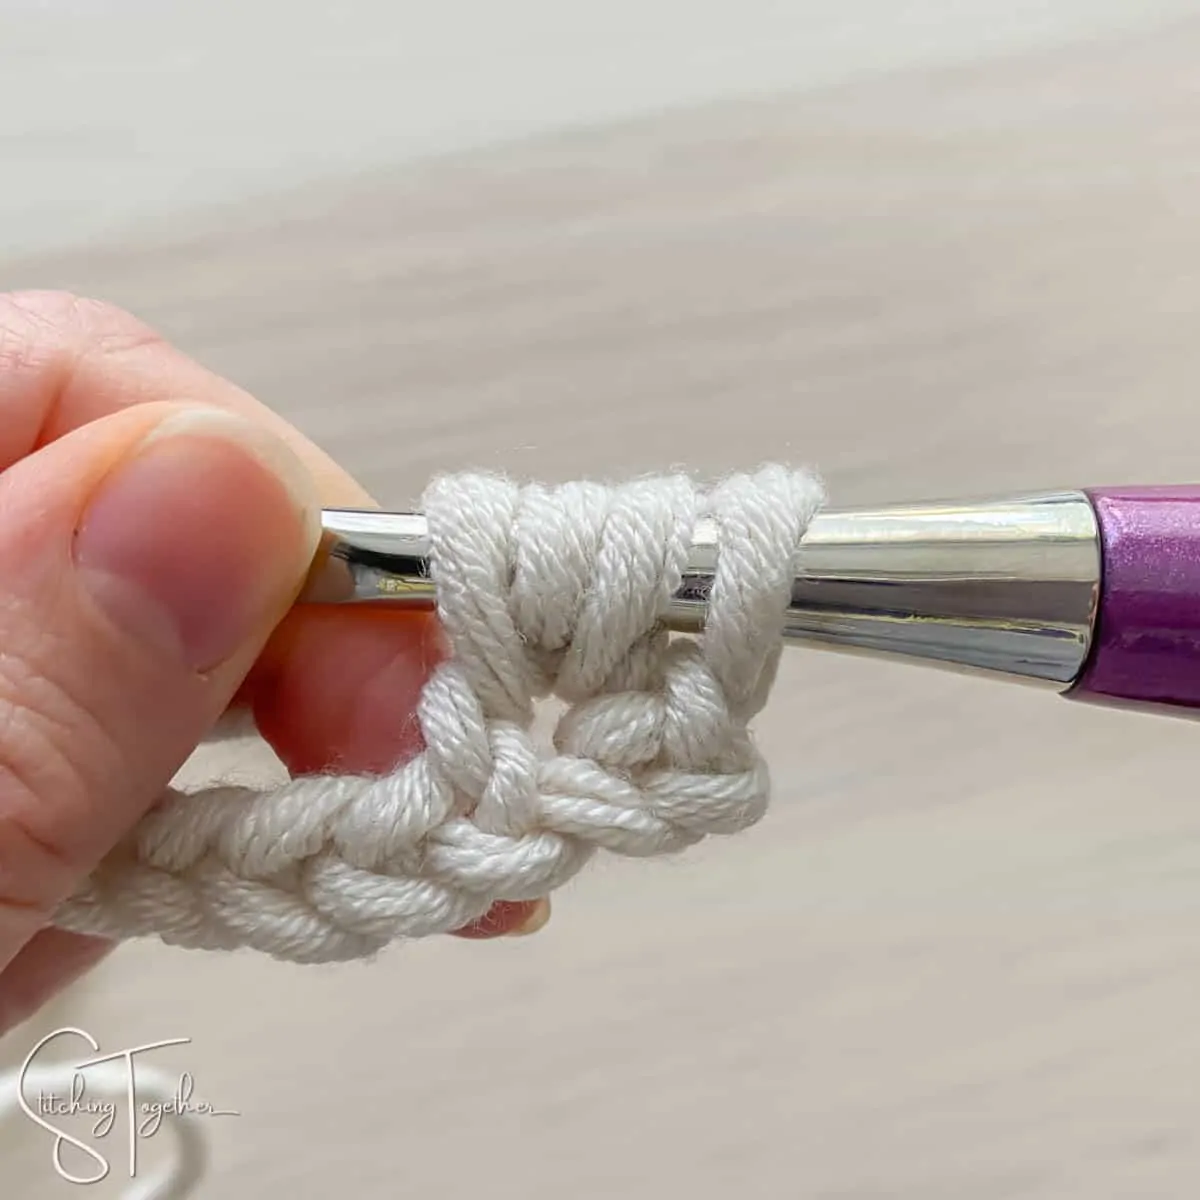
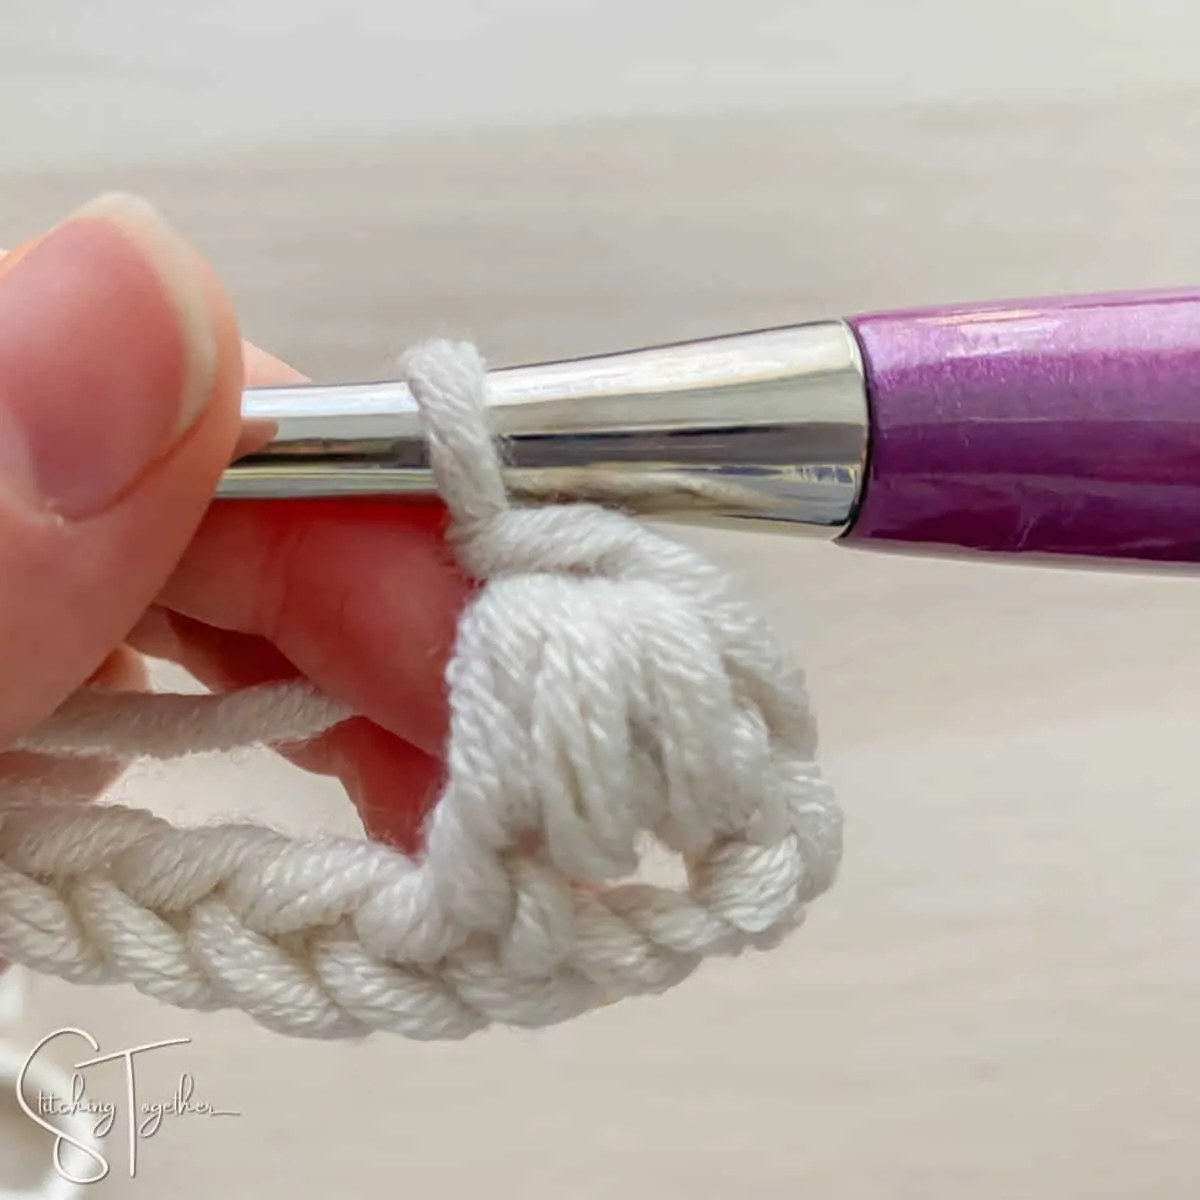
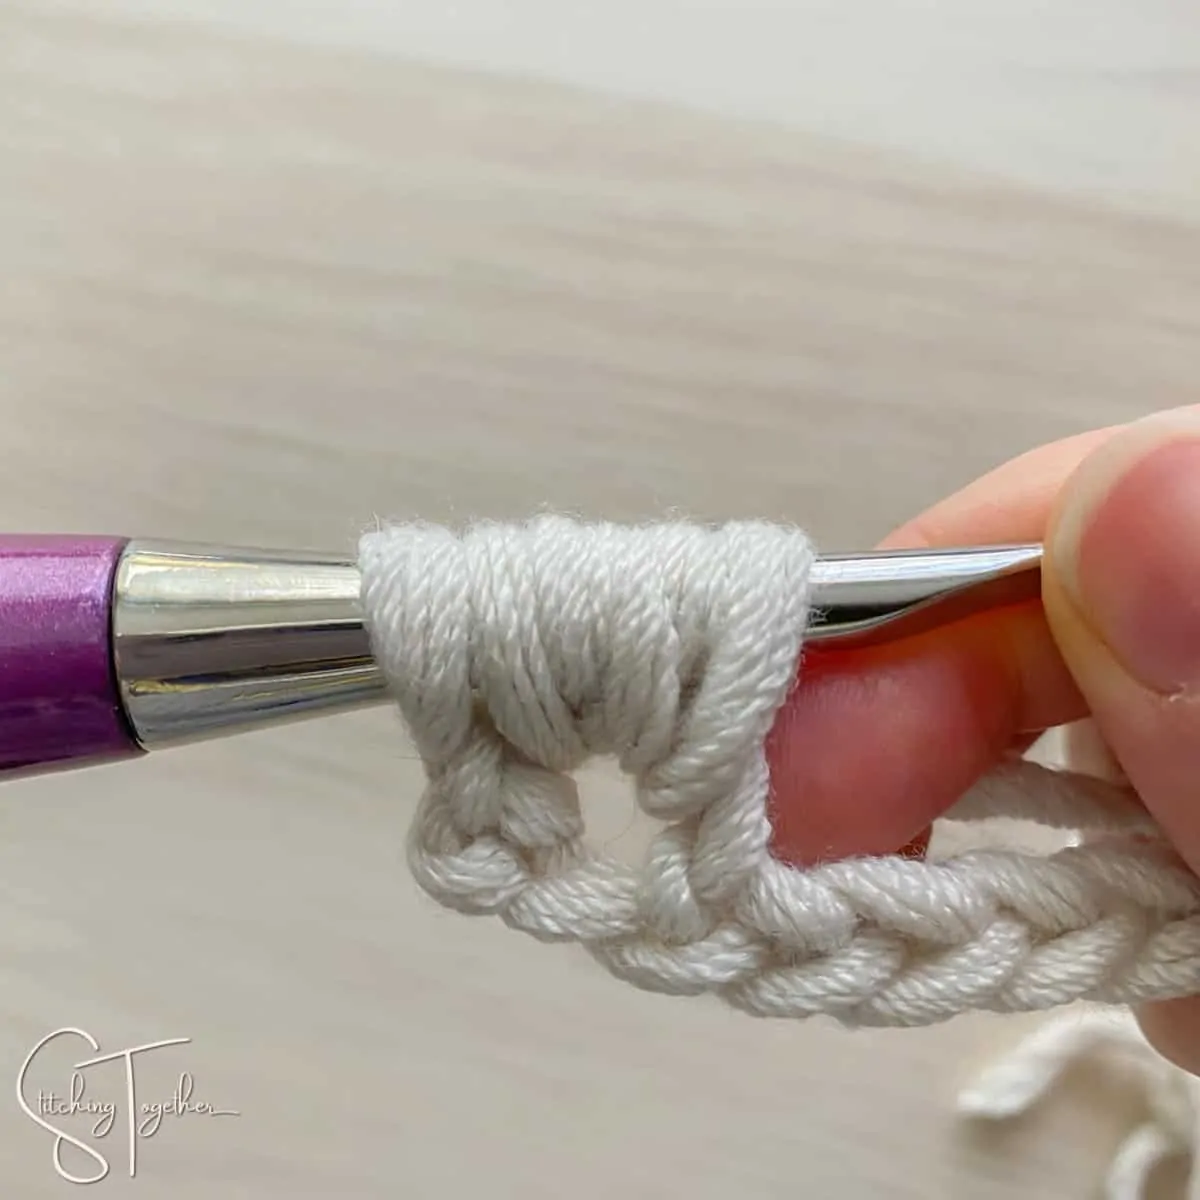
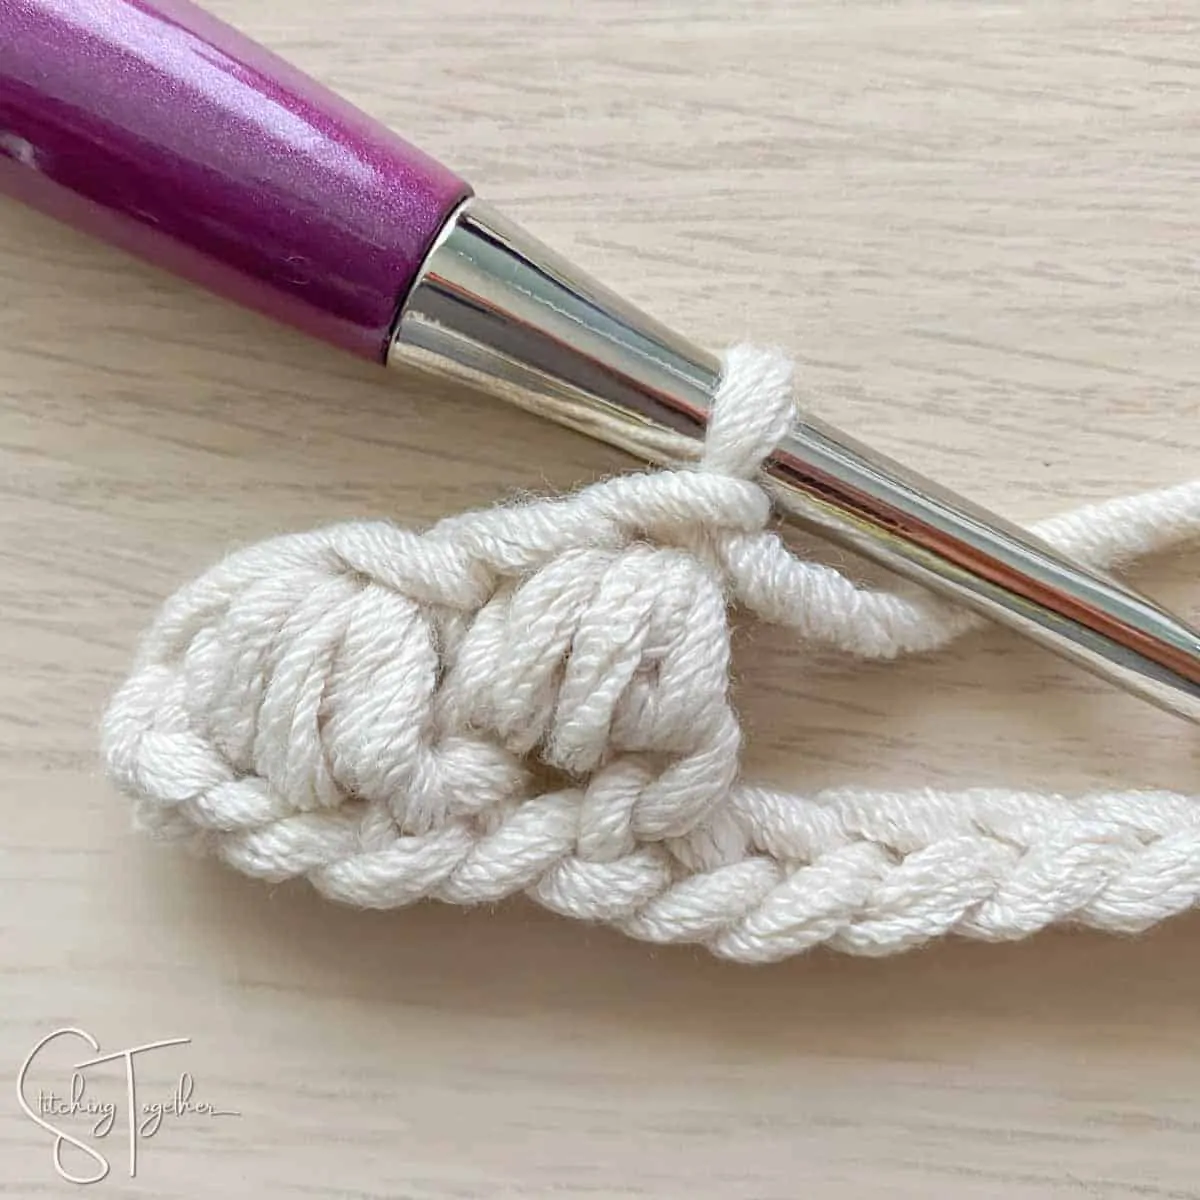
Yarn over and pull through all 6 loops on the hook.

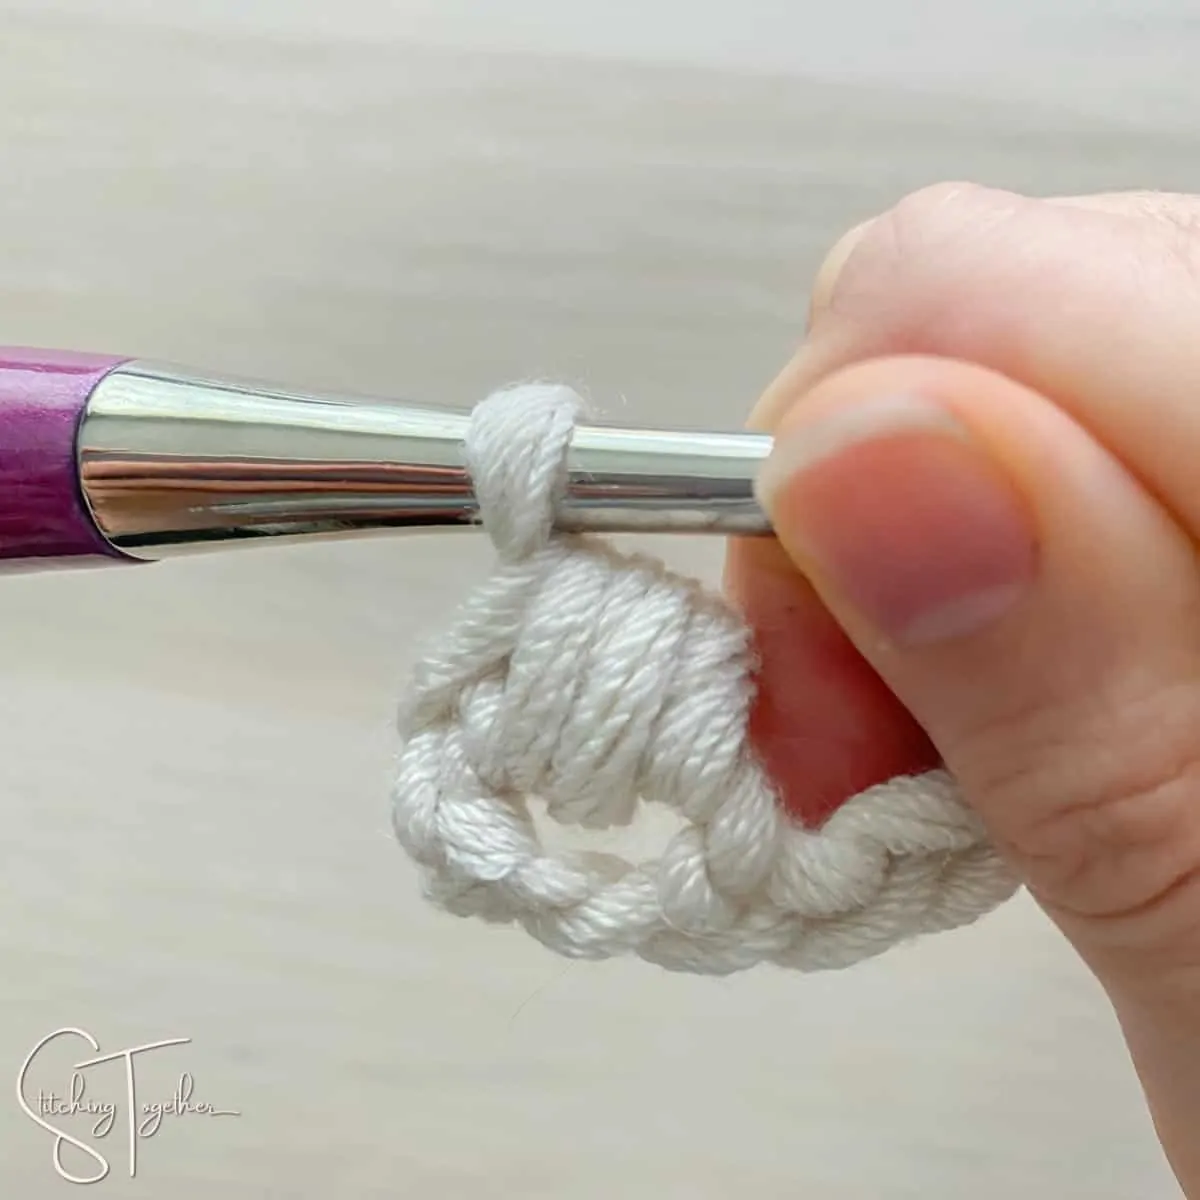
Chain 1 to secure to stitch.
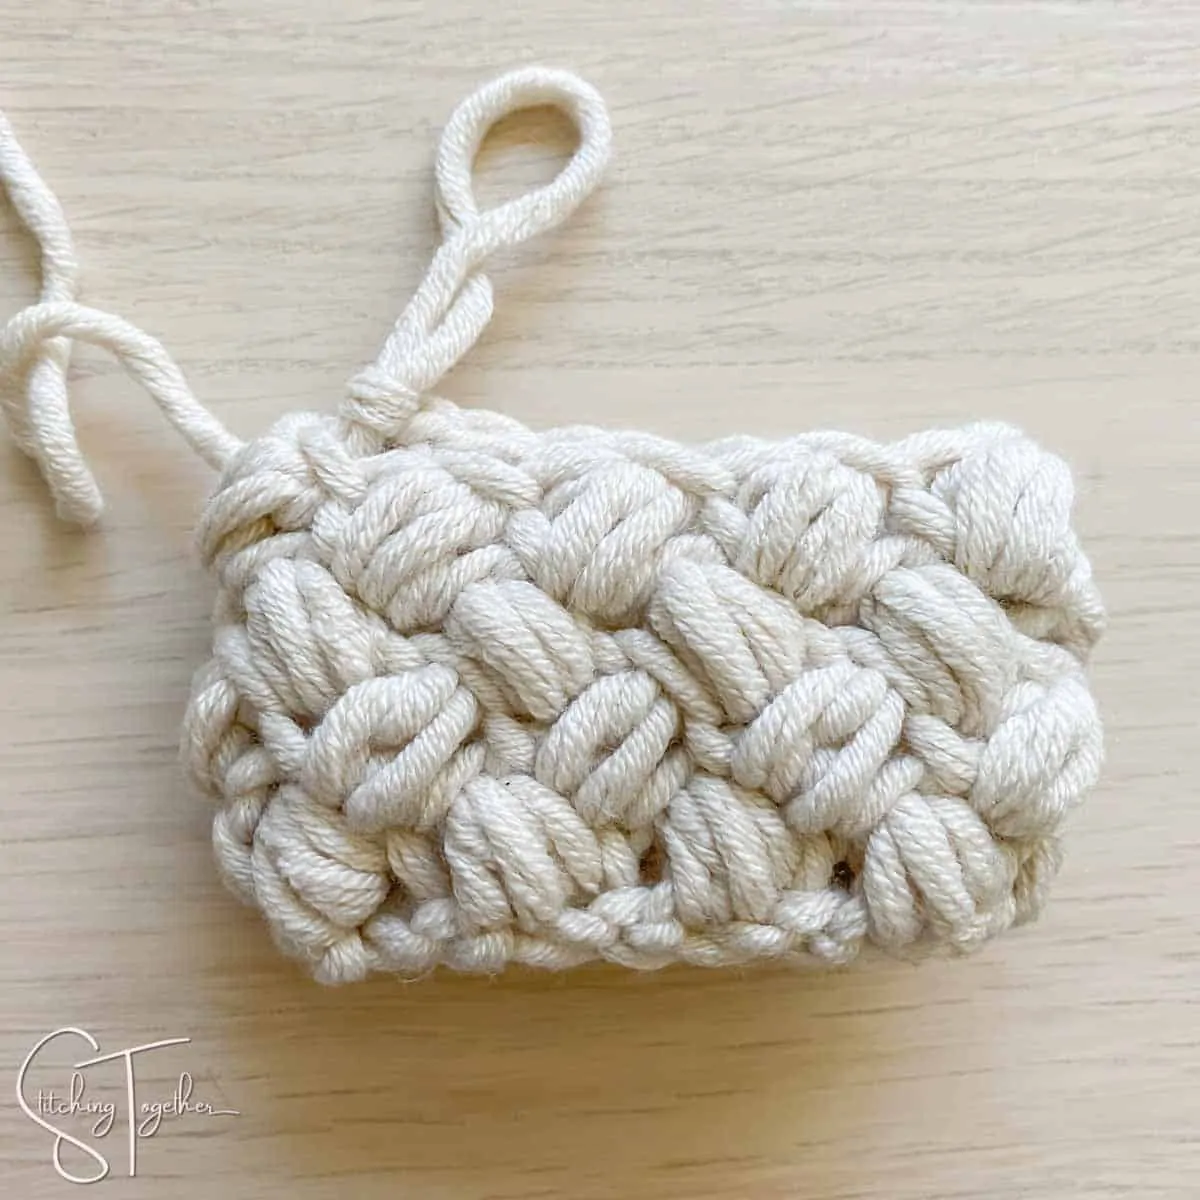
There you go! You’ve finished the basic bean stitch, but there’s still more to learn of course.
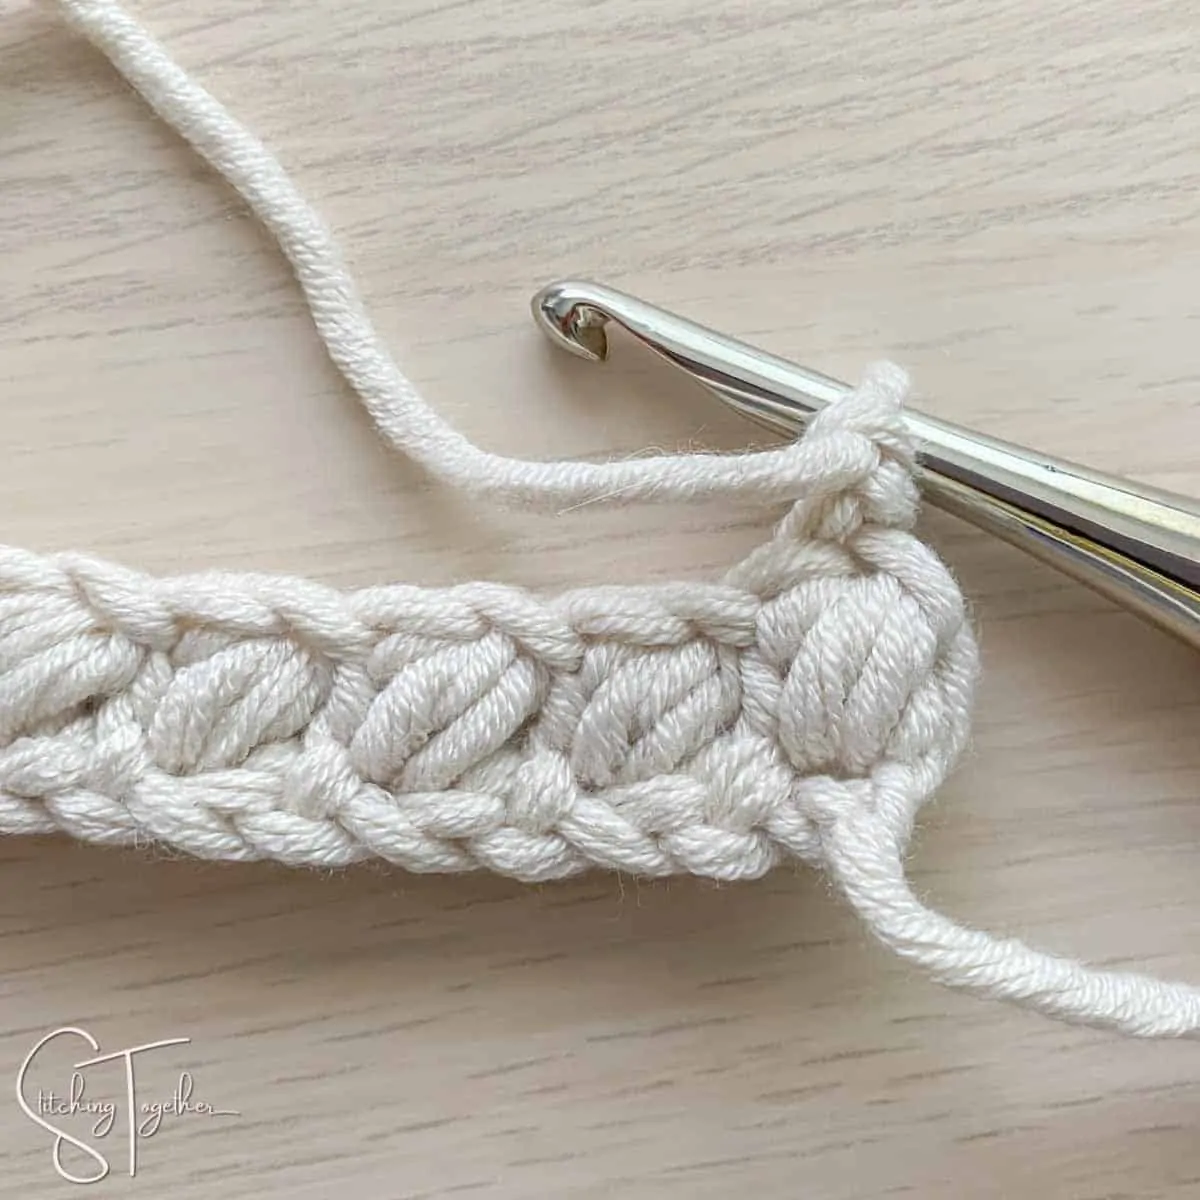
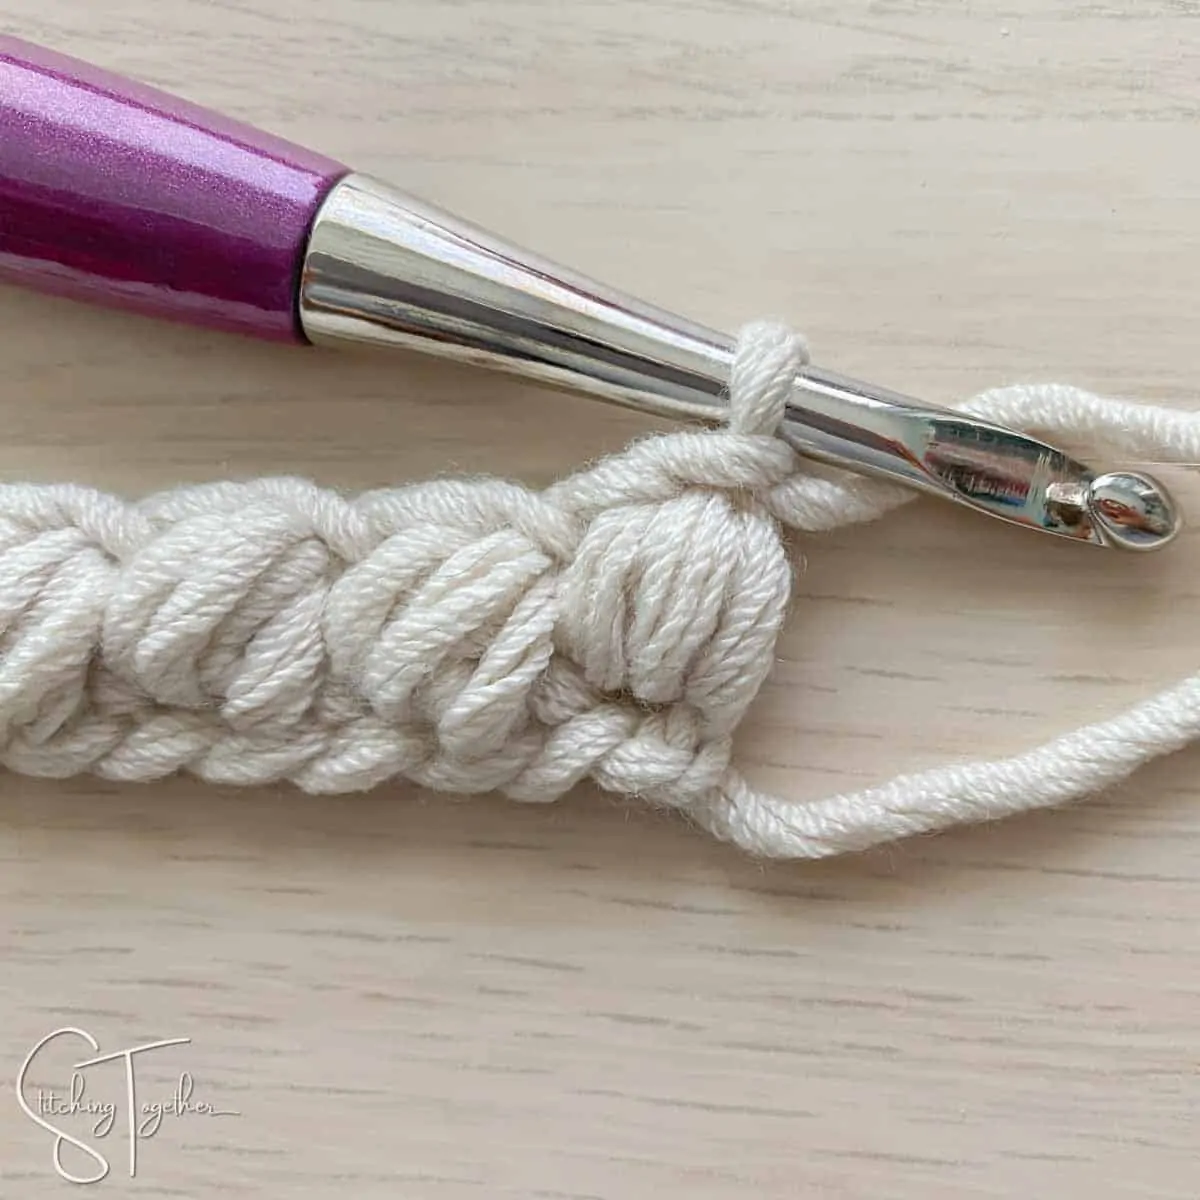
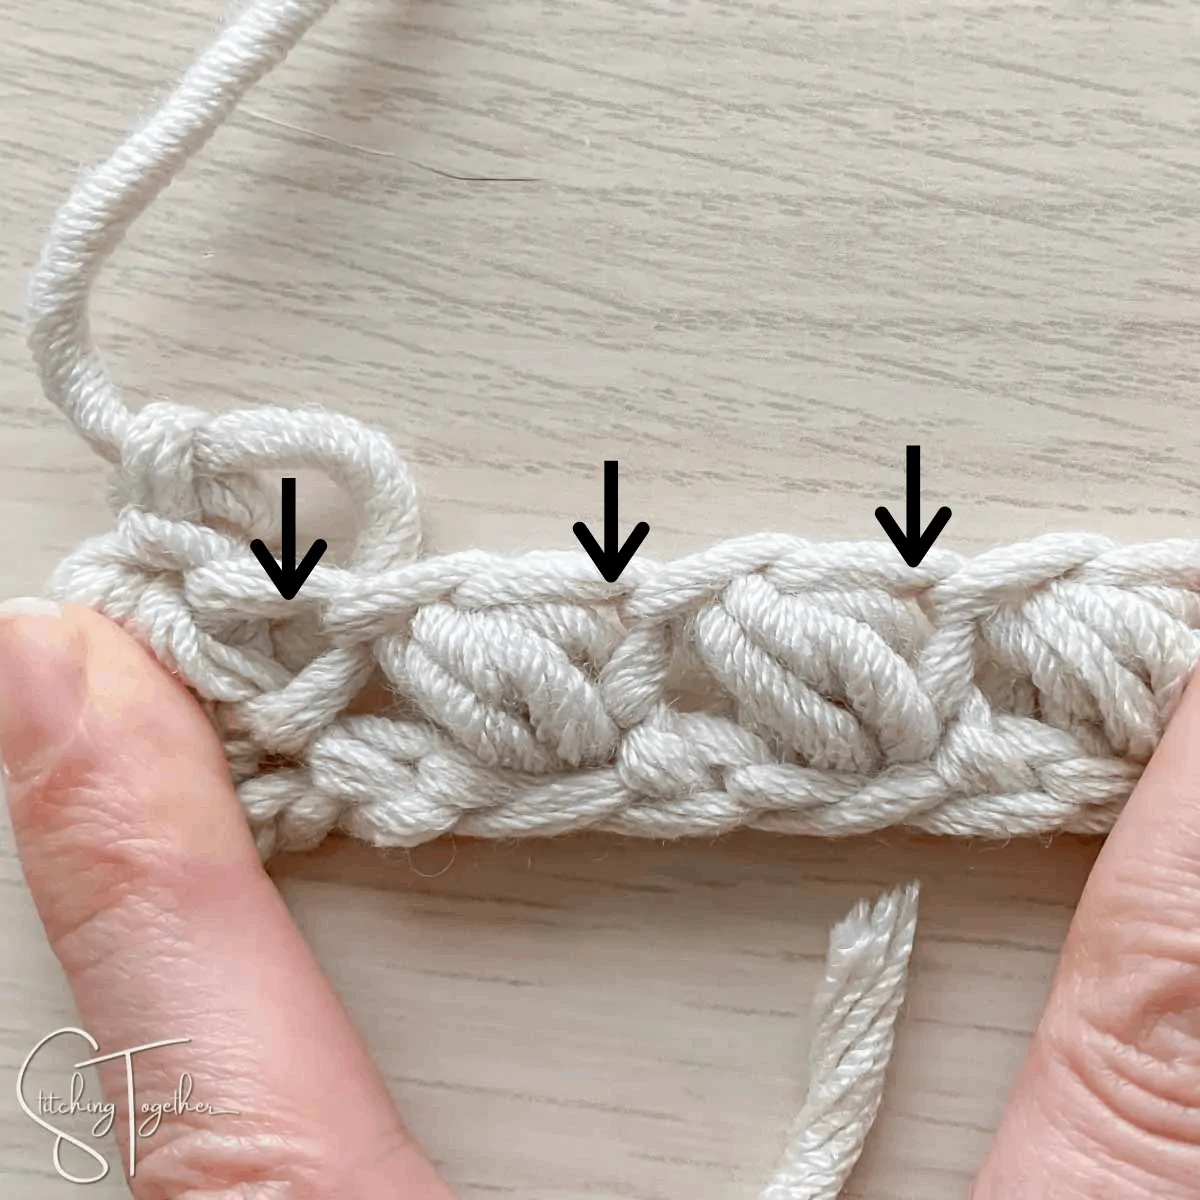
Skip the next stitch then make another bean stitch.
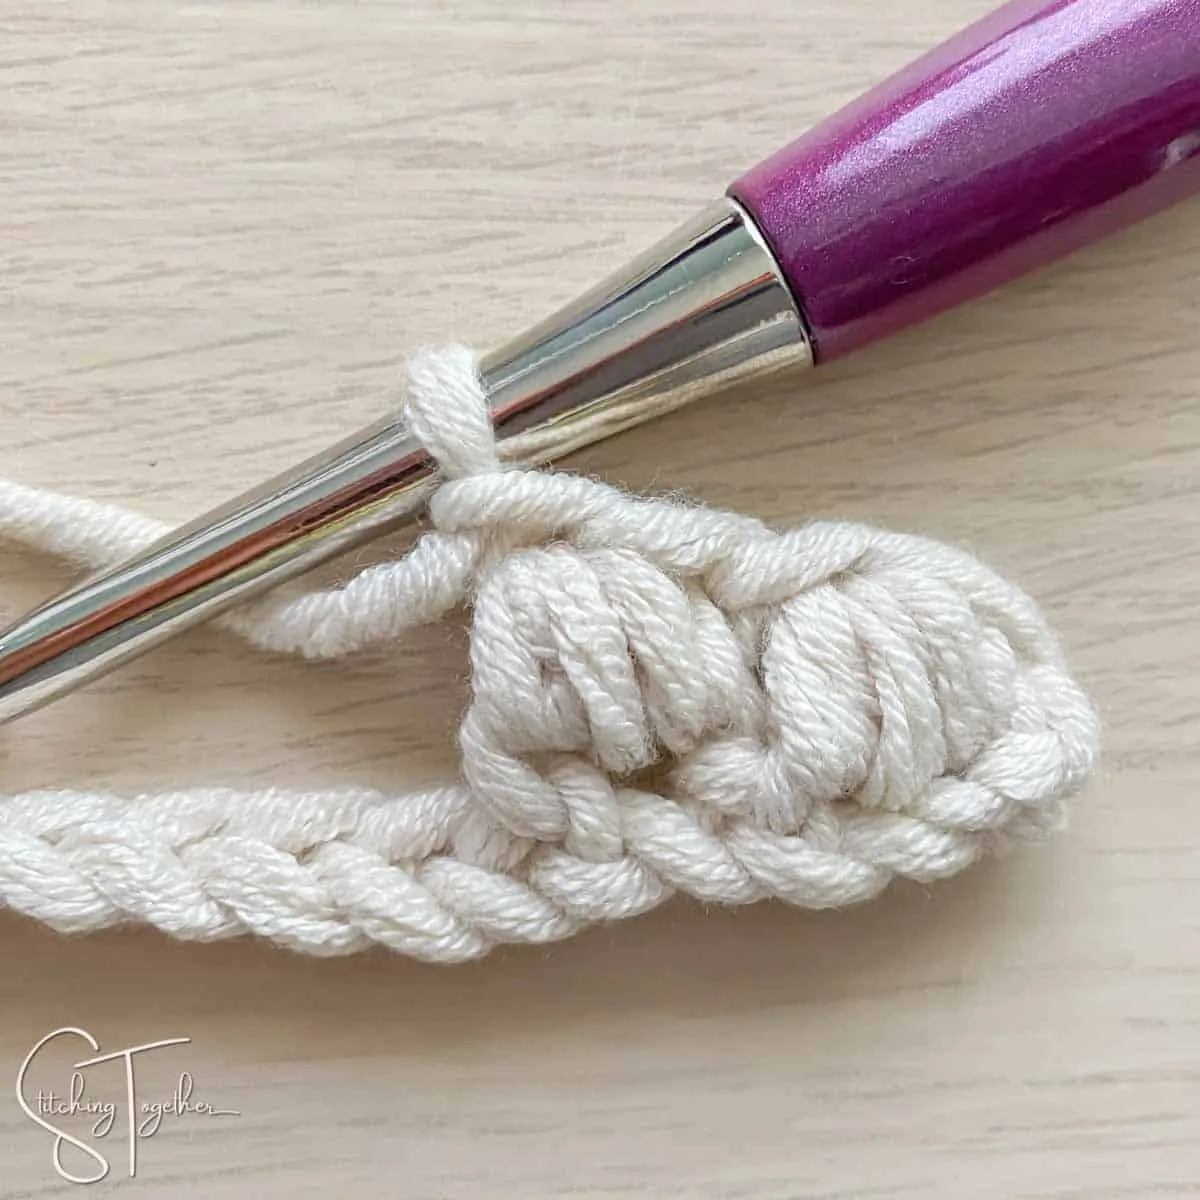
Continue skipping a stitch and then making another bean stitch all the way to the end of the row.
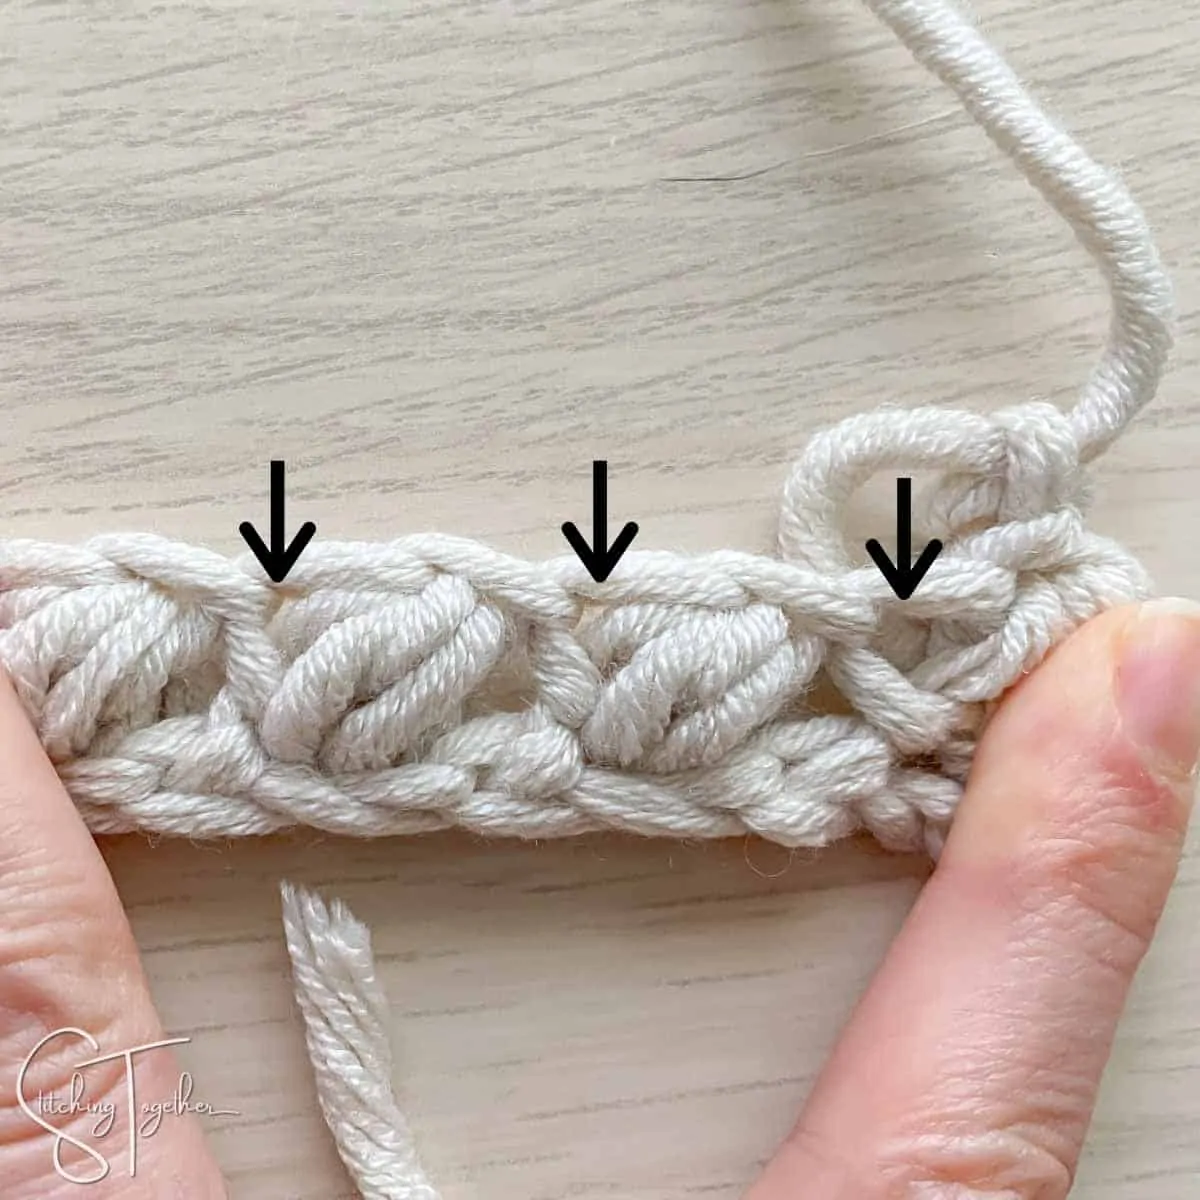
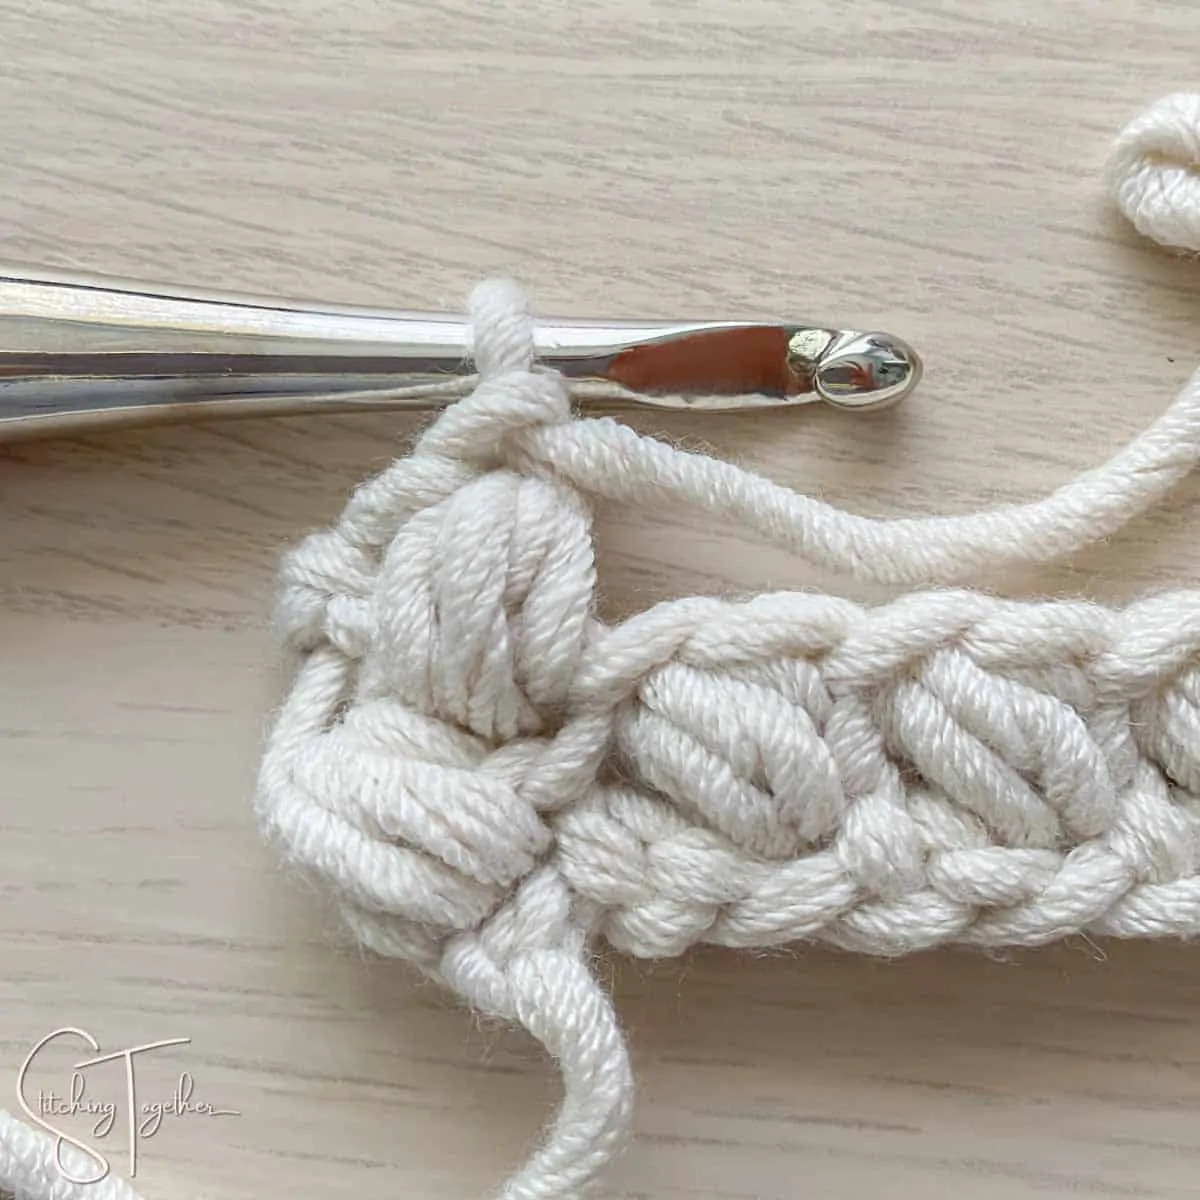
You’ve already chained 1 to secure that last bean stitch, now you’ll chain again and turn.
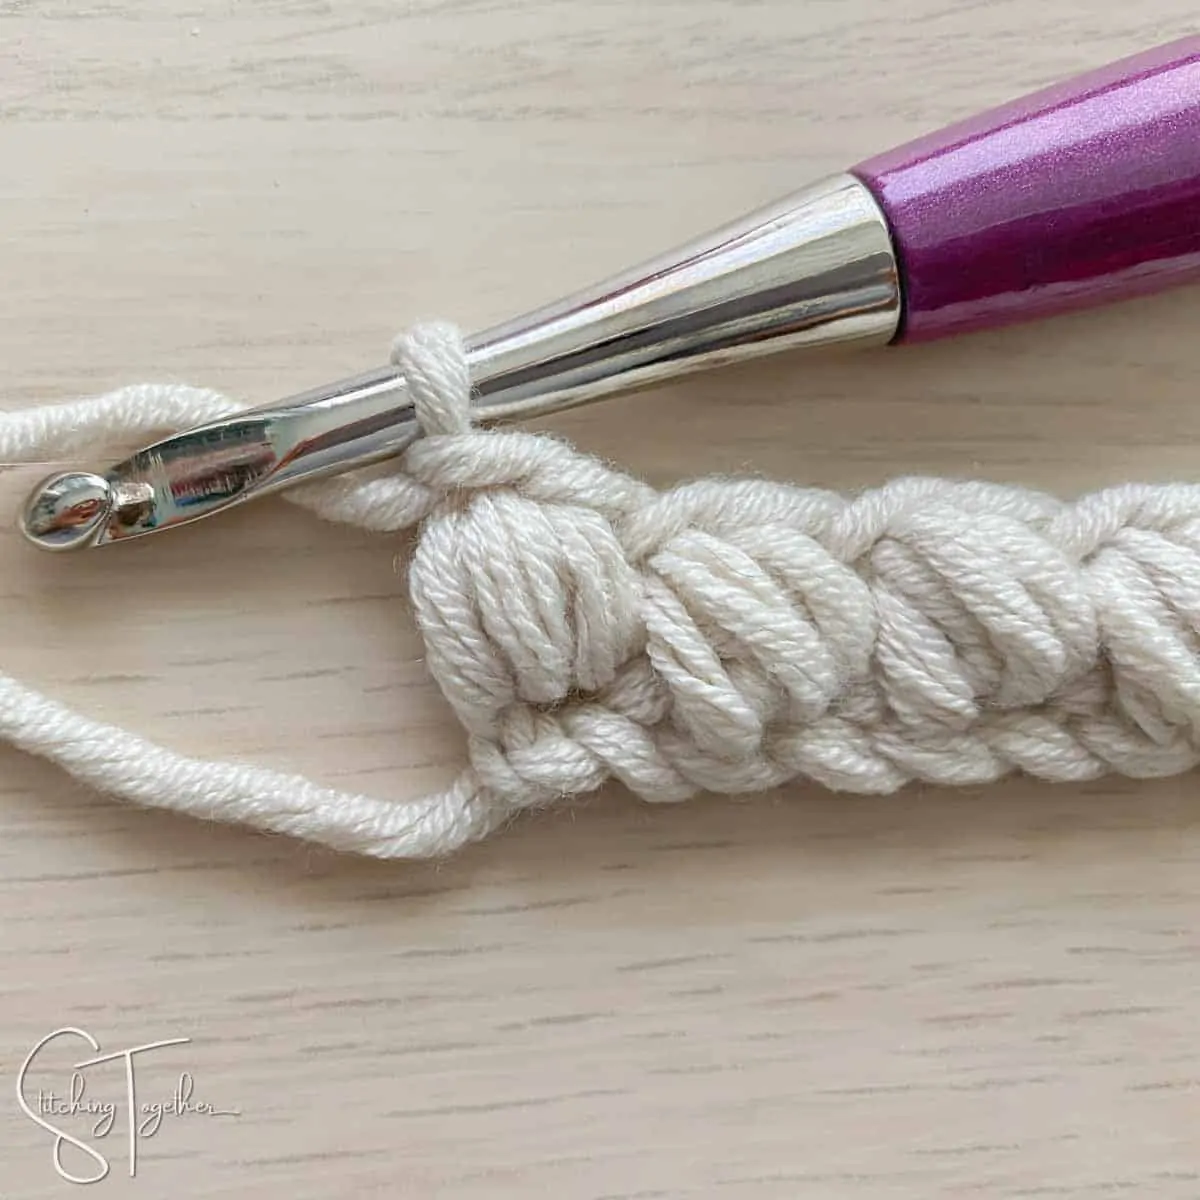
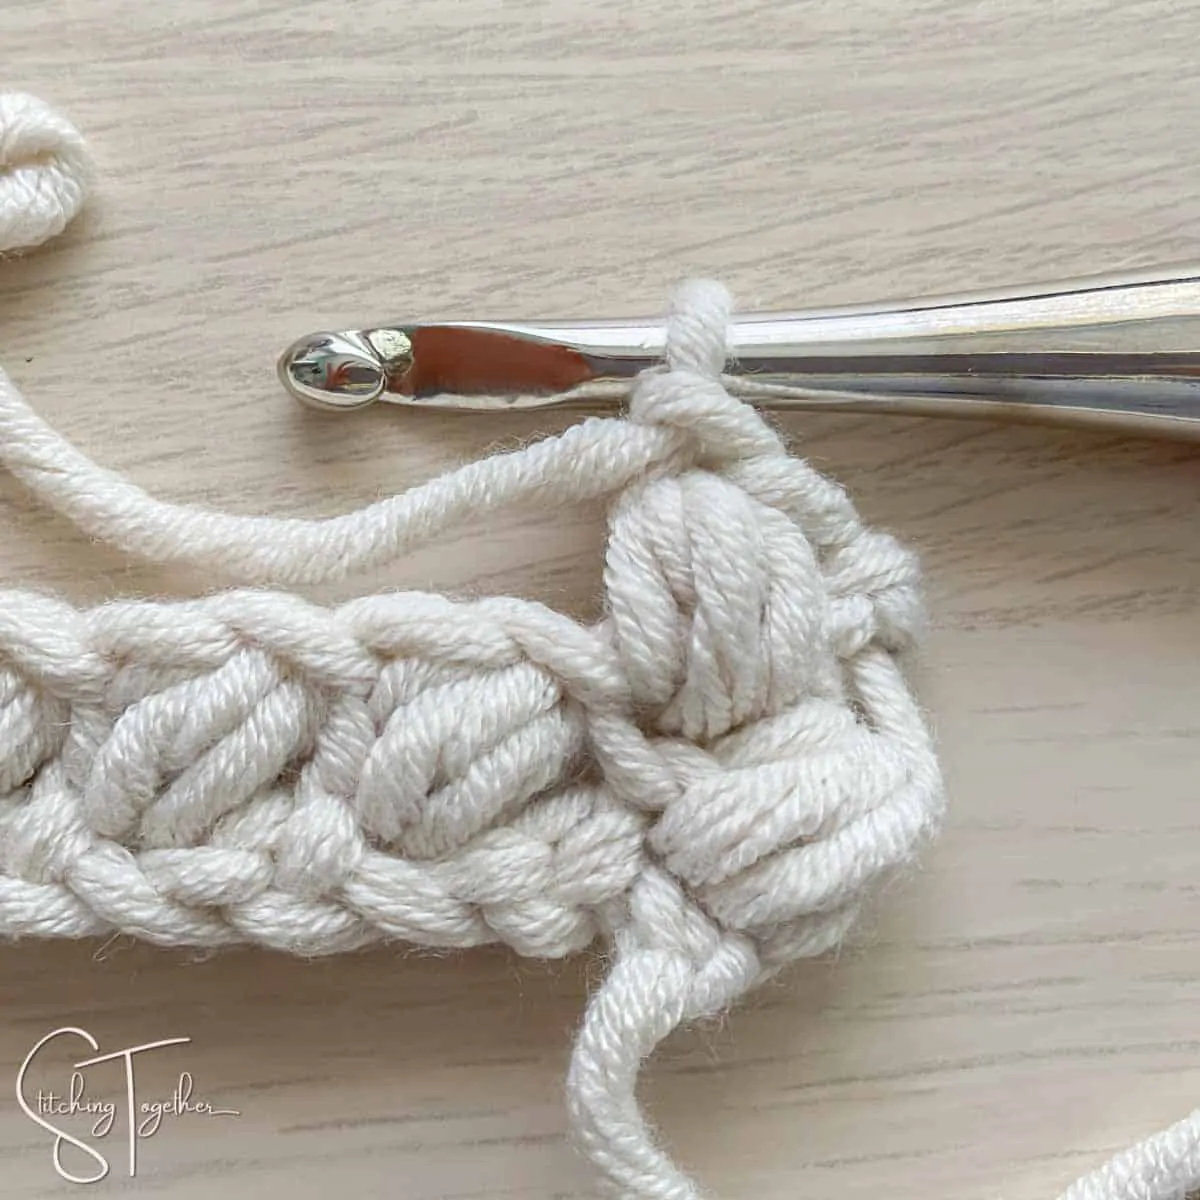
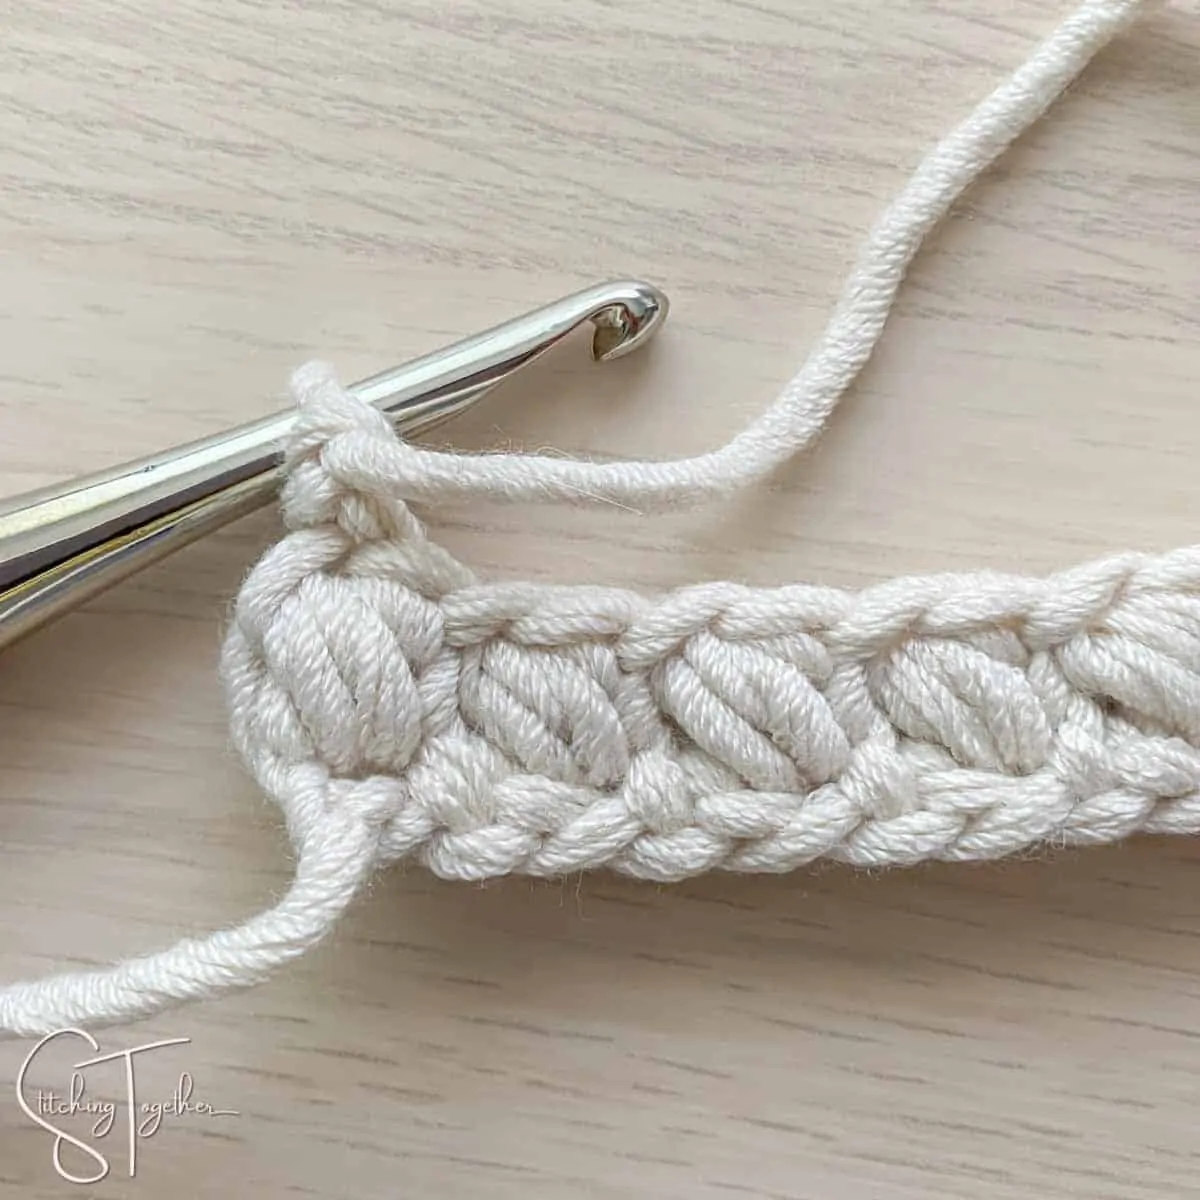
Each bean stitch in after row 1 will be work in the “v” space created by the bean stitch in the row below.
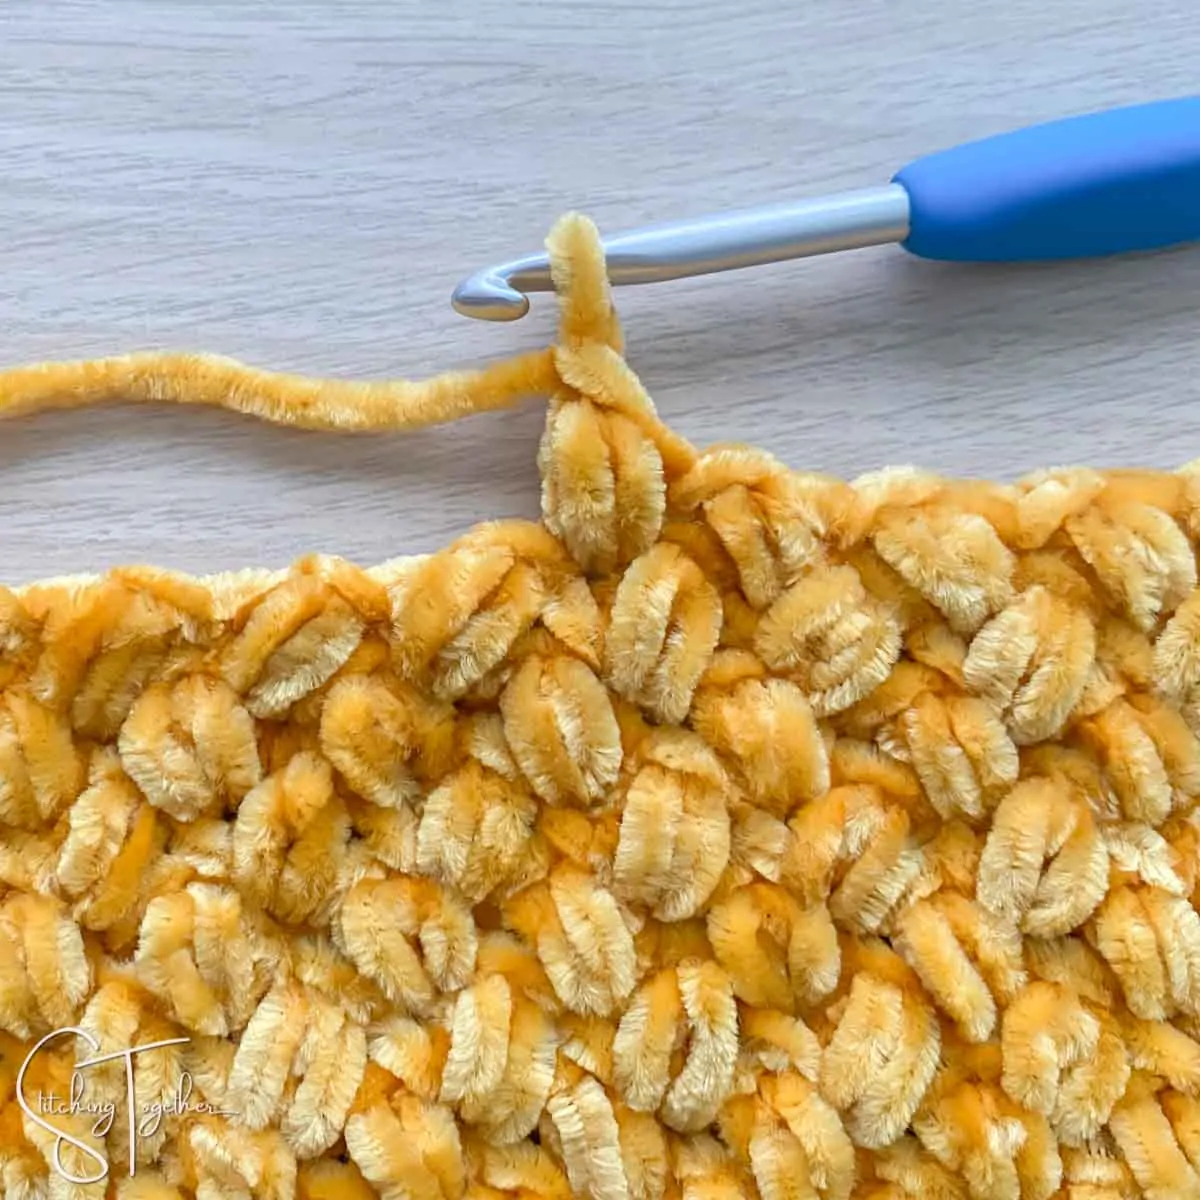
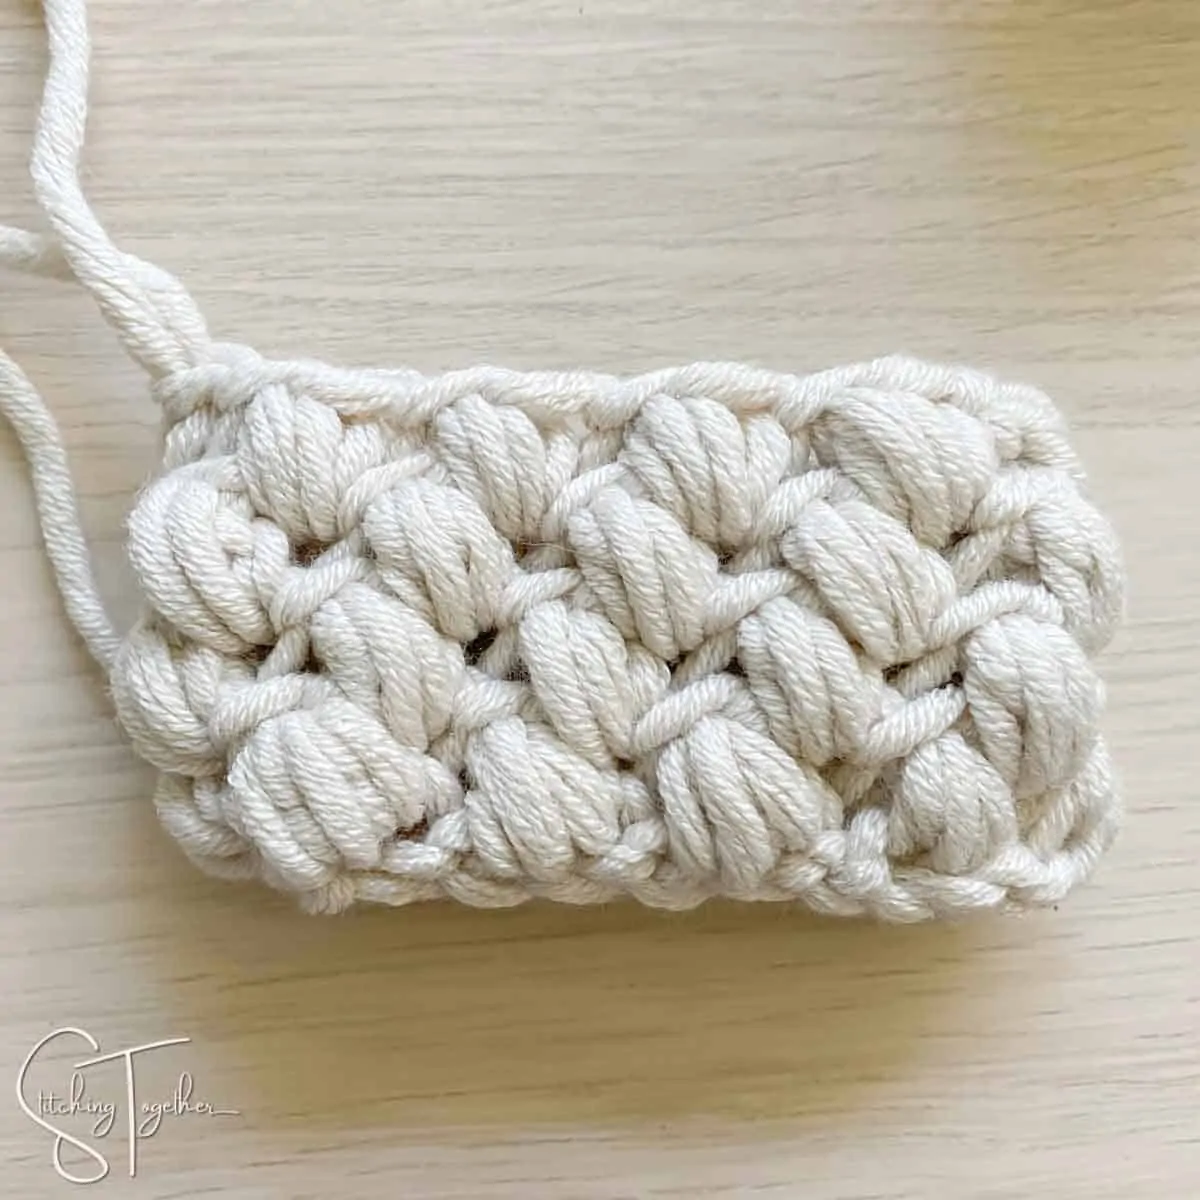
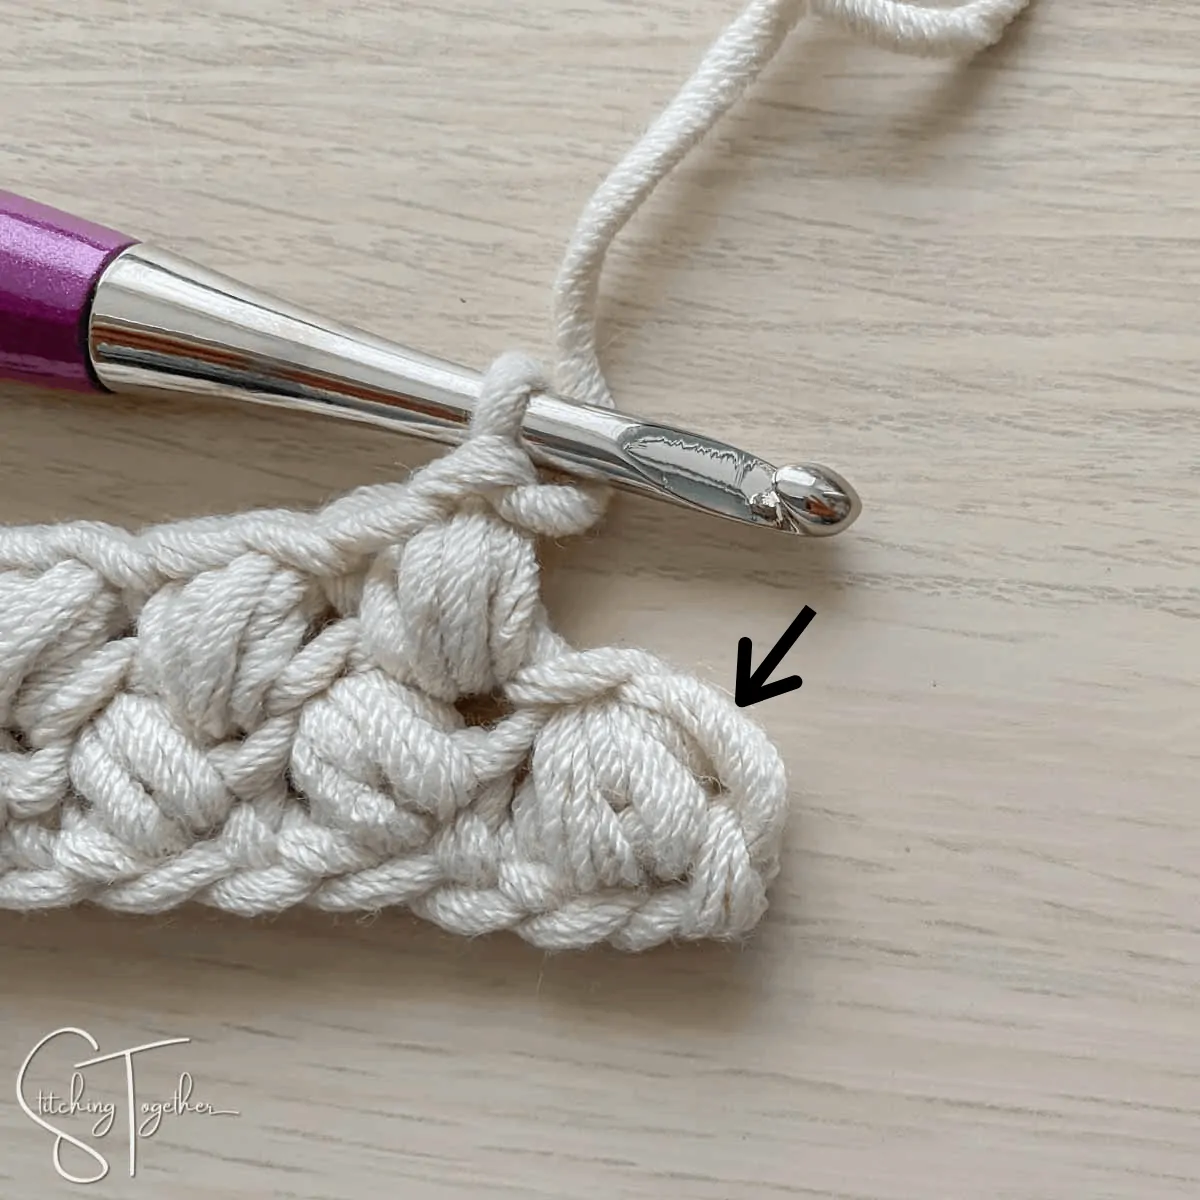
Here’s the first completed bean of row 2. You can see it pushes the bean stitch below it even farther to the side.
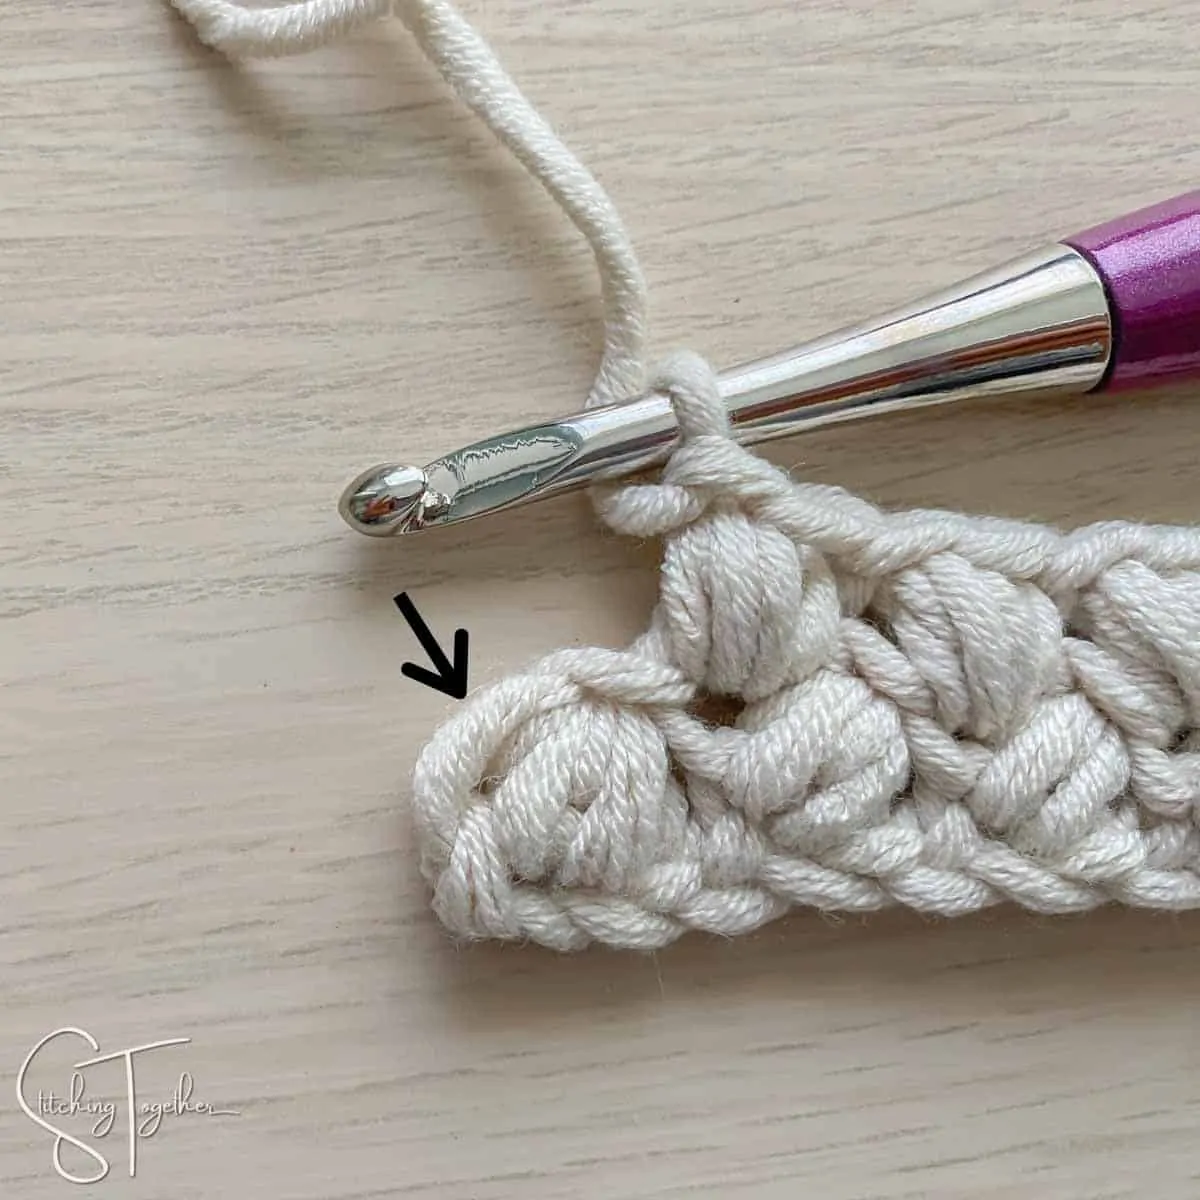
Once you reach the end of the row, the last bean will go almost on the side of the row below.
Bean Stitch Crochet Tutorial – Left Handed
Start with an odd numbered chain.
Insert hook into the 3rd ch from the hook and pull up a loop (2 loops on the hook).
Yarn over, insert hook into the same stitch, and pull up a loop (4 loops on the hook)
Next, yarn over, insert hook into the same stitch, and pull up a loop (6 loops on the hook)
Yarn over and pull through all 6 loops on the hook.
Chain 1 to secure to stitch.
There you go! You’ve finished the basic bean stitch, but there’s still more to learn of course.
Skip the next stitch then make another bean stitch.
Continue skipping a stitch and then making another bean stitch all the way to the end of the row.
You’ve already chained 1 to secure that last bean stitch, now you’ll chain again and turn.
Each bean stitch in after row 1 will be work in the “v” space created by the bean stitch in the row below.
Here’s the first completed bean of row 2. You can see it pushes the bean stitch below it even farther to the side.
Once you reach the end of the row, the last bean will go almost on the side of the row below.
Great! Now you know how to do the bean stitch! Isn’t it fun? Head to the Bean Stitch Twisted Headband to use it in a quick and easy project.