Mini Bean Stitch (Elizabeth Stitch) Full Crochet Tutorial
Disclosure: This post may contain affiliate links. As an Amazon Associate, I earn from qualifying purchases. Please visit my Privacy Policy for disclosures and more information.
If you are a fan of stitches that are easy to work and give you fabric with loads of squishy texture, then you will love the mini bean stitch! This simple stitch, also known as the Elizabeth Stitch, works quickly once you get going and is perfect for many types of crochet projects like scarves, blankets, pillows, and more.
The primary skills you need to know to work the mini bean crochet stitch are chaining, working in the same stitch spaces, yarning over, and pulling through all the loops on your hook. Basic crochet skills!
Below you’ll find the written pattern followed by photo tutorials for right and left-handed crocheters. You’ll be working this gorgeous stitch in no time!
Before you get started, be sure to save this crochet tutorial on Pinterest so you can refer back to it later.
There are many more crochet tutorials right here on Stitching Together so you can quickly learn new stitches and stitch patterns.
Mini Bean Stitch Introduction
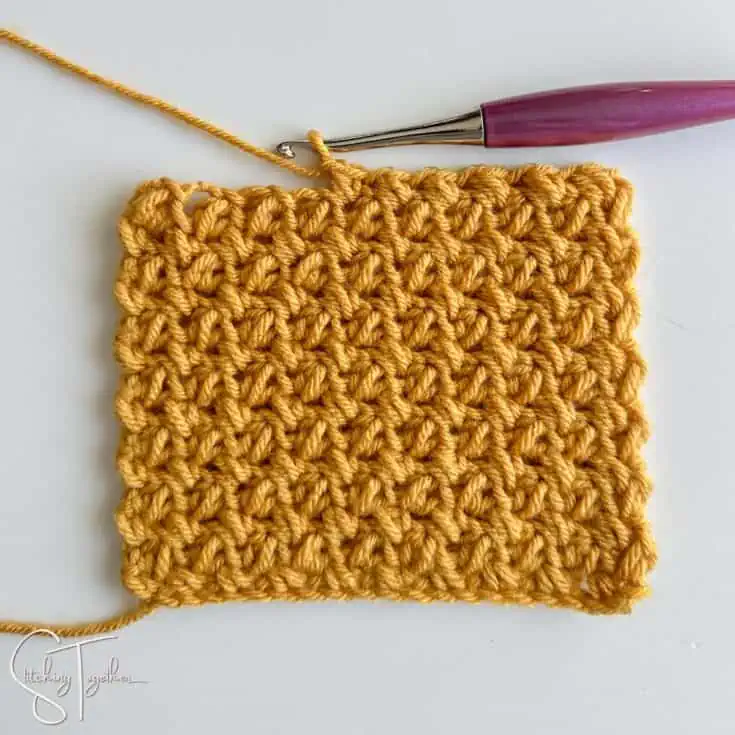
The mini bean stitch pattern is a series of puff-like stitches worked in such a way that they push the puffs in the previous row off to the side. You get a cute zig-zag pattern that adds loads of amazing texture and interest to your reversible fabric.
What’s the Difference Between the Bean Stitch and the Mini Bean Stitch?
Would you be surprised to learn that the only difference between the crochet Bean Stitch and the Mini Bean Stitch is that there is one less yarn over in the mini version? That’s it!
When you work the Bean Stitch you will yarn over and pull up a loop one more time than you do with the Mini Bean, which gives a stitch that looks a lot more like a bean than the mini one.
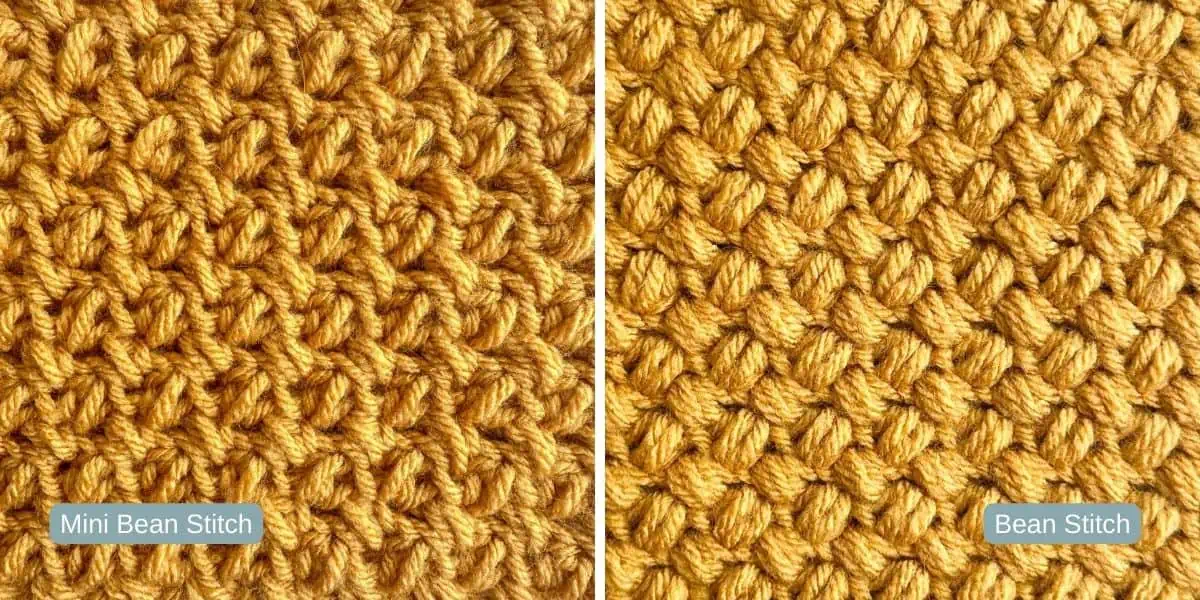
It is a little harder to see the similarities between the stitches in this photo comparison because I used a larger hook for the mini bean stitch swatch, which made the solid fabric a little looser. I find, especially for tutorials and learning stitches, it is often easier to use a larger hook size.
Where Can I Use the Mini Bean Stitch?
This stitch is so versatile that you’ll find yourself using it in all sorts of projects. I already have two different scarf patterns that use the mbs: the Striped Scarf and the Textured Infinity Scarf. It also works beautifully in blankets, dishcloths, wearables, and home decor patterns.
The great part about this stitch is that even though it creates a squishy and textured fabric, it doesn’t make a stiff fabric. You can still use this stitch for pieces you want to flow.

How to Crochet the Mini Bean Stitch
Let’s get to the tutorial! First, we will go through instructions on how to actually make one mini bean stitch. After that, you can follow the written pattern instructions or the photo tutorial and make a swatch of mini bean stitches to practice. Once you learn rows 1 and 2, the rest of the rows are just repeat row 2, so you can get into a great crocheting groove as you work this pattern.
Mini Bean Stitch Written Instructions
- Start with a chain that is an odd number.
- Insert your hook into the 3rd chain from the hook and pull up a loop (2 loops on the hook).
- Yarn over, insert your hook into the same stitch and pull up a loop (4 loops on the hook).
- Yarn over and pull through all four loops on the hook.
- Chain 1 to secure the stitch.
Mini Bean Stitch Pattern Instructions
Once you learn a new stitch, it’s always fun to try it out! You’ll want to follow the steps below to make a small practice swatch. You can use any yarn and coordinating hook to work this swatch. I listed the worsted weight yarn and hook size I used below.
Materials used in the pictured sample swatch:
I Love This Yarn (100% Acrylic, category 4, medium weight yarn – 7oz/355yds – 199g/325m)
US Size J/10 6.00 mm Crochet Hook (pictured: Furls Odyssey Hook)
Abbreviations:
ch(s): chain(s)
mbs: mini bean stitch
st(s): stitch(es)
Notes:
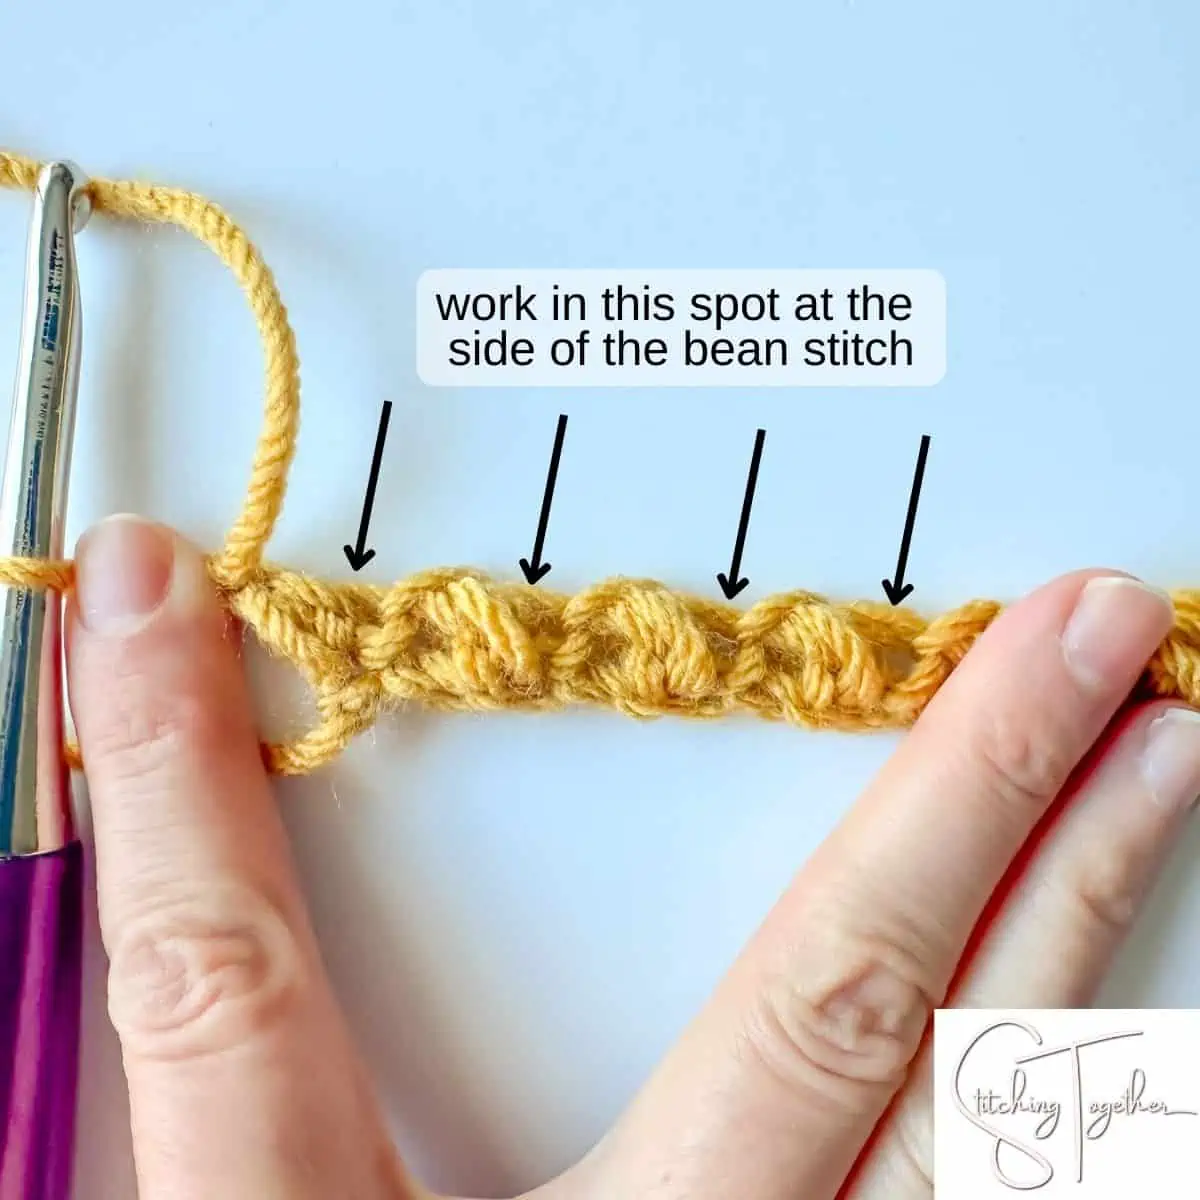
When working into the mbs into completed rows of mini bean stitches, do not work into the ch 1, but work into the mbs itself which is almost on the side of the stitch.
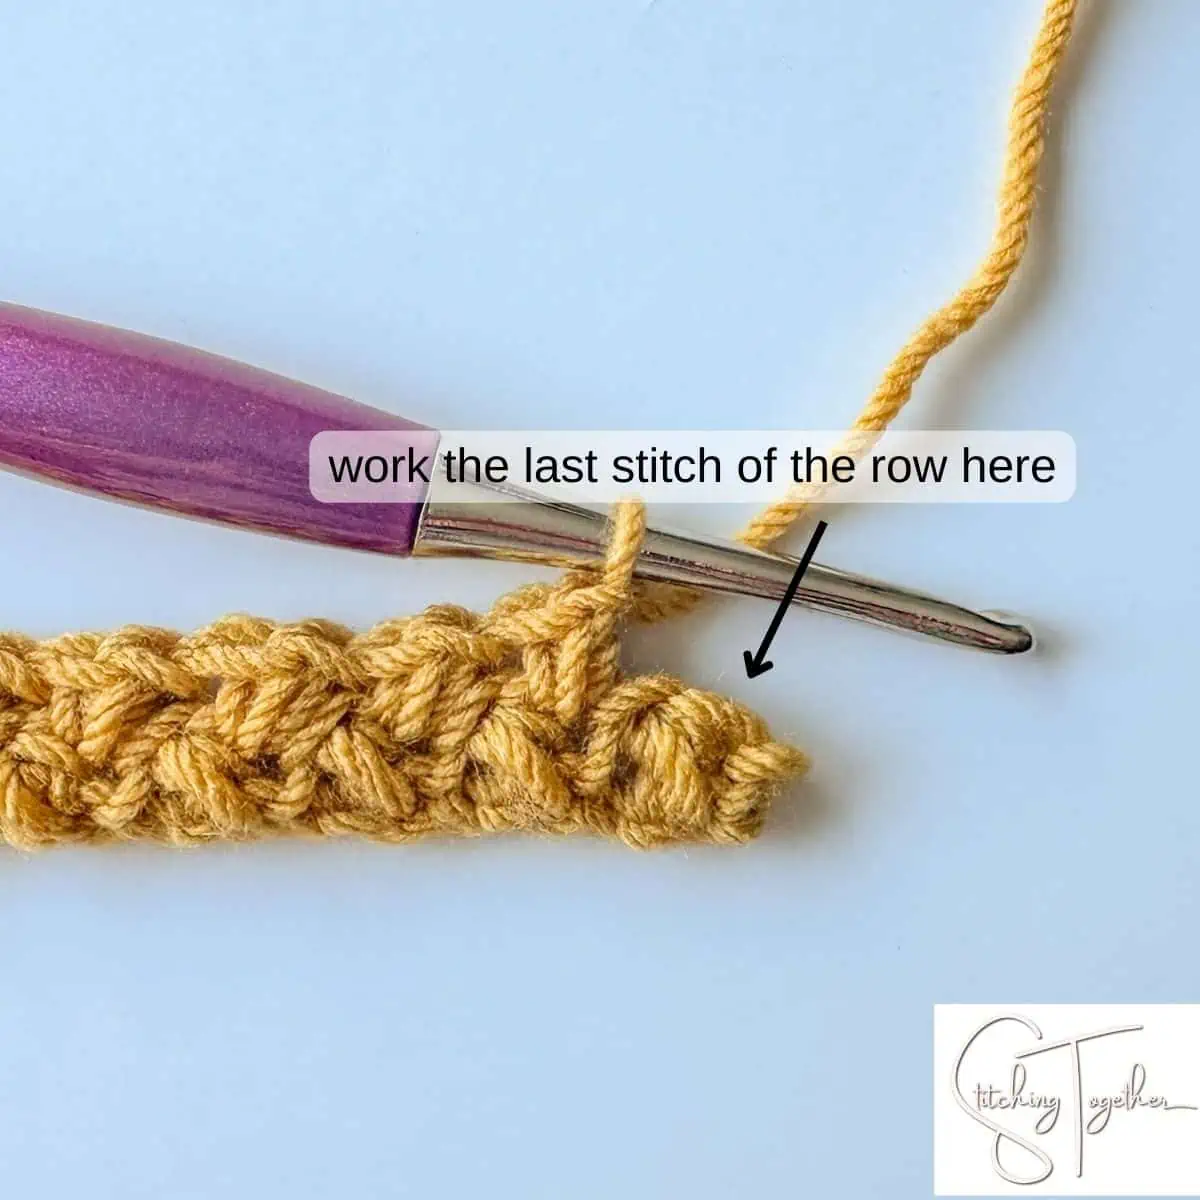
You will not chain 1 to start each row. The last stitch of each row is worked into the last mini bean stitch of the row below and not the chain one that closed the last stitch.
Pattern:
Ch 21 or any multiple of 2+1
Row 1: mbs in the 3rd ch from hook, *skip ch, mbs in the next ch, repeat from * to the end of the row, turn (10 mbs)
Row 2-17: mbs in each st across, turn (10 mbs)
Right-Handed Mini Bean Stitch Photo Tutorial
Mini Bean Stitch Tutorial - Right Handed
Learn how to crochet the mini bean stitch with this step-by-step photo tutorial for right handed crocheters.
Instructions
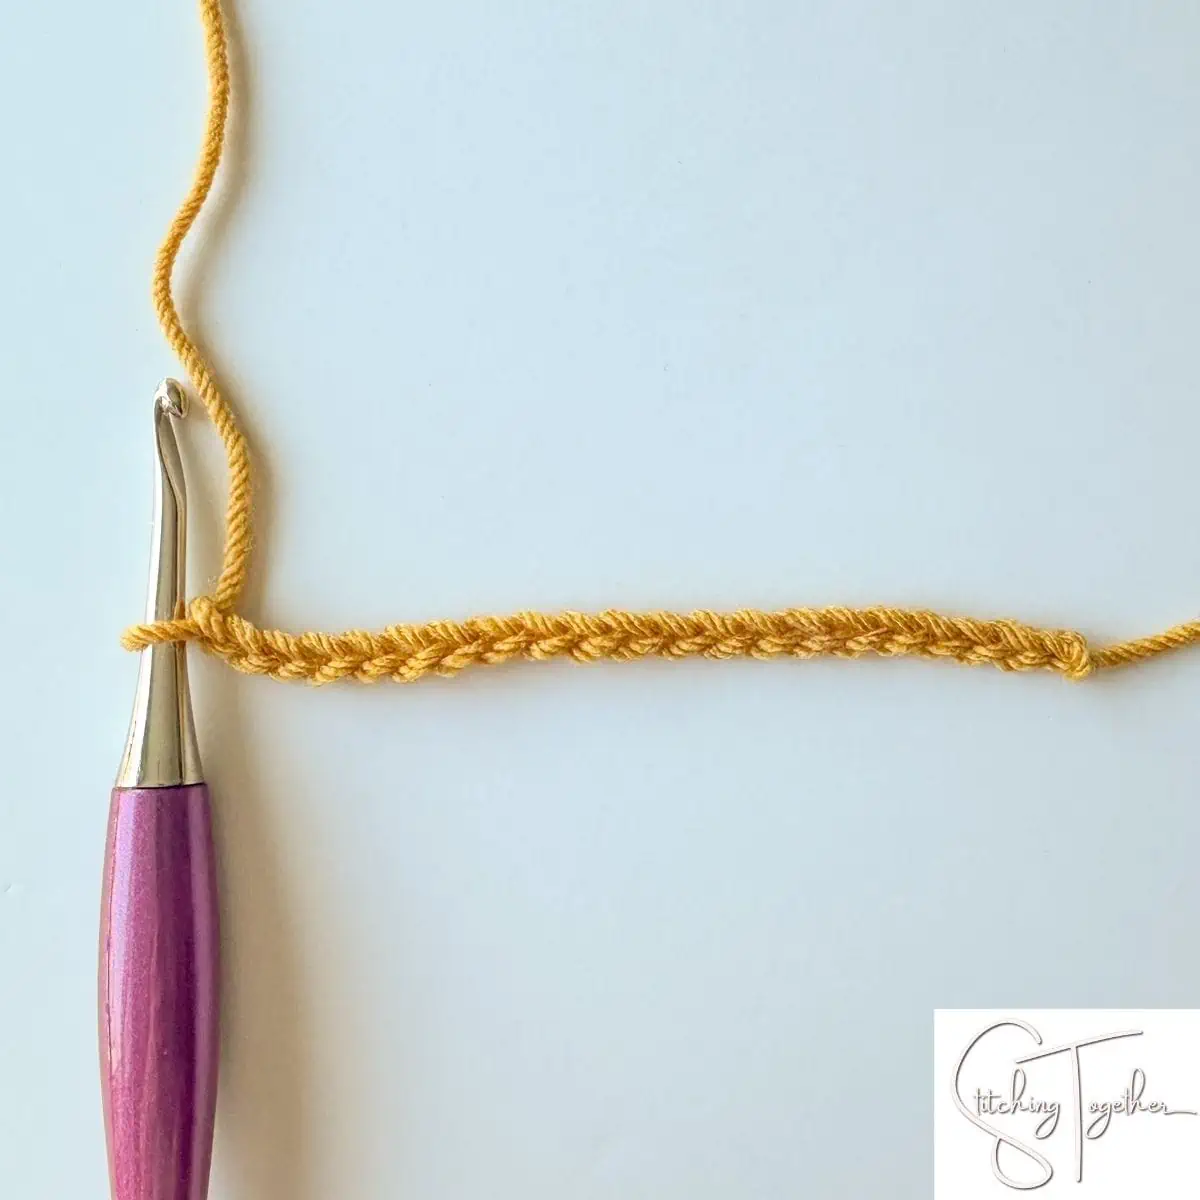
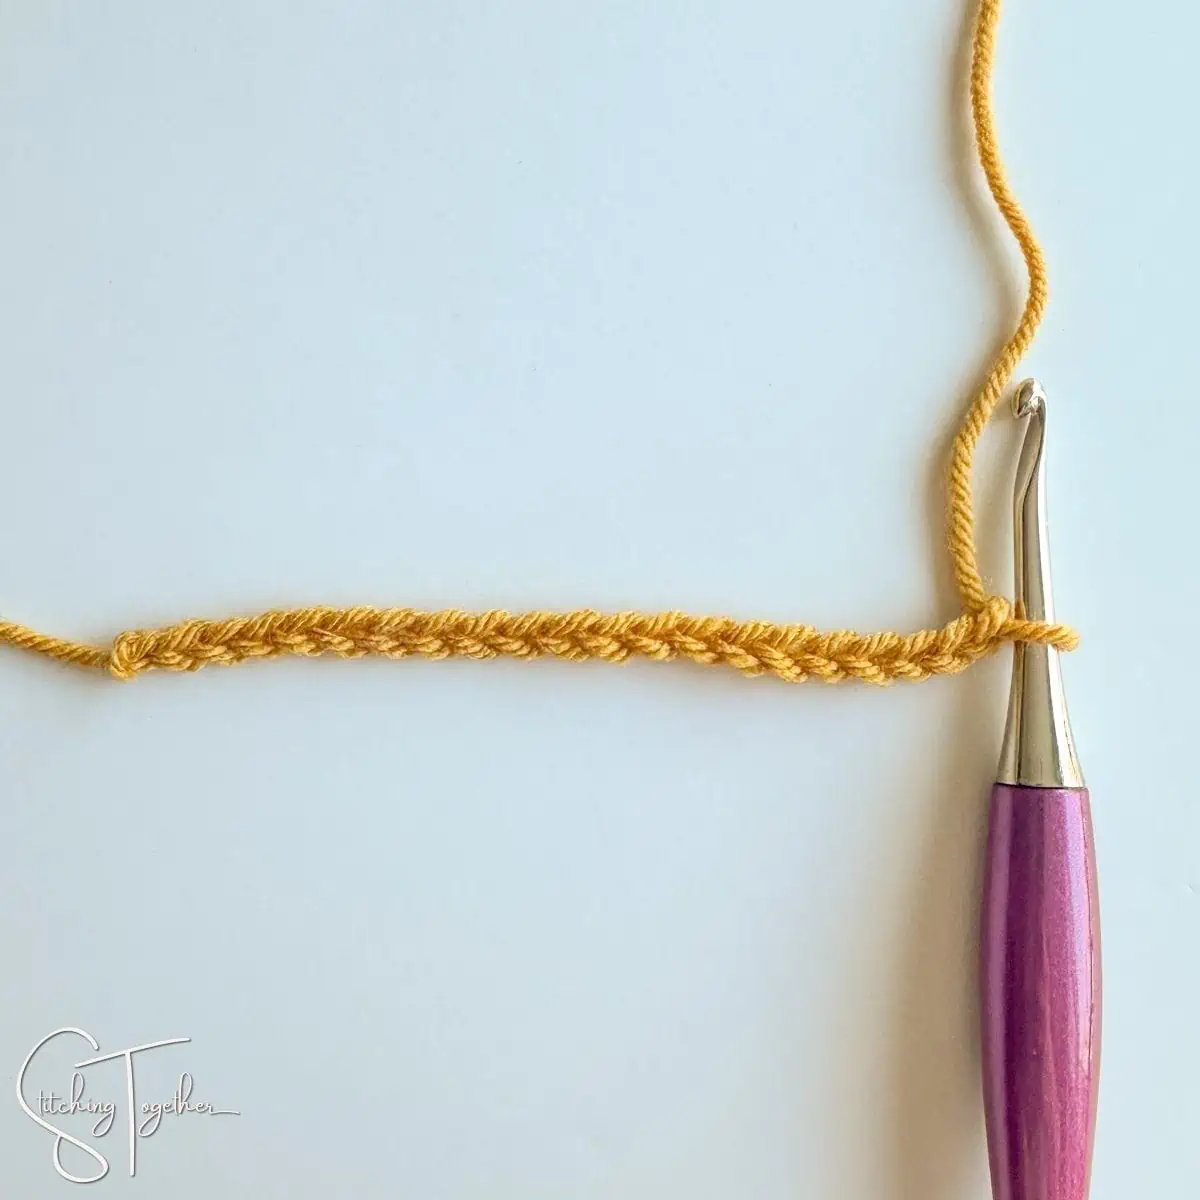
- Chain any multiple of 2+1. For the sample swatch, I chained 21.

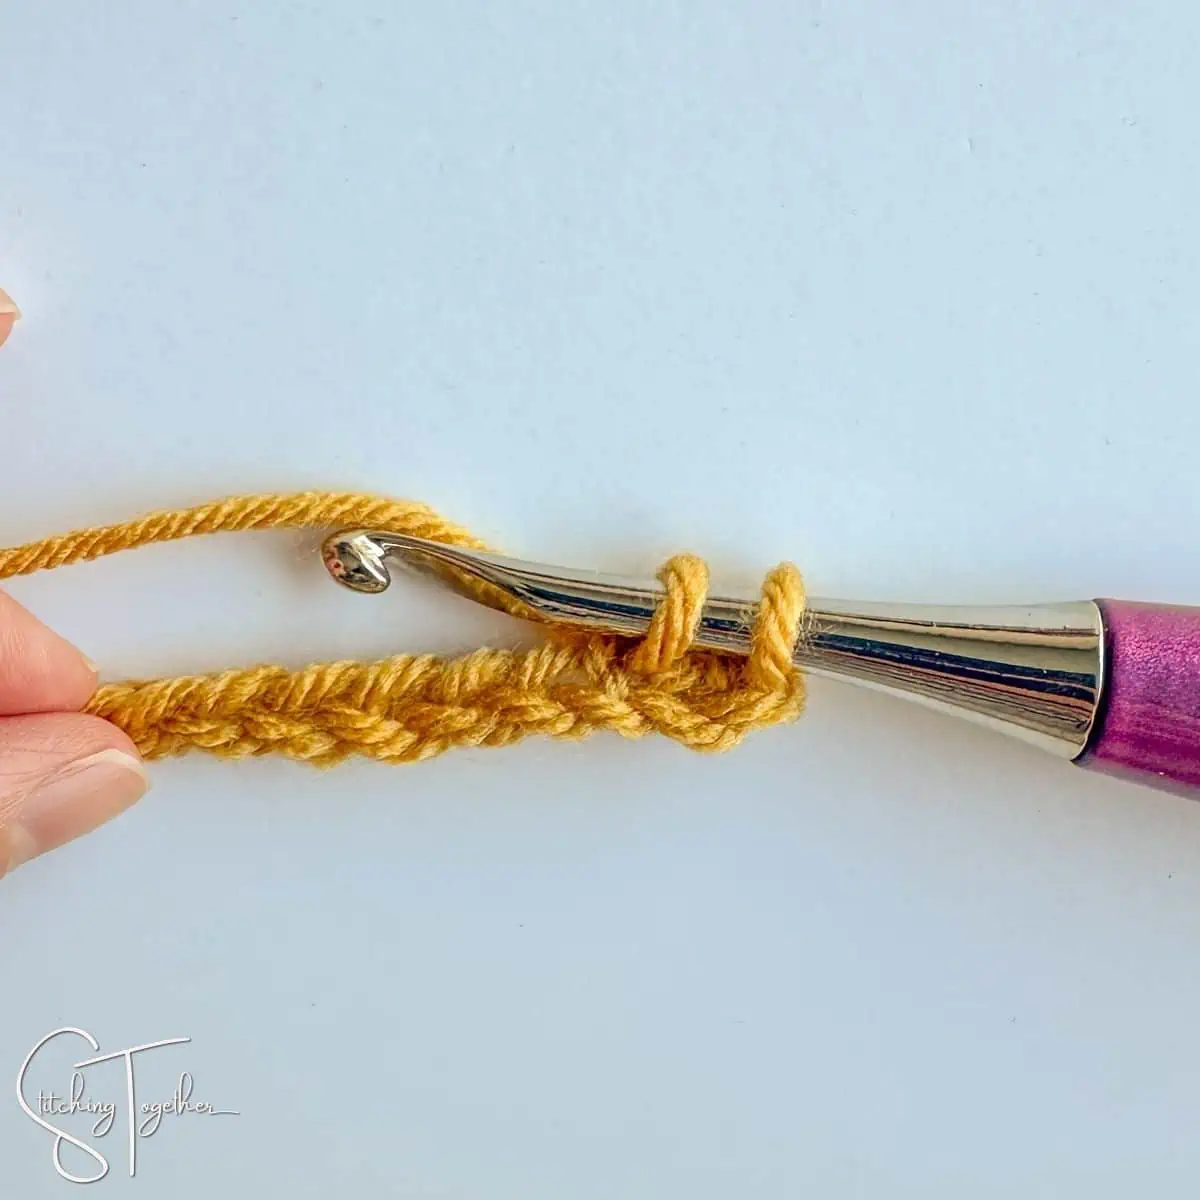
- Insert hook in 3rd chain from hook and pull up a loop.
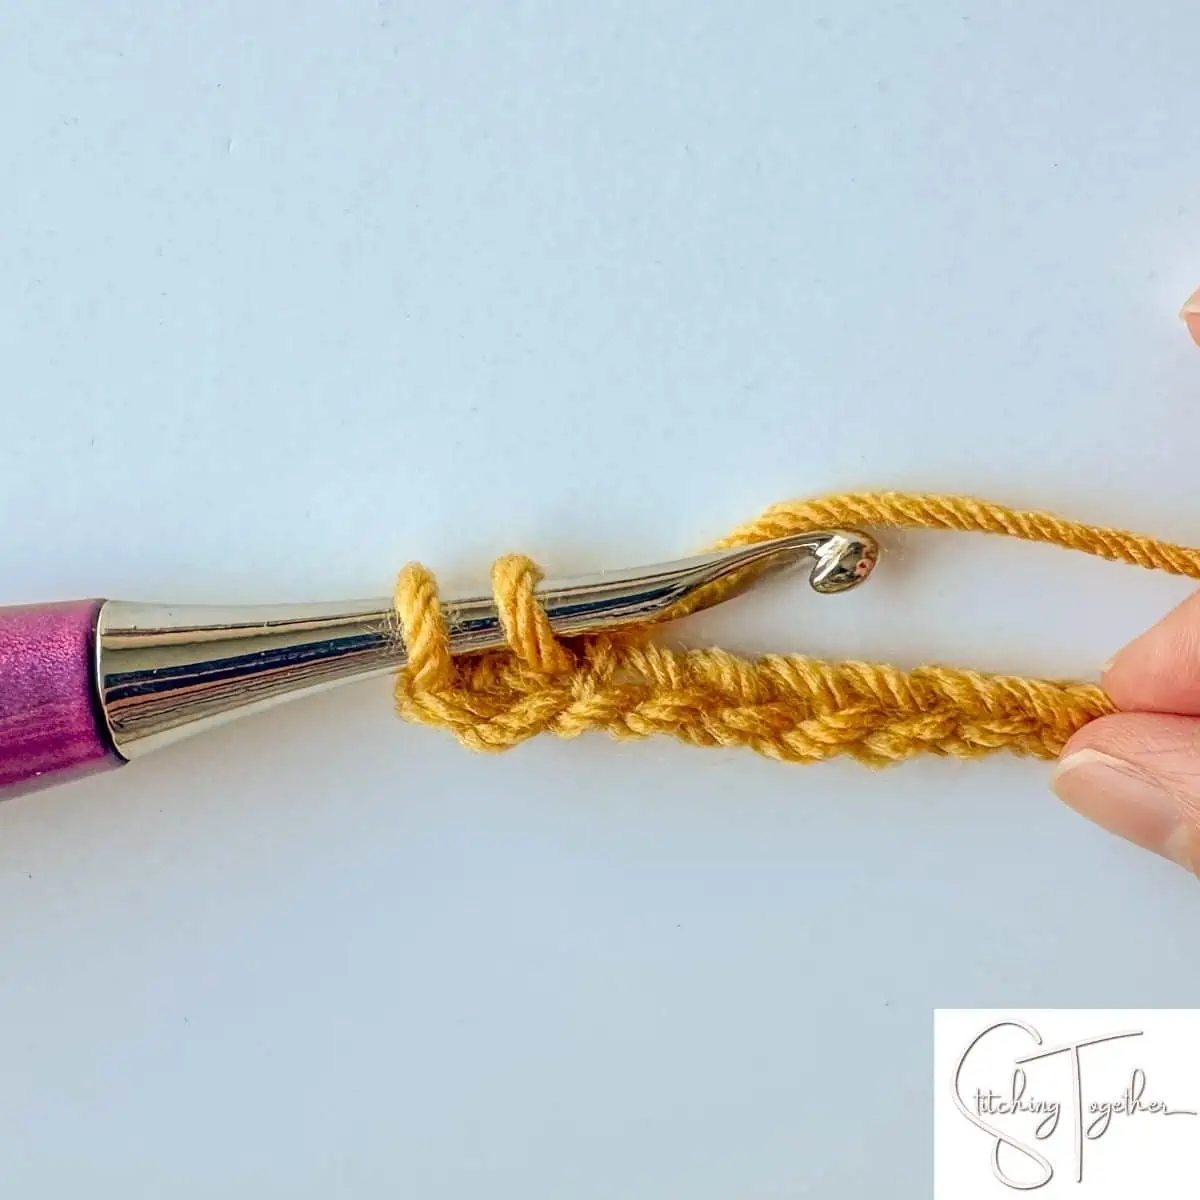
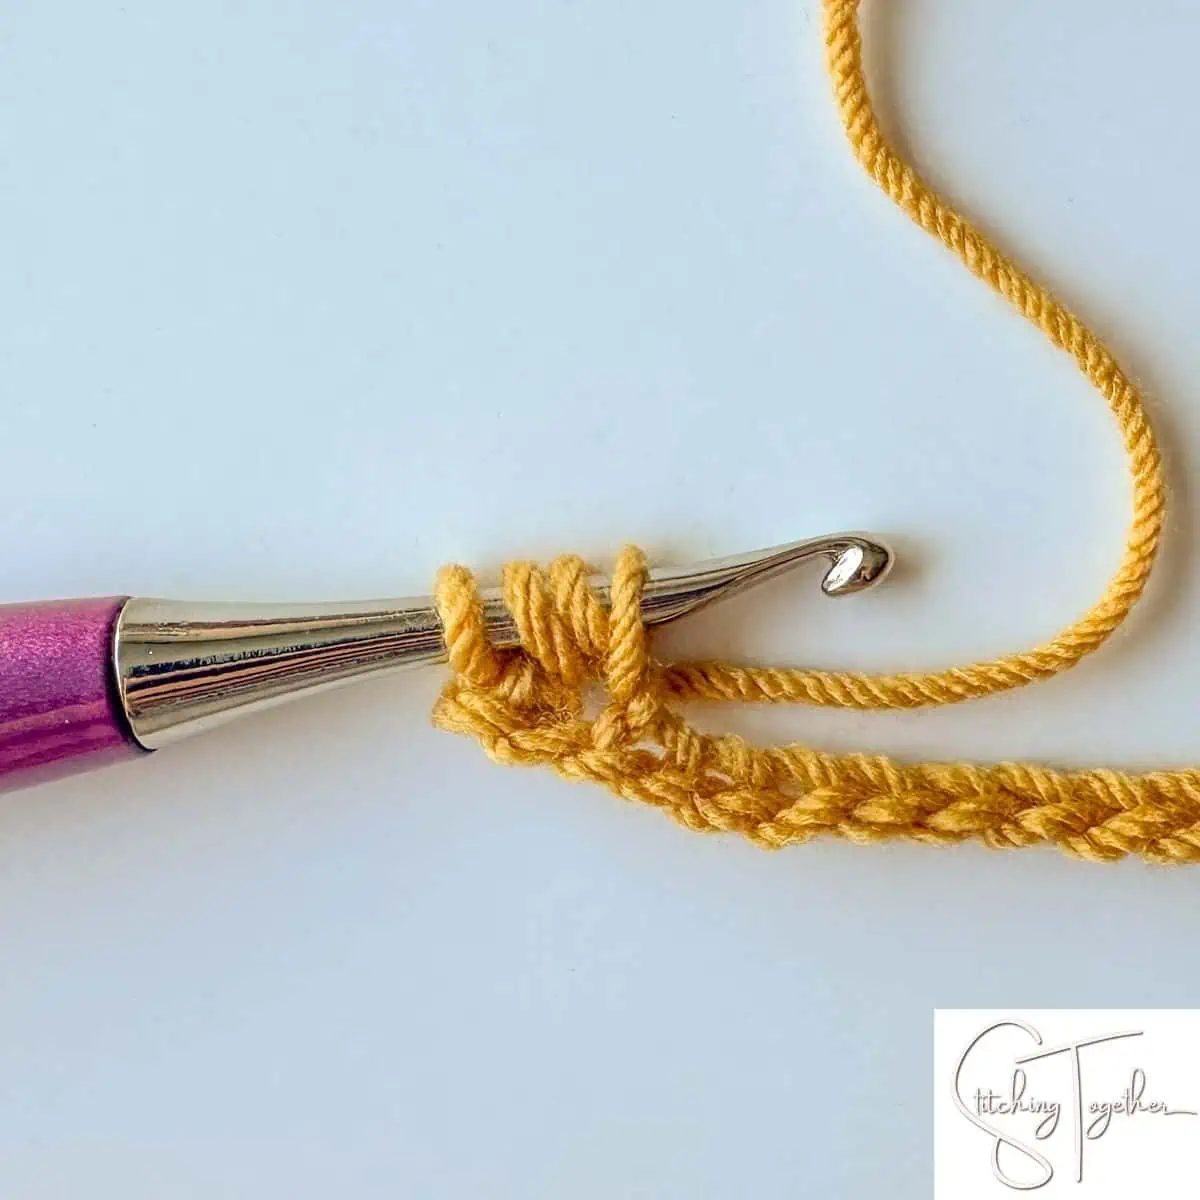
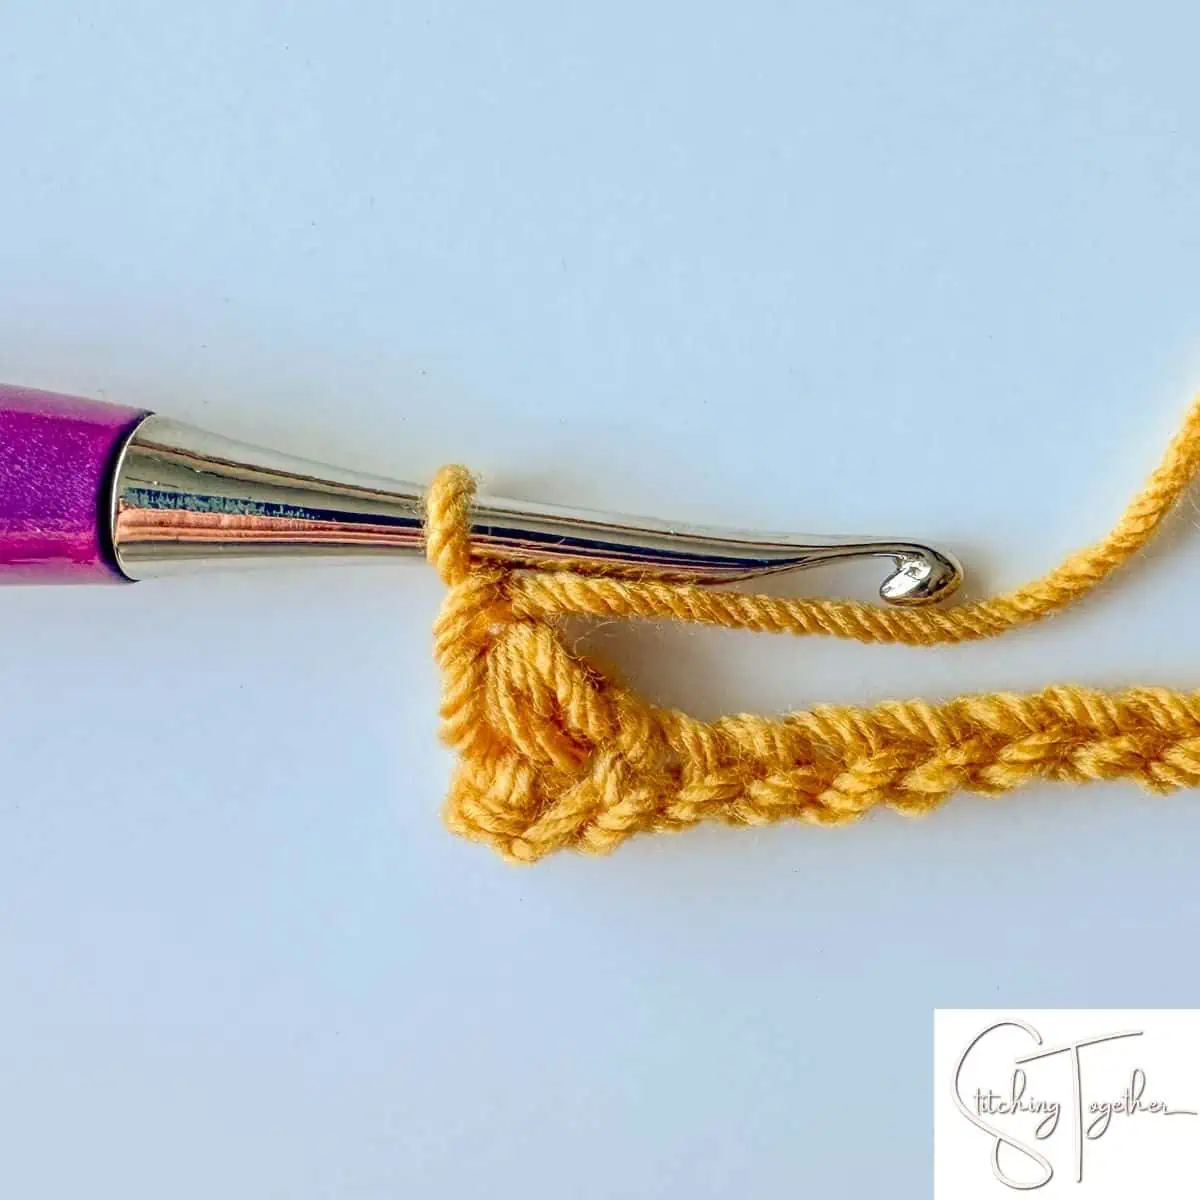
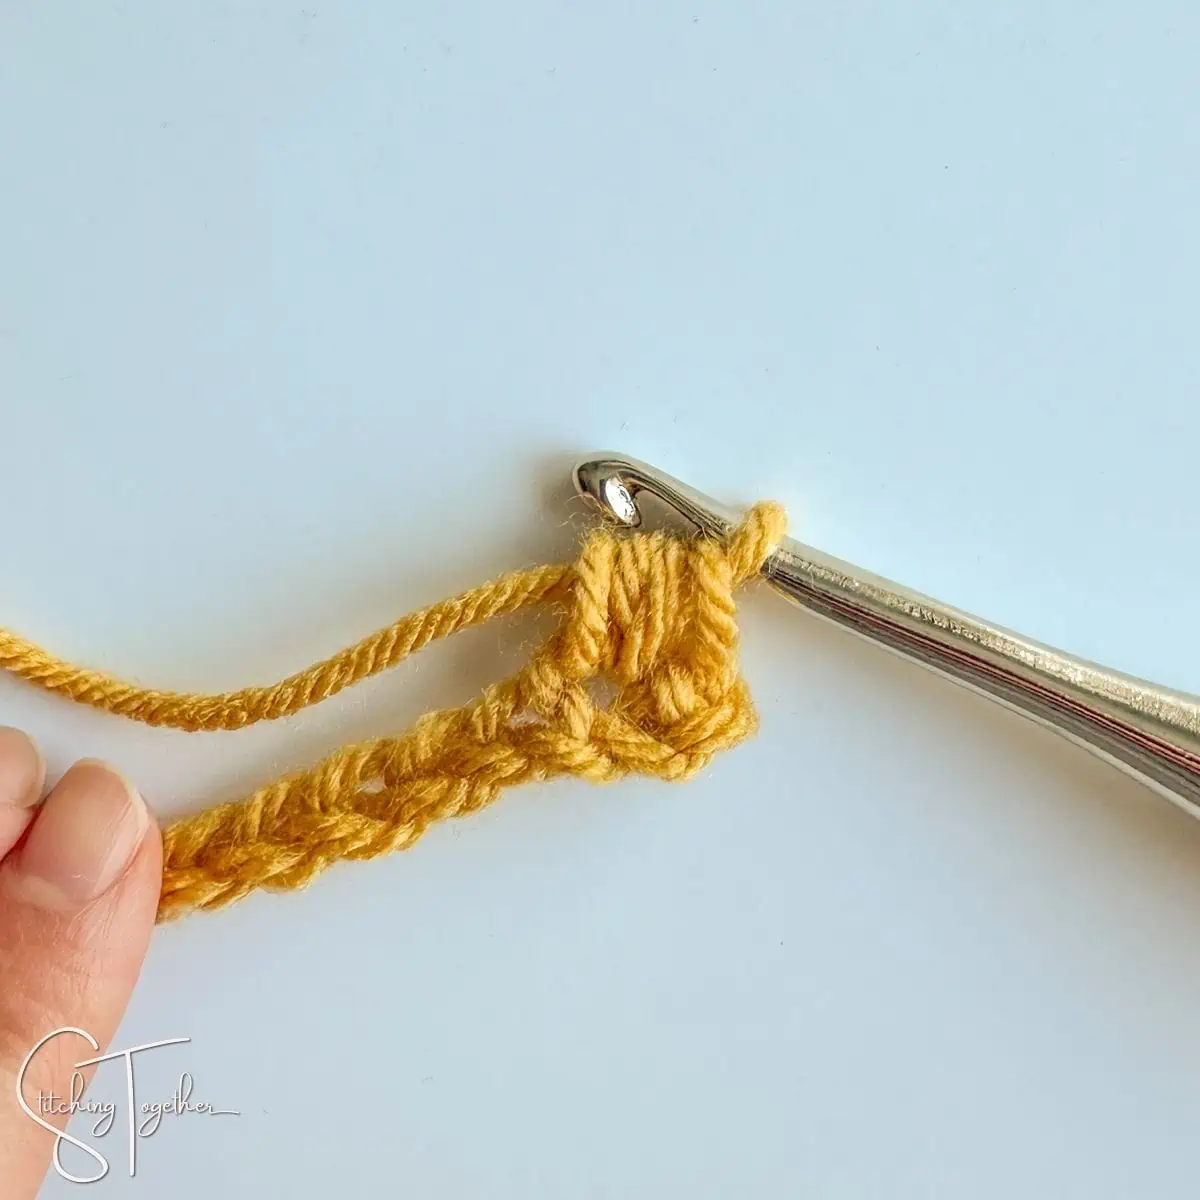
- Yarn over, insert hook into the same chain and pull up a loop. You will have 4 loops on your hook.
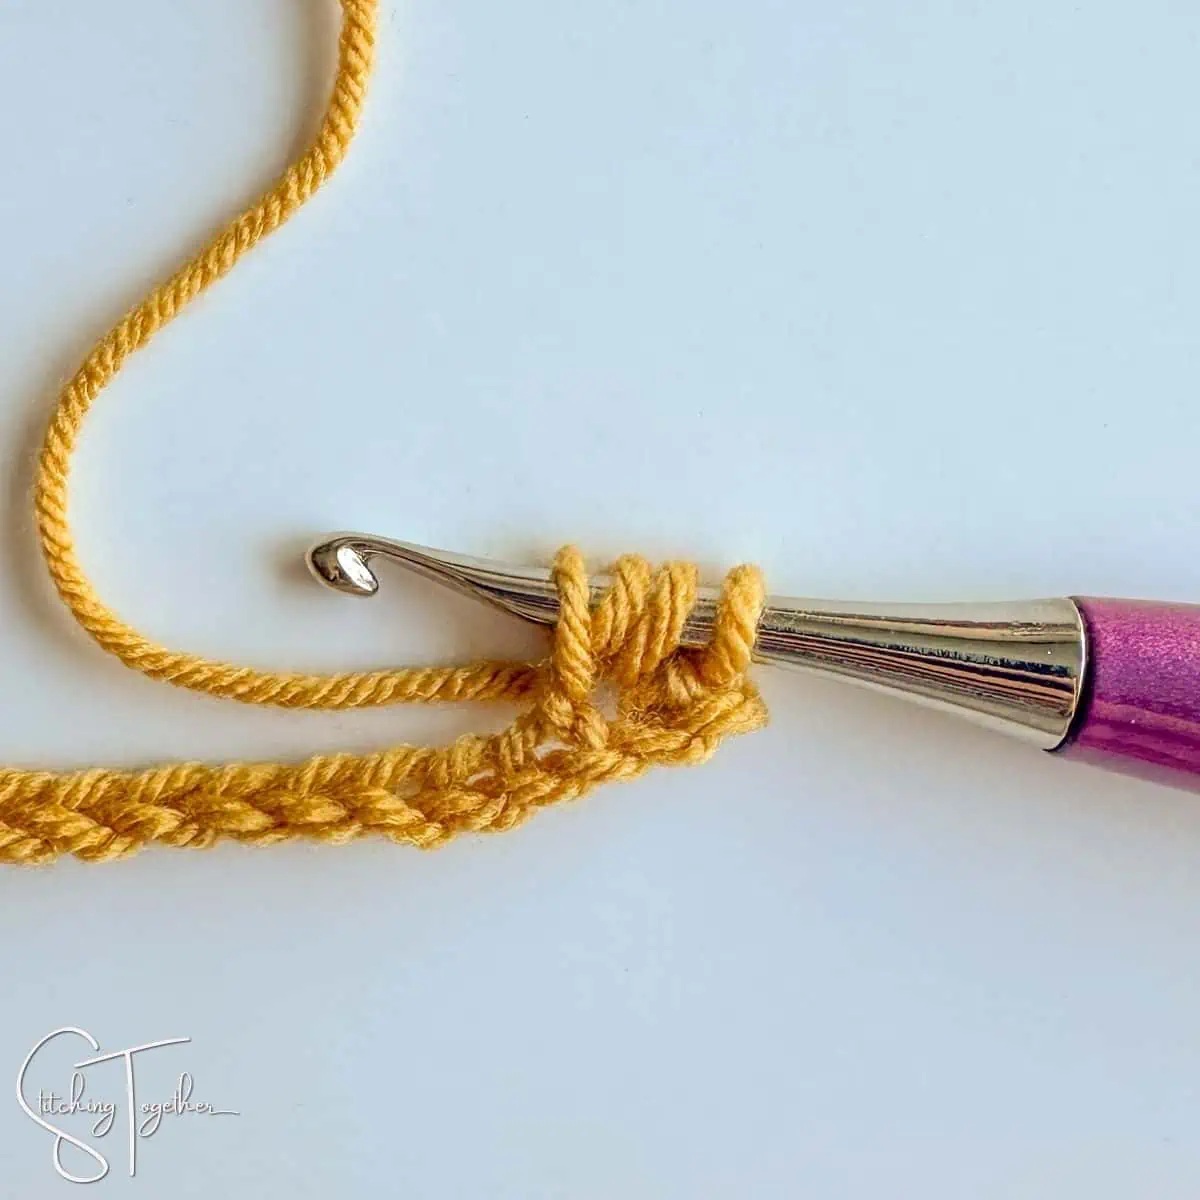
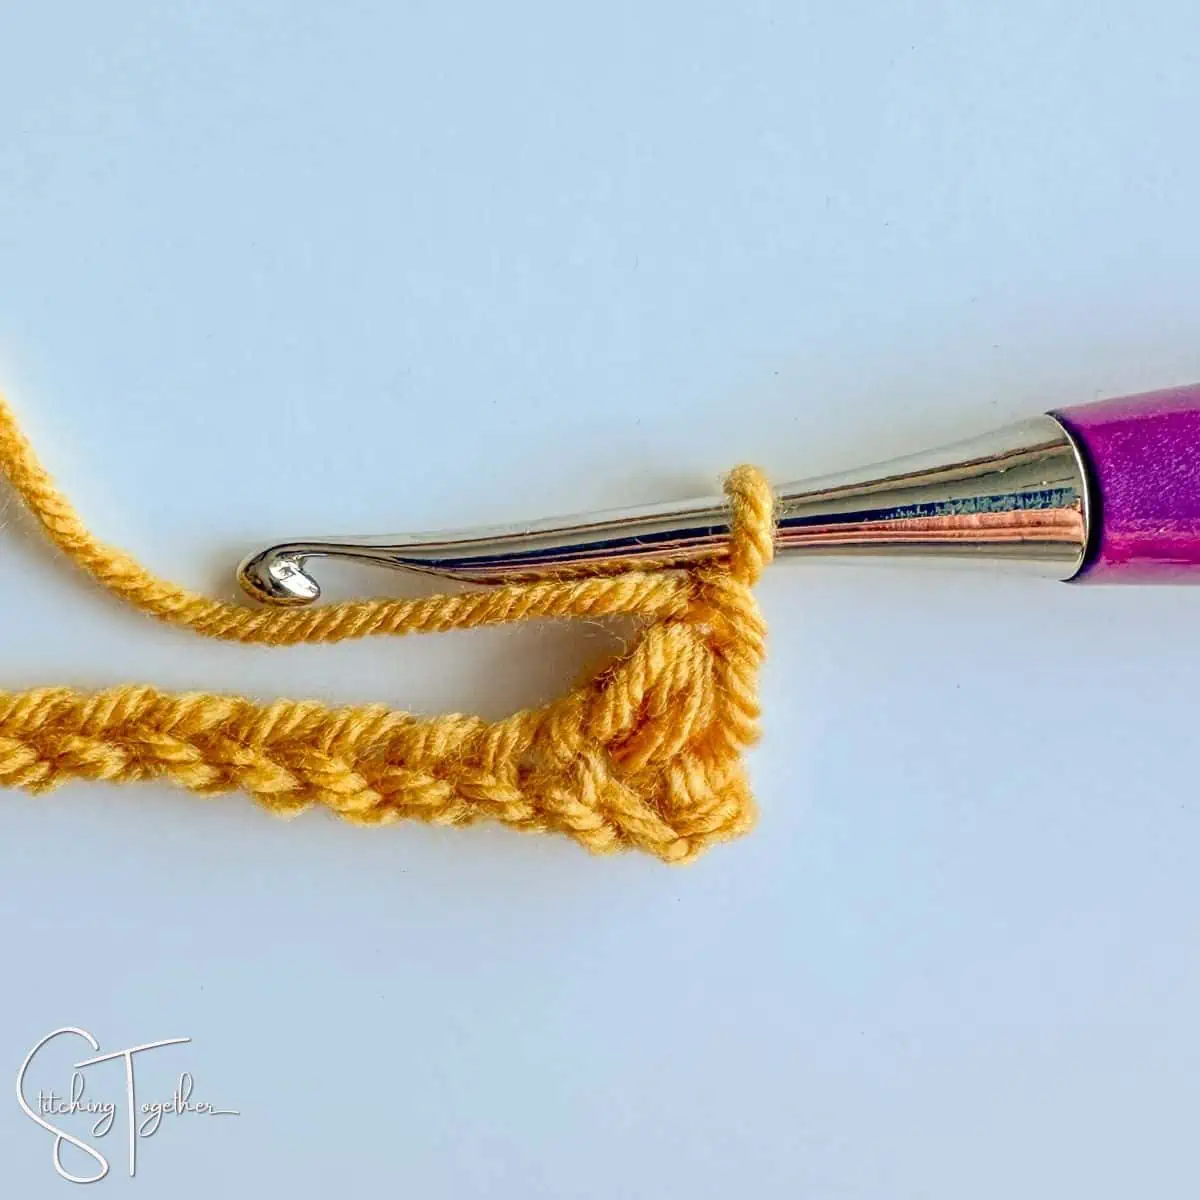
- Yarn over and pull through all 4 loops on your hook.
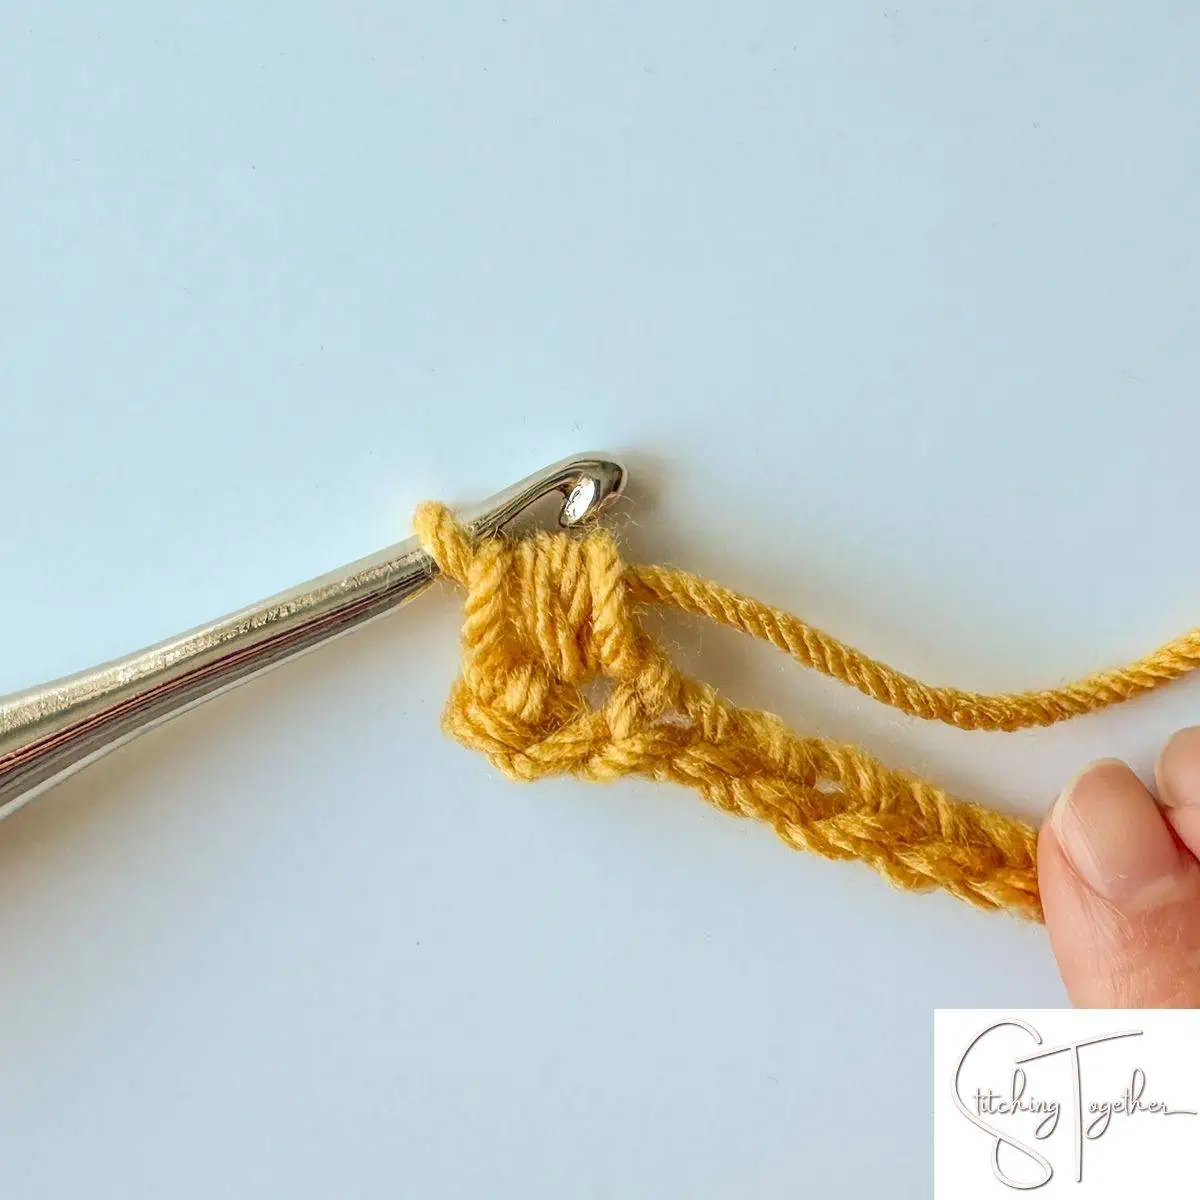
- Chain 1 to secure the stitch. You made your first mini bean stitch!
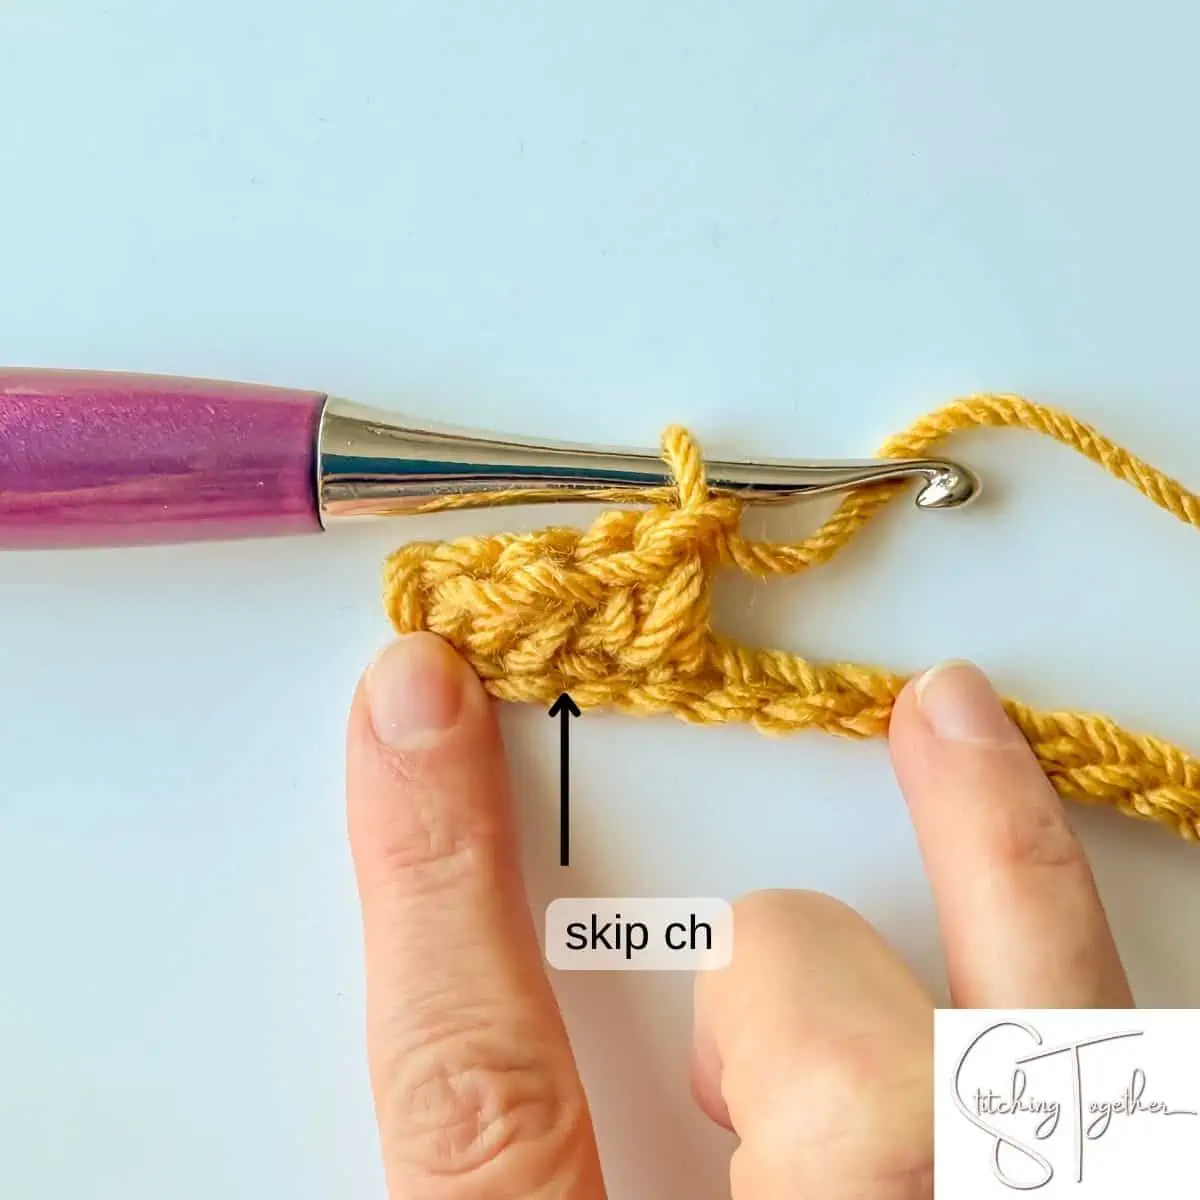
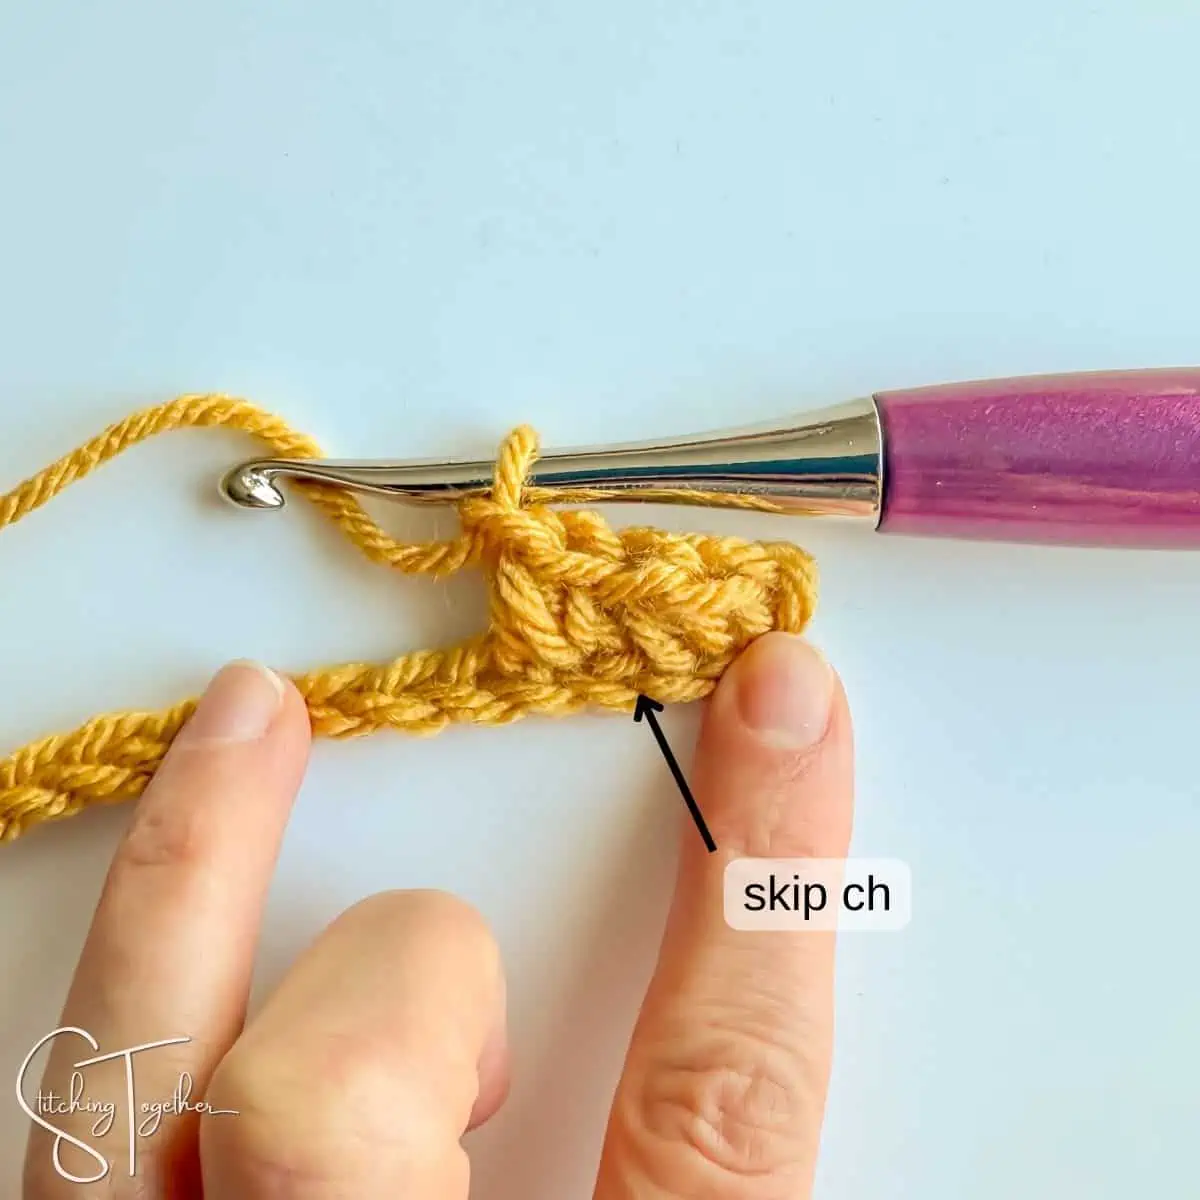
- To make the next mini bean stitch, skip 1 chain and pull up a loop in the next chain then follow steps 3-5.
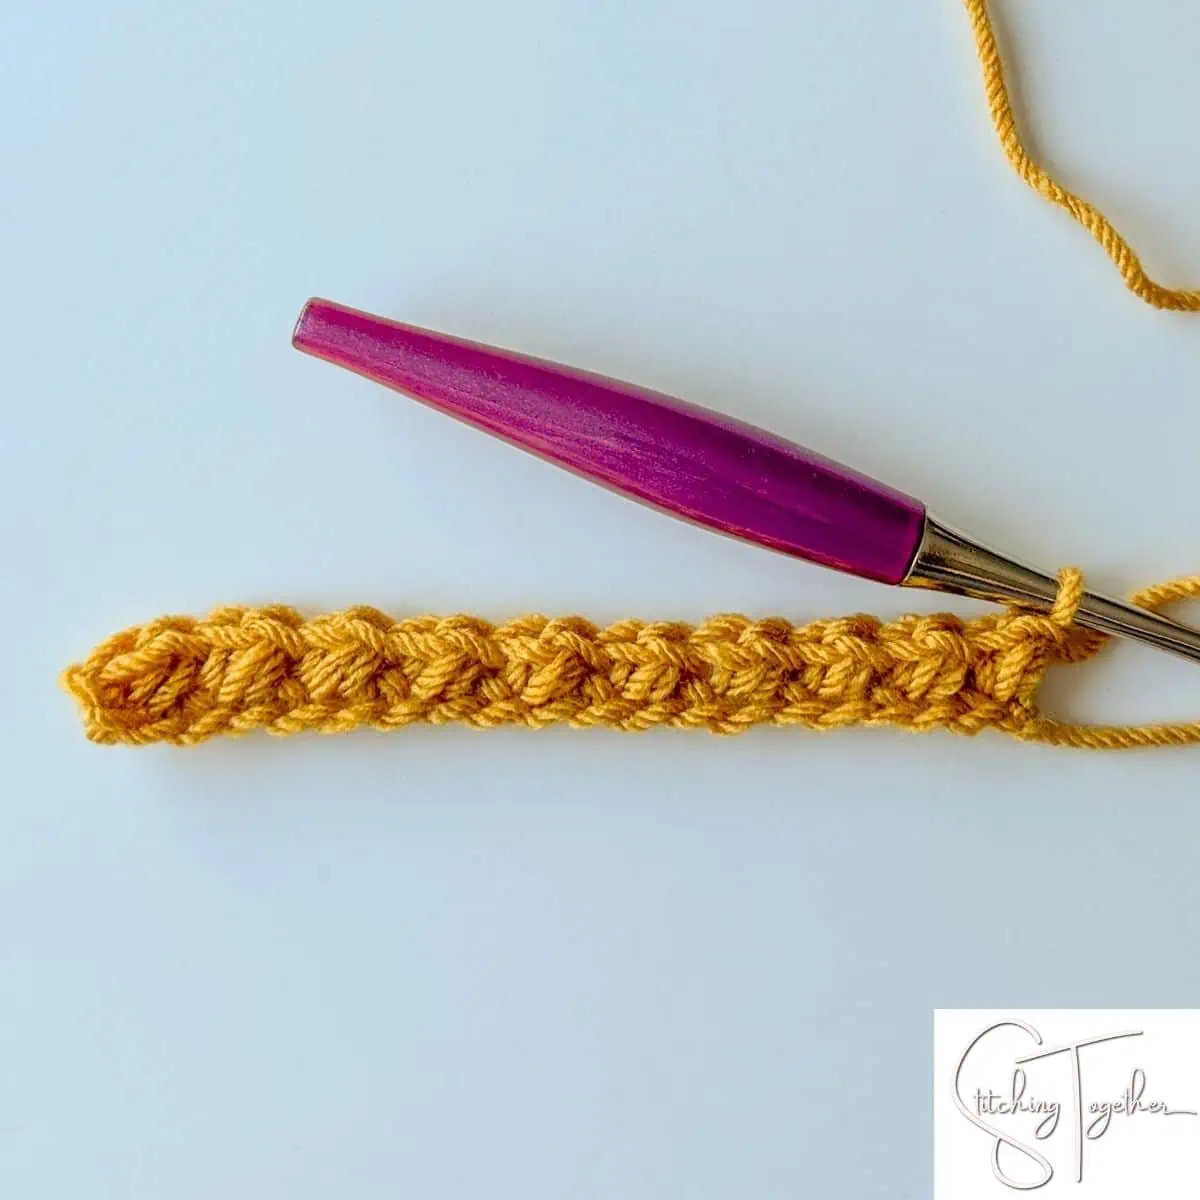
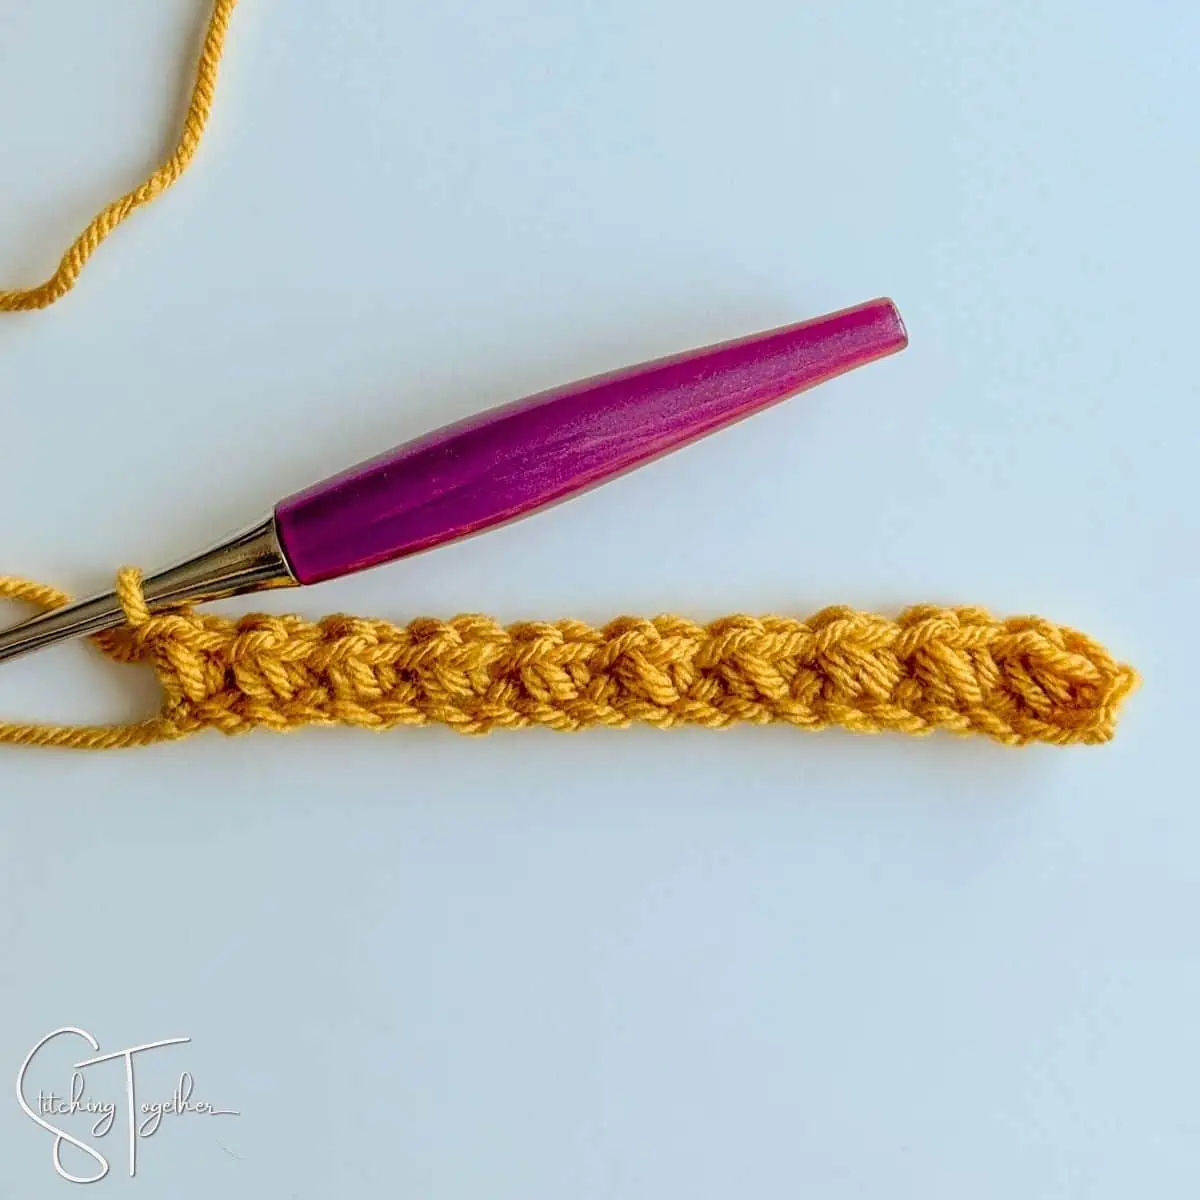
- Continue working to the end of the row. Next we will go over how to work Row 2 and each subsequent row.
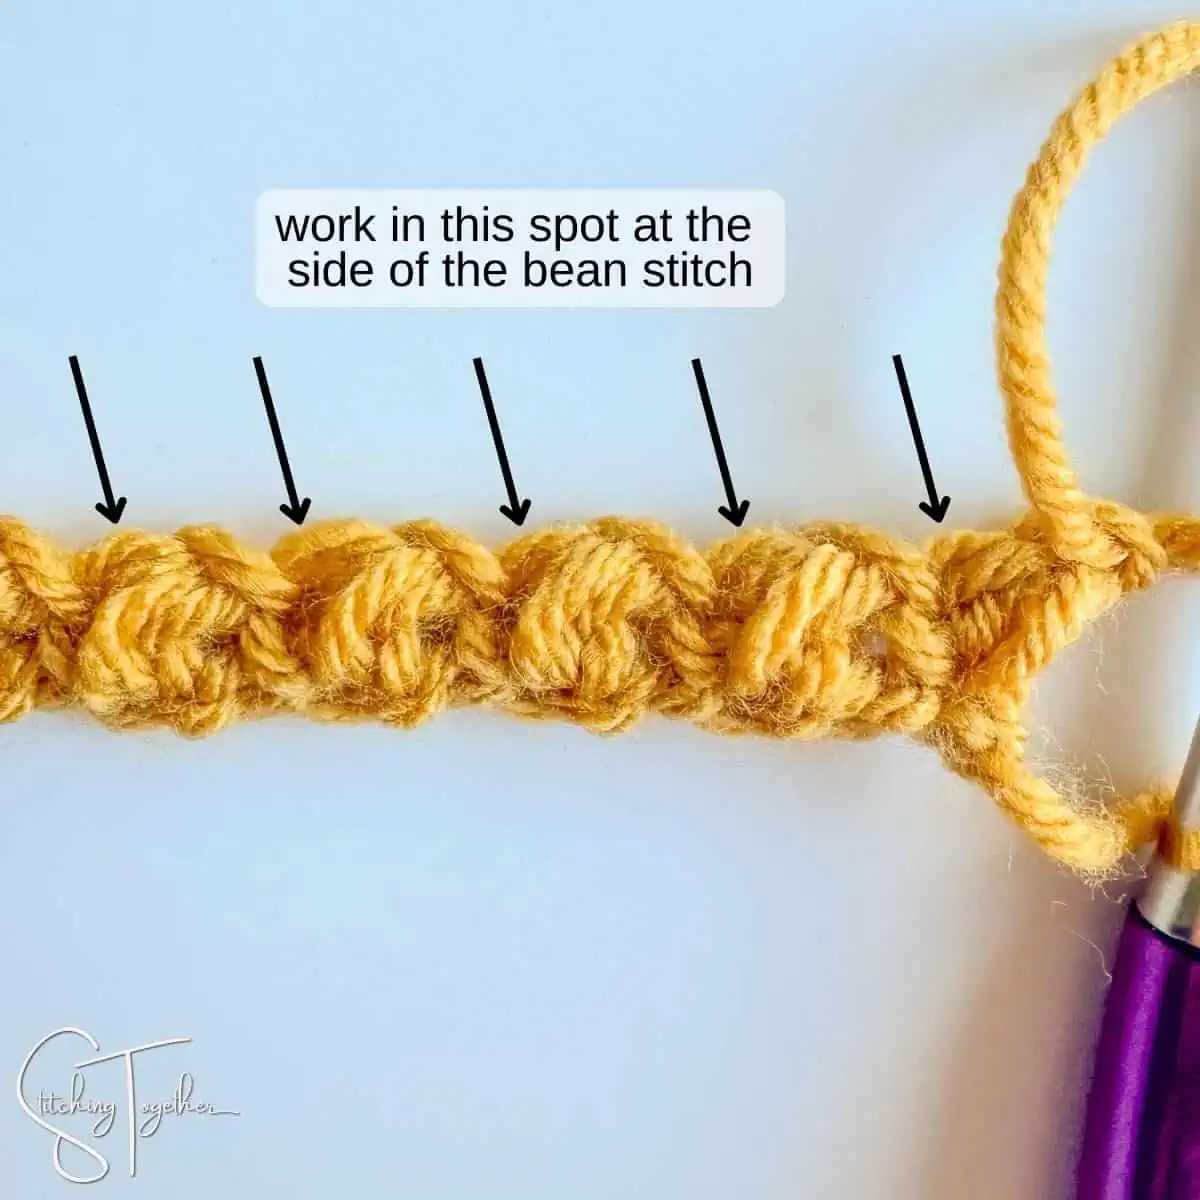
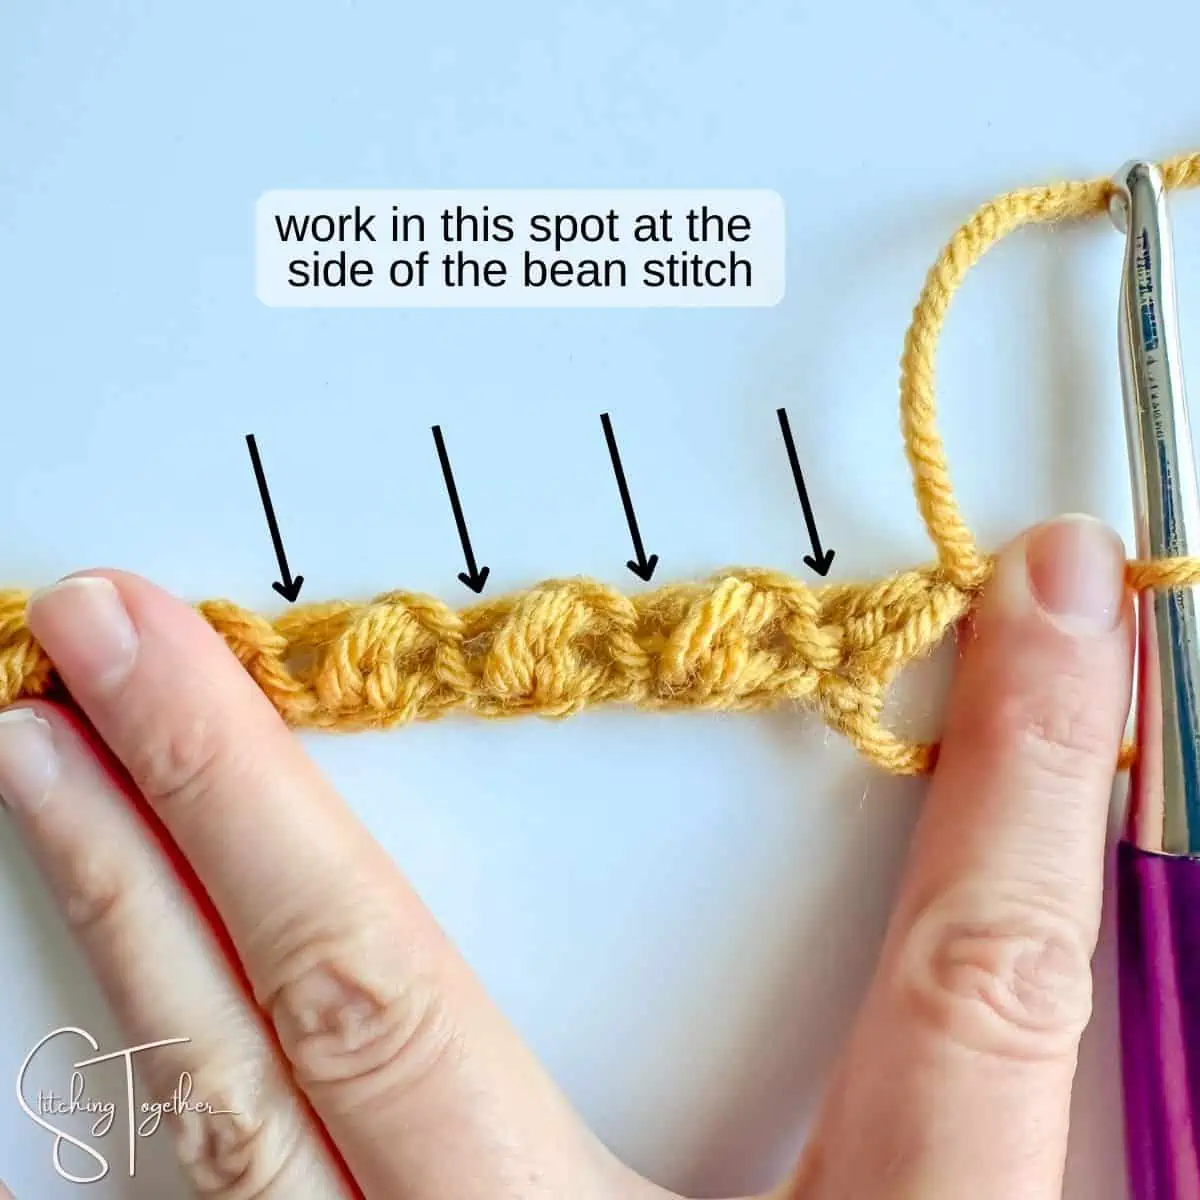
- Turn your work. You do not make another chain to start the next row. You'll work the mini bean stitches in the mini bean stitch of the row below and not in the chain 1s.
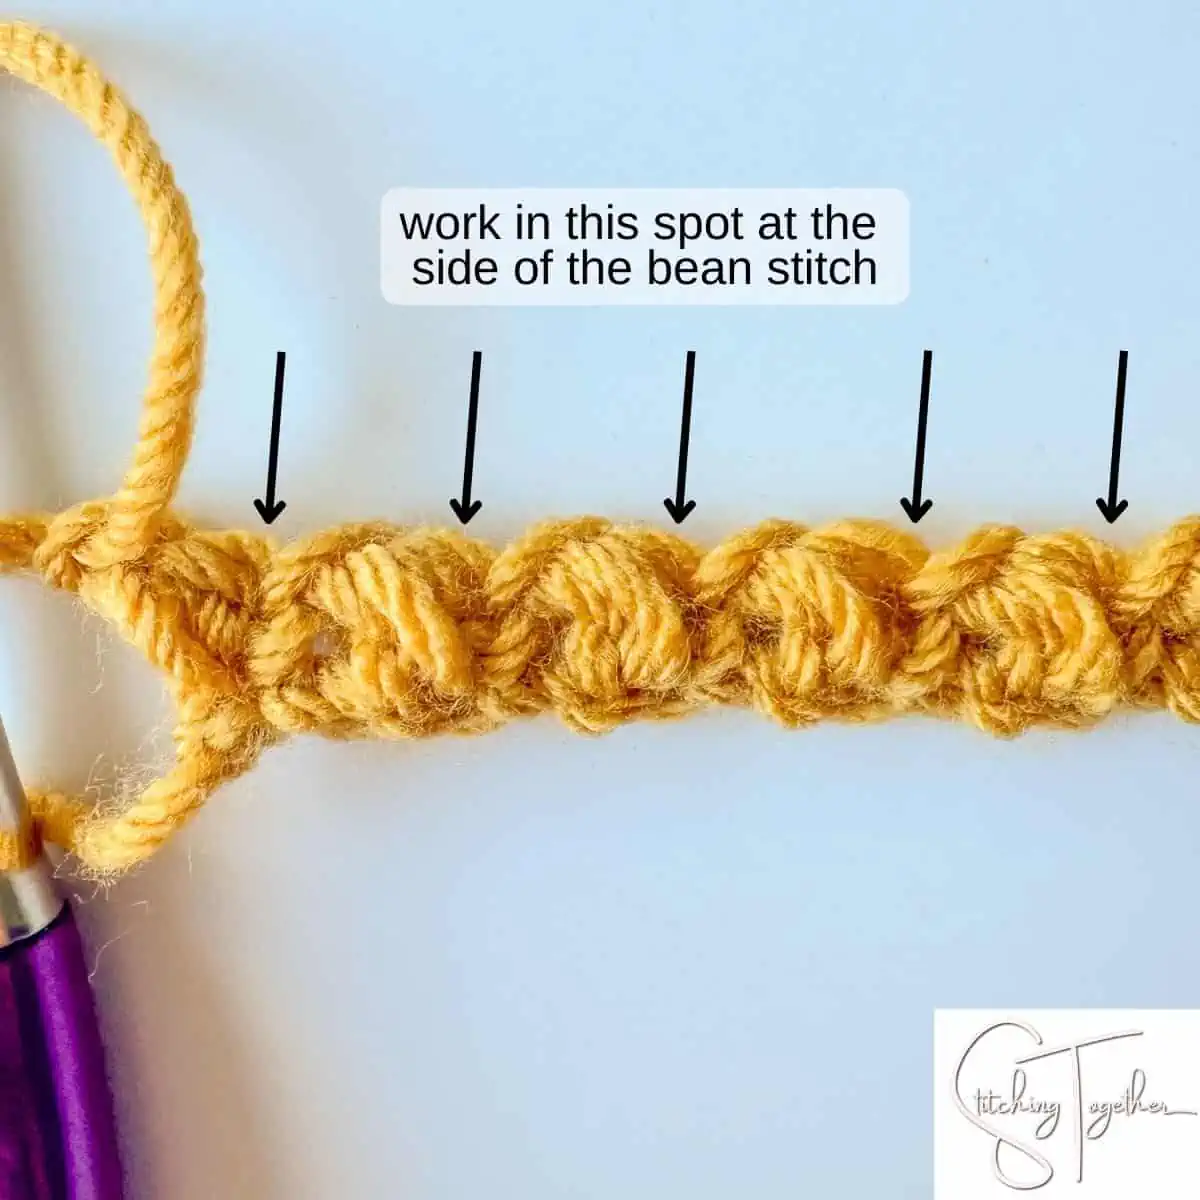
- Here are the stitches stretched out so you can see more clearly where to work your stitches.
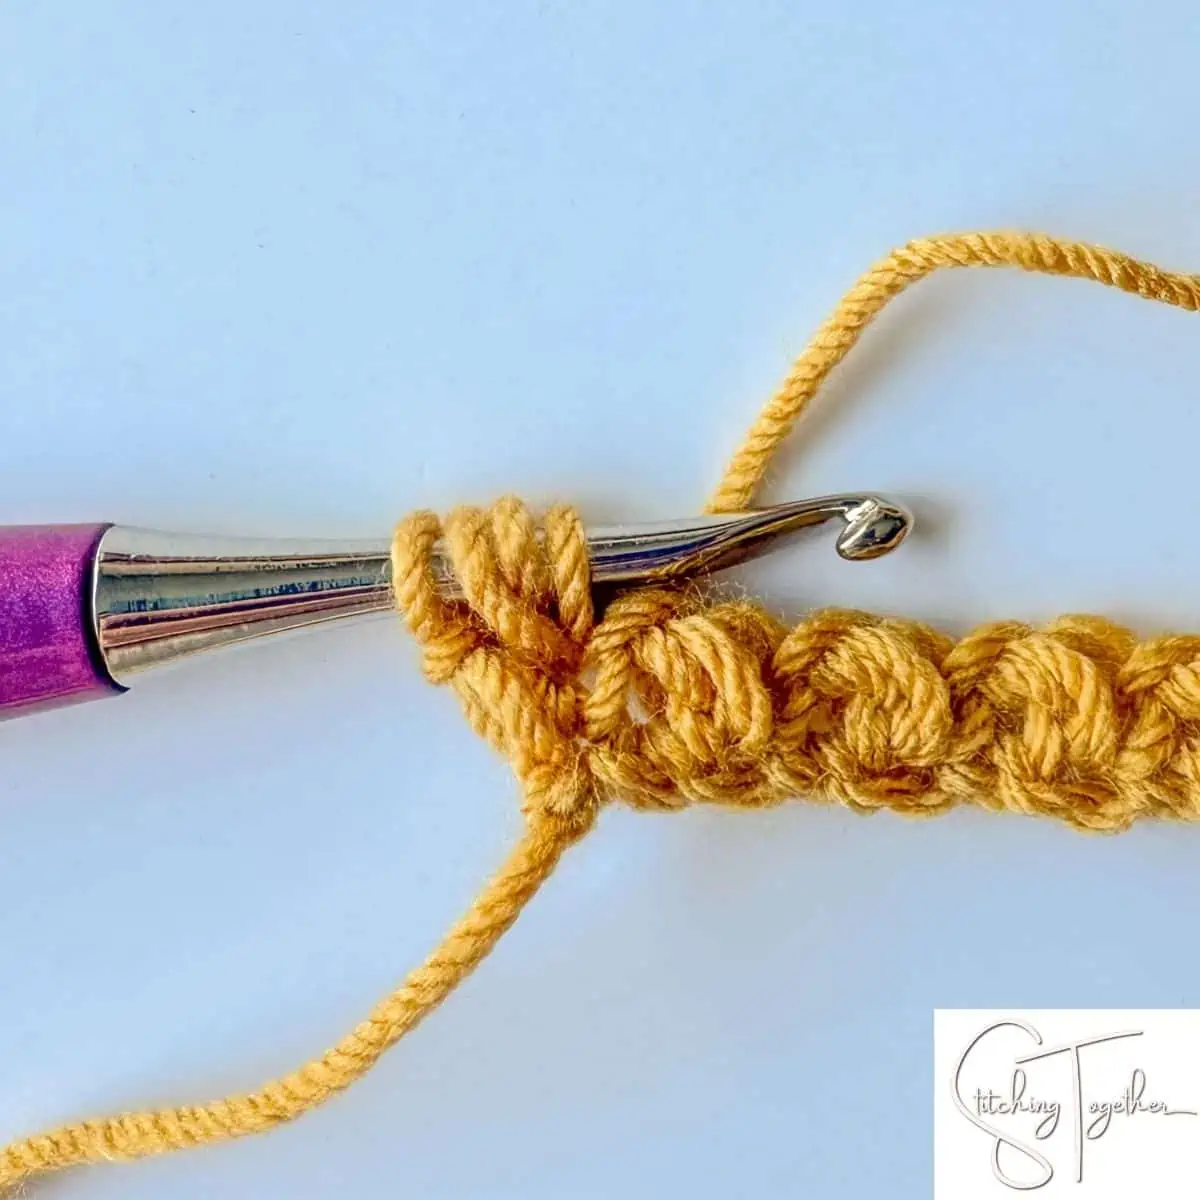
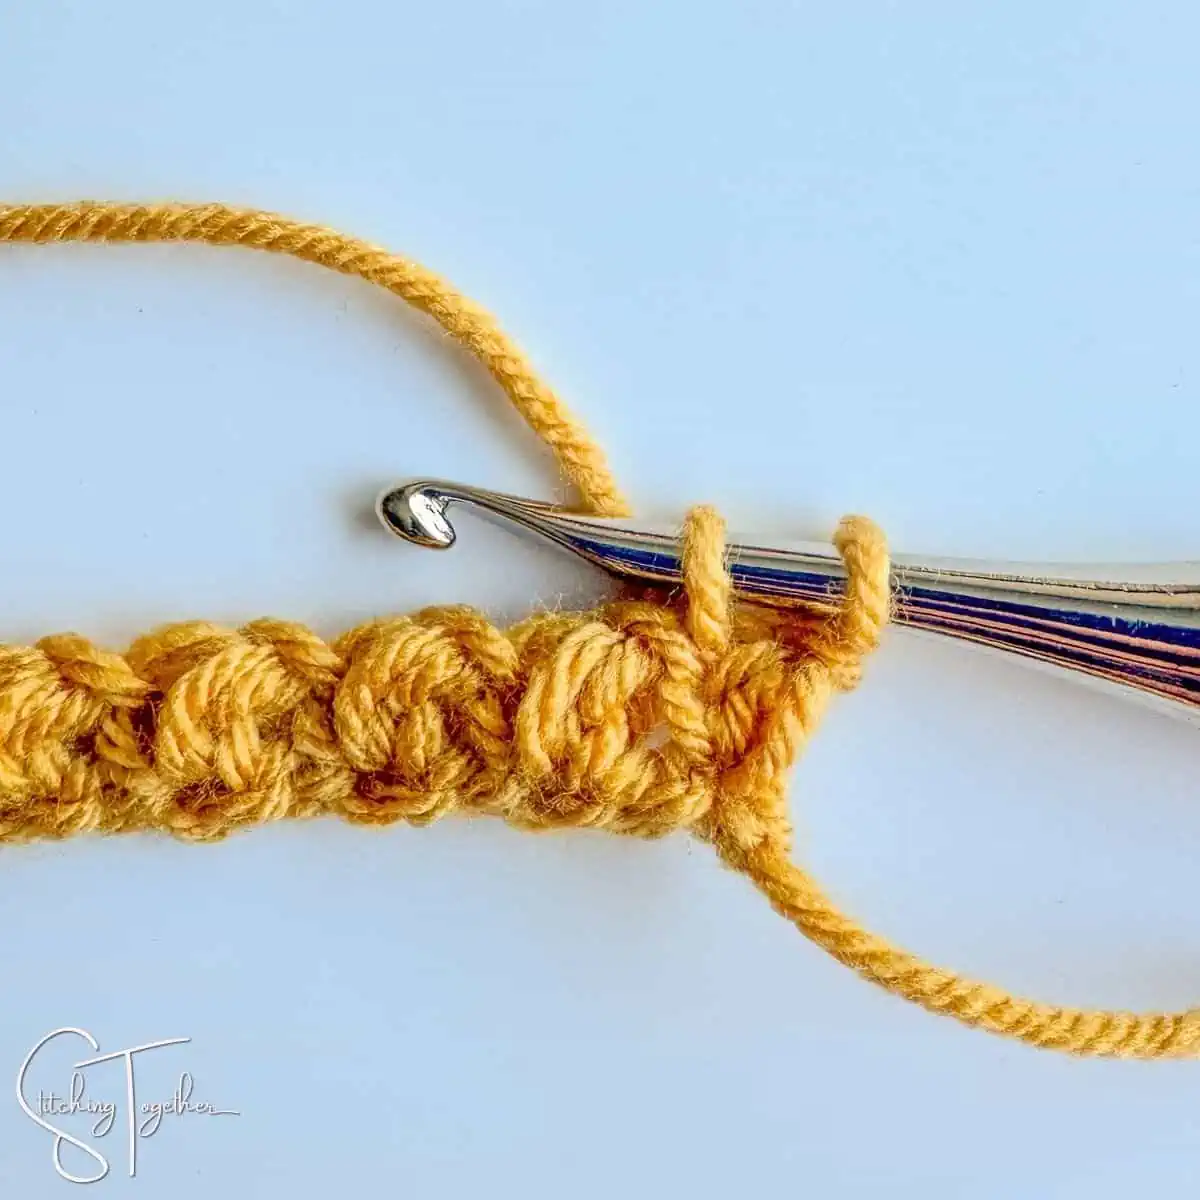
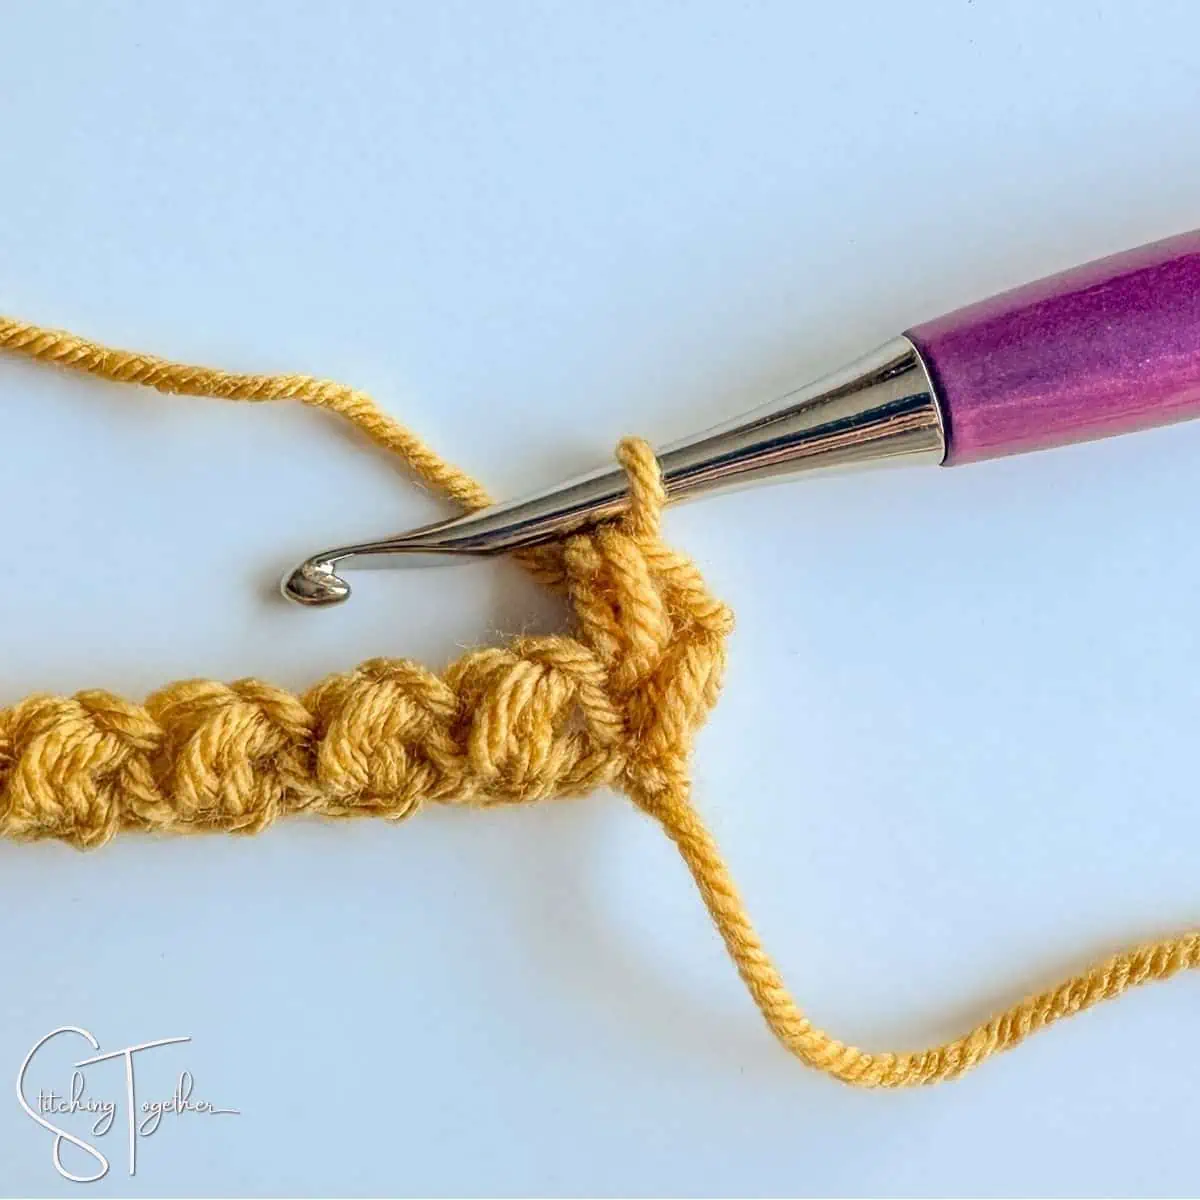
- Working the mbs into the row below requires the same steps as working into the chain, but we will go over it one more time. Insert your hook into the mbs of the row below and pull up a loop.
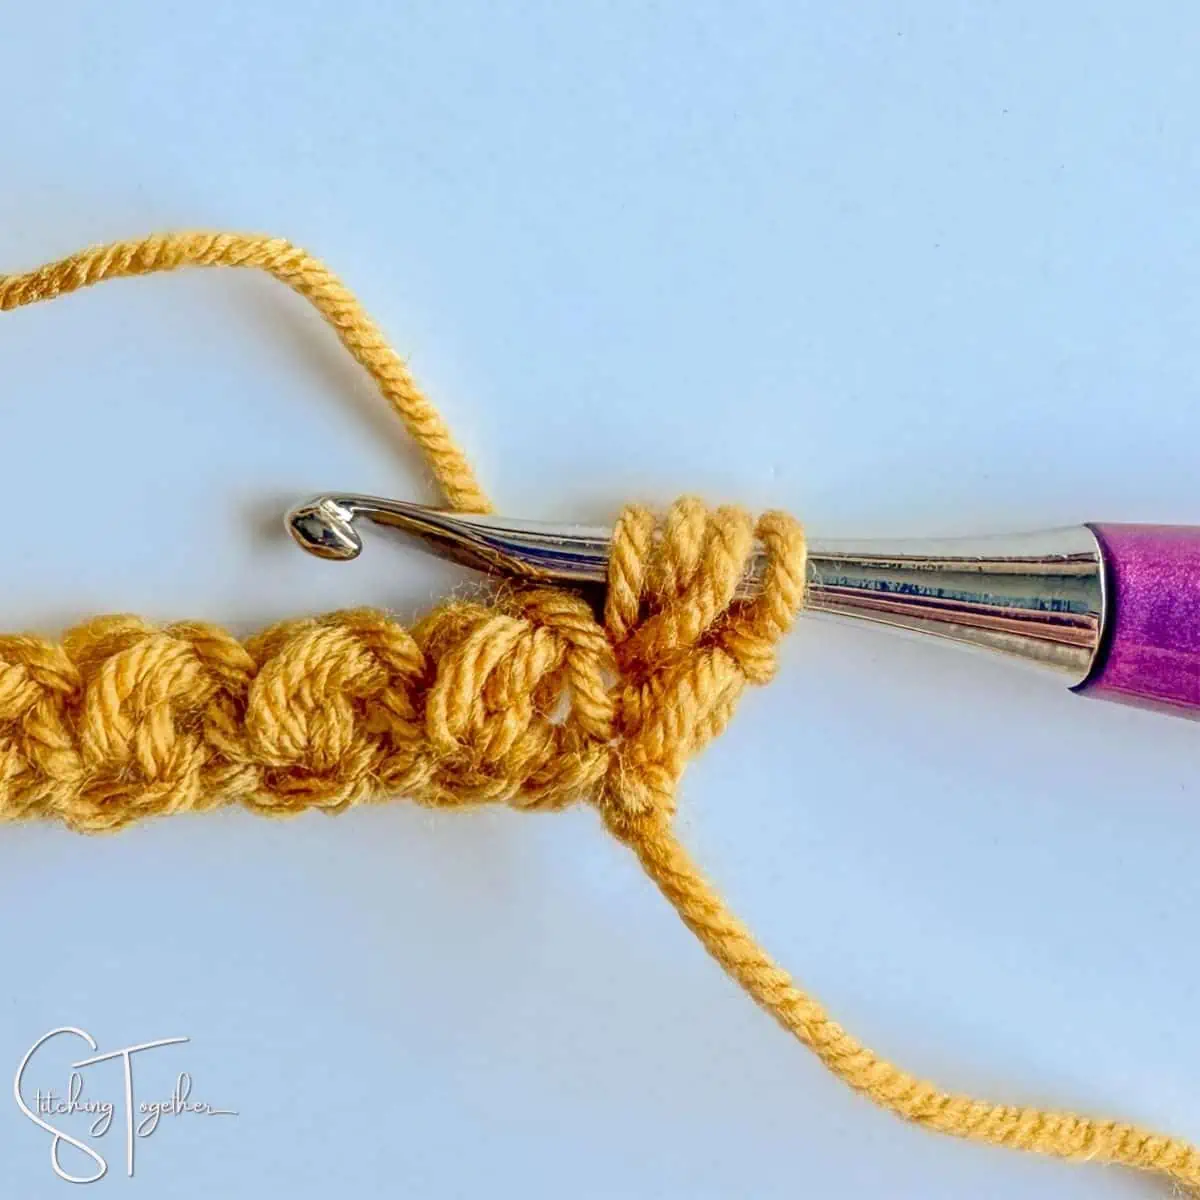
- Yarn over, insert hook into the same stitch and pull up a loop. You will have 4 loops on your hook.
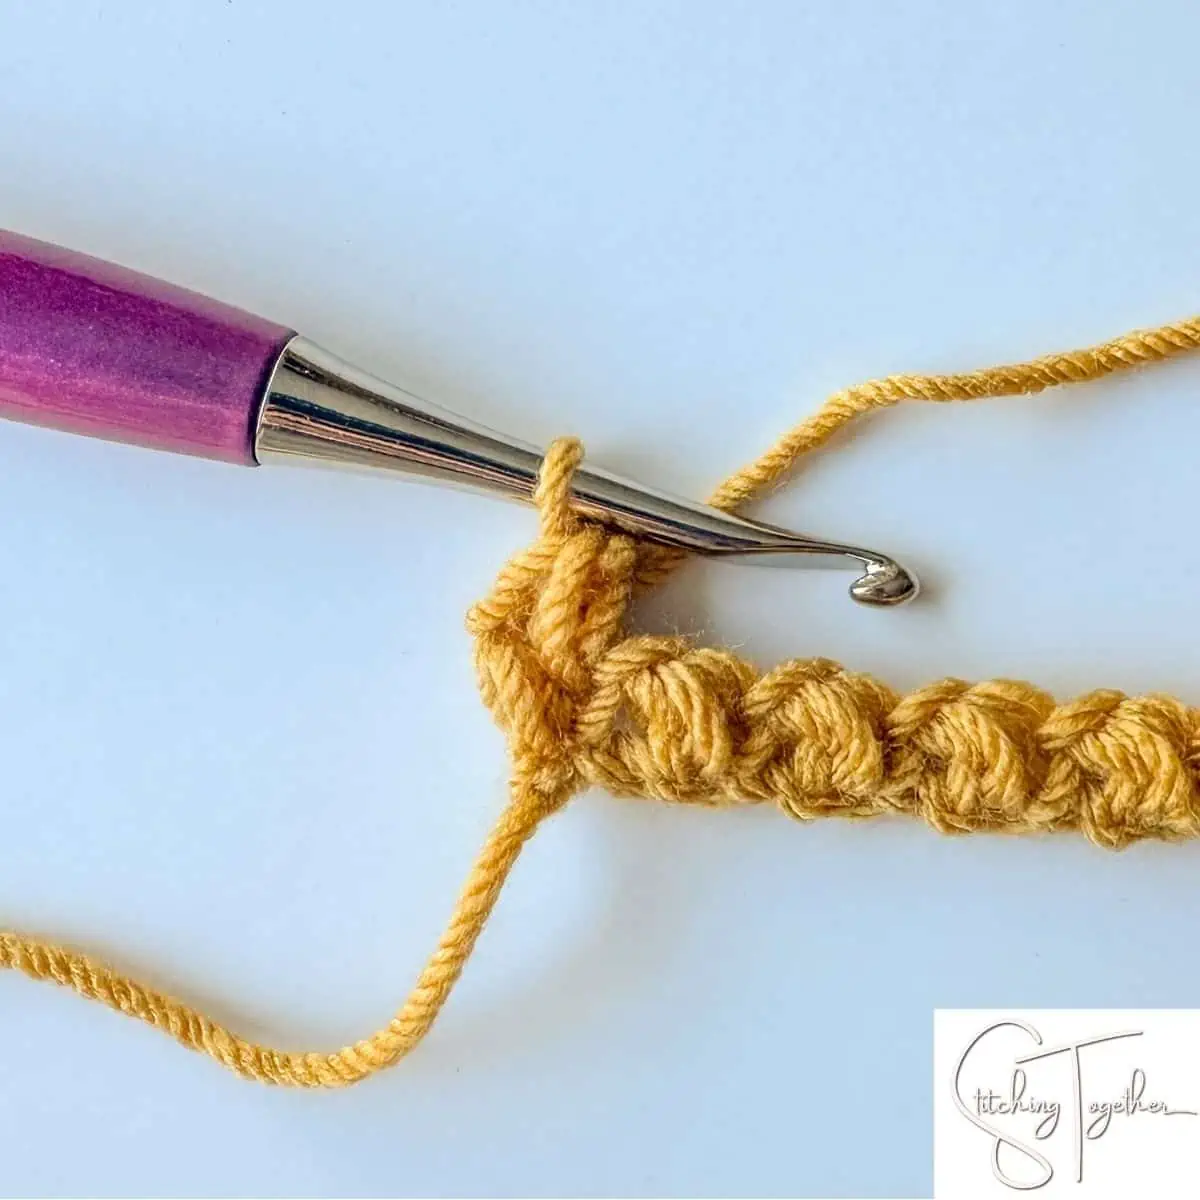
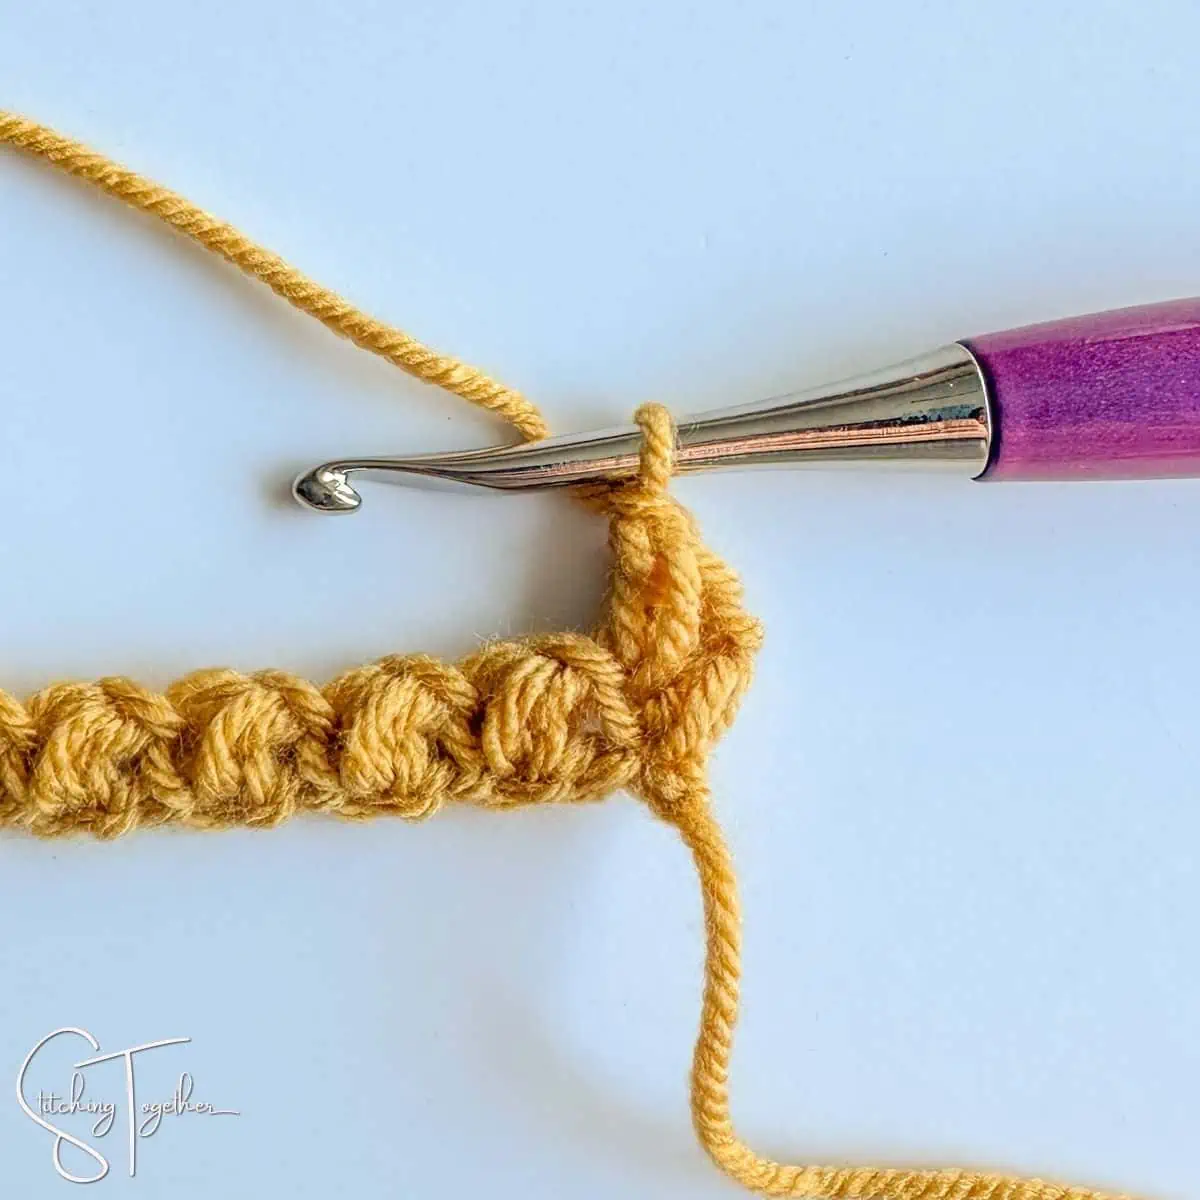
- Yarn over and pull through all 4 loops on your hook.
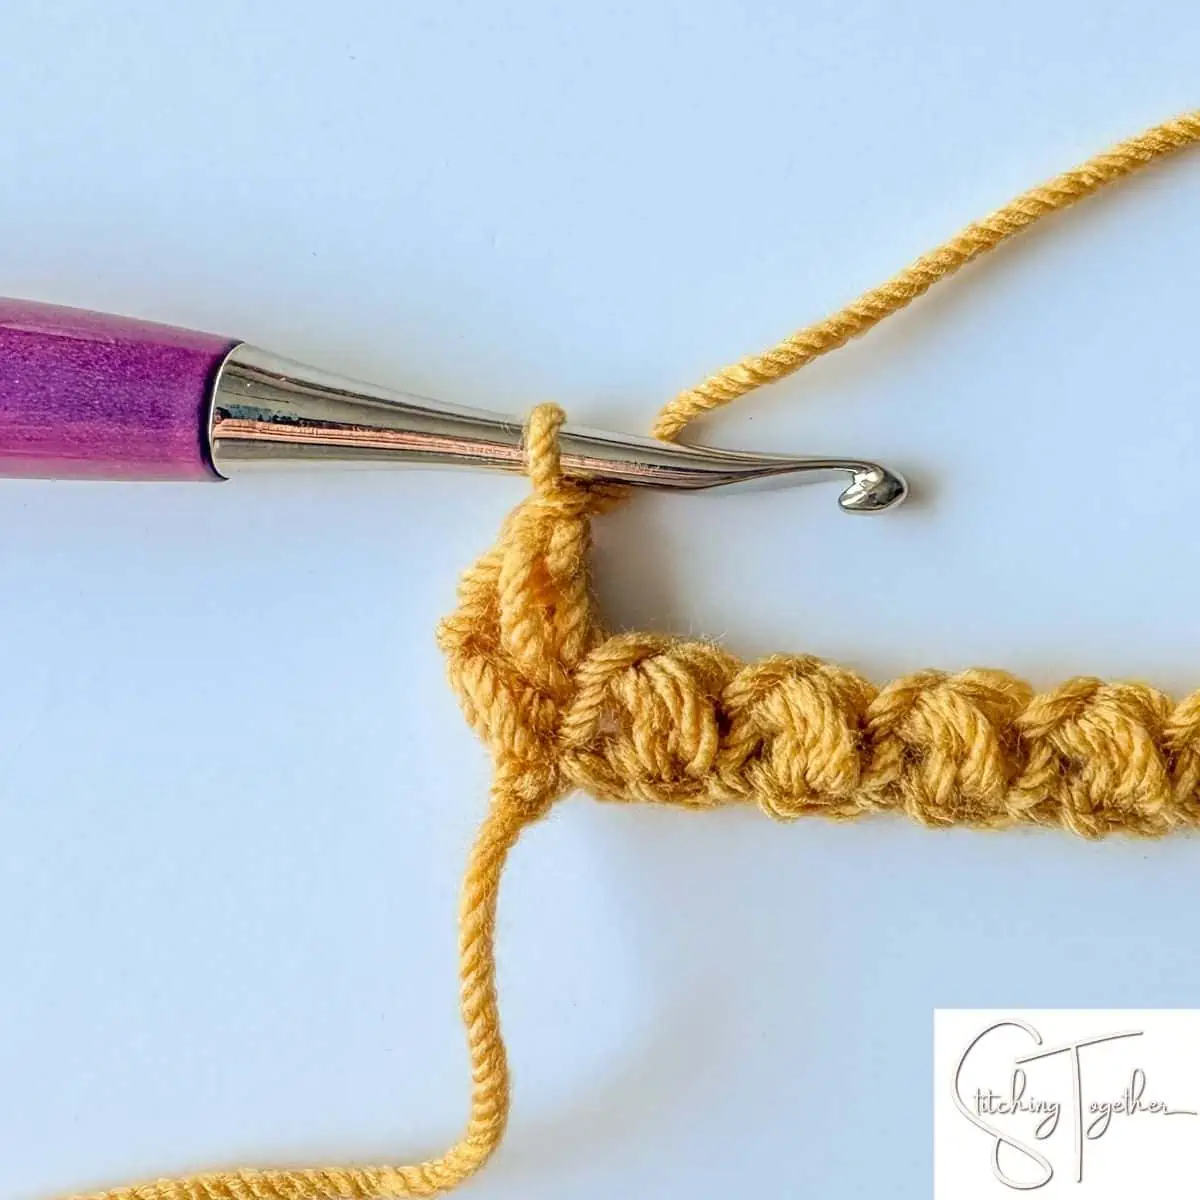
- Chain 1 to secure the stitch.
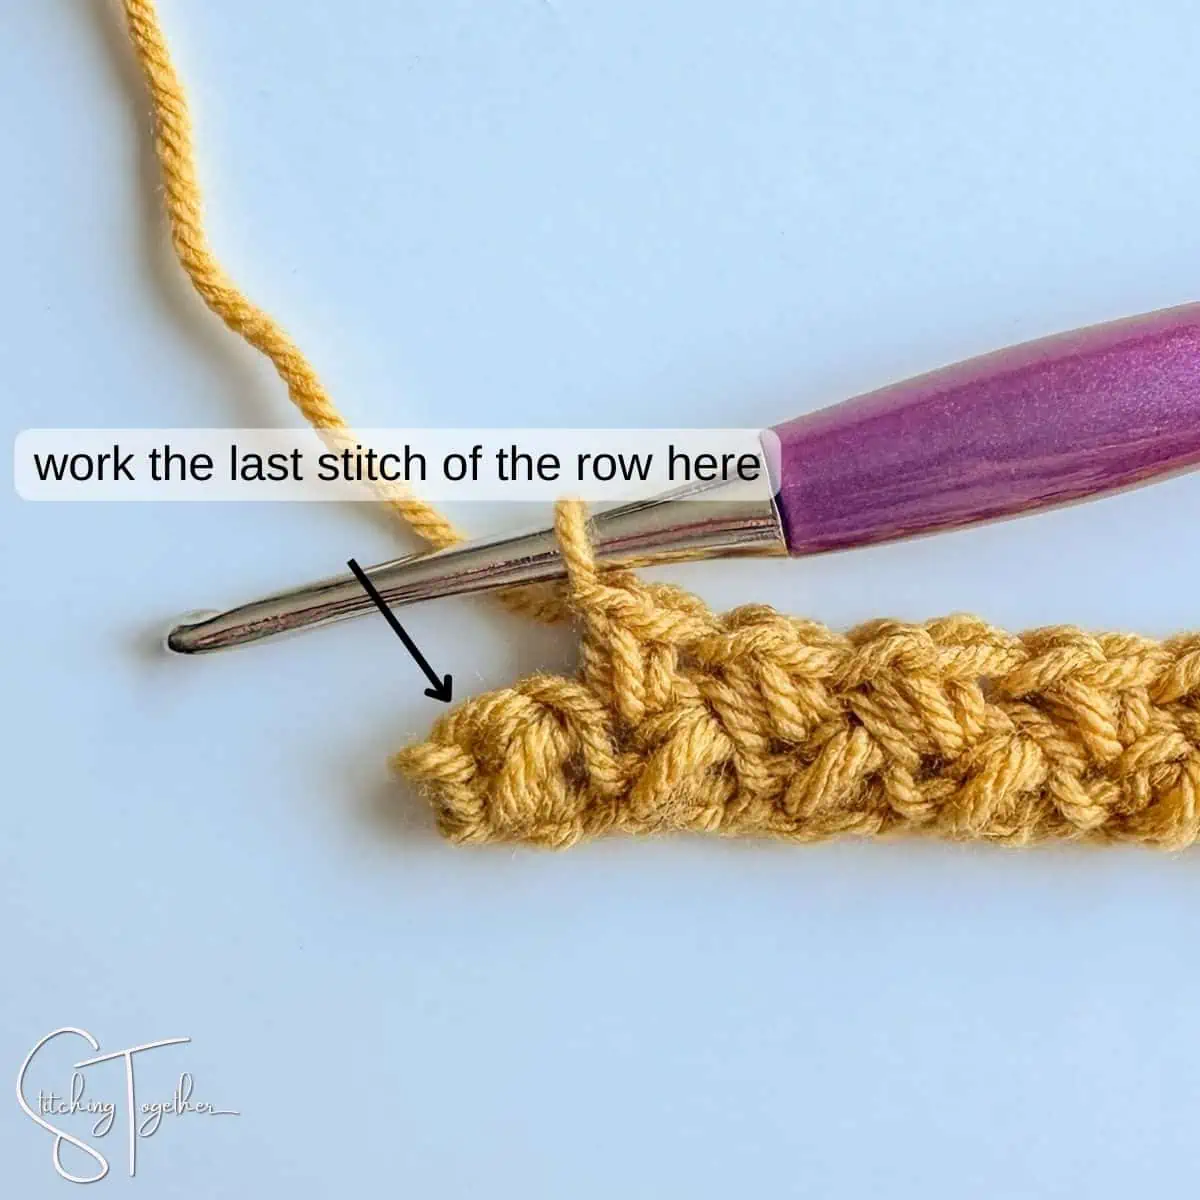
- Continue working until the end of the row. Your final mbs will be placed in the last mbs of the row below and not in the chain 1 that secured the mbs.
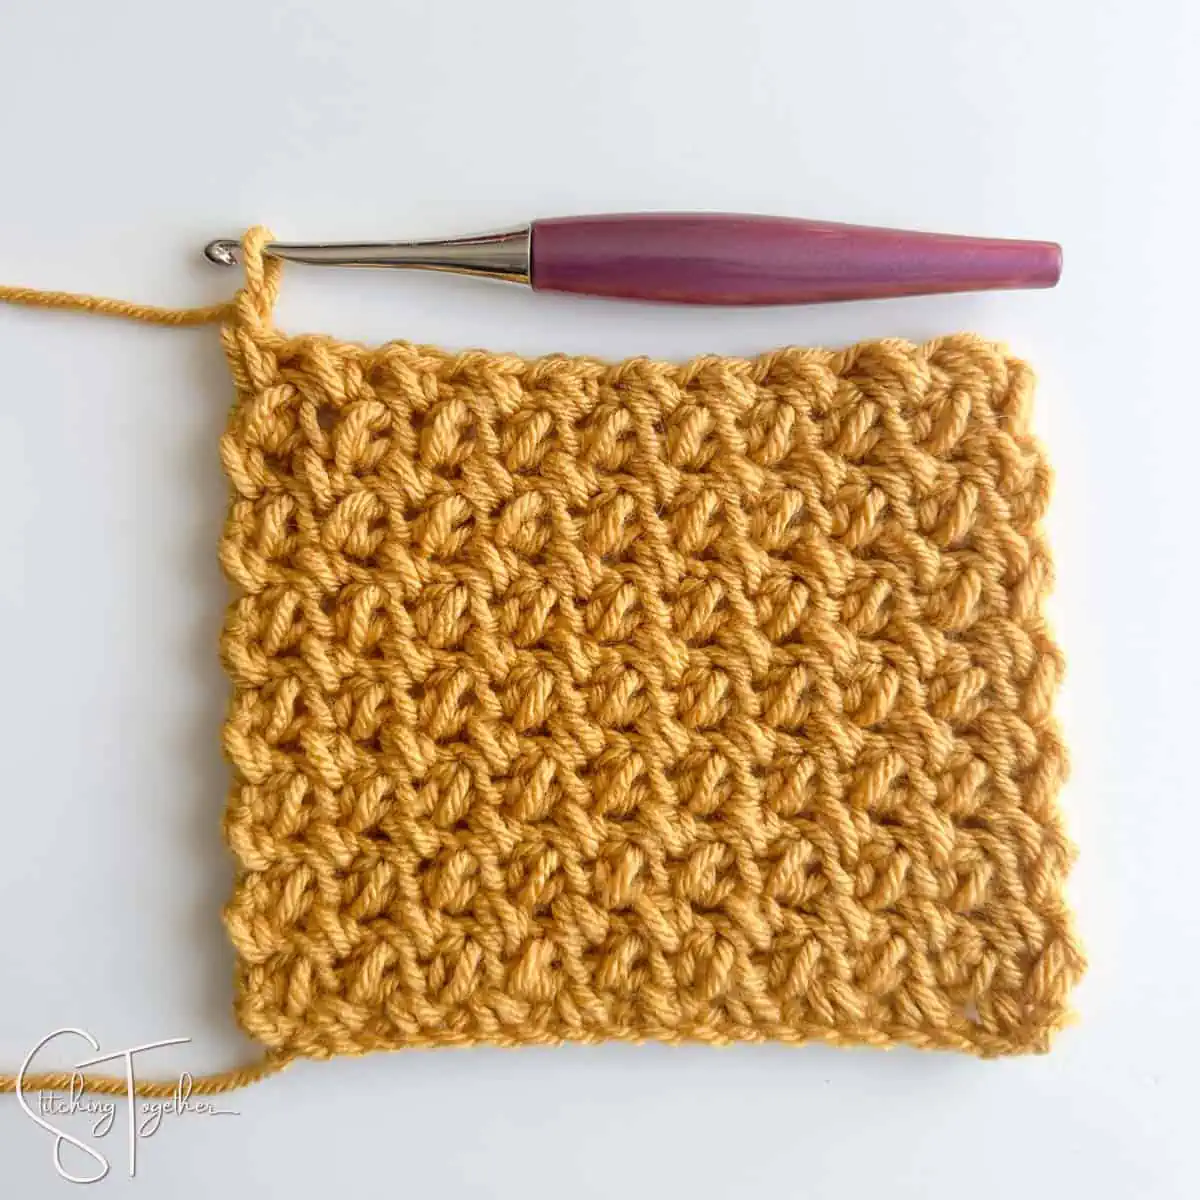
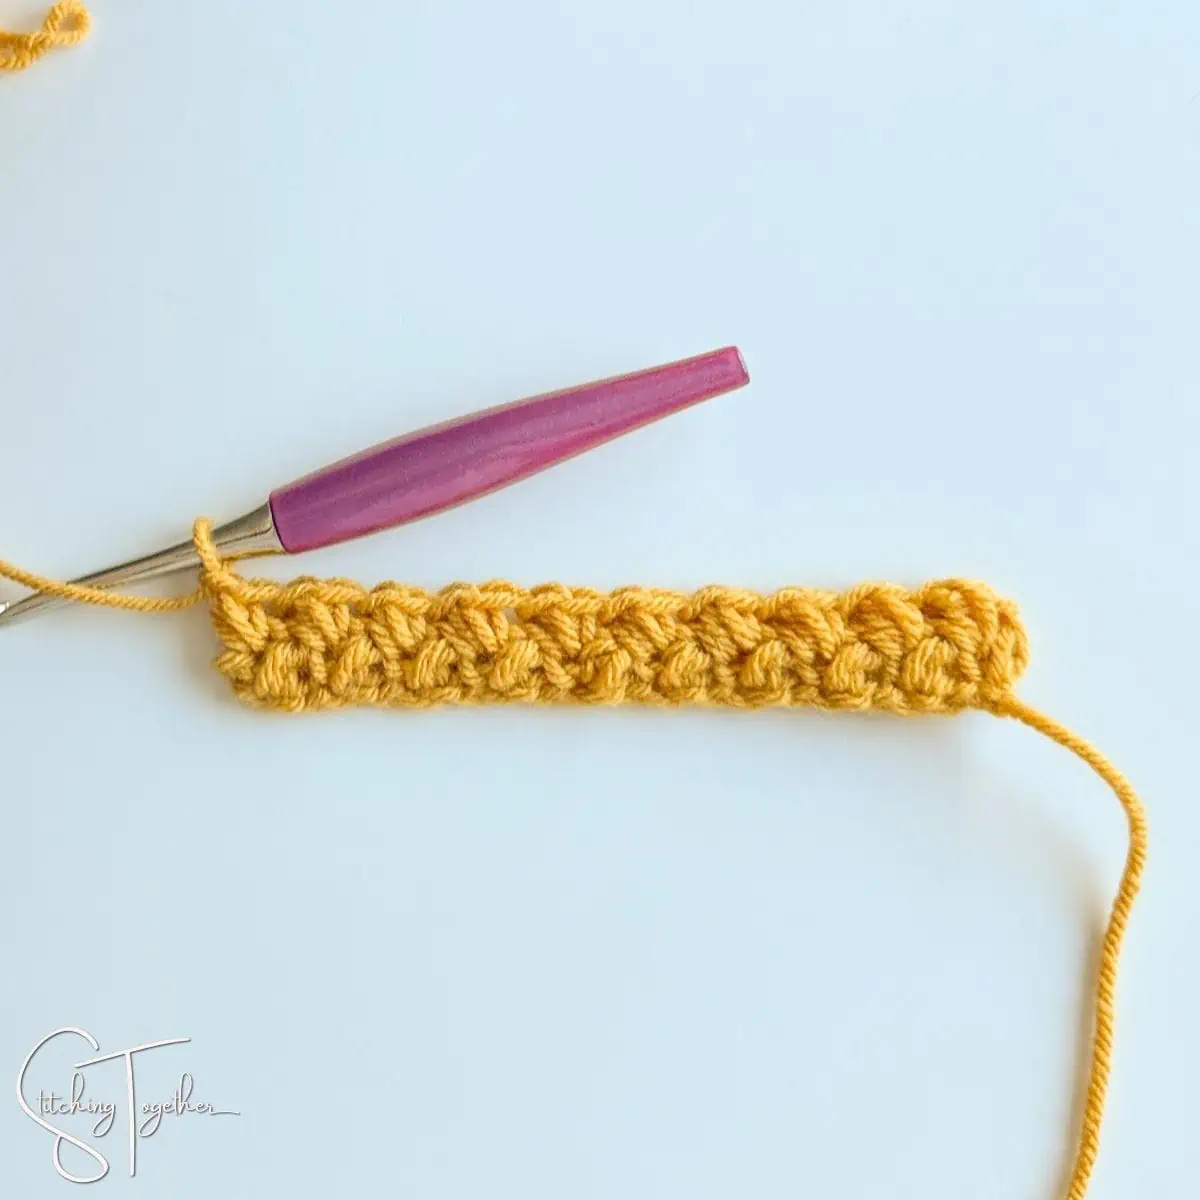
- You did it! Isn't it so pretty? Keep working the subsequent rows just like you did Row 2 and you'll have a gorgeous swatch of mini bean stitch fabric in no time!
Left-Handed Mini Bean Stitch Photo Tutorial

Mini Bean Stitch Tutorial - Left Handed
Learn how to crochet the mini bean stitch with this step-by-step photo tutorial for left handed crocheters.
Instructions
- Chain any multiple of 2+1. For the sample swatch, I chained 21.
- Insert hook in 3rd chain from hook and pull up a loop.
- Yarn over, insert hook into the same chain and pull up a loop. You will have 4 loops on your hook.
- Yarn over and pull through all 4 loops on your hook.
- Chain 1 to secure the stitch. You made your first mini bean stitch!
- To make the next mini bean stitch, skip 1 chain and pull up a loop in the next chain then follow steps 3-5.
- Continue working to the end of the row. Next we will go over how to work Row 2 and each subsequent row.
- Turn your work. You do not make another chain to start the next row. You'll work the mini bean stitches in the mini bean stitch of the row below and not in the chain 1s.
- Here are the stitches stretched out so you can see more clearly where to work your stitches.
- Working the mbs into the row below requires the same steps as working into the chain, but we will go over it one more time. Insert your hook into the mbs of the row below and pull up a loop.
- Yarn over, insert hook into the same stitch and pull up a loop. You will have 4 loops on your hook.
- Yarn over and pull through all 4 loops on your hook.
- Chain 1 to secure the stitch.
- Continue working until the end of the row. Your final mbs will be placed in the last mbs of the row below and not in the chain 1 that secured the mbs.
- You did it! Isn't it so pretty? Keep working the subsequent rows just like you did Row 2 and you'll have a gorgeous swatch of mini bean stitch fabric in no time!