
Cozy Waffle Stitch Crochet Headband — Soft, Free Pattern
Disclosure: This post may contain affiliate links. As an Amazon Associate, I earn from qualifying purchases. Please visit my Privacy Policy for disclosures and more information.
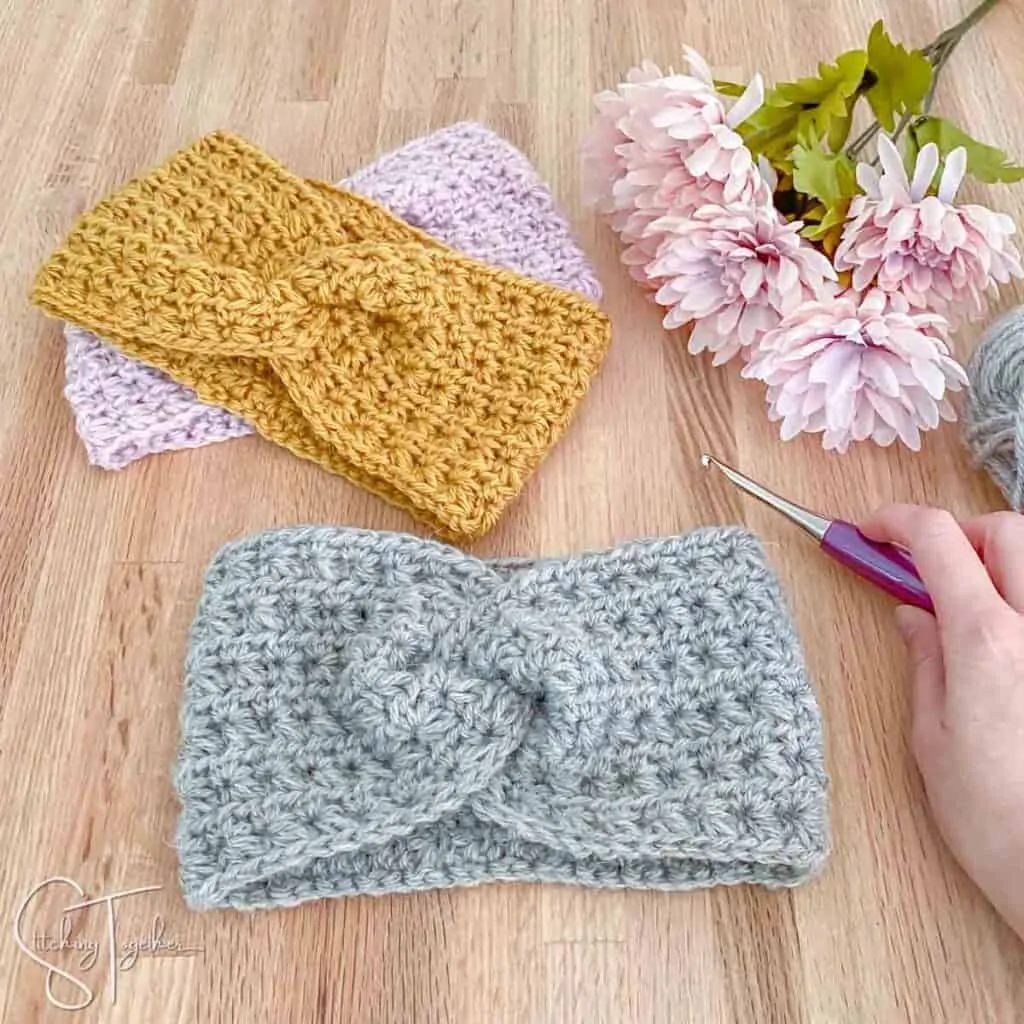
What can you get when you combine an easy pattern with beautiful soft yarn? Many things, of course; we are crocheters, after all, but in this instance, you can get a cozy waffle stitch crochet headband perfect for cold weather temps.

Crochet ear warmers or headbands are a perfect project that you can quickly make for yourself, to give as gifts, or to sell at craft fairs. Keep reading for all the details and the free crochet pattern or you can purchase the ad-free PDF here.
Waffle Stitch Headband FAQ
Using a soft tape measure, measure around the crown of your head just above the ears. You’ll typically want to make the headband 2″ shorter than your head measurement to ensure a snug fit. See the Simple Crochet Ear Warmer Pattern for a size chart and more details.
Adjusting the size of the headband is fairly simple. To adjust the length, add or subtract rows until you get the desired size. To adjust the width, add or subtract multiples of 3 to the starting chain. Each multiple of 3 will adjust the width by around 0.5 inches.
In crochet, a waffle weave or waffle stitch is a textured fabric created by alternating double crochet stitches and front post double crochet stitches. The three-dimensional pattern created on the fabric looks like a waffle.
The waffle stitch, bobble stitch, and popcorn stitch are all textured crochet stitch patterns that add visual interest to the fabric. The bobble and popcorn stitches create raised, rounded bumps, while the waffle stitch creates a series of boxes.
Stitches Used for the Crochet Waffle Stitch Headband Ear Warmer
The waffle stitch pattern makes a fabric that looks complicated, but it is actually pretty easy. To work the waffle stitch, you’ll need to know how to chain, double crochet, and front post double crochet. All you need to create those cute little boxes that look like the pattern on waffles is easily alternating between double crochets and front post double crochet stitches
If you haven’t worked the waffle crochet stitch pattern before, head over to the waffle stitch tutorial and do a practice swatch as you learn the stitch combination. You can always learn while working on this headband too, since it is a small and quick project.

Related: Waffle Stitch Crochet Pattern Roundup
Yarn Used for the Waffle Stitch Ear Warmer
Yarn Bee Soft & Sleek DK yarn was a wonderful choice for this design. As its name suggests, it is so soft and smooth to work with. It works up easily and allows the amazing textures of the waffle stitch to really pop.
However, do not be fooled by the DK in the name; this yarn feels lighter than DK weight. I would say it is right on the cusp of Fine (#2) and Light (#3). Many of the comments for this yarn on the Hobby Lobby website agree that it is thinner than DK weight. I intentionally wanted a thin yarn so the waffle stitch boxes were smaller than they would be with thicker yarn. The small boxes still give loads of texture without creating a bulky ear warmer.

For the yarn substitution suggestions below, I tried to pick yarns that have similar yards per ounce weight. You can see that the yarn type ranges from Fingering to DK weight. Apparently, yarn weight categories are not an exact science. If you’d like to use a totally different yarn than any of these suggestions, I’ll go over adjusting the size below.
Yarn Substitution Ideas
Ice Cream Yarn – Lion Brand
Cotton Fair – Premier Yarn
Rialto – Debbie Bliss
Brava Sport – Knit Picks
Of course, you can use thicker yarn to make this headband extra cozy. If you decide to use a different yarn weight altogether, use a hook size that is recommended by the yarn weight and follow the instructions below for adjusting the size.
Adjusting the Size
Adjusting the size of your crochet headband is really simple. Before you start, you’ll want to head over to the Simple Crochet Ear Warmer pattern where there is an Ear Warmer Size chart. Using this chart will help you to make a headband that’s the perfect size.
To adjust the circumference of the headband, you are just going to add or subtract rows. This measurement is the most important to make sure you get a good fit. If you use a yarn that is thicker than the sample yarn I used, you will be working fewer rows to get the same length. Having a tape measure handy will make this process much simpler.
This headband is already nice and wide, coming in at around 5 inches. To adjust the width, you’ll want to keep your starting chain a multiple of 3+2, or if you’d like to start with a foundation double crochet row, that’ll be a multiple of 3. Each one of my waffle stitch boxes measured just under half an inch, so for every multiple of 3 that is subtracted from the starting chain or foundation row, it will subtract around half an inch from the width.

Free Waffle Stitch Headband Crochet Pattern
Skill Level: Easy
Materials:
US size D/3, 3.25 mm crochet hook
Yarn Bee Soft and Sleek DK (Category 3 Light Yarn, 100% Acrylic, 478 yds/4oz)
- Samples used approximately 203 yds. Colors pictured are Ivory, Oxblood and Pretty in Peacock
Large Eye Yarn Needle
Scissors
.
Everything you need for this project can be ordered right online
Save time and shop from home!
.
Gauge: 4”x4” = 26 sts by 16 rows
Finished Size: 19.5” around by 5” wide
Abbreviations:
ch: chain
dc: double crochet
st(s): stitch(es)
fpdc: front post double crochet
Notes:
The chain 2 to start each row counts as a stitch.
I tend to crochet with a tight tension, so 2 chains gives me enough height to start a row of double crochets. If your tension is looser, you may want to chain 3 to start each row.
If you’d like to make a different size, keep your starting chain a multiple of 3+2 and add or subtract rows
Waffle Stitch Headband Pattern Instructions
Ch 35 (multiple of 3+2)
Row 1: dc in 4th ch from hook and in each st across, turn. (33)
Row 2: ch 2 (counts as first dc), *fpdc in next st, dc in next 2 sts, repeat from * until the last 2 sts; fpdc in next st, dc in top of ch, turn. (33)
Row 3: ch 2 (counts as first dc), *dc in next st, fpdc in the next 2 sts, repeat from *until the last 2 sts; dc in next st, dc in top of ch, turn. (33)
Repeat rows 2 and 3 until you’ve reached a total of 76 rows or your headband reaches the desired length. Leave a long tail end of at least 6”.
Creating the Twist
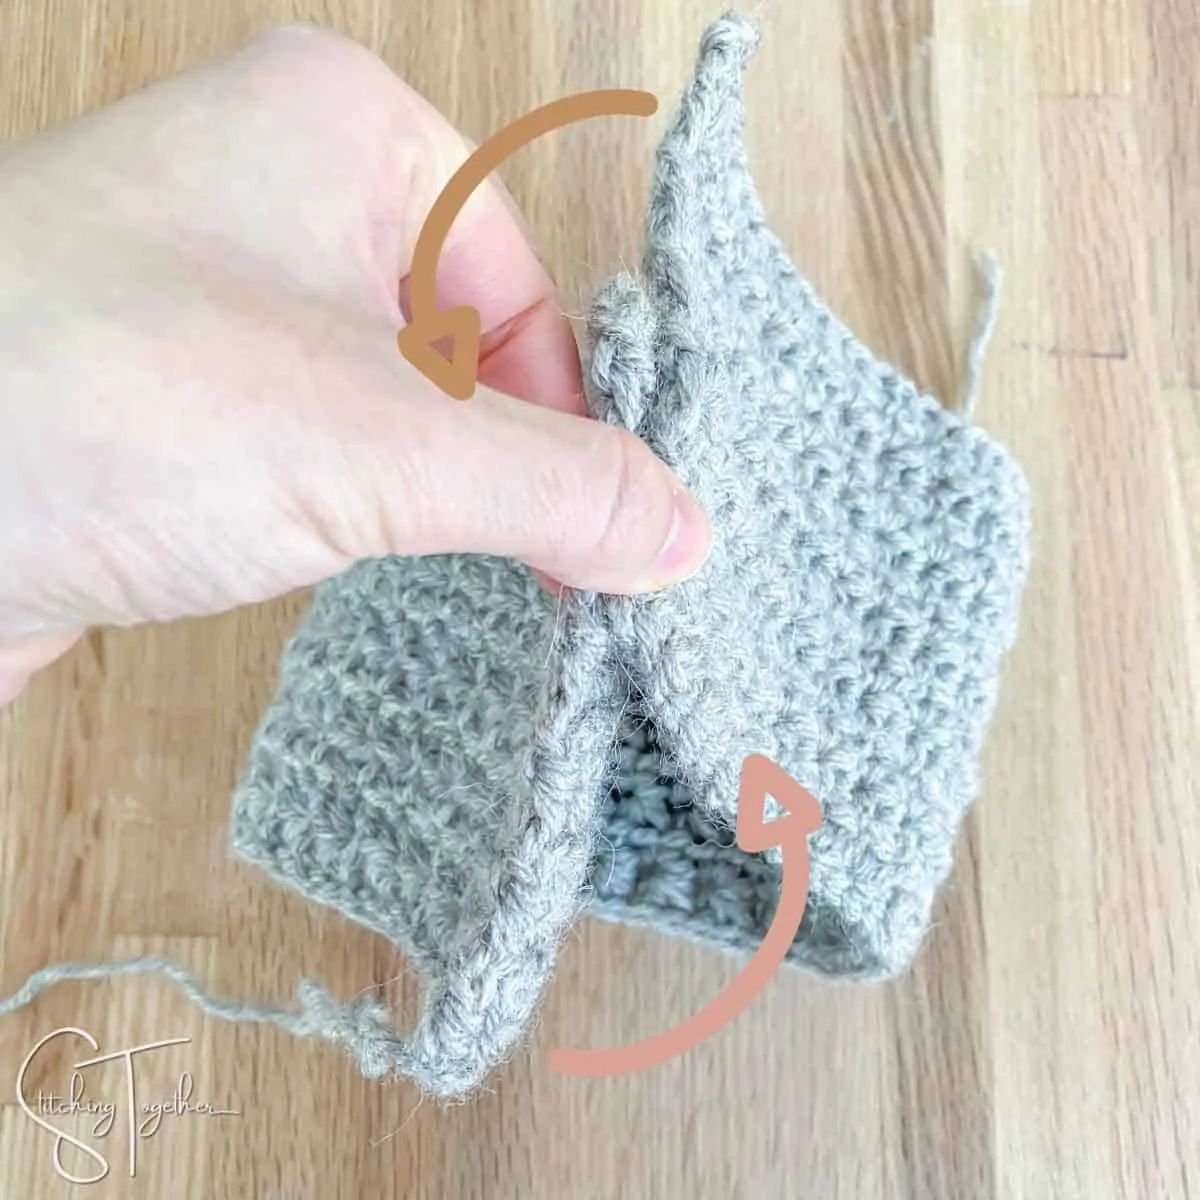
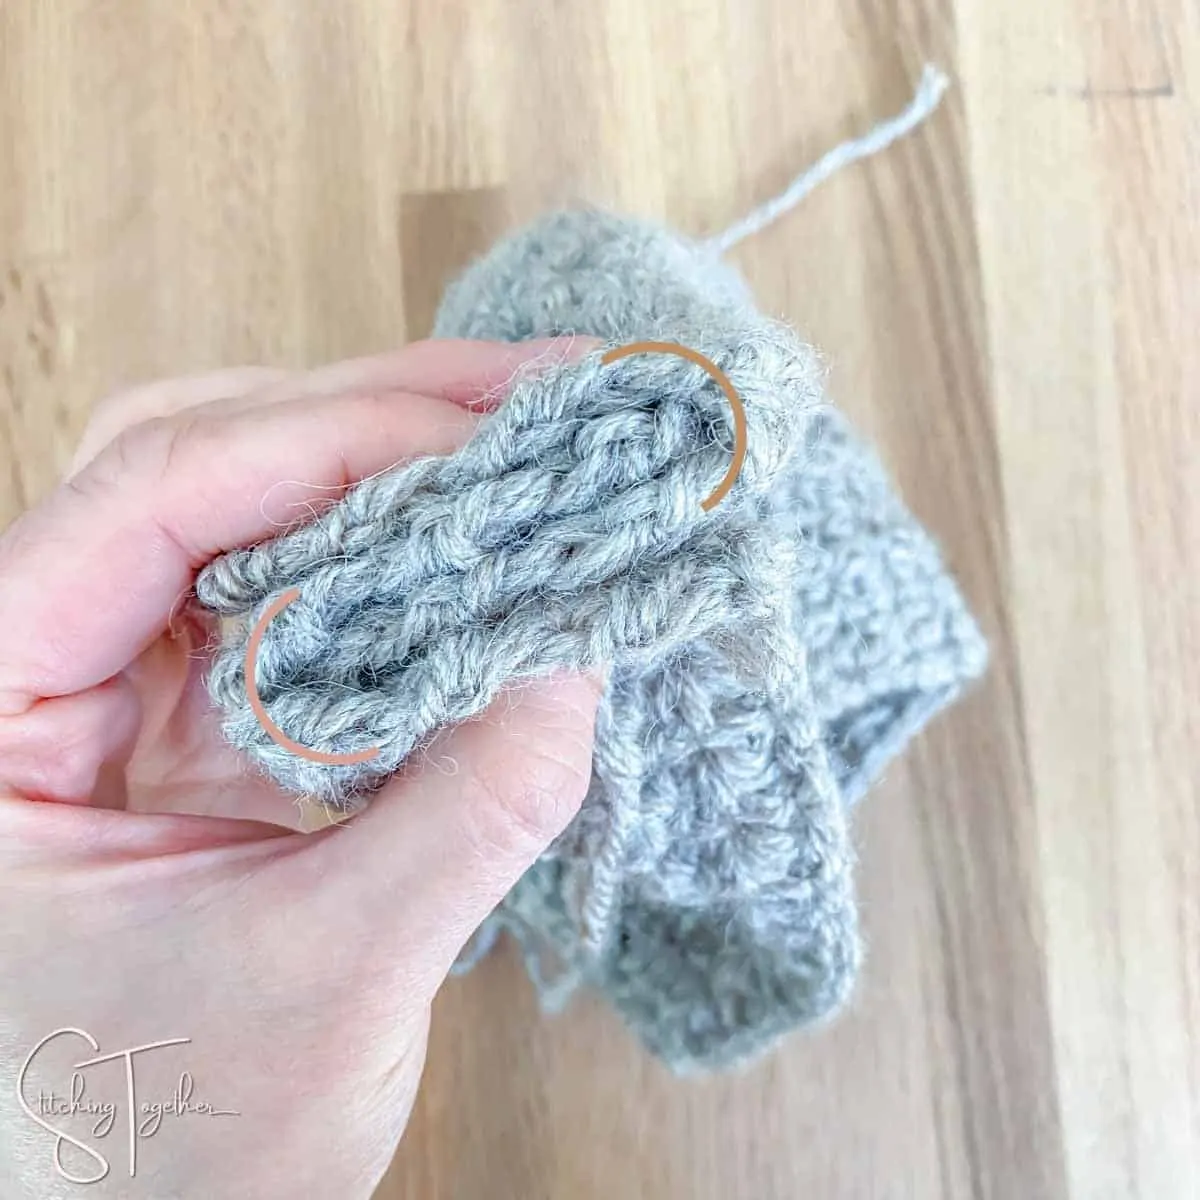
With the wrong side facing out, bring the ends of the headband together so half of one end is against half of the other end. (If you want the side with the boxes (right side) to be visible, make sure it is on the inside as you are sewing the twist.)
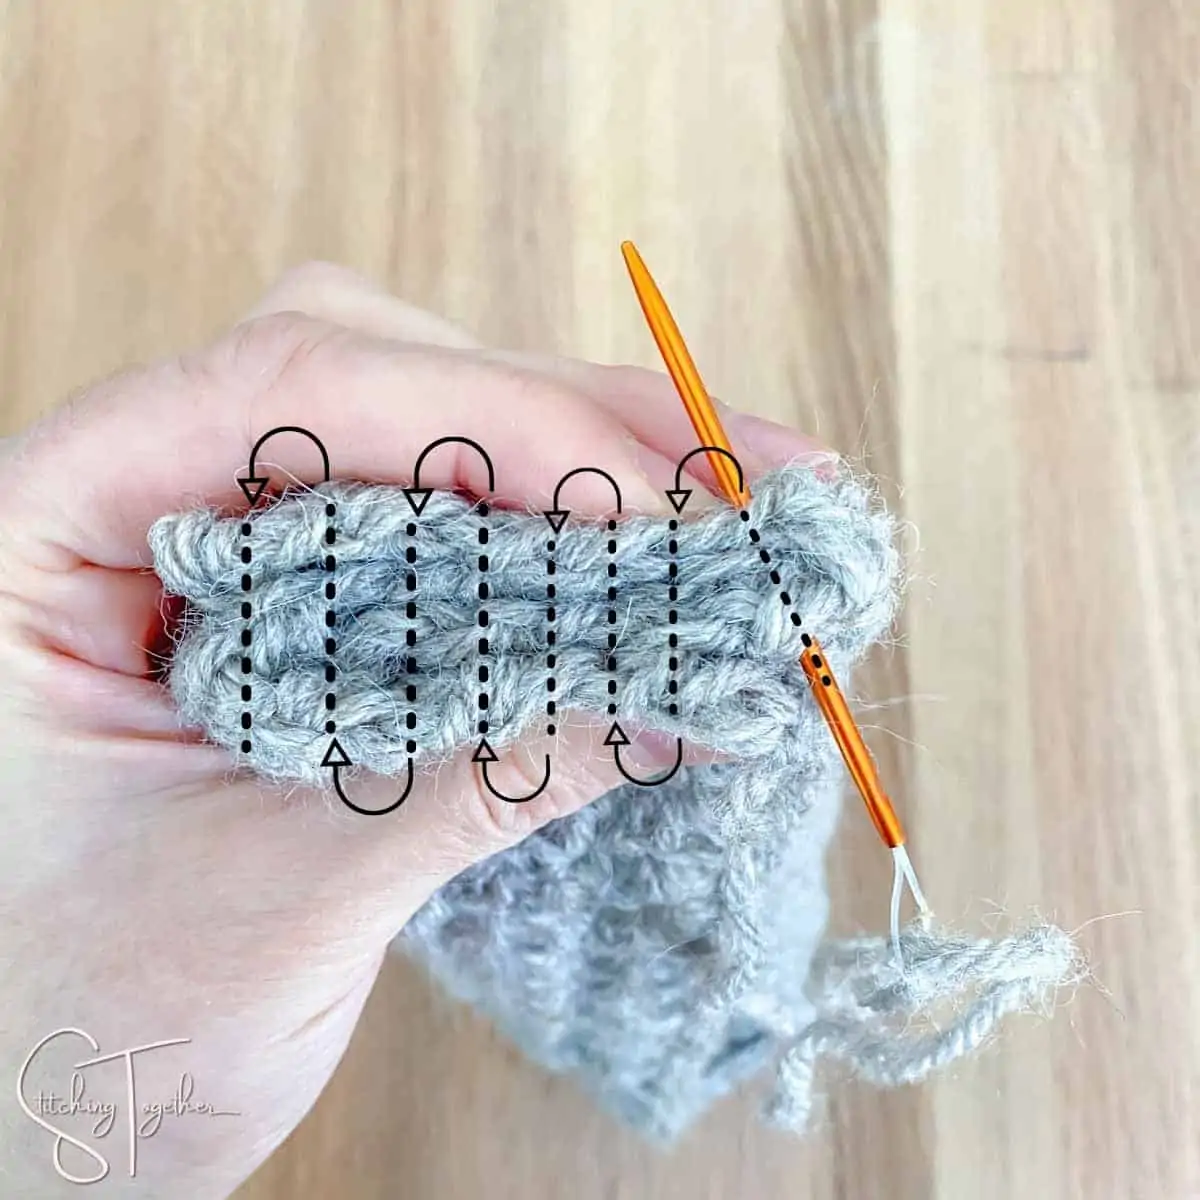
Wrap each side around the other side of the headband. Using the long tail end and a large needle, weave the yarn back and forth through all four layers. Weave in ends. Turn right side out and smooth down.

Will you share pictures of your finished projects?
- Tag Stitching Together on Instagram with @stitching_together and use the #stitchingtog
- Upload your picture in the Tried It section of this pin
- Share your work in the Stitching Together Community.
More Free Crochet Headband Patterns


Do you love working with the waffle stitch? You won’t want to miss these other free waffle stitch crochet patterns:
Waffle Stitch Blanket
Waffle Stitch Baby Blanket
Crochet Waffle Stitch Dishcloth Pattern