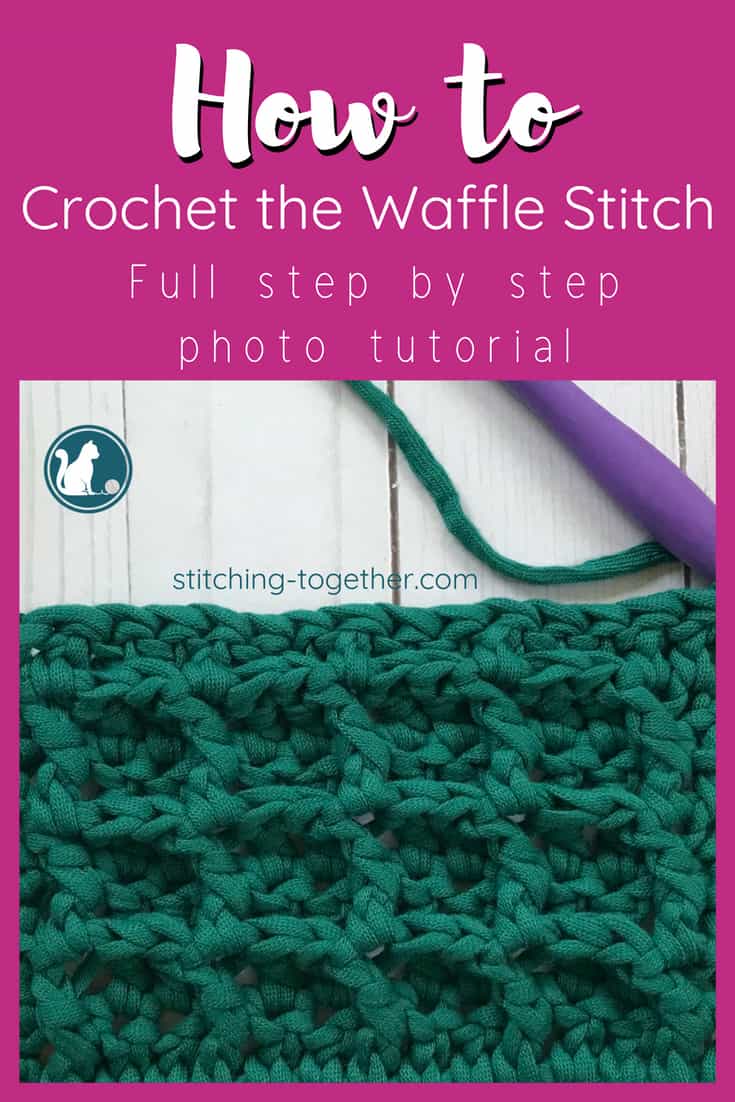
How to Crochet the Waffle Stitch: Step-by-Step Tutorial
Disclosure: This post may contain affiliate links. As an Amazon Associate, I earn from qualifying purchases. Please visit my Privacy Policy for disclosures and more information.
One of the best things about crocheting, besides making something amazing from a ball of string, is the amazing textures that can be achieved by combining stitches. The waffle stitch does not disappoint when it comes to texture!
If you have not crocheted this fun stitch, let’s learn it together. We will walk through how to crochet the waffle stitch with this step-by-step photo tutorial which also includes photos for left-handers!
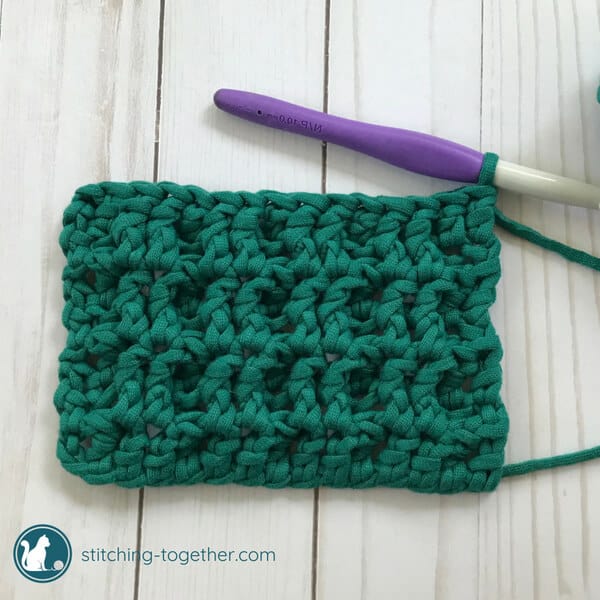
Waffle Stitch Crochet
To master the waffle crochet stitch, you need to know how to do regular double crochets, front post double crochets, as well as the basics of chaining and turning your work.
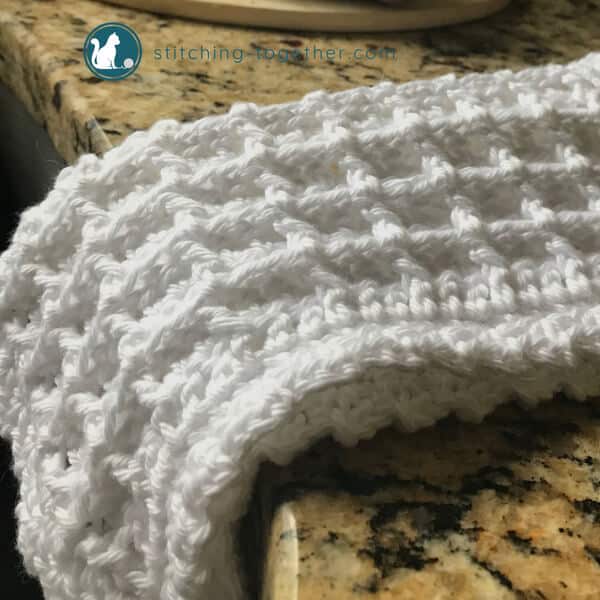
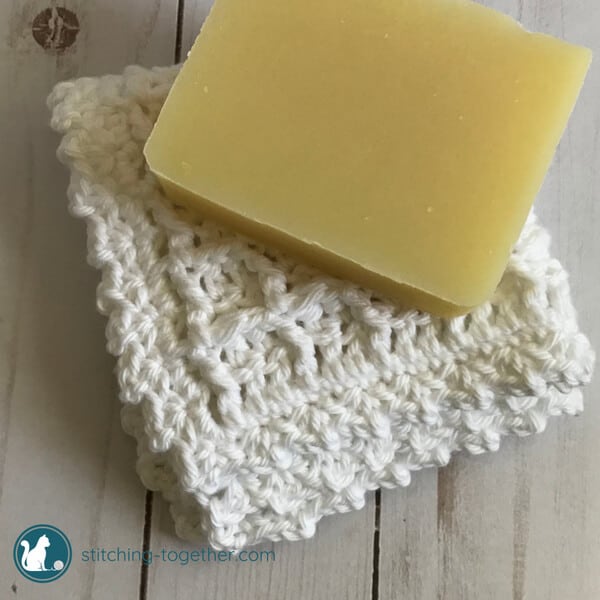
The waffle pattern looks great in a variety of different yarns and different yarn sizes and it can be used in many kinds of projects like scarves, baby blankets, hats and more.
Once you have it down, head over to the Crochet Waffle Stitch Dishcloth Pattern, which is a free crochet pattern, to make something lovely using the waffle stitch!
After that, you’ll want to make sure you check out the Waffle Stitch Pattern Roundup the includes things like waffle stitch blankets, waffle stitch scarves, and waffle stitch bags. You’ll find enough crochet waffle stitch projects to keep you busy for a long time.
You also don’t want to miss the Waffle Stitch Blanket Pattern and the Waffle Stitch Baby Blanket Pattern. Both are gorgeous and fun to make!
Don’t forget to pin this tutorial so you always know where to find it!
About the Waffle Stitch Crochet Tutorial
As you work your way through the tutorial below, up first are the written instructions without photos.
If you are experienced in reading patterns, you may not need to read further than the written instructions for the waffle stitch.
After the written instructions, you’ll find the start of the photo tutorial for right-handers followed by the photo tutorial for left-handers.
The instructions given for the photos are written in full sentences for those of you who may struggle to read crochet patterns.
At the end of each set of instructions, I’ve also included the abbreviated instructions like you would find in a crochet pattern. My hope is that seeing the full instructions next to the abbreviated instructions will help you grow in the skill of reading patterns!
Double Crochet Stitches
The waffle stitch pattern is made up of a combination of double crochet stitches and front post double crochet stitches. It is really a simple stitch pattern to learn once you get the hang of it.
You may notice, that besides the first row, I instruct to chain 2 to start a new row. Most instructions for the double crochet stitch have you chaining 3 at the start of the row. It is really a matter of preference whether you chain 2 or 3.
The point of the turning chain is to give you enough height to start the next row. I tend to crochet smaller and tighter so 2 chains are sufficient for me. You may want to experiment on a separate swatch and see what gives you the neatest edge.
Waffle Stitch Written Pattern Instructions
Abbreviations:
ch(s): chain(s)
dc(s): double crochet(s)
st(s): stitch(es)
fpdc(s): front post double crochet(s)
Instructions
Ch multiple of 3+2
Row 1: dc in 4 ch from hook and in each st across, turn.
Row 2: ch 2 (counts as 1st dc), *fpdc in next st, dc in next 2 sts, repeat from * until the last 2 sts; fpdc in next st, dc in top of ch, turn
Row 3: ch 2 (counts as 1st dc), *dc in next st, fpdc in the next 2 sts, repeat from *until the last 2 sts; dc in next st, dc in top of ch, turn
Repeat rows 2 and 3
How to Crochet the Waffle Stitch – Right-Handed Photo Tutorial
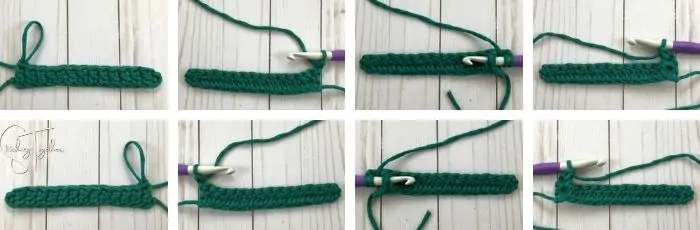
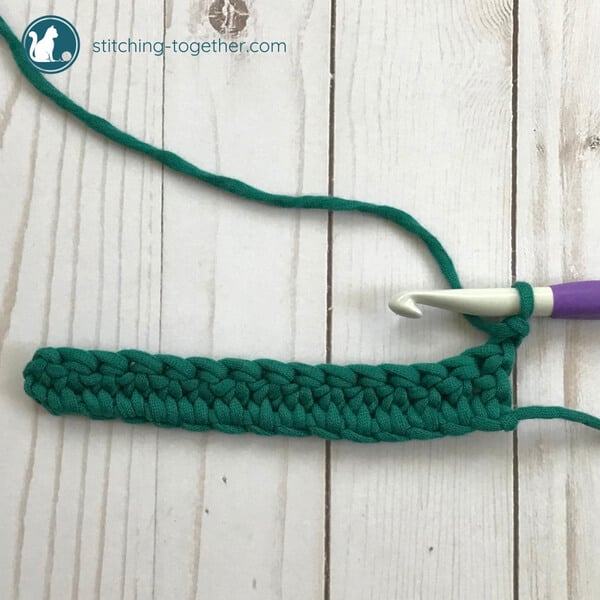
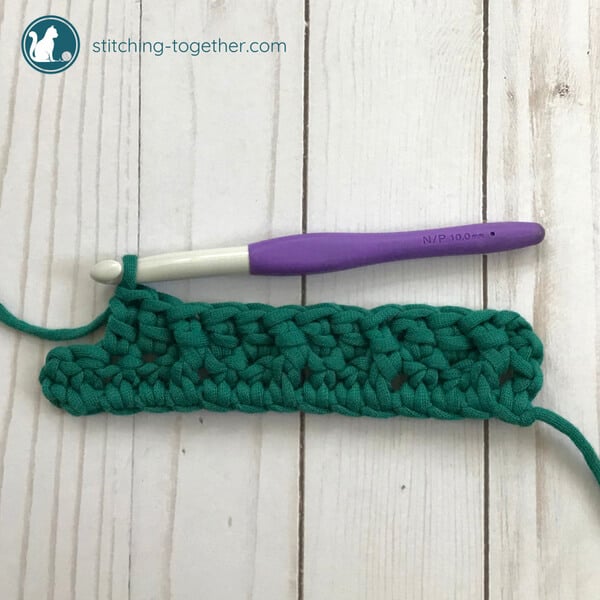
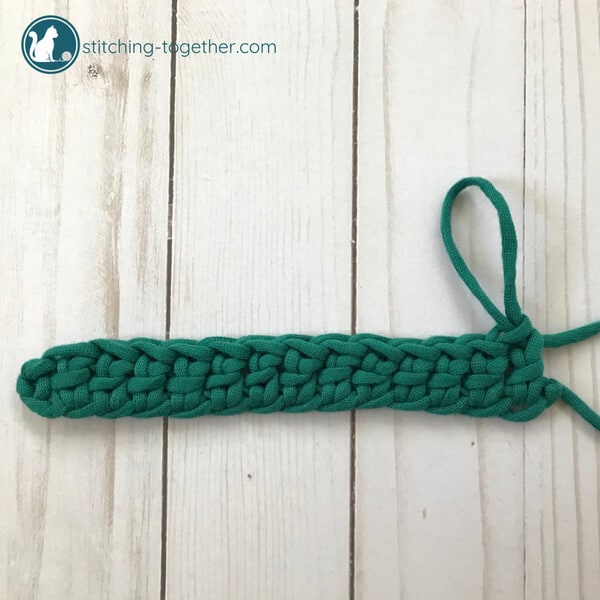
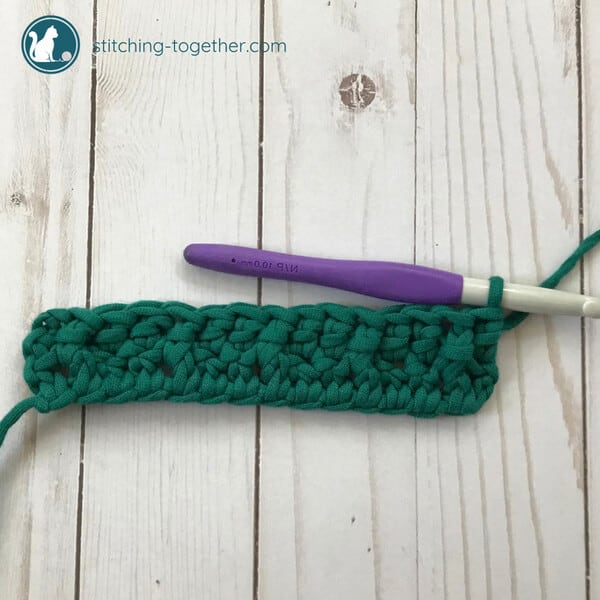
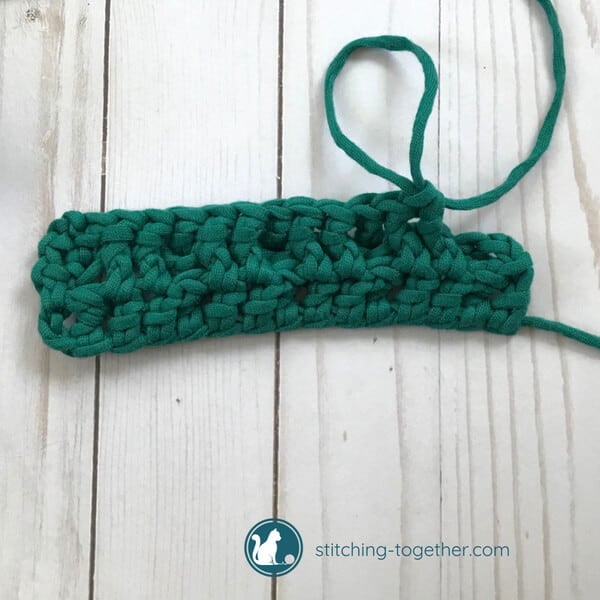
To start, chain a multiple of 3 + 2. Double crochet in the 4th chain from the hook and double crochet in each stitch across, turn. (ch multiple of 3 +2; dc in 4th ch from hook, dc in each st across, turn)
**Three chains will be used for starting the first row and will count as your first double crochet. I started with a chain of 17, which gave 15 stitches in the first row. If you start with a foundation dc, you’ll want a multiple of 3 for the foundation row.

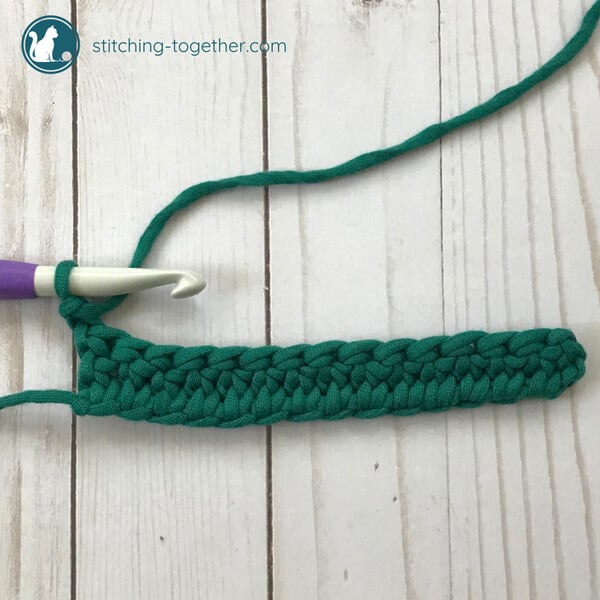
Chain 2 to start row 2 – counts as first stitch. (ch 2, counts as 1st st)
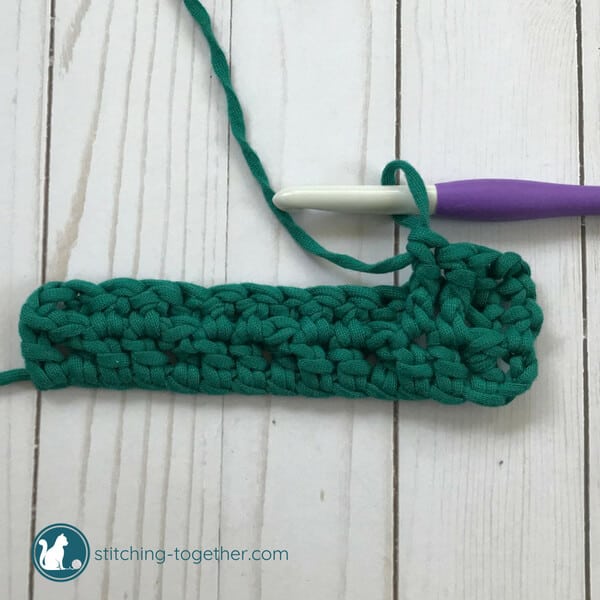
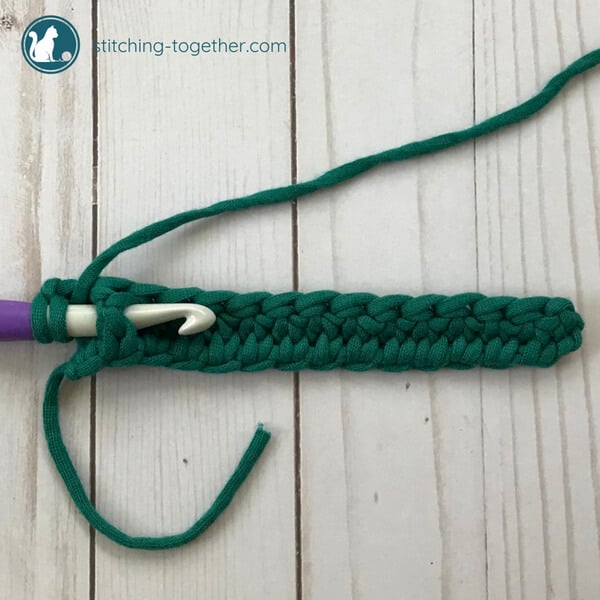
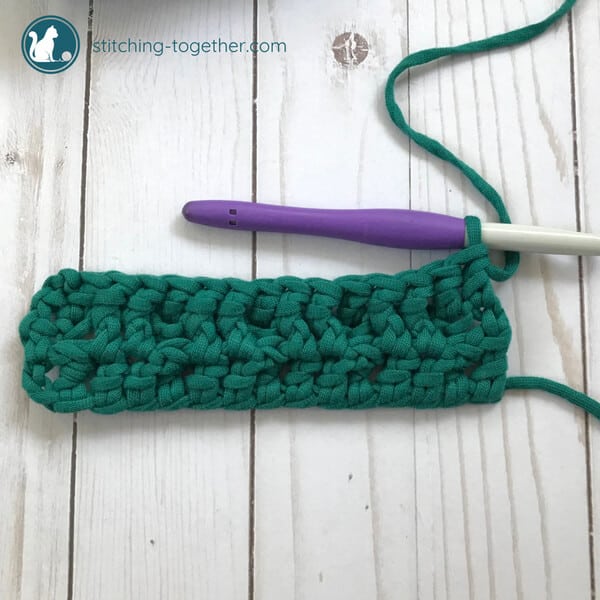
Start the front post double crochet by inserting the hook from the front around the post of the next stitch in the previous row. (fpdc in next dc)
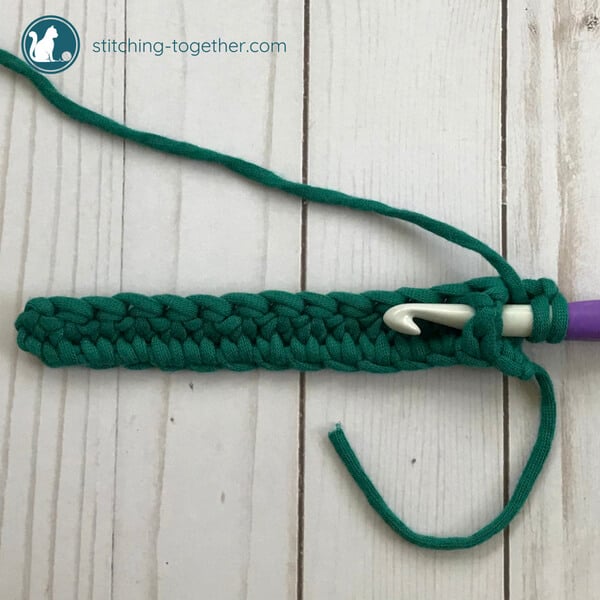
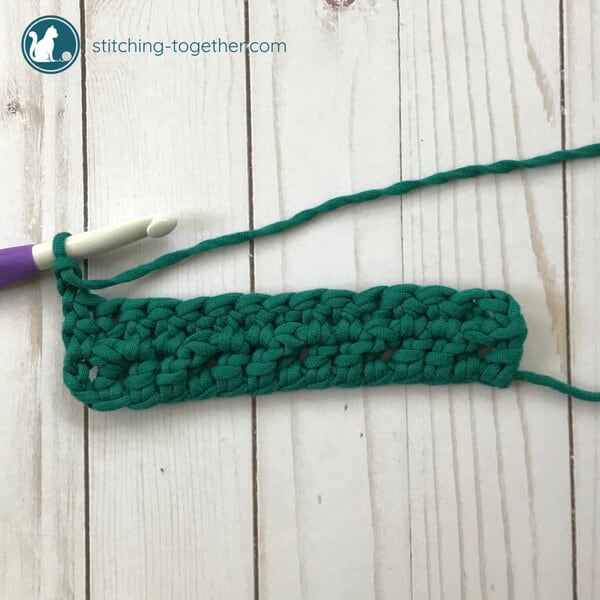
Double crochet in the next 2 stitches. (dc in the next 2 sts)
Continue, repeating steps 3-5, until reaching the last 2 stitches of the row.
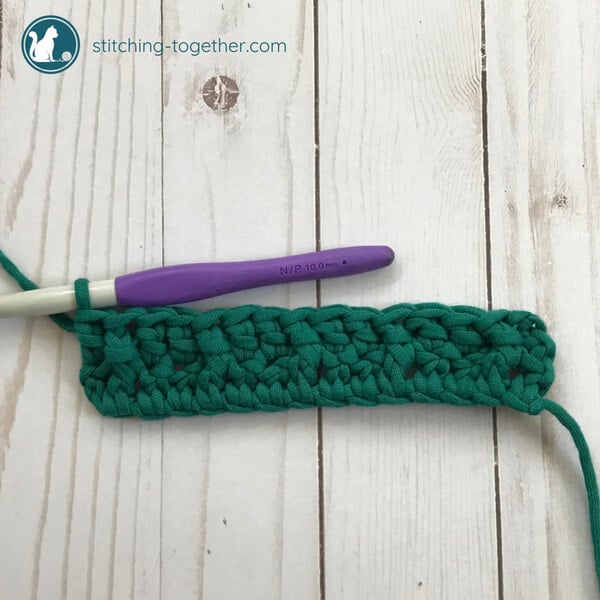
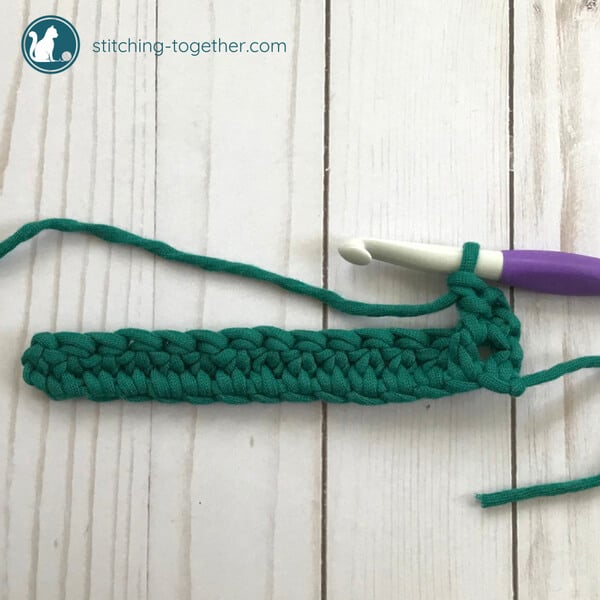
Front post double crochet in the next stitch followed by a double crochet in the top of the ch at the end of the row, turn. (fpdc, dc in top of ch, turn).
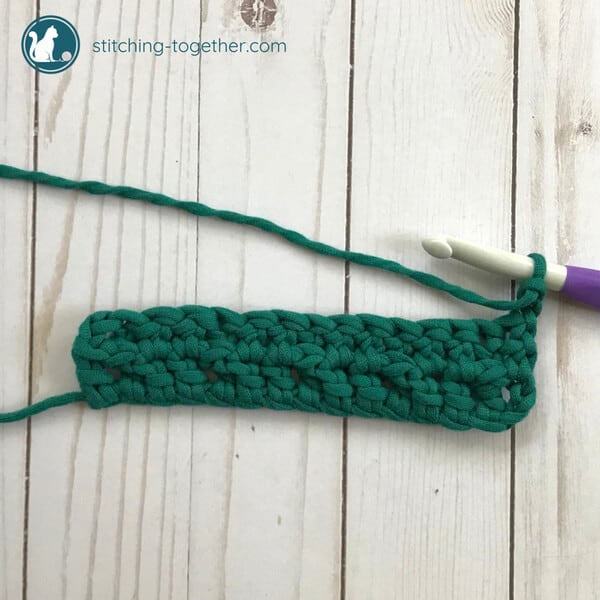
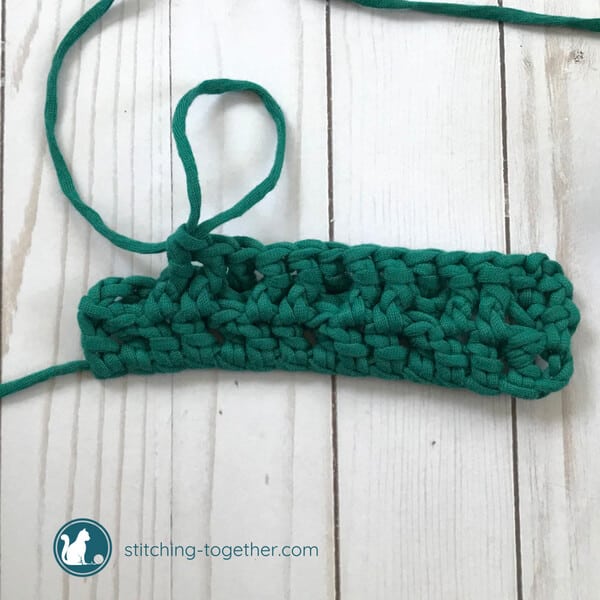
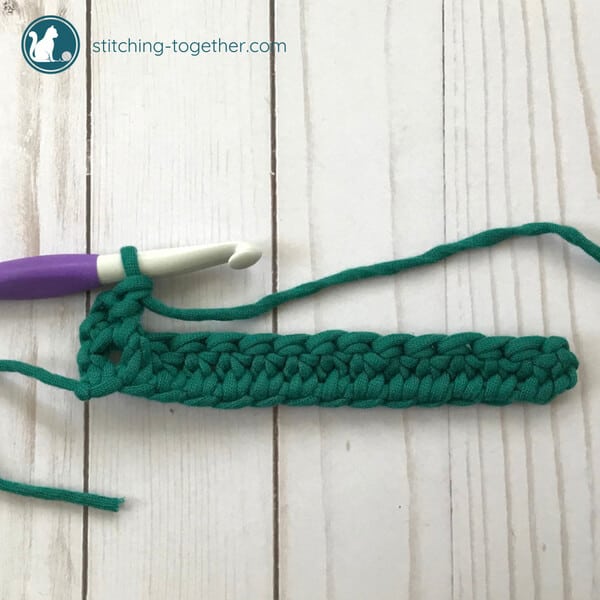
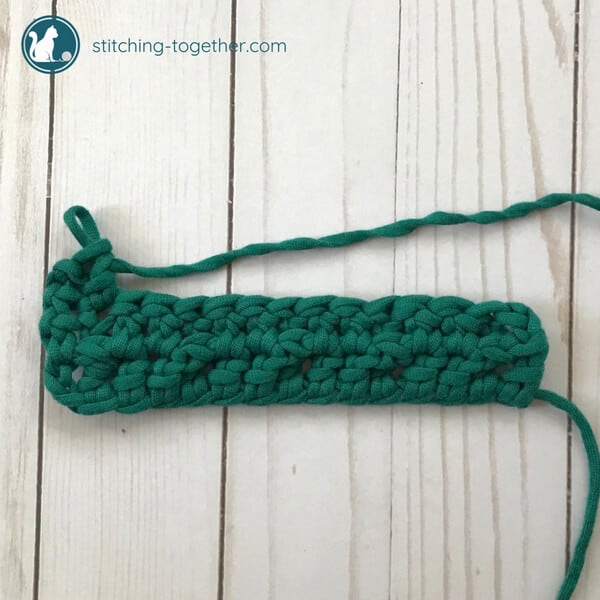
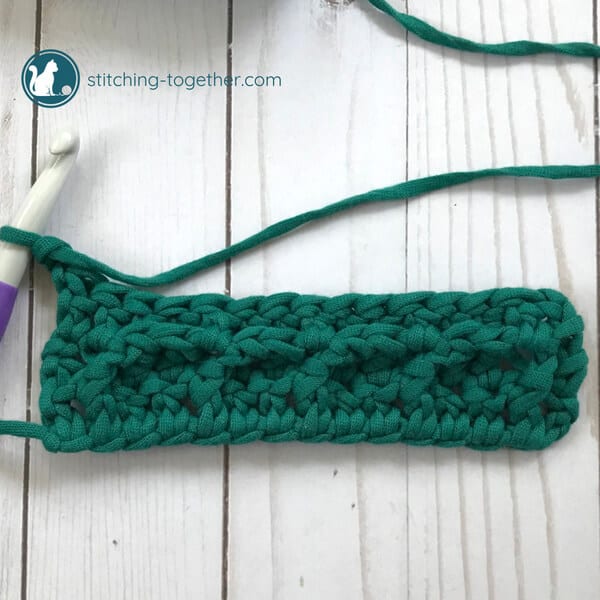
Chain 2 to start the 3rd row (counts as first stitch). (ch 2, counts as 1st st).
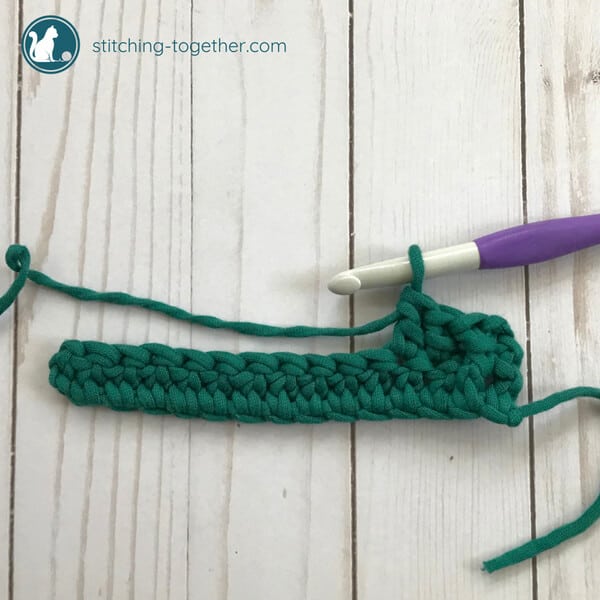
Double crochet in the next stitch. (dc in next st) Don’t forget that the chain 2 counts as your first stitch so you do not double crochet in the stitch immediately below in the previous row.
Front post double crochet around the next two stitches. (fpdc in next two sts)
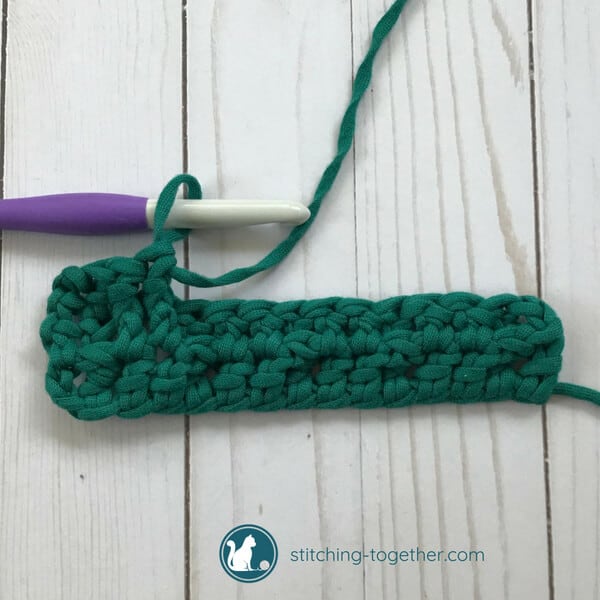
Continue repeating steps 8 and 9 until the last two stitches of the row.
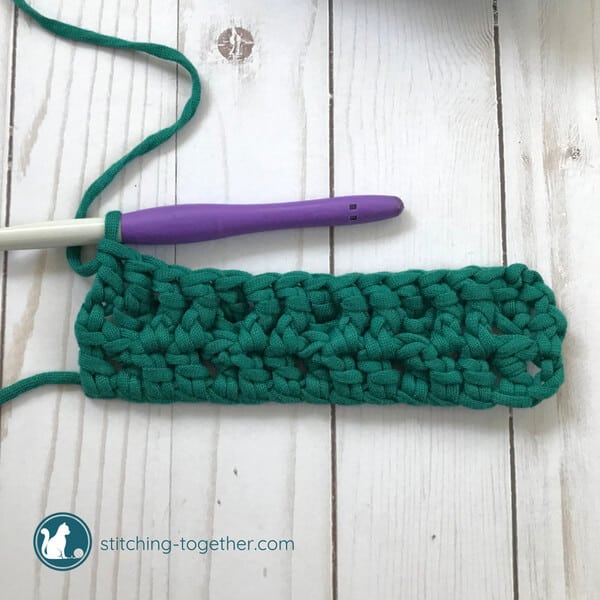
Double crochet in the next stitch and double crochet in the top of the ch, turn. (dc in next st, dc top of ch, turn.)
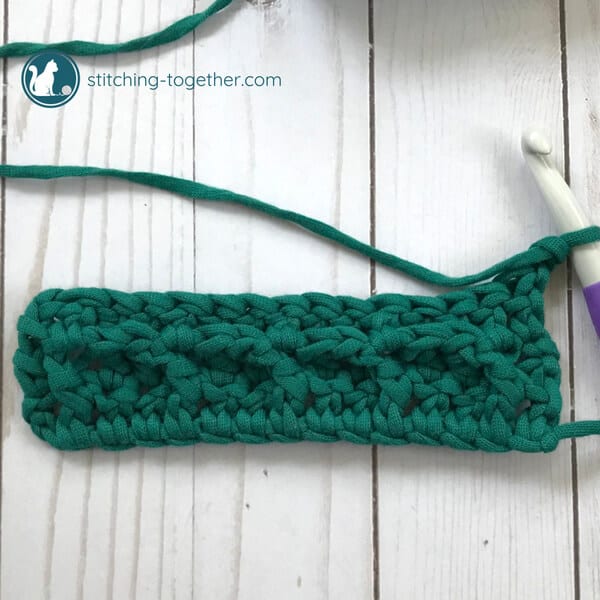
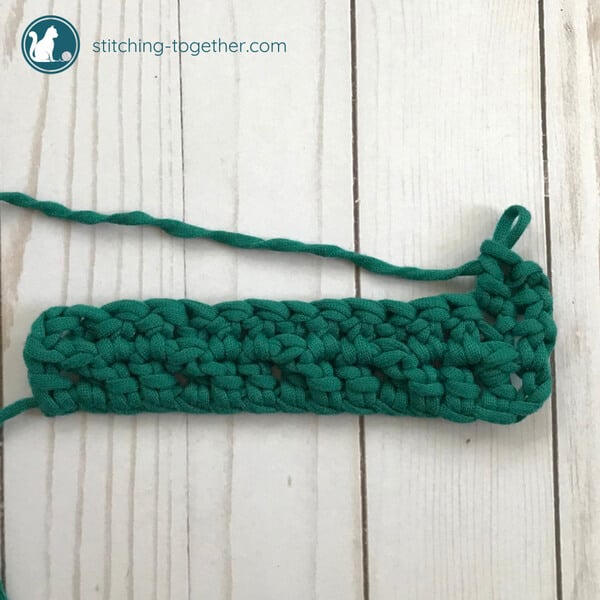
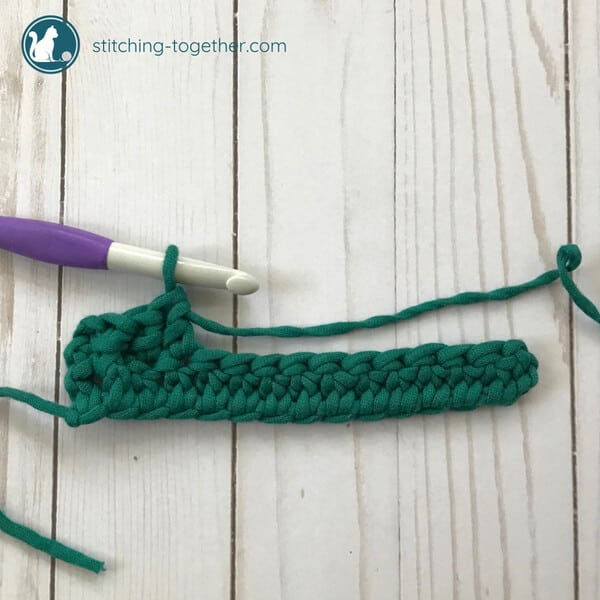
When you turn your work, you can already see the little boxes forming by the end of row 3.
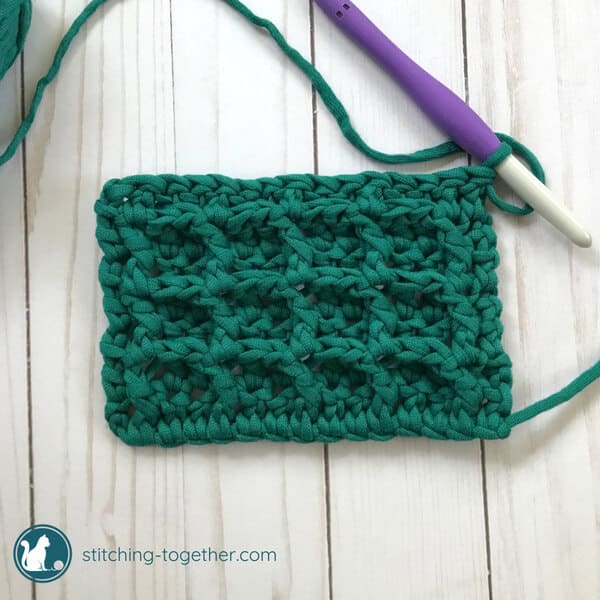
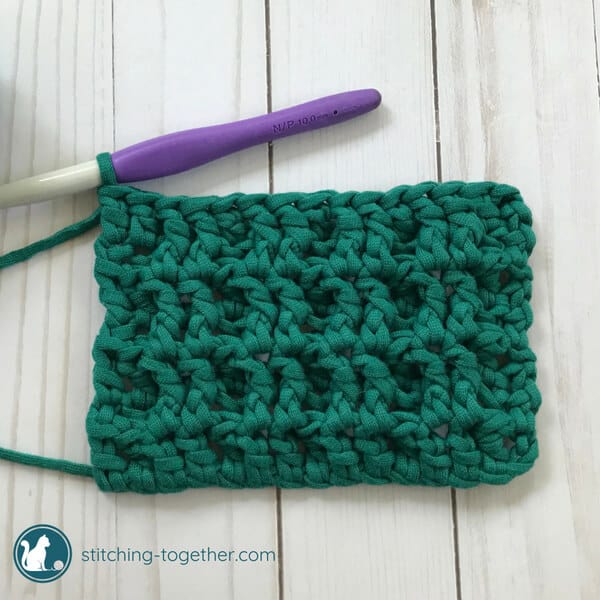
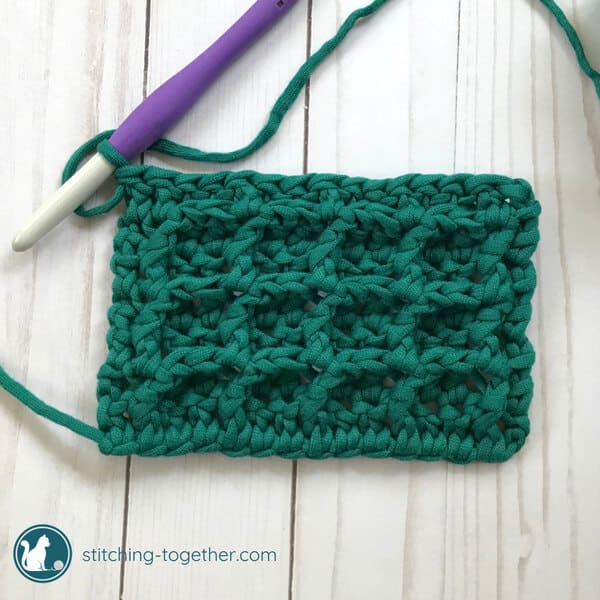
Continue to repeat rows 2 and 3.
Waffle Stitch Tutorial – Left Handed Step by Step
To start, chain a multiple of 3 + 2. Double crochet in the 4th chain from the hook and double crochet in each stitch across, turn. (ch multiple of 3 +2; dc in 4th ch from hook, dc in each st across, turn)
**Three chains will be used for starting the first row and will count as your first double crochet. I started with a chain of 17, which gave 15 stitches in the first row. If you start with a foundation dc, you’ll want a multiple of 3 for the first row.
Chain 2 to start row 2 – counts as first stitch. (ch 2, counts as 1st st)
Start the front post double crochet by inserting the hook from the front around the post of the next stitch below. (fpdc in next st)
Double crochet in the next 2 stitches. (dc in the next 2 sts)
Continue, repeating steps 3-5, until reaching the last 2 stitches of the row.
Front post double crochet in the next stitch followed by a double crochet in the top of the ch, turn. (fpdc, dc in top of ch, turn).
Chain 2 to start the 3rd row (counts as first stitch). (ch 2, counts as 1st st).
Double crochet in the next stitch. (dc in next st) Don’t forget that the chain 2 counts as your first stitch so you do not double crochet in the stitch immediately below.
Front post double crochet around the next two stitches. (fpdc around the next two sts)
Continue repeating steps 8 and 9 until the last two stitches of the row.
Double crochet in the next stitch and double crochet in the top of the ch, turn. (dc in next st, dc top of ch, turn.)
When you turn your work around, you can already see the little boxes forming by the end of row 3.
Continue to repeat rows 2 and 3.
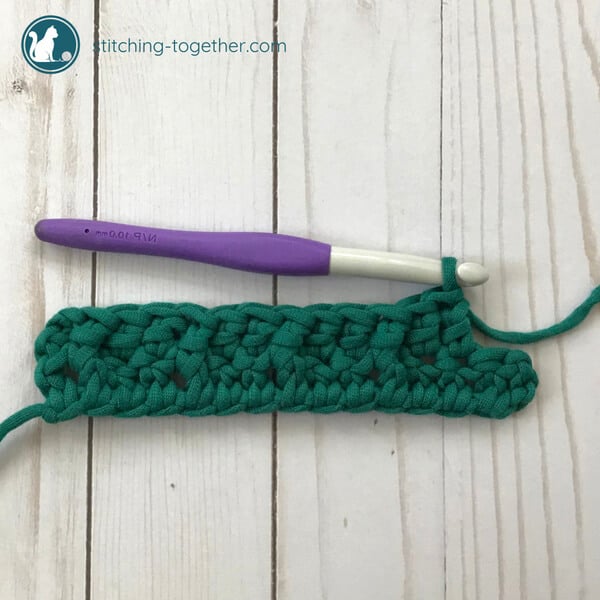
Alright! Now you should be able to crochet the waffle stitch! It’s a great stitch with amazing texture that makes a squishy crochet fabric! Are you ready to practice it?
Try the crochet waffle stitch dishcloth pattern and put your new stitch to use or head to the crochet waffle stitch crochet pattern roundup post to see other projects where you can use the modern waffle stitch.
What will you use the regular waffle stitch for? Perhaps a scarf, dishcloth, or blanket? Either way, you’ll love working with this unique stitch pattern.
Yarn used for the tutorial: Red Heart Strata which has been discontinued but can still be found on AMAZON! and my favorite Clover Amour Crochet hook size N/P 10.0 mm.
Adding a Border to a Waffle Stitch Pattern
It is almost always best to add a round of single crochet stitches to any project before starting a border.
Since the waffle stitch is made up of combination of double crochet stitches, you can treat the border like you would with an all double crochet project.
Work a row of single crochets along the top and bottom of your fabric and then place 2 single crochets at the end of each row along the sides.
After that, you can continue with rounds of single crochets, like I did for the waffle stitch baby blanket or you can add a fancier border using shell stitches or even a double waffle stitch.
Don’t miss these other great stitch tutorials: