Ribbed Crochet Headband Pattern
Disclosure: This post may contain affiliate links. As an Amazon Associate, I earn from qualifying purchases. Please visit my Privacy Policy for disclosures and more information.
Are you looking for a quick and easy headband pattern to make for yourself or as the perfect stocking stuffer?
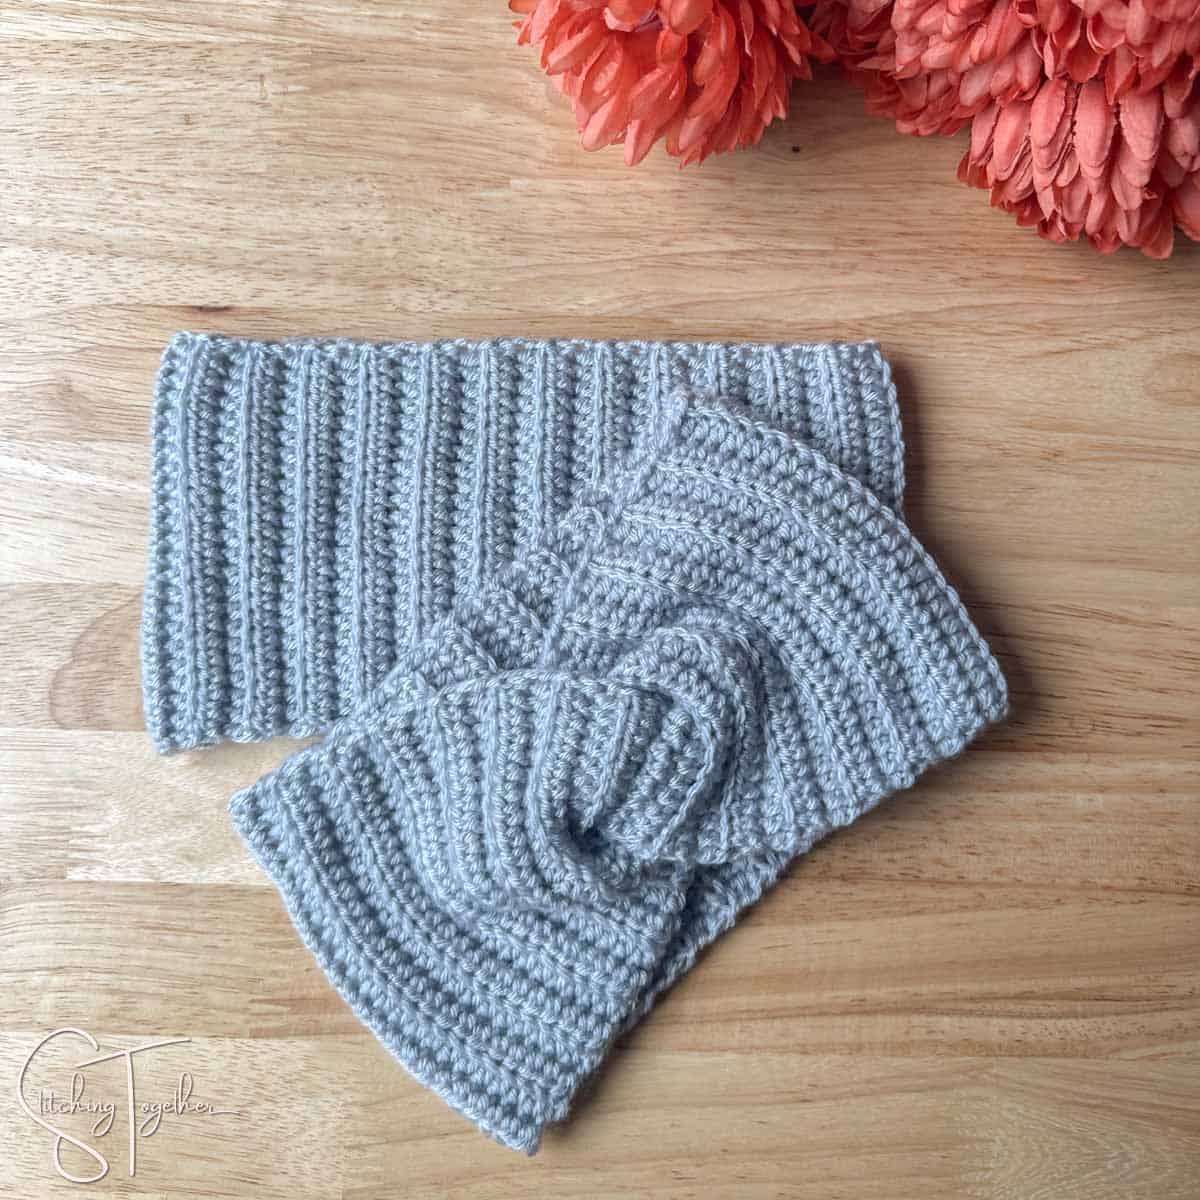
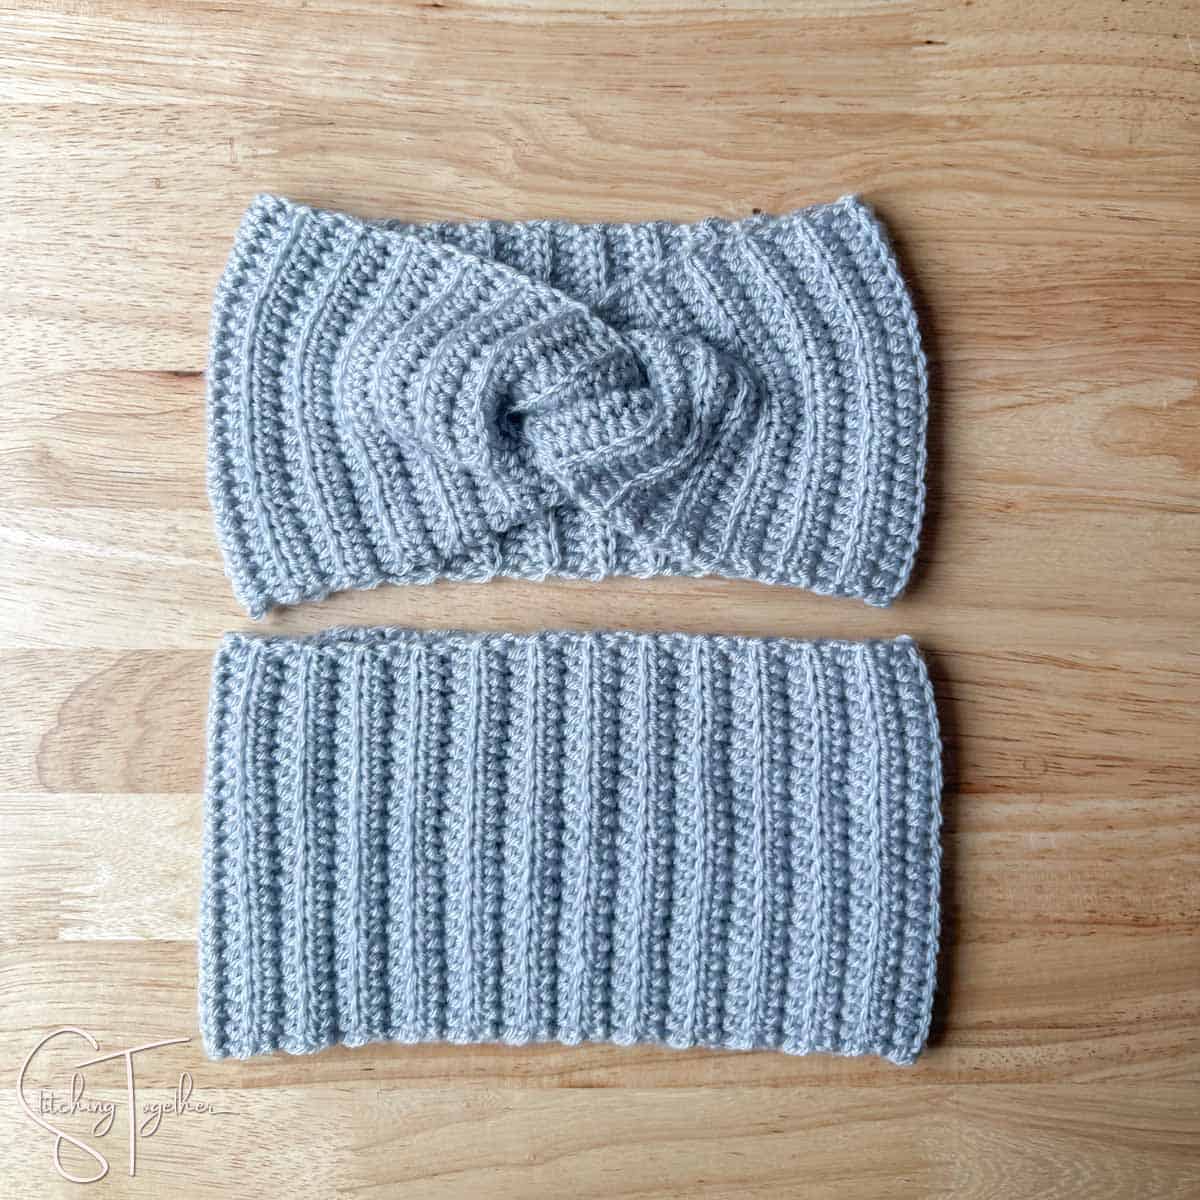
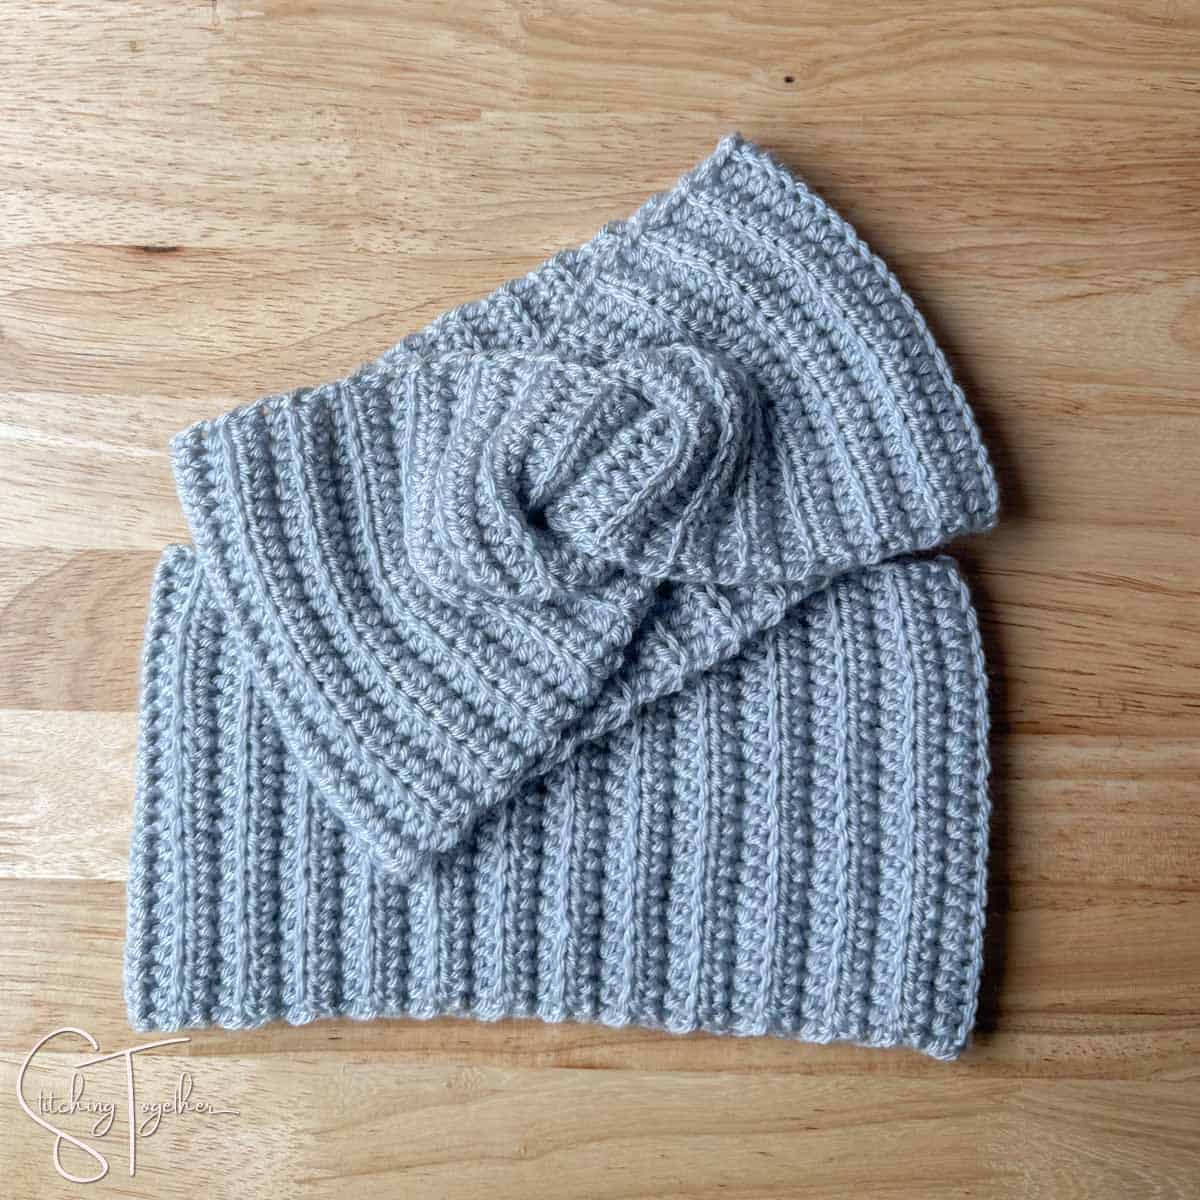
This crochet ribbed headband pattern is just that type of project. The stitches are simple but the thin yarn plus easy ribbing give you an ear warmer that’ll keep you warm and cozy and that makes a great winter accessory.
You can keep reading for all the details of the free pattern, or you can purchase the ad-free printable PDF version here.
Although this pattern is rated as an Easy skill level and not a beginner’s skill level, it is beginner-friendly for newer crocheters who understand the parts of crochet stitches and can identify and work in the back loops and of course, you need to know how to do the half double crochet stitch.
Don’t miss the matching Easy Ribbed Infinity Scarf Pattern!
How do you Crochet a Ribbed Headband?
This headband is crocheted by working in short rows, increasing the length with each row. Once the desired length is reached, you’ll join the short ends with your favorite joining method to make a large loop.
You can also easily make this into a twisted headband if you like that style.
If you need a good gift idea, this ear warmer would make a great present for any lady who likes stylish and warm accessories.
Related: Ribbed Crochet Hat Pattern
Stitches Used for the Crochet Ribbed Headband
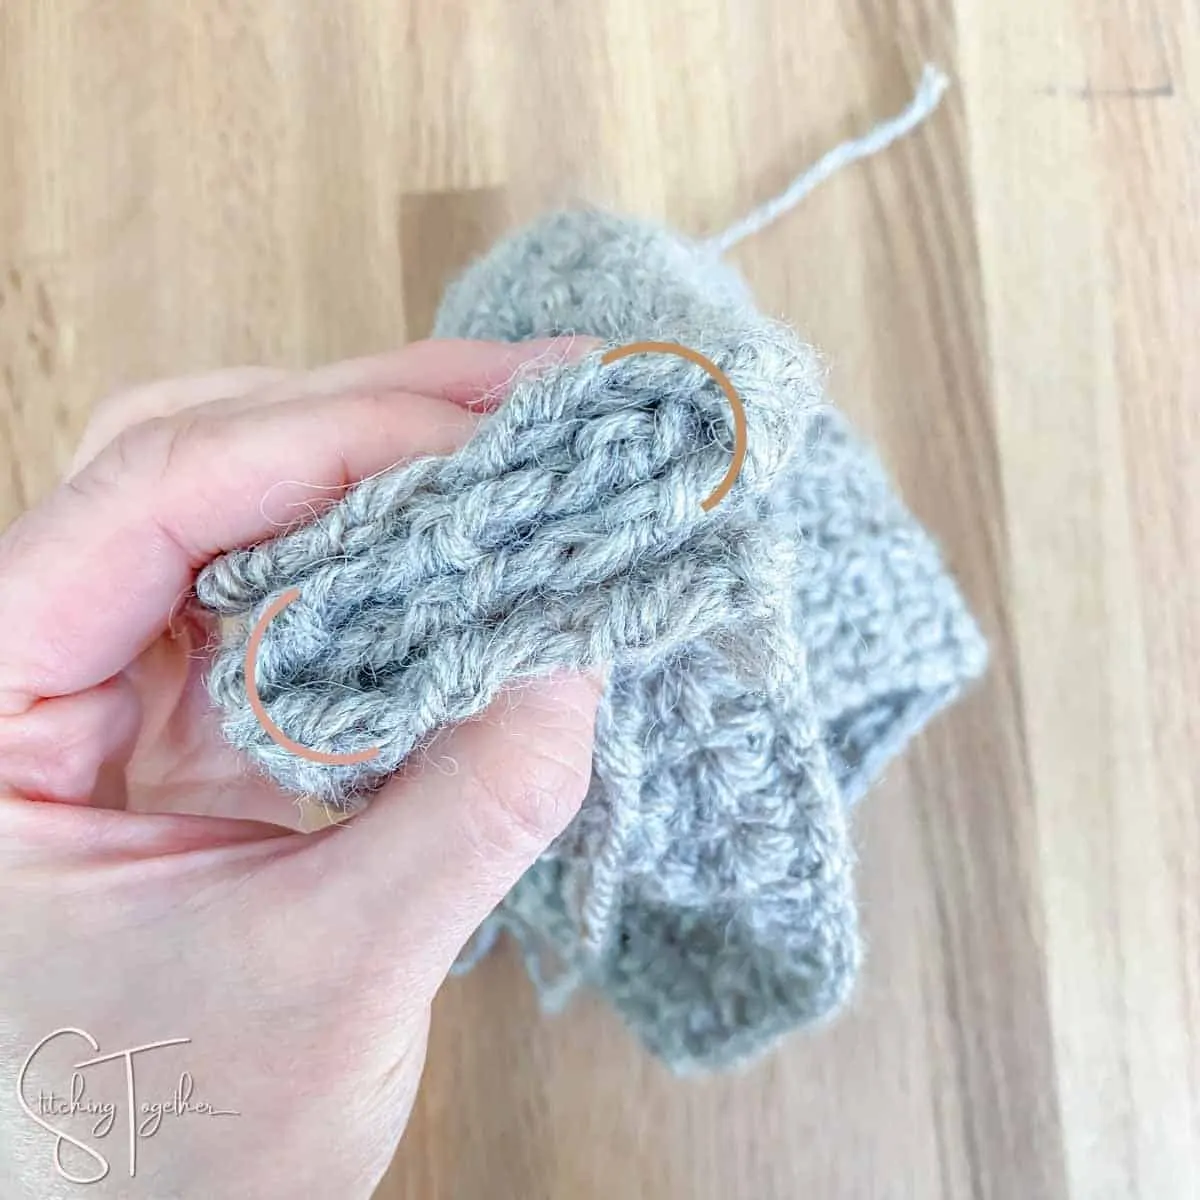
To keep this crochet headband pattern simple, I used half double crochets worked in the back loop only which gives that beautiful ribbing. The last stitch of each row is worked through both loops like a normal half double crochet, giving you a super clean edge. Simple, right?
You’ll love the gorgeous texture of created by the combination of the thin yarn and the ribbing. It feels nice against your skin and is so comfortable and warm to wear.
I really think an adventurous beginner could tackle this pattern and it would be a great opportunity to learn a joining stitch like a whip stitch if you haven’t learned that yet.
Related: Waffle Stitch Headband Free Crochet Pattern
Yarn Used to Crochet a Ribbed Headband
Do you have a favorite yarn? I do and it’s Premier Everyday Anti-Pilling Yarn. I love using it, I love the drape it creates and I love the wide range of colors available.
Normally I reach for their worsted-weight acrylic, but for this easy headband, I used their DK-weight anti-pilling yarn.
The great thing about ordering from Premier Yarn is their reward program where you can earn points to use towards purchasing more yarn! You can sign up here through my link and you get a coupon and I get rewards. FUN!
Yarn Substitutions
You can use most soft DK-weight or even a medium-weight yarn.
There are many baby yarn options that are DK-weight, but you are usually limited to baby-specific colors. Thankfully Paintbox Yarns Simply DK has a wide range of color options and so does Stylecraft Special DK.
If you use a worsted weight yarn instead of a light-weight yarn, you can keep the starting chain the same and you’ll just have a headband that is a little wider. You’ll definitely want to work the length to a specific measurement instead of a specific number of rows if you use a different yarn. Also, if you use a thicker yarn, be sure to adjust your hook size to match the yarn.
Yarn Substitution Ideas
Simply DK – Paintbox Yarns
Special DK – Stylecraft
LB Collection Superwash Merino – Lion Brand Yarn
Adjusting the Size
You can adjust the size of this ribbed crochet headband to get just the right fit !
If you are making the headband for someone else, you can use the size chart provided in the Simple Ear Warmer pattern to determine the size and measurements you’ll want to make. If you are making it for yourself, and you can measure your own head, that’ll be the best way to ensure a great fit.
To adjust the circumference, you’ll want to add or subtract rows and work towards the measurement (number of inches around) you’d like.
Since you are working in the back loops only, the stitches have a lot of stretch and they tend to stay somewhat stretched. You’re going to want to work 2-3 inches less than the smallest size (headband measurement) in your range or 4-5 inches smaller than the measured head circumference.
My head circumference is right around 22″ so normally I make a hat or ear warmer around 20″ in circumference, but because these stitches have so much stretch, I make my headband 5″ smaller than my head measurement which was around 17″ long.
The great thing about working the crochet headband pattern in short rows is that it is super easy to adjust the length.
Easy Crochet Ribbed Headband
Skill Level: Easy
Materials:
- US size 7, 4.5 mm crochet hook
- Premier Anti-Pilling Everyday DK yarn (category 3 light weight 100% acrylic yarn 100g / 3.5oz – 250m / 273yds)
- Sample used approximately 94 yds (1.2 oz) in Mist
- Large Eye Yarn Needle
.
Everything you need for this project can be ordered right online
Save time and shop from home!
Premier Anti-Pilling Everyday DK yarn
.
Abbreviations:
ch(s): chain(s)
hdc(s): half double crochet(s)
st(s): stitch(es)
blo: back loop only
Gauge: 4” x 4” = 18 hdcs by 12 rows (gauge was taken with hdc blo)
Finished Size: before sewing together, the headband measures approximately 17” long by 5” wide
Notes:
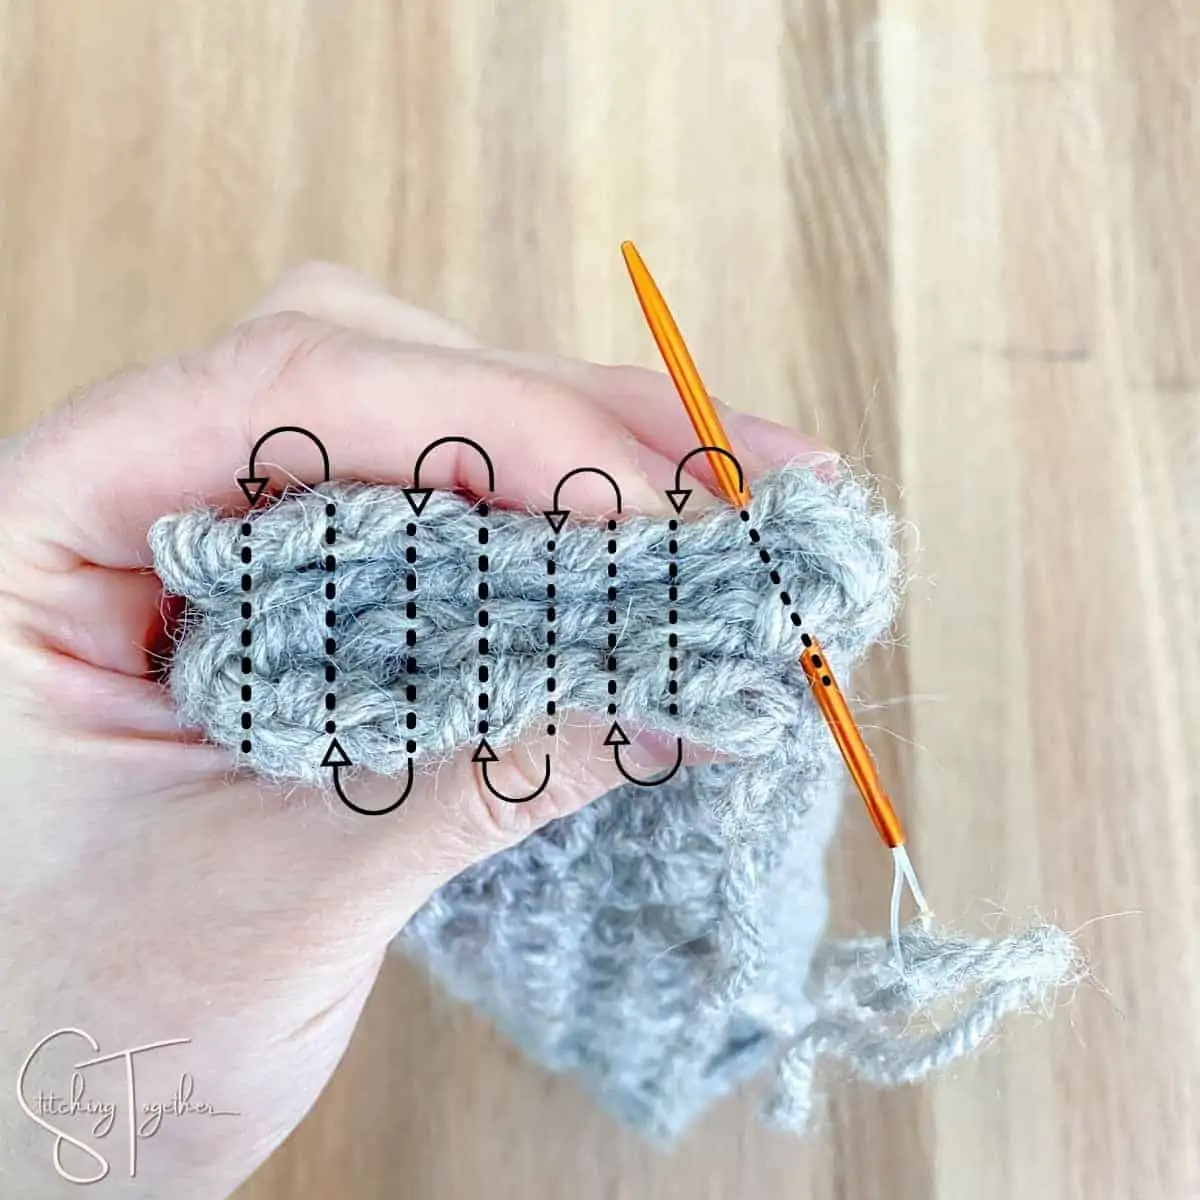
All stitches are worked in the back loop except the last stitch of each row. Work the last stitch through both loops like a normal stitch to get a cleaner edge.
The ch 1 to start each row does not count as a stitch.
You’ll be working your hdcs in the back loop only of each row which is the loop farthest away from you as you work.
The rows of the headband will run vertically when it is finished, forming the ribbing. To adjust the size, you will increase or decrease the number of rows used.
The hdc stitches worked in the back loop only have a lot of stretch, so you’ll want to crochet your headband around 4-5″ smaller than the measured head circumference.
Pattern Instructions:
Ch 24
Row 1: hdc in the 2nd ch from hook and in each ch across, turn (23)
Row 2: ch 1, hdc blo in each st across until the last st, hdc in last st, turn (23)
Rows 3-52: repeat row 2. Leave a long tail end.
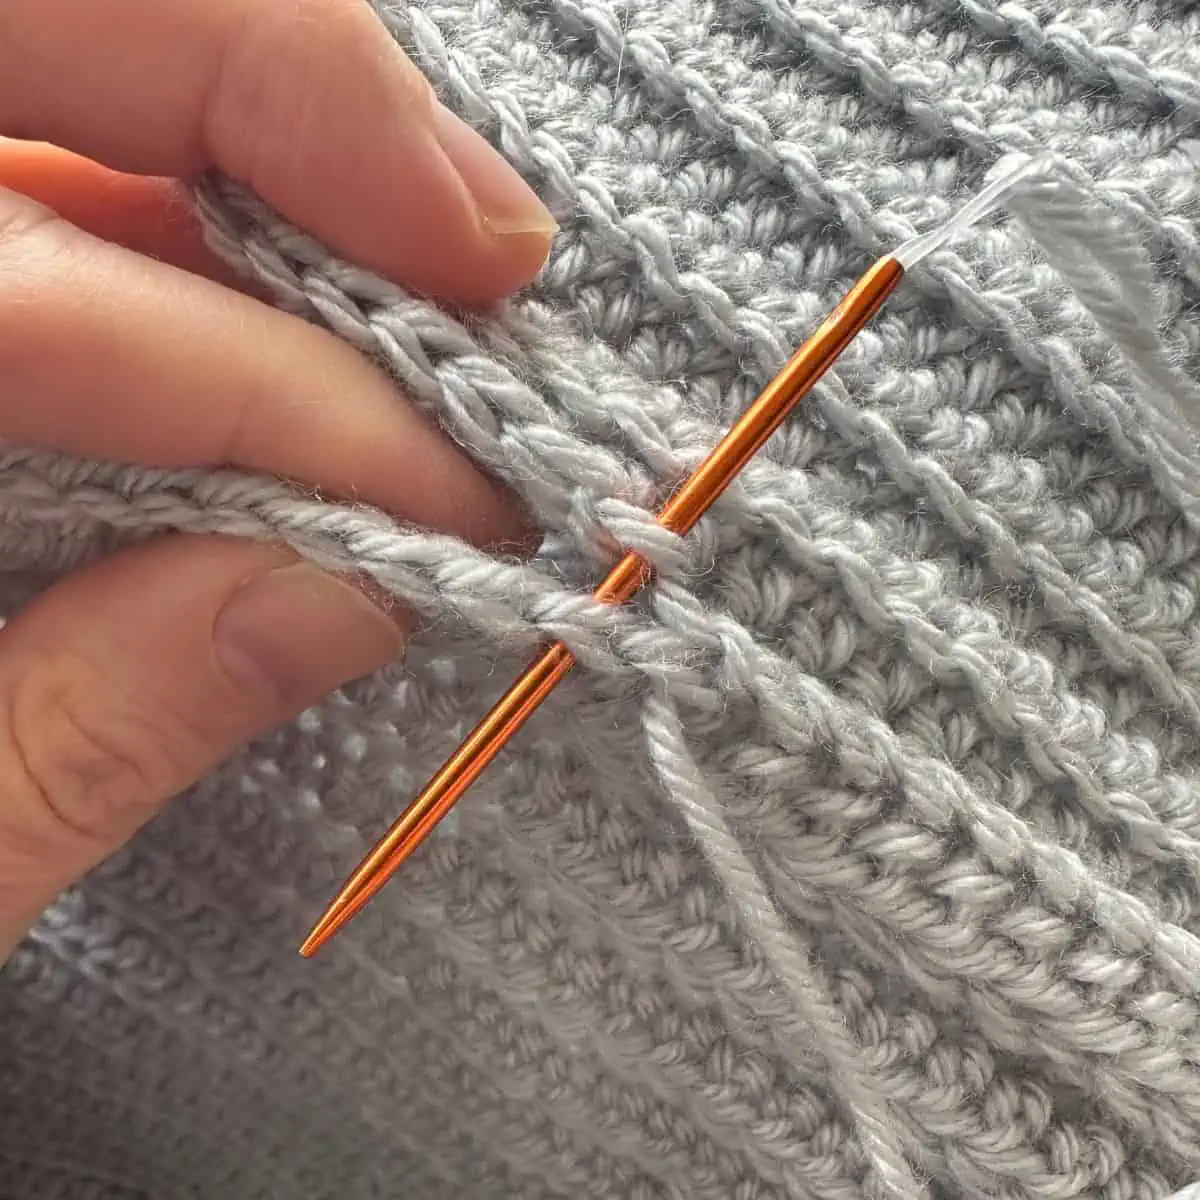
Join the short ends of the headband together to form a circle and whip stitch or use other joining method. I worked through two loops on one side and one loop on the other side to match the ribbing pattern as closely as possible.
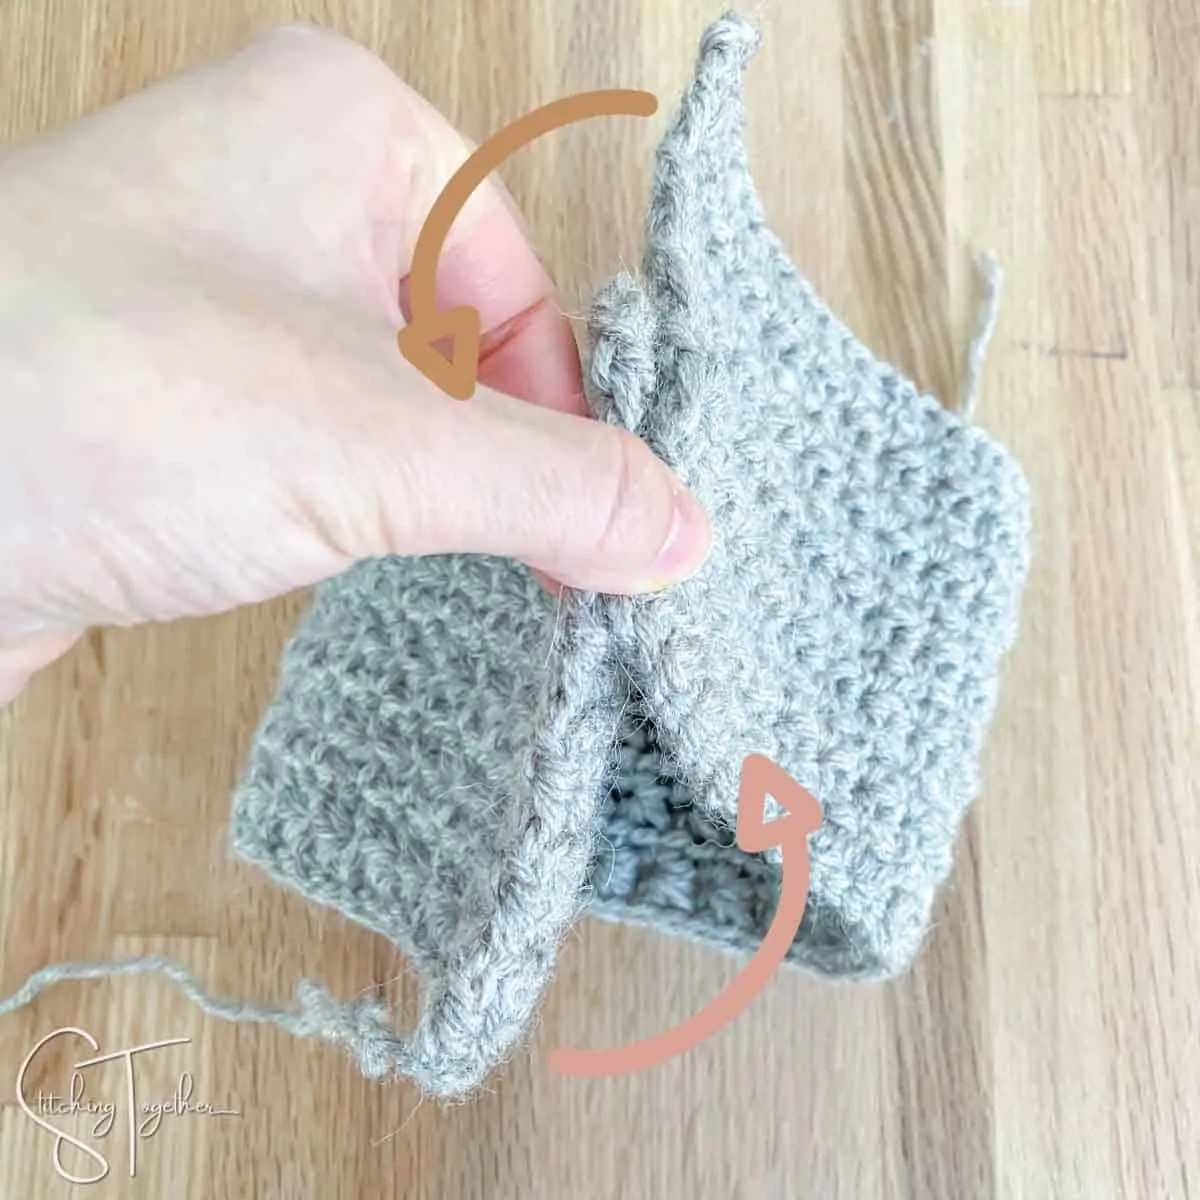
You can also easily make it into a twisted headband by folding the ends of the headband around each other and sewing through all four layers. You’ll then flip the headband inside out to form a smooth twist.
Purchase the Printable PDF
Will you share pictures of your finished projects?
- Tag Stitching Together on Instagram with @stitching_together and use the #stitchingtog
- Upload your picture in the Tried It section of this pin
- Share your work in the Stitching Together Community.