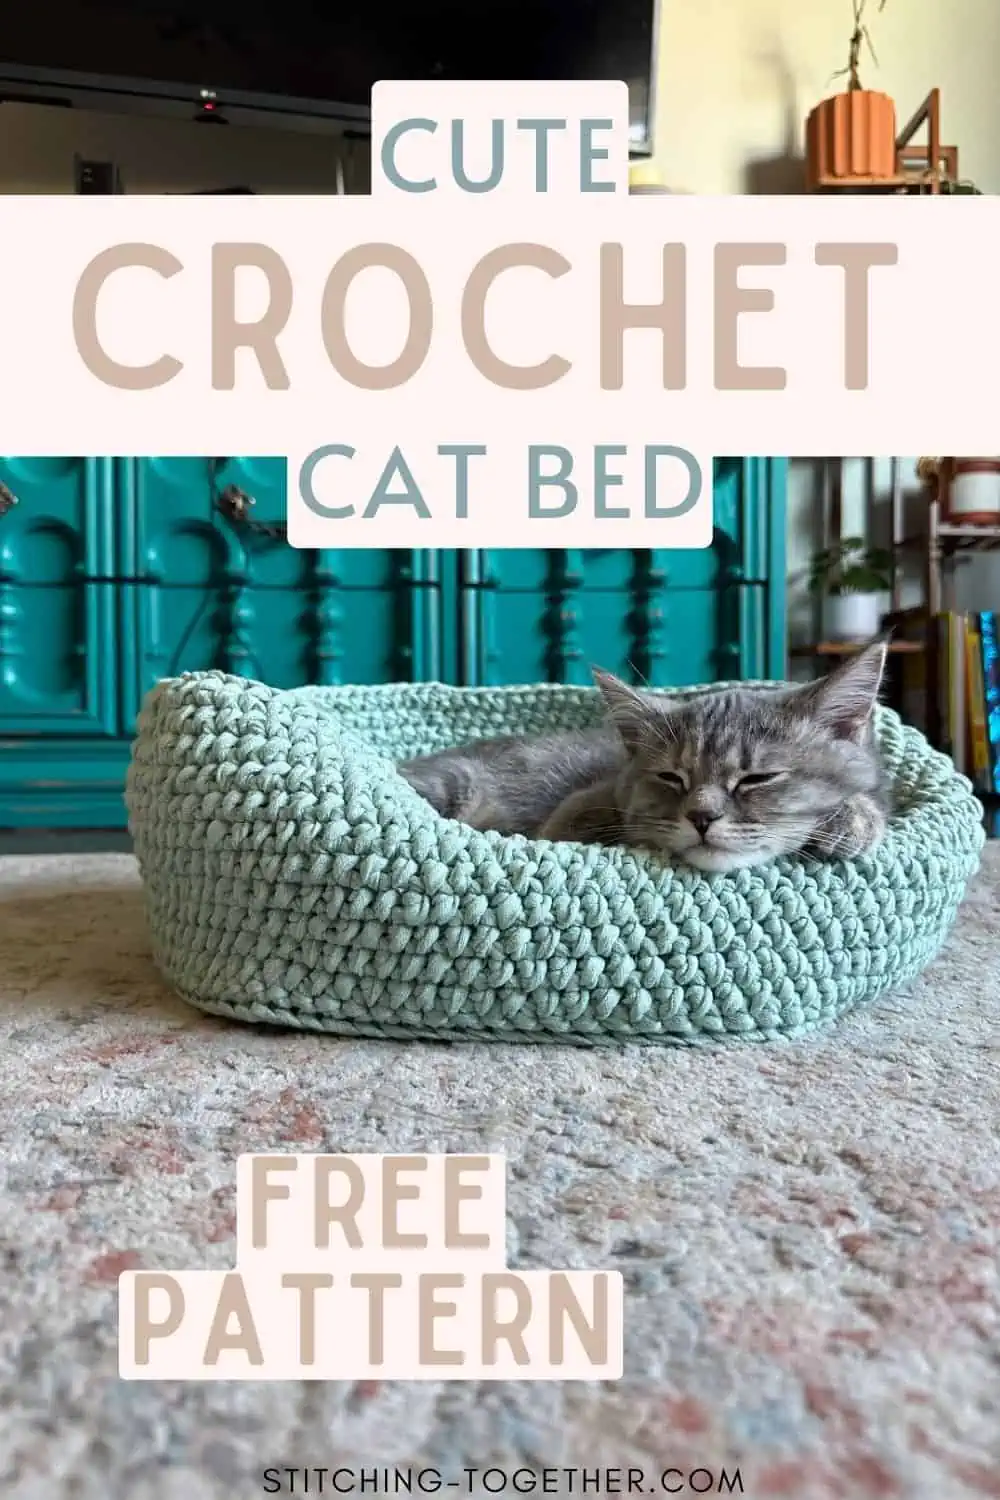
Cozy Crochet Cat Bed Pattern – Free & Easy
Disclosure: This post may contain affiliate links. As an Amazon Associate, I earn from qualifying purchases. Please visit my Privacy Policy for disclosures and more information.
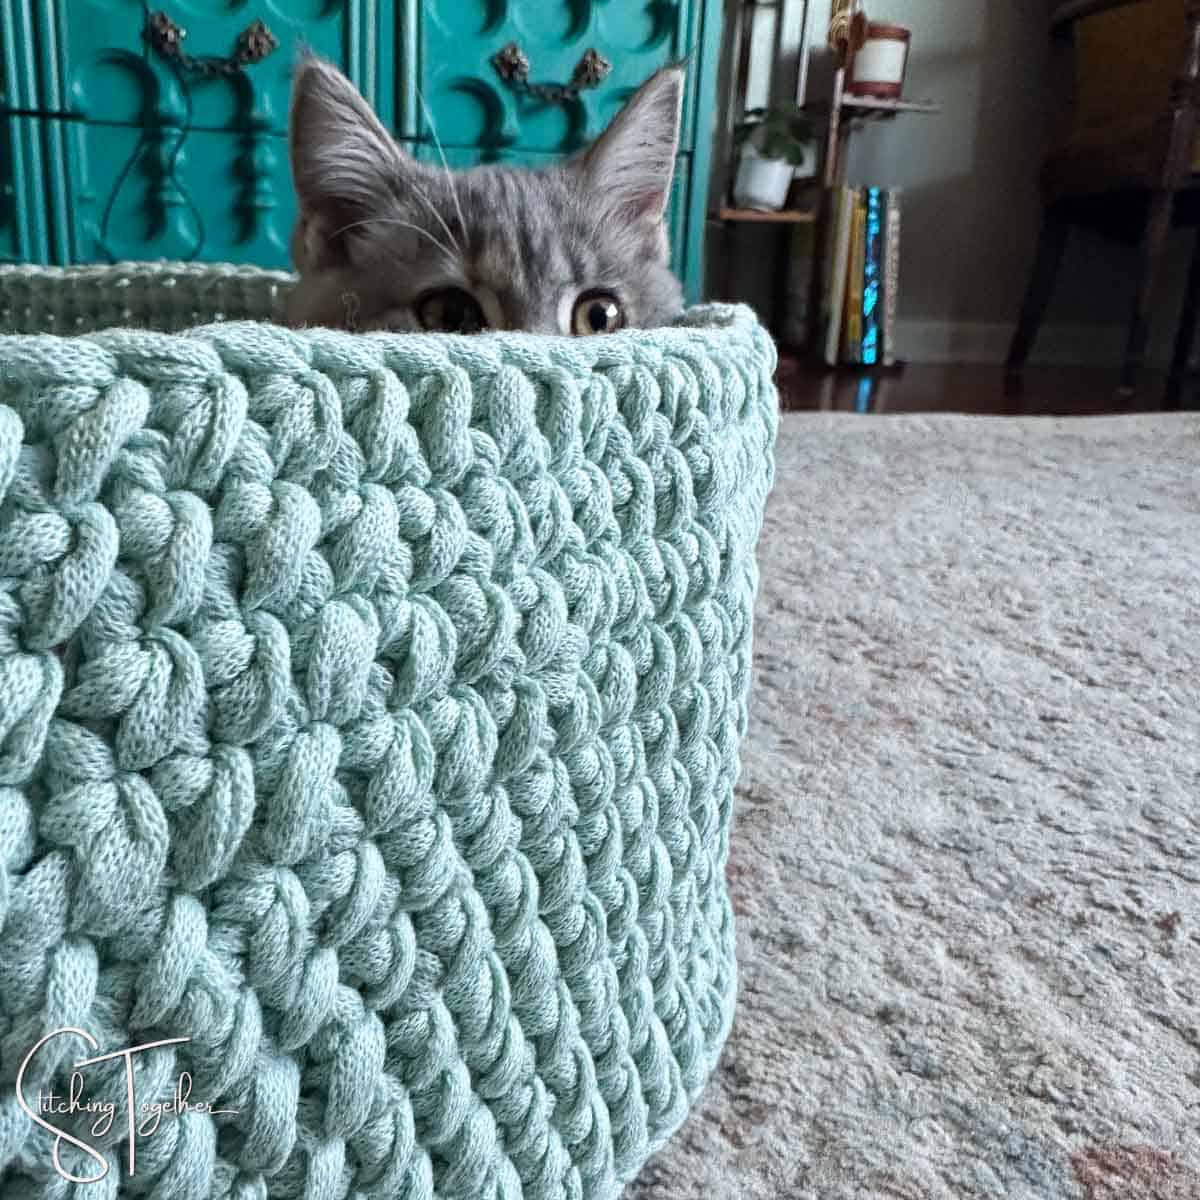
If you’ve spent any time with cats in your home, you know that cat beds can be a take-it-or-leave-it sort of thing. It will either be their favorite place in the world or they will pretend it doesn’t exist.
There’s a third option too, where they will do both: first love it and then act like they can’t even see it. I’ve lost track of how many store-bought cat beds I’ve purchased over the years, but I am confident they ignored more than 50% of them.
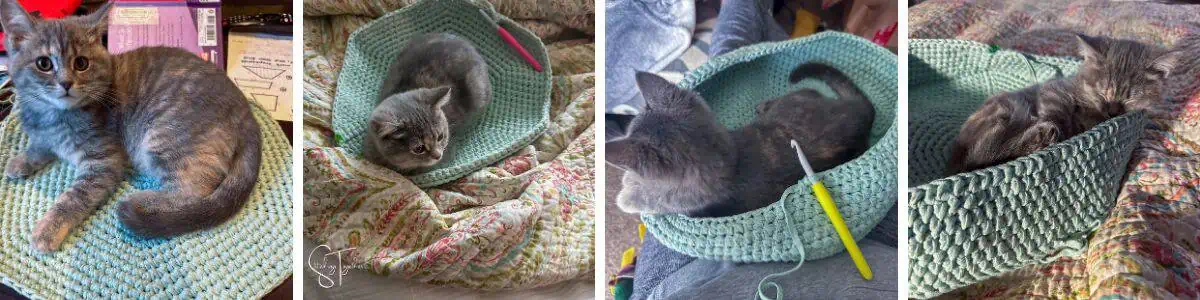
Well, not one to be deterred from attempting to spoil my feline friends, I thought maybe a DIY crochet cat bed would win them over, or a least win over the kitten who loves being on top of anything I am working on right now. She’s loved and claimed each stage of the process, so I hope she’ll actually use the finished cat bed.
Related: Crochet Cat Sweater
I have no hope that my older grumpy cat will even give it a second glance. If at least one of my cats finds this bed to be a comfortable place to take a cat nap, then I consider it a win.
Of course, if you have a small canine furry friend, a new bed can easily be used as a dog bed.
Keep reading for all of the details and free cat bed pattern, or you can purchase an ad-free PDF version here.
Cozy Crochet Cat Bed Introduction
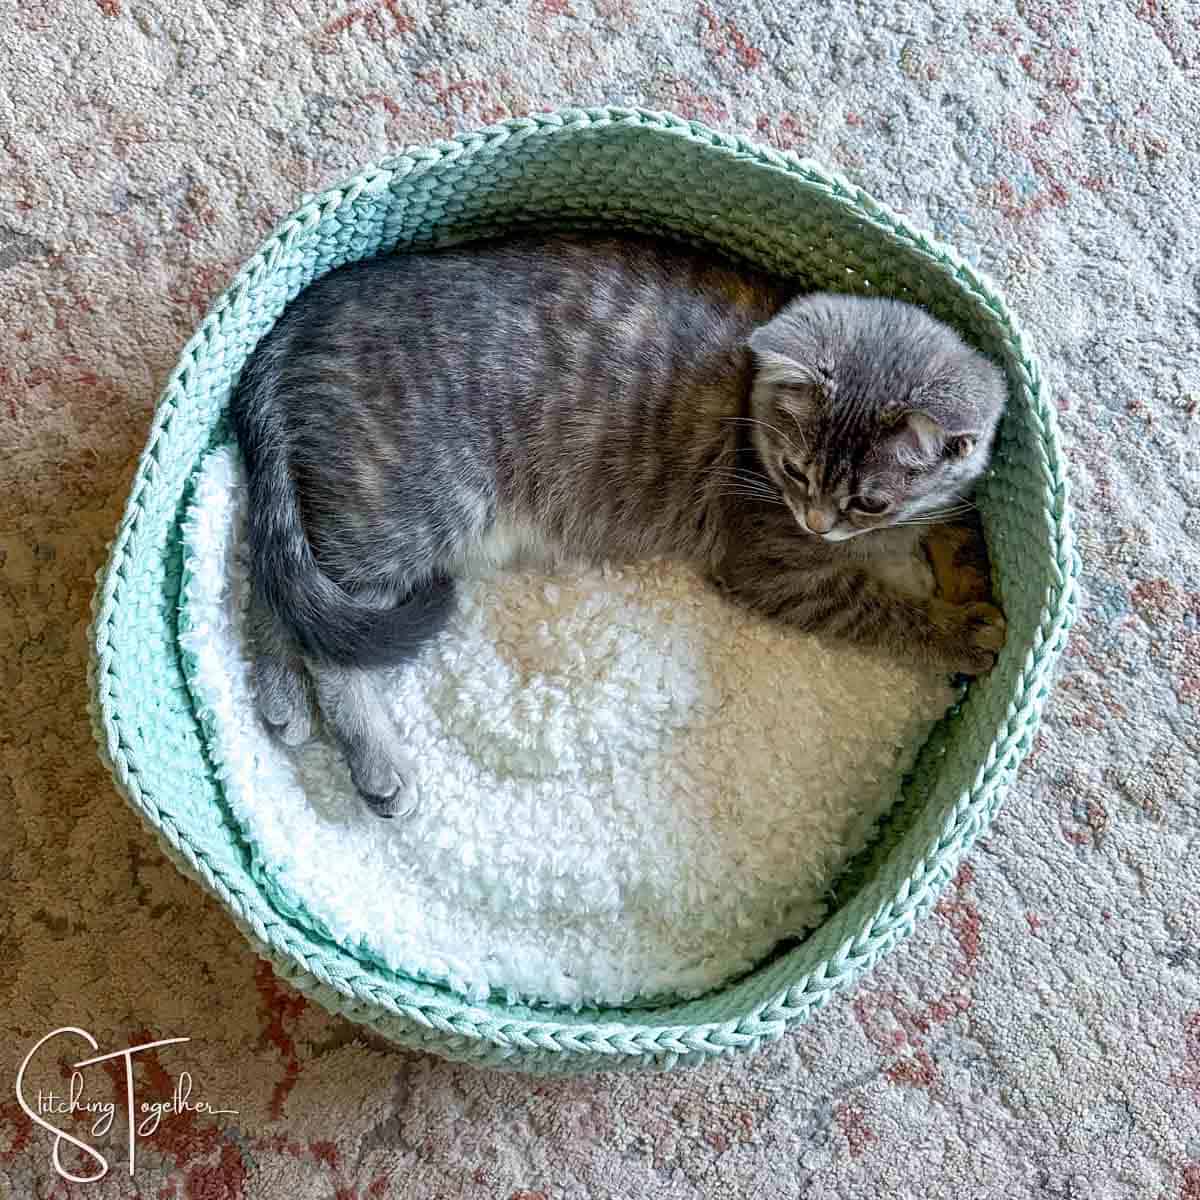
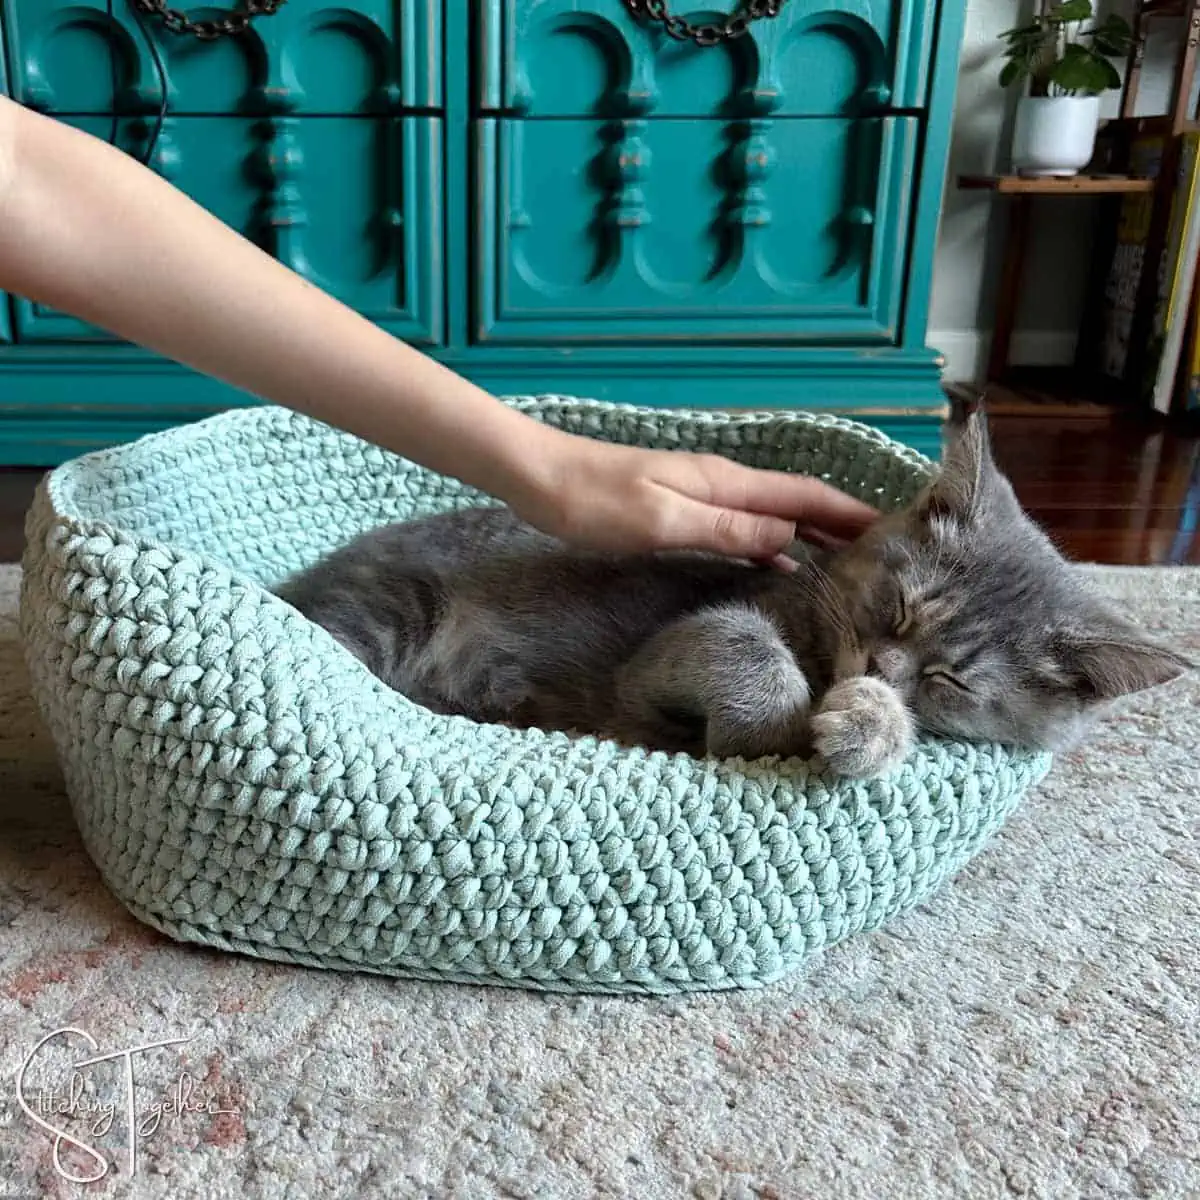
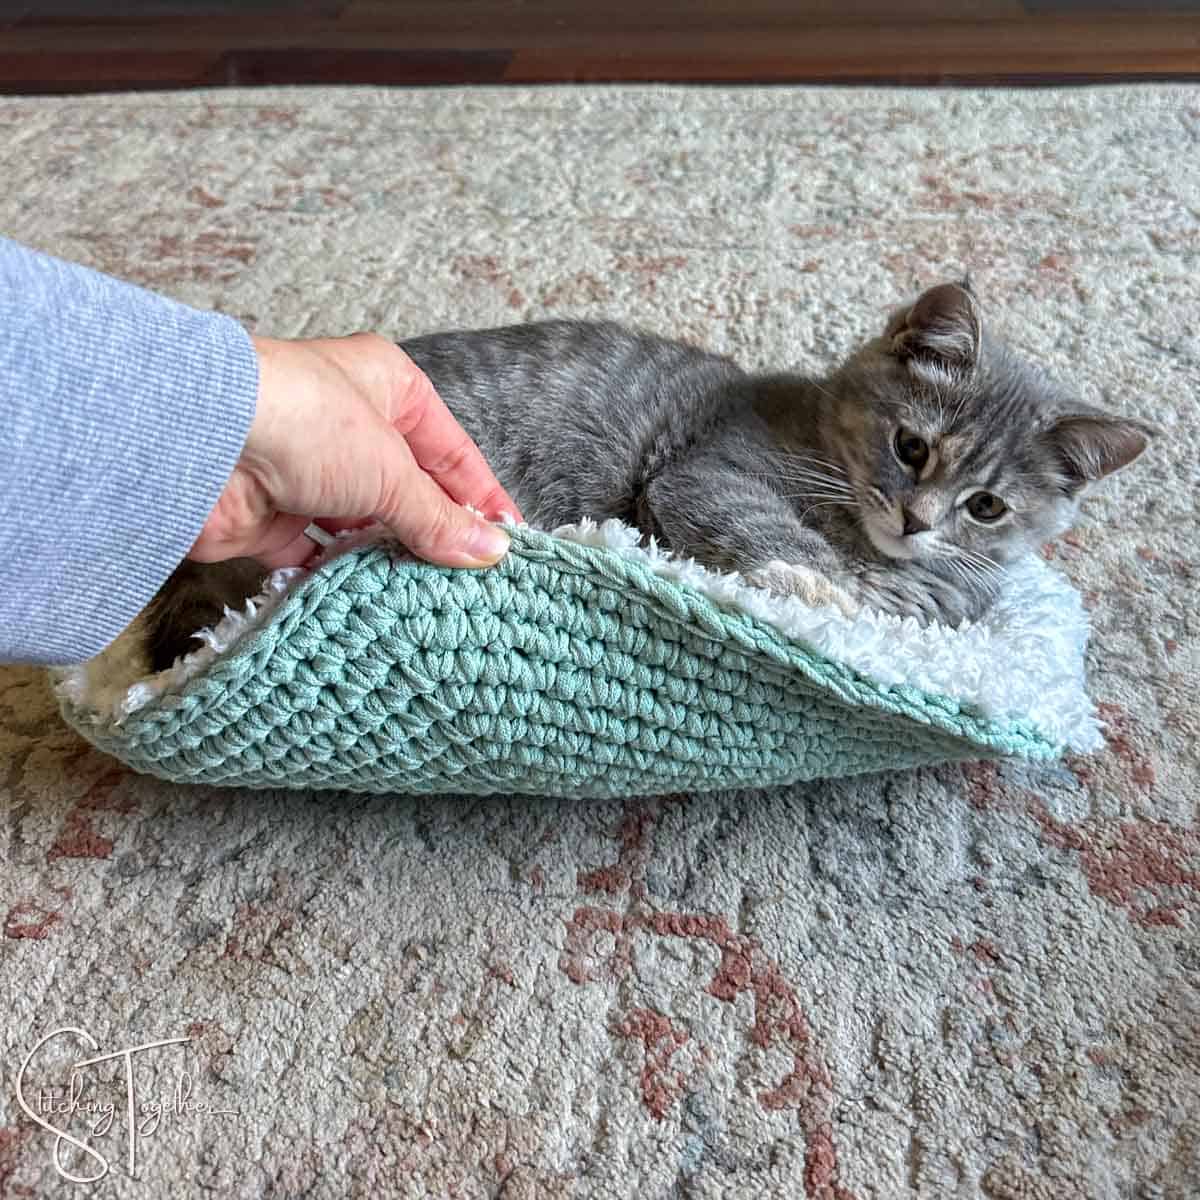
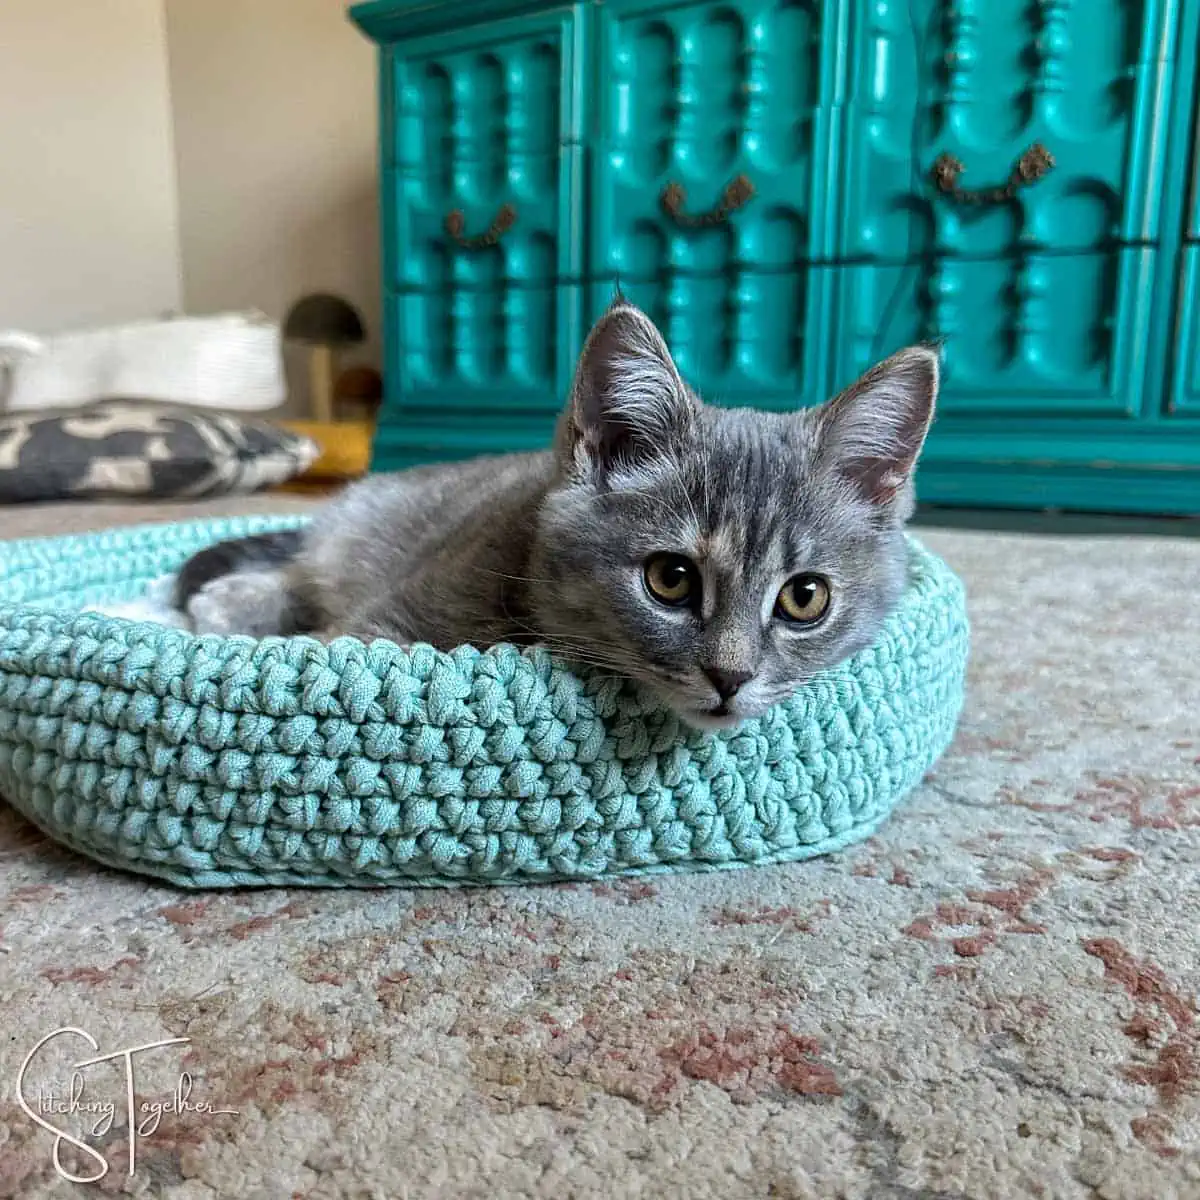
This easy crochet cat bed is made with super bulky yarn and has two parts: the base/sides and the cushion insert. The insert is removable and can be used as a separate, cute crochet cat bed if your cat needs a change.
The construction is simple, and you’ll only use basic stitches to make the entire bed:
- Magic Circle
- Single crochet stitches
- Joined rounds
- Slip stitches
- Increases
- Yarn under half double crochet stitches
Supplies
The majority of the bed is made with Hoooked Ribbon XL, which is a Category 6, Super Bulky tape yarn made from recycled materials. It is less dense than a t-shirt yarn but works up similarly. Thankfully, it is also machine washable, which is great for a pet bed.
The top of the bed insert is made with Cozy Sherpa from Loops and Threads. It is also a Super Bulky weight yarn that has a fleece-like feeling. Since it is it 100% polyester, it is also machine washable.
Below, I put some yarn substitution recommendations, but you could also hold 3 strands of worsted-weight yarn together to work the main parts of the kitty bed and any type of faux fur yarn or blanket yarn for the top of the cushion if you want a soft and cozy place for your favorite feline to curl up.
Although both types of yarn used are the same size, I used a different hook size for each yarn. The base and sides of the bed need to be stif,f so I used an 8.0 mm hook for the bottom and a 7.0 mm hook for the sides.
For the top of the cushion, with the sherpa yarn, I used a 9.0 mm hook, mainly so it would be a little easier to feel the stitches since they are harder to see with fuzzy yarn.
I used my favorite ergonomic hooks, which are so much more comfortable than regular hooks, especially when using bulky yarns. You may also find it helpful to use a stitch marker to keep track of the first stitch of each round.
Yarn Substitution Ideas
Ribbon XL
Ribbon – Premier Yarns
Cover Story Lazy Days Thick & Quick Yarn – Lion Brand Yarn
Zpaghetti – Hoooked
Cozy Sherpa
Bunny – Premier Yarns
Go for Fleece Sherpa – Lion Brand Yarn
Blanket Yarn – Bernat
Go for Faux – Lion Brand Yarn
Stitches
The stitches to make this cozy bed are just basic crochet stitches, other than the yarn under half double croche,t which is designated in the pattern as a modified half double crochet.
The base of the bed is made with single crochets worked in joined rounds. Then you’ll do a round in the front loop only without increasing. After that, you’ll use the yarn under hdc to make the sides of the bed. If you are struggling at all with the yarn under hdc, check out this post, which has a few pictures that can guide you.
The removable cushion is joined rounds of single crochets for both the top and bottom sections.
Save this Cat Bed on Pinterest!
Buy the ad-free PDF version:
Free Cozy Cat Bed Crochet Pattern
Skill Level: Easy
Gauge: 4” = 9.5 rounds from center
Finished Size: 15” across x 5.5” tall
Supplies
US size L/11, 8.0 mm crochet hook
US size 7.00 mm crochet hook
US size M/N 9.0 mm crochet hook
Hoooked Ribbon XL (Category 6, Super Bulky tape yarn)
- Sample used approximately 478 yds (32.1 oz) in Early Dew
Loops & Threads Cozy Sherpa (Category 6, Super Bulky fuzzy yarn)
- Sample used approximately 78 yds (5.92 oz) in Blanc
Large Eye Yarn Needle
Scissors
Stitch Markers
Abbreviations
ch: chain
st: stitch
sc: single crochet
sl st: slip stitch
inc: increase (2 single crochets in the same stitch)
mhdc: modified half double crochet (see special stitches)
Notes
The bed and bottom of the cushion are made with Hoooked Ribbon XL (tape) yarn. The top of the removable cushion is made with Cozy Sherpa (fuzzy) yarn.
As you work on the cushion, you’ll want to make sure you check that it will fit in the bottom of the bed. Because fuzzy yarns vary so much, you may need a different number of rounds for the top of the cushion to match the bottom of the cushion. I changed to a larger hook size for the top of the cushion only because it was easier to feel my stitches since they are hard to see with most types of fuzzy yarn.
You do not have to change hooks for the bed. The entire thing can be worked with the L 8.0 mm hook. The sides will be slightly taller and a little less stiff.
The placement of the increases was not varied so the base and cushion have a slight hexagonal shape.
If you want to make a larger bed, keep adding rounds to the bottom of the bed with 6 increases each round. There is ample space for my 4-month-old kitten and my petite adult cat, but you may need to increase the size for a larger cat or a small dog.
Special Stitches
Modified half double crochet (mhdc): yarn under, insert hook into stitch, pull up a loop, yarn over, pull through all three loops on the hook.
Yarn under: wrap yarn around the hook from front to back instead of back to front like a yarn over.
Cat Bed Pattern Instructions
Bottom of the Bed
Start a magic ring with L 8.0 mm hook
Round 1: 6 sc in ring, tighten to close, join with a sl st to the first sc. (6)
Round 2: ch 1, inc in each st around, join with a sl st to the first sc. (12)
Round 3: ch 1, *sc, inc, repeat from * around, join with a sl st to the first sc. (18)
Round 4: ch 1, *2 sc, inc, repeat from * around, join with a sl st to the first sc. (24)
Round 5: ch 1, *3 sc, inc, repeat from * around, join with a sl st to the first sc. (30)
Round 6: ch 1, *4 sc, inc, repeat from * around, join with a sl st to the first sc. (36)
Round 7: ch 1, *5 sc, inc, repeat from * around, join with a sl st to the first sc. (42)
Round 8: ch 1, *6 sc, inc, repeat from * around, join with a sl st to the first sc. (48)
Round 9: ch 1, *7 sc, inc, repeat from * around, join with a sl st to the first sc. (54)
Round 10: ch 1, *8 sc, inc, repeat from * around, join with a sl st to the first sc. (60)
Round 11: ch 1, *9 sc, inc, repeat from * around, join with a sl st to the first sc. (66)
Round 12: ch 1, *10 sc, inc, repeat from * around, join with a sl st to the first sc. (72)
Round 13: ch 1, *11 sc, inc, repeat from * around, join with a sl st to the first sc. (78)
Round 14: ch 1, *12 sc, inc, repeat from * around, join with a sl st to the first sc. (84)
Round 15: ch 1, *13 sc, inc, repeat from * around, join with a sl st to the first sc. (90)
Round 16: ch 1, *14 sc, inc, repeat from * around, join with a sl st to the first sc. (96)
Round 17: ch 1, *15 sc, inc, repeat from * around, join with a sl st to the first sc. (102)
Round 18: ch 1, *16 sc, inc, repeat from * around, join with a sl st to the first sc. (108)
Round 19: ch 1, *17 sc, inc, repeat from * around, join with a sl st to the first sc. (114)
Sides of the Bed
Switch to 7.0 mm hook. You’ll no longer be increasing for the rest of the bed. If you find your sides are curving in, you can flip the bed inside out to work the rest of the rounds. This can help the sides stay straight.
Round 20: ch 1, sc flo in each st around, join with a sl st to the first sc. (114)
Rounds 21-32: ch 1, mhdc in each st around, join with a sl st to the first mhdc. (114)
Invisible fasten off the final round and weave in all ends.
Bottom of Cushion
Start a magic ring with L 8.0 mm hook
Round 1: 6 sc in ring, tighten to close, join with a sl st to the first sc. (6)
Round 2: ch 1, inc in each st around, join with a sl st to the first sc. (12)
Round 3: ch 1, *sc, inc, repeat from * around, join with a sl st to the first sc. (18)
Round 4: ch 1, *2 sc, inc, repeat from * around, join with a sl st to the first sc. (24)
Round 5: ch 1, *3 sc, inc, repeat from * around, join with a sl st to the first sc. (30)
Round 6: ch 1, *4 sc, inc, repeat from * around, join with a sl st to the first sc. (36)
Round 7: ch 1, *5 sc, inc, repeat from * around, join with a sl st to the first sc. (42)
Round 8: ch 1, *6 sc, inc, repeat
from * around, join with a sl st to the first sc. (48)
Round 9: ch 1, *7 sc, inc, repeat from * around, join with a sl st to the first sc. (54)
Round 10: ch 1, *8 sc, inc, repeat from * around, join with a sl st to the first sc. (60)
Round 11: ch 1, *9 sc, inc, repeat from * around, join with a sl st to the first sc. (66)
Round 12: ch 1, *10 sc, inc, repeat from * around, join with a sl st to the first sc. (72)
Round 13: ch 1, *11 sc, inc, repeat from * around, join with a sl st to the first sc. (78)
Round 14: ch 1, *12 sc, inc, repeat from * around, join with a sl st to the first sc. (84)
Round 15: ch 1, *13 sc, inc, repeat from * around, join with a sl st to the first sc. (90)
Round 16: ch 1, *14 sc, inc, repeat from * around, join with a sl st to the first sc. (96)
Round 17: ch 1, *15 sc, inc, repeat from * around, join with a sl st to the first sc. (102)
Round 18: ch 1, *16 sc, inc, repeat from * around, join with a sl st to the first sc. (108)
Keep the working yarn to join the top and bottom of the cushion.
Top of the Cushion
Start a magic ring with M/N 9.0 mm hook and Sherpa yarn
Round 1: 6 sc in ring, tighten to close, join with a sl st to the first sc. (6)
Round 2: ch 1, inc in each st around, join with a sl st to the first sc. (12)
Round 3: ch 1, *sc, inc, repeat from * around, join with a sl st to the first sc. (18)
Round 4: ch 1, *2 sc, inc, repeat from * around, join with a sl st to the first sc. (24)
Round 5: ch 1, *3 sc, inc, repeat from * around, join with a sl st to the first sc. (30)
Round 6: ch 1, *4 sc, inc, repeat from * around, join with a sl st to the first sc. (36)
Round 7: ch 1, *5 sc, inc, repeat from * around, join with a sl st to the first sc. (42)
Round 8: ch 1, *6 sc, inc, repeat from * around, join with a sl st to the first sc. (48)
Round 9: ch 1, *7 sc, inc, repeat from * around, join with a sl st to the first sc. (54)
Round 10: ch 1, *8 sc, inc, repeat from * around, join with a sl st to the first sc. (60)
Round 11: ch 1, *9 sc, inc, repeat from * around, join with a sl st to the first sc. (66)
Round 12: ch 1, *10 sc, inc, repeat from * around, join with a sl st to the first sc. (72)
Round 13: ch 1, *11 sc, inc, repeat from * around, join with a sl st to the first sc. (78)
Round 14: ch 1, *12 sc, inc, repeat from * around, join with a sl st to the first sc. (84)
Round 15: ch 1, *13 sc, inc, repeat from * around, join with a sl st to the first sc. (90)
Round 16: ch 1, *14 sc, inc, repeat from * around, join with a sl st to the first sc. (96)
Join the Top and Bottom of the Cushion
Hold the top and bottom of the cushions together and line up the increases, slip stitch or whip stitch around both the bottom and top of the cushion using the tape yarn. Fasten off and weave in ends.
When you are ready for another adorable project for your cat, don’t miss this cute cat sweater crochet pattern by Cheryl and Crochet365Knittoo!
Will you share pictures of your finished projects?
- Tag Stitching Together on Instagram with @stitching_together and use the #stitchingtog
- Upload your picture in the Tried It section of this pin
- Share your work in the Stitching Together Community.