Magic Circle Crochet Tutorial
Disclosure: This post may contain affiliate links. As an Amazon Associate, I earn from qualifying purchases. Please visit my Privacy Policy for disclosures and more information.
No matter what you call it, a circle, ring, or loop, this magic isn’t out of your reach and doesn’t require a wand (unless you count your hook.) Join me in walking through this step-by-step magic circle crochet tutorial to demystify this technique.
What is the Crochet Magic Circle?
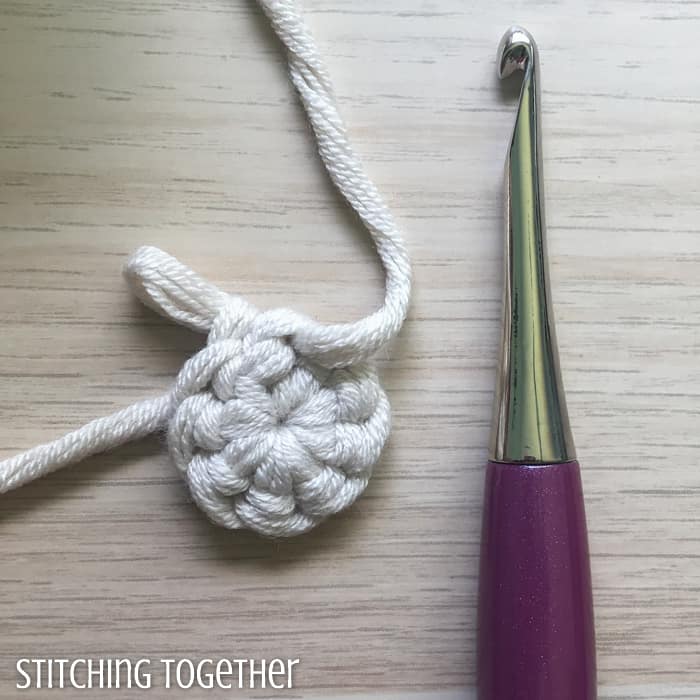
The magic circle is a crochet technique that allows you to start working in the round WITHOUT a large hole in the center.
The advantage of the magic ring method is that you can completely close the center of the ring which is especially helpful in projects that shouldn’t have holes, like amigurumi.
Patterns that don’t use the magic circle generally instruct you to use a short starting chain, join that chain in a circle with a slip stitch to the first chain and then work your first round right into that circle (chain 2 method). There isn’t a way to tighten the center of the circle so you are left with a hole.
By starting with a loop or 2 of yarn, the magic ring method allows you to tighten the center of the ring after you’ve completed your first round of stitches which gives you a tight start to your project.
The magic circle works well for crochet patterns that require starting with a circle like amigurumi, granny squares, and more. After starting with a crochet magic ring, you can go on to work in joined rounds or a continuous spiral.
Related: Moss Stitch Tutorial
One Loop or Two Loops? Learning the Double Magic Circle
There are different varieties of the magic circle, some starting with one adjustable loop and some starting with two. I’ve even heard of starting with more loops, but I’ve never tried that myself.
Although either way takes time to master the single adjustable ring method IS slightly easier. You are working around less yarn which doesn’t get as squirrely as two loops of yarn.
However, I find that two loops of yarn give a more secure center for the magic ring technique that is less likely to unravel. I’ve seen too many people desperately sad that their favorite granny squares started to come apart because the loop came undone.
Keep in mind that no matter which method you use moving forward, you still want to make sure that the tail end is woven in securely by using a yarn needle.
Related: sc rib stitch
Be sure to save this tutorial so you can come back to it
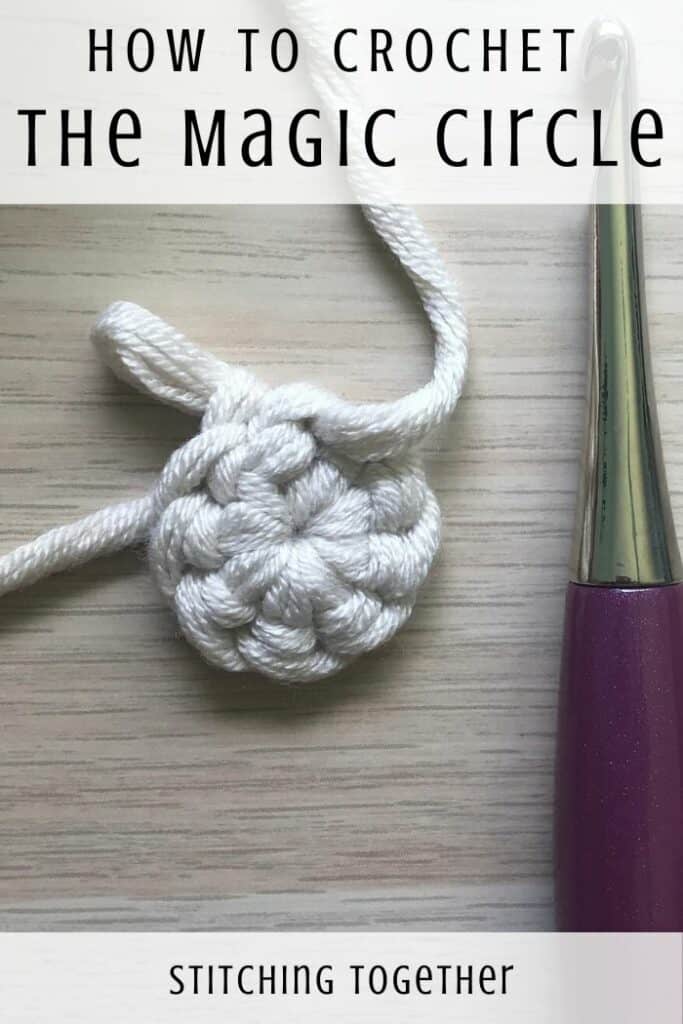
How do you make a Magic Circle Crochet?
Can you believe all the magic starts just by wrapping yarn around your fingers three times? You don’t need a chain stitch or slip knot to start this technique. When you start you’ll probably want to use two or three fingers to wrap your yarn around but as you get the hang of it, you’ll likely be able to use just one finger or your thumb.
After you have the circle of yarn wrapped, put your hook under all three strands, grab the first one, which is the working end of the yarn, and pull it under the other two strands. Yarn over and pull through the loop on your hook securing the two loops which will be the center of your ring.
Chain the number of chains you need for your pattern then start the first stitch by working into the loop. This technique works great for single crochet, half double crochet, double crochet, and treble crochet stitches.
When you’ve completed all your stitches, pull the loops closed using the yarn tail and join the last stitch with the first using a slip stitch. That’s it!
Are you ready to walk through the photo tutorial? The right-handed tutorial is first followed by the exact same step by step instructions with left-handed pictures.
You’ll need some yarn and an appropriately sized hook to practice the magic loop.
I am using my Furls Odyssey Crochet Hook and Bernat Beyond Yarn.
Magic Circle Crochet Tutorial – Right Handed
Start by placing the tail end of the yarn across two or three fingers on your left hand so that the tail end is away from your body
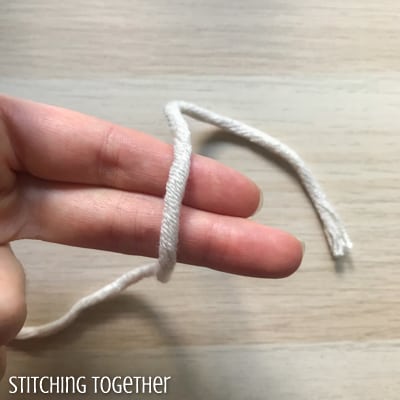
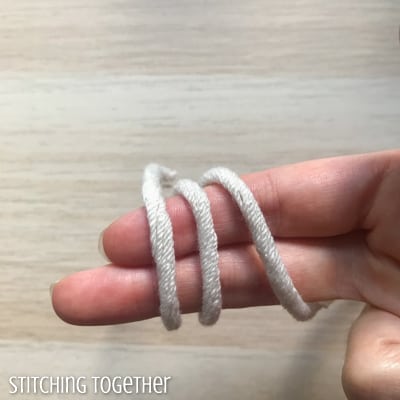
Wrap yarn around your fingers two times so you have 3 strands on your fingers.
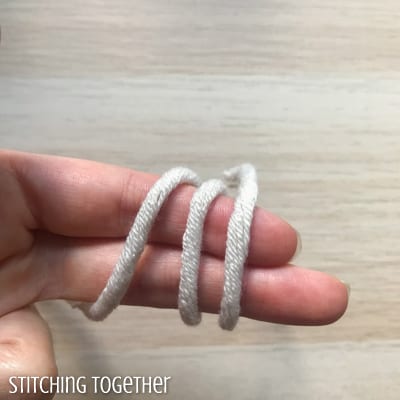
Hold the tail end with your other fingers and insert your hook under all three strands and grab the first strand.
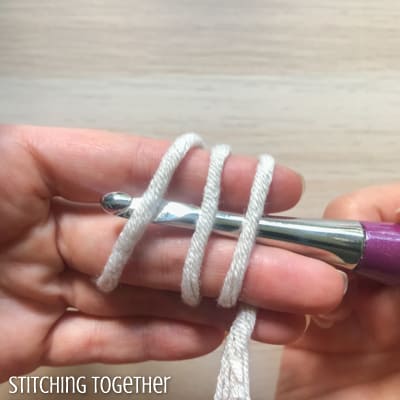
Pull the first strand under both the other strands of yarn.
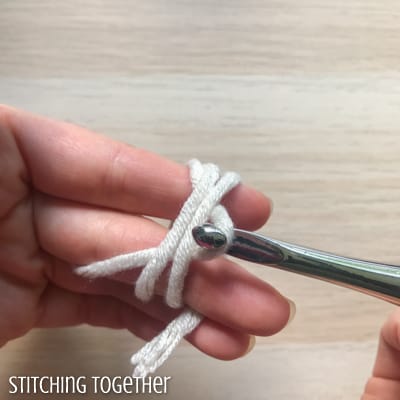
Carefully pull all the strands of yarn off of your fingers keeping the loop on your crochet hook.
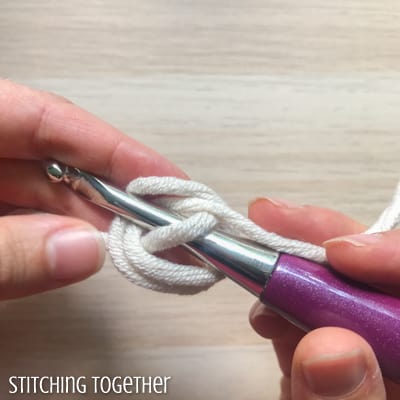
Yarn over
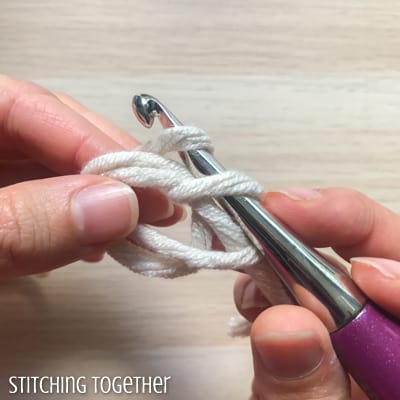
pull through the loop on the hook to secure the circle.
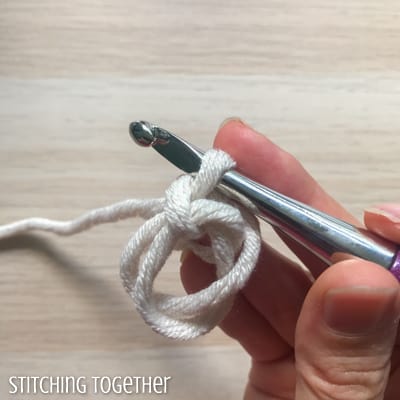
Chain 1 (for single crochet or more for other stitches)
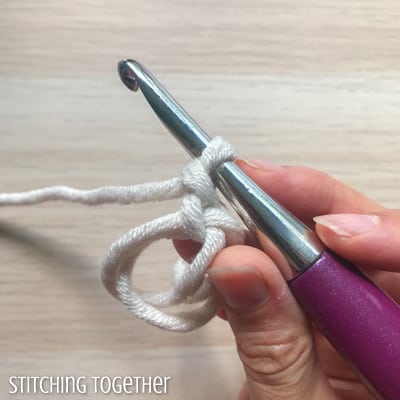
Insert hook through the middle of the loop – you’ll be working the stitches around the top 2 strands of yarn.
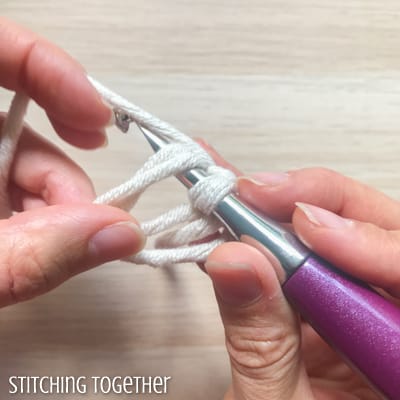
Yarn over and pull up a loop.
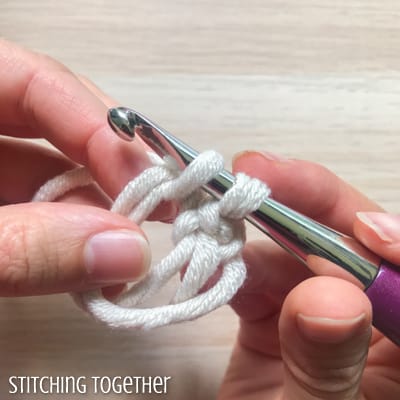
Yarn over and pull through both loops on the crochet hook. You’ve just made your first single crochet stitch in your ring.
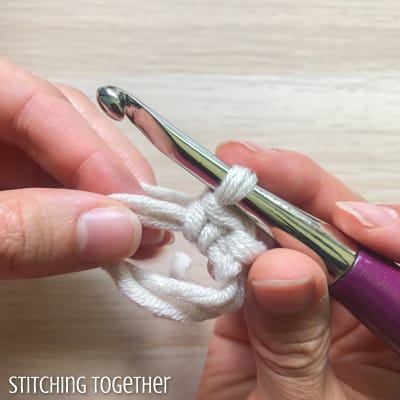
Continue single crocheting in the ring – we will do 8 scs for this tutorial.
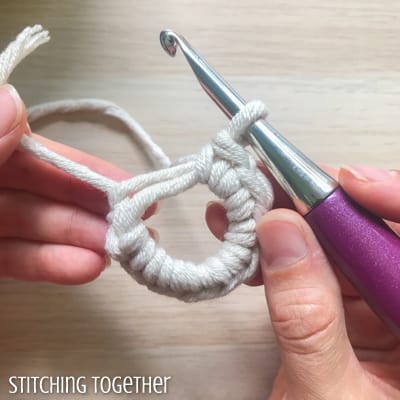
Now we will work on closing the magic ring. I am not going to lie, this can be the trickiest part, but I know you can do it! Start by pulling your working yarn loop to make it longer (you don’t want to accidentally pull it out) and remove your hook. Then pull the yarn tail end from between the other two strands of yarn.
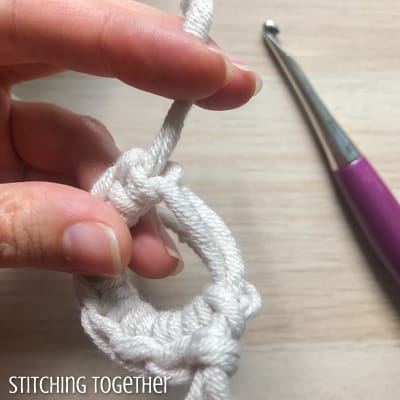
Give the tail end a little tug. The strand that tightens first is the one we want to grab. Eventually, you’ll be able to remember that the strand that comes out of the same location as the yarn tail is the one you want to pull.
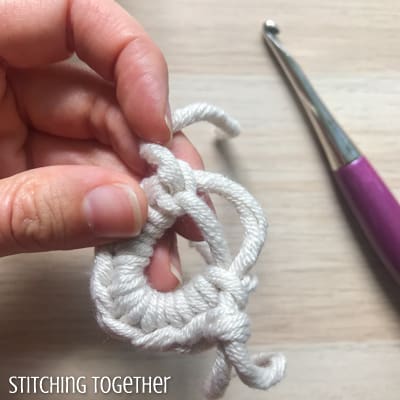
Pull the loop so that it isn’t pulling the tail in but is tightening the other loop. Keep pulling until the hole in the middle closes. If it doesn’t close all the way right now, don’t worry, it will when you pull the next loop tight.
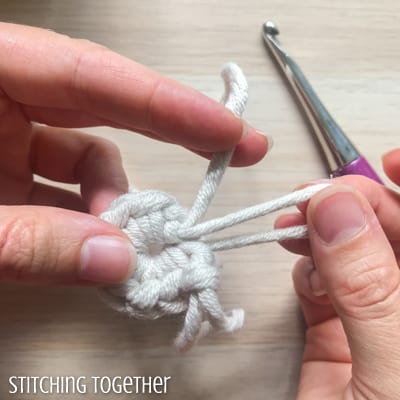
Now grab the tail and pull to close the last loop.
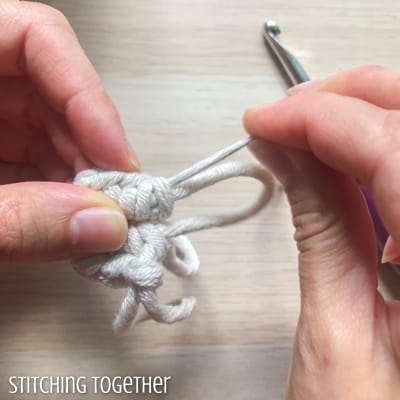
Look at that tight magic ring!
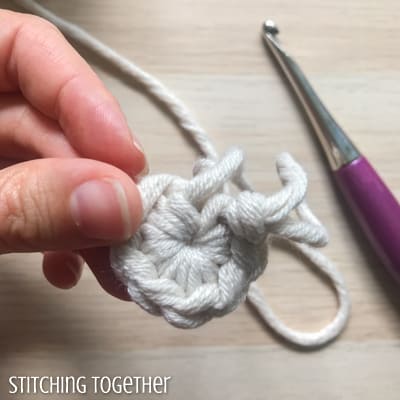
Insert your hook back into the working yarn loop.
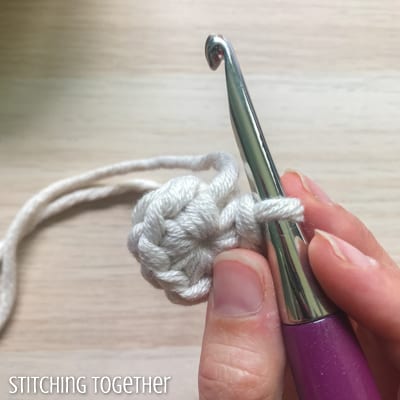
Insert your hook in the first sc of the round (You can leave the tail in the front or pull it to the back. I tend to leave it at the front since I will weave it in either way.)
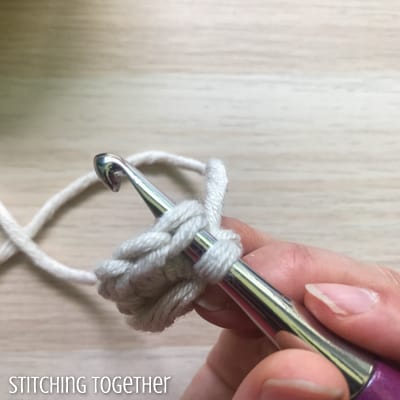
Yarn over and pull through all the loops to slip stitch the ring closed.
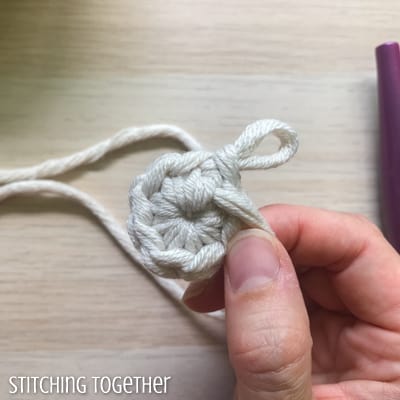
You did it. Done. Look at that. Now keep practicing until it is fluid and you don’t need to look at each step of the tutorial. You’ll never want to start without a magic ring again.
Magic Ring Crochet Tutorial – Left Handed
Start by placing the tail end of the yarn across two or three fingers on your right hand so that the yarn end is away from your body
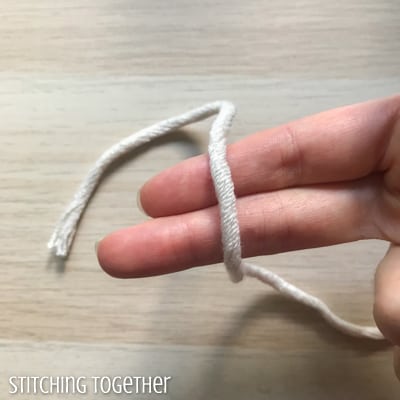
Wrap the yarn around your fingers two times so you have 3 strands on your fingers.
Then hold the tail end with your other fingers and insert your hook under all three strands and grab the first strand.
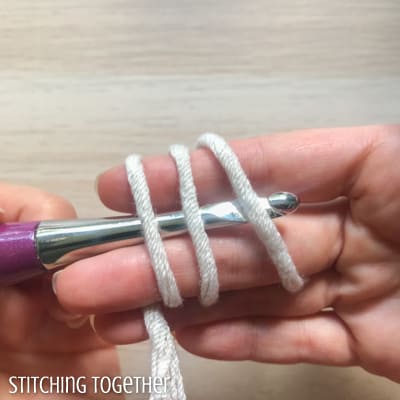
Pull the first strand under both the other strands of yarn.
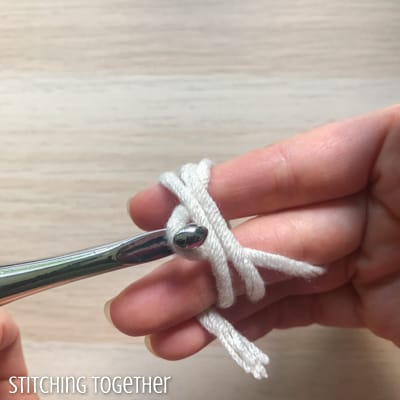
Next, carefully pull all the strands of yarn off of your fingers keeping the loop on your hook.
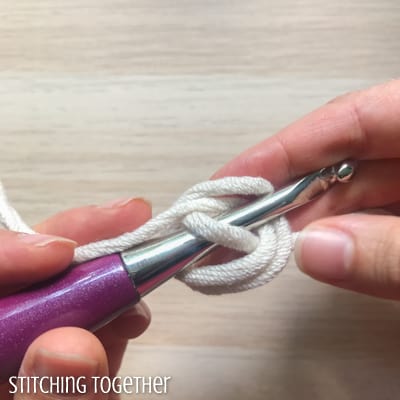
Yarn over and
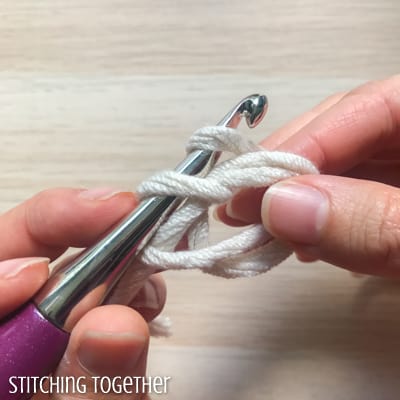
pull through the loop on the hook to secure the circle.
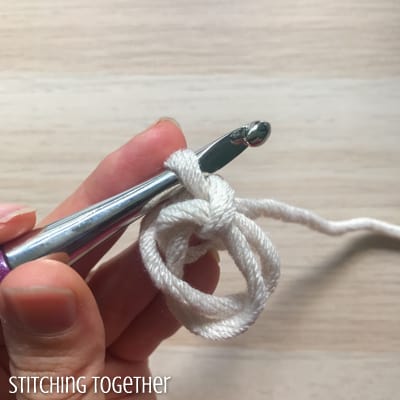
Chain 1 (for single crochet or more for other stitches)
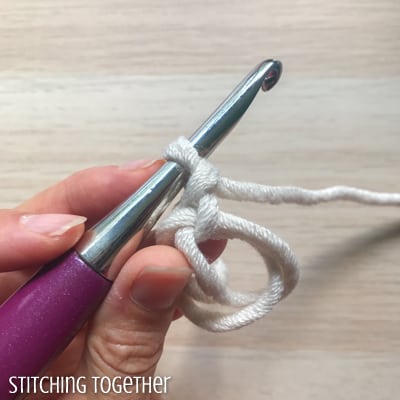
Insert hook through the middle of the loop – you’ll be working the stitches around the top 2 strands of yarn.
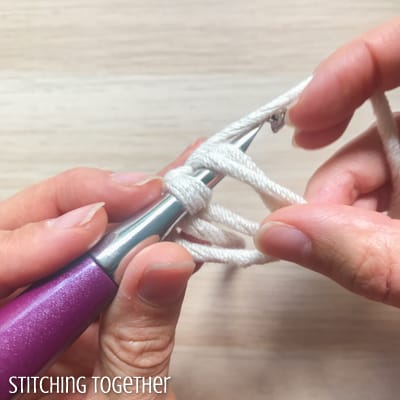
Yarn over and pull up a loop.
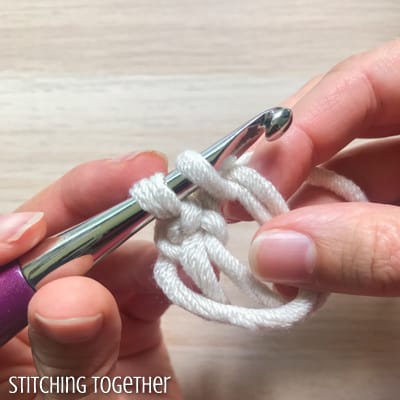
Yarn over and pull through both loops on the hook. You’ve just made your first single crochet in your ring.
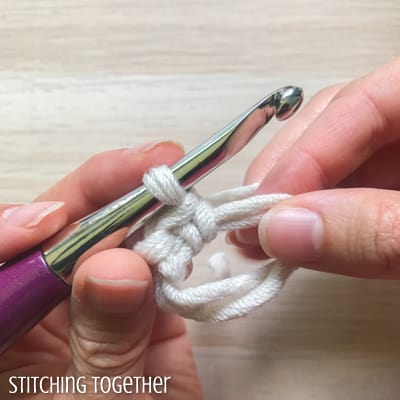
Continue single crocheting in the ring – we will do 8 scs for this tutorial.
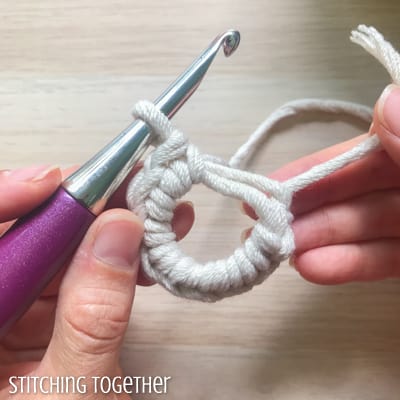
Now we will work on closing the ring. I am not going to lie, this can be the trickiest part, but I know you can do it! Start by pulling your working loop to make it longer (you don’t want to accidentally pull it out) and remove your hook. Then pull the tail end from between the other two strands of yarn.
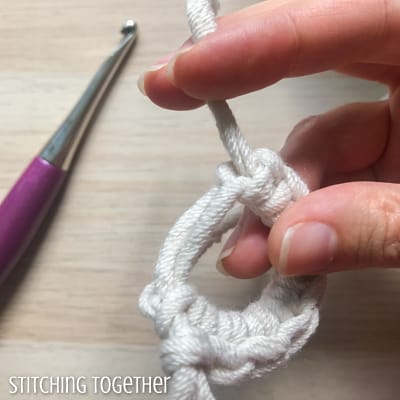
Give the tail end a little tug. The strand that tightens first is the one we want to grab. Eventually, you’ll be able to remember that the strand that comes out of the same location as the tail end is the one you want to pull.
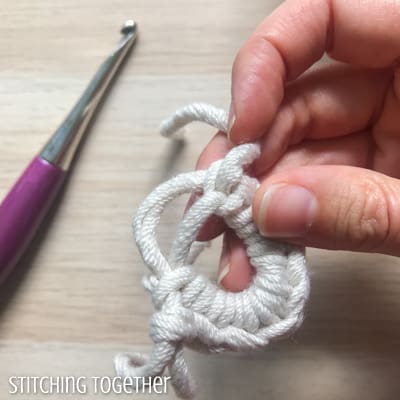
Pull the loop so that it isn’t pulling the tail in but is tightening the other loop. Keep pulling until the hole in the middle closes. If it doesn’t close all the way right now, don’t worry, it will when you pull the next loop tight.
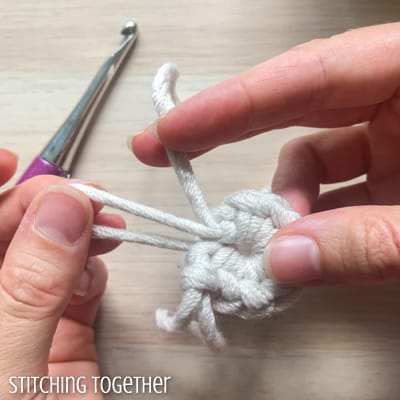
Now grab the tail and pull to close the last loop.
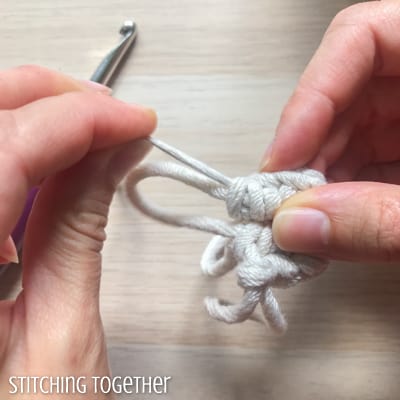
That’s it. Look at that tight ring.
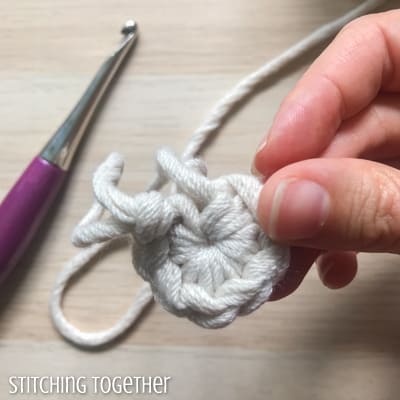
Insert your hook back into the working loop.
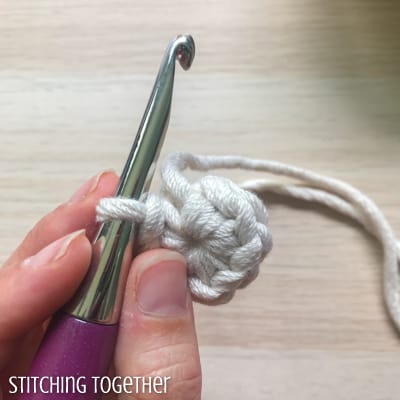
Insert your hook in the first sc of the round (You can leave the tail in the front or pull it to the back. I tend to leave it at the front since I will weave it in either way.)
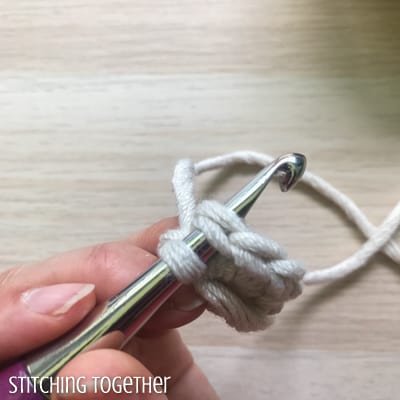
Yarn over and pull through all the loops to slip stitch the ring closed.
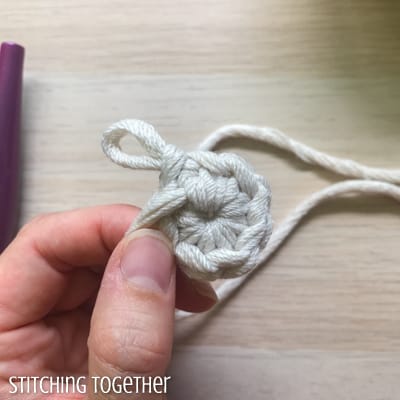
You did it. Done. Look at that. Now keep practicing until it is fluid and you don’t need to look at each step of the tutorial. You’ll never want to start without using the magic circle technique again.
Here are some quick and small crochet projects that use the magic ring crochet technique:
