The Kensington Crochet Bolero Pattern
Disclosure: This post may contain affiliate links. As an Amazon Associate, I earn from qualifying purchases. Please visit my Privacy Policy for disclosures and more information.
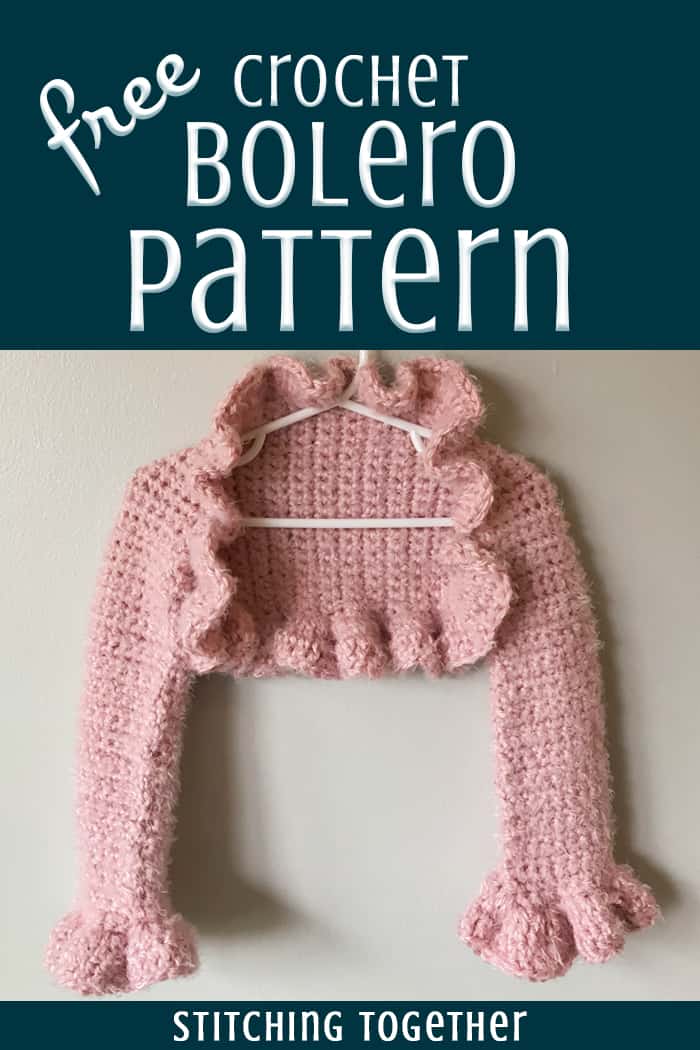
You’ve come to the right place to learn how to make a crochet bolero (crochet shrug) for girls! This adorable crochet bolero pattern can be found entirely for free below in sizes for 2 to 14 year-old girls. You can also purchase an inexpensive printable version of this pattern here. Don’t forget to save the free crochet bolero pattern on Pinterest!
Do you ever find that you know a word but you aren’t sure why you know it and aren’t totally convinced it is the correct word?
I’ve had the design for this crochet bolero bouncing around in my head ever since I made the Toddler Cocoon Shrug and it’s been called a “bolero” since then. But what on earth is a bolero and why do I know this word?
Turns out a bolero is a cropped jacket or cardigan which is cut in one piece. Huh, apparently I managed to choose the correct word even though I still don’t know why I know it. (I’m not that fancy!)
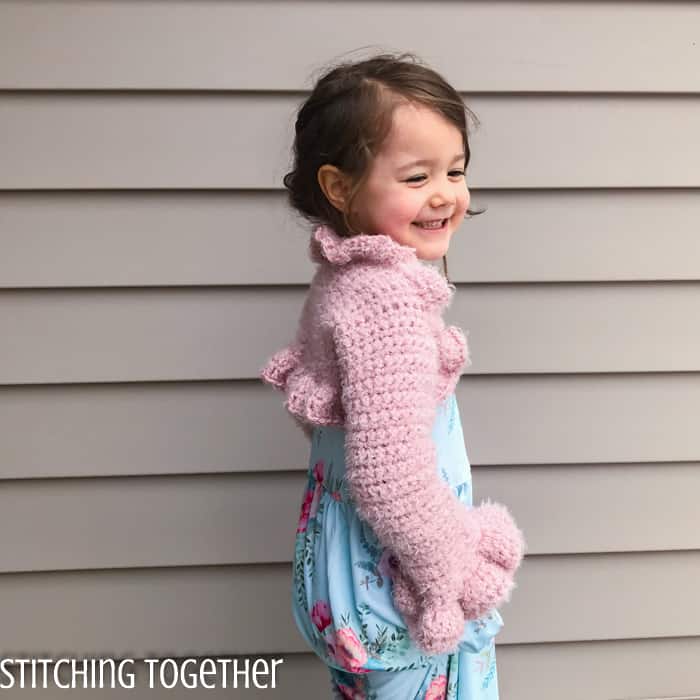
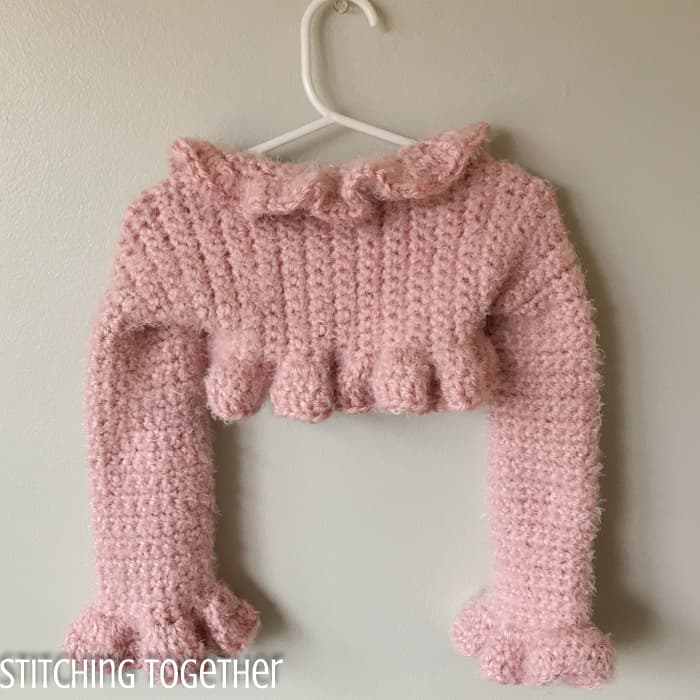
Although the crochet version of the bolero isn’t cut in one piece, it is made in one piece! You just single crochet one long rectangle, do some simple sewing and you’ve made an adorable little crochet jacket! The ruffles are easy to add and take the cuteness up a notch.
(If you sew, I’d imagine this concept would work great with some soft knit fabric. *runs to check fabric stash.*)
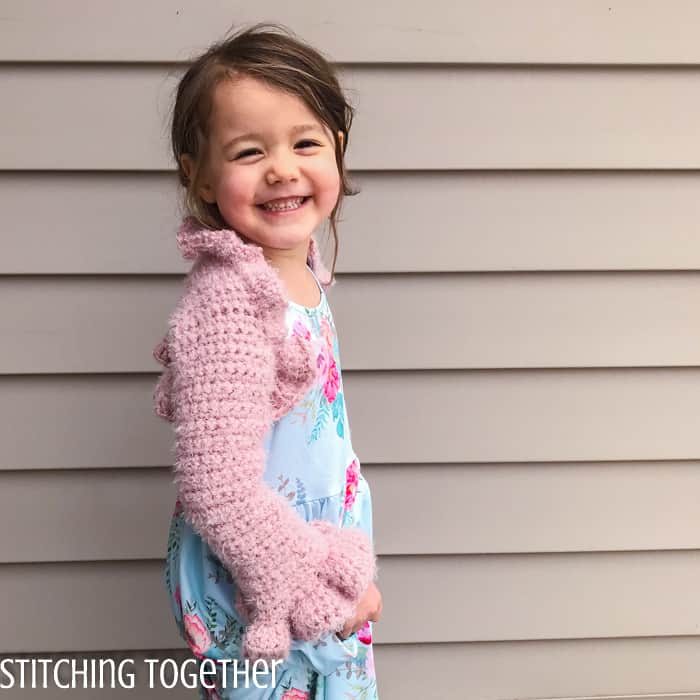
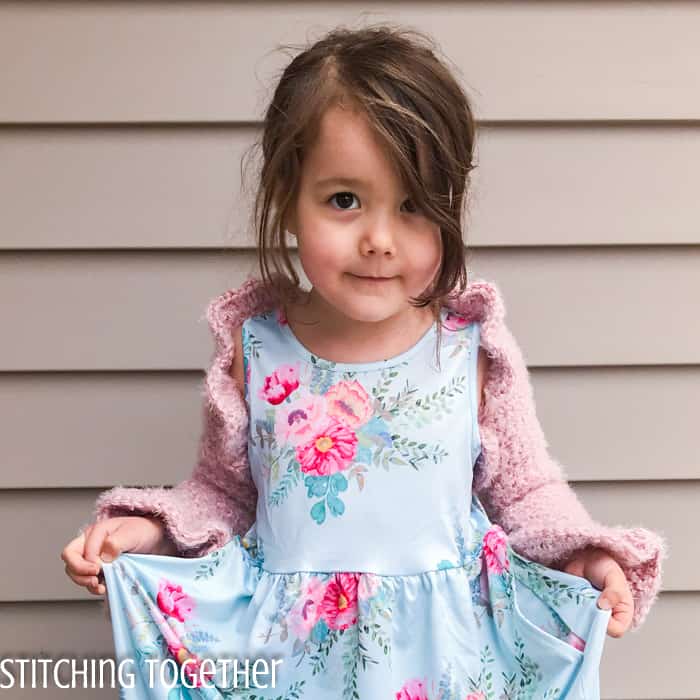
This amazingly cuddly and cozy bolero was made with Red Heart Hygge yarn. You can read more about what I think about this yarn in Luxury Crochet Scarf post. Since it is almost Easter time, I was hoping to create something that my favorite gal pal could wear over her Easter dress.
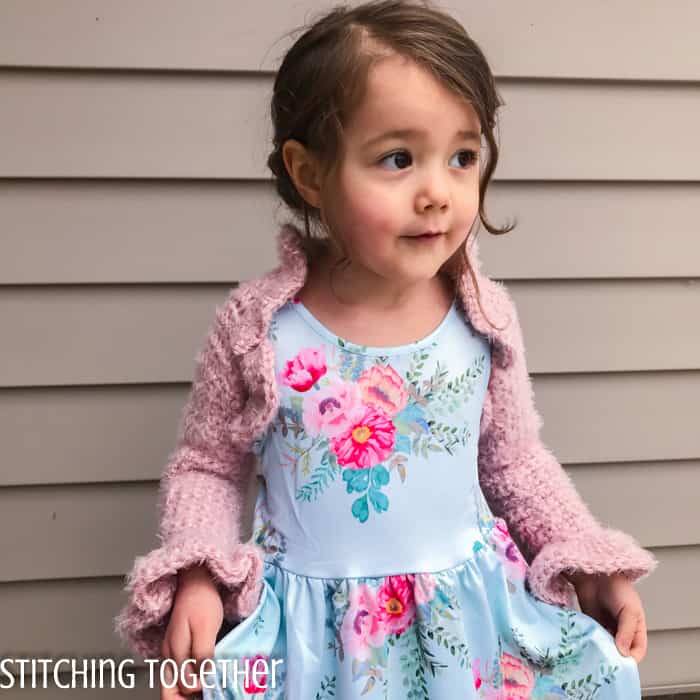
We never know what the weather will be like here in MN. Last year we had a full out blizzard in April. This year it could be hot which means air conditioners will be running and it’ll be freezing inside. Who knows!
Either way, she’ll be prepared with this warm crochet shrug which matches her new dress perfectly. Never mind that I ordered a size too large and she’ll really have to wait until next year to wear it.
Do you love that blue (supposed to be mint) dress as much as I do? You can get one on Amazon! The fabric is thin and I haven’t washed it yet but it isn’t expensive and will serve it’s purpose.)
Save the Kensington Crochet Bolero on Pinterest
The Kensington Crochet Bolero Pattern
Buy the ad- free printable PDF on Etsy or on Ravelry
Skill Level: Easy
Materials
Size L, 8.0 mm Crochet Hook (Amazon carries my favorite inexpensive hooks!)
2 skeins of #5 Bulky Yarn (5 oz/141 g, 132 yds/121 m)
-
Sample used two skeins of Red Heat Hygge in Powder
Large eye needle (these worked great with this yarn)
Gauge
4” x 4”= 12 rows by 9.5 scs
Finished Size
Sample was made to fit a 4-year-old girl – see the chart in the notes section for additional sizing information
Abbreviations
ch(s): chain(s)
sc(s): single crochet(s)
st(s): stitch(es)
dc(s):double crochet(s)
sl st(s): slip stitch(es)
Notes
The crochet bolero is made by first crocheting a long rectangle then folding it in half and sewing inward toward the center, leaving an opening large enough to allow the bolero to be put on.
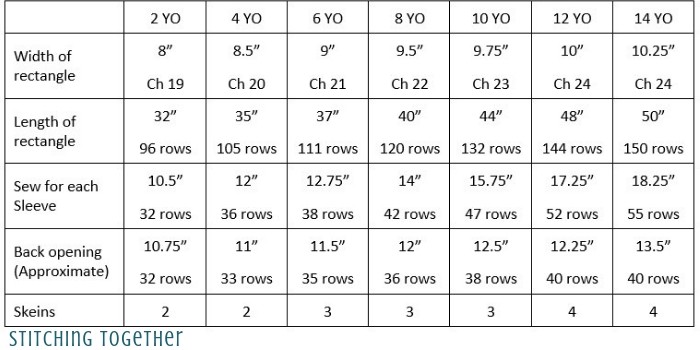
The table below provides both the starting chain and row counts as well as measurements. If you are having a difficult time matching gauge, it may be easier to follow the measurements for the size you are wanting to make.
Sizes are written in the pattern for a 2-year-old with 4, 6, 8, 10, 12 and 14 in parenthesis.
To further adjust the sizing or to ensure the best fit, there are three main measurements to take: the circumference of the upper arm, length across the body with arms held out – wrist to wrist, and the width across the back from shoulder to shoulder.
The width of the rectangle is determined by the circumference of the upper arm plus one inch. The length is determined by arm length measured wrist to wrist minus 4″ to allow to the ruffles to be added. If you don’t want ruffles, add 4″ to the length of the rectangle.
The opening of the bolero is a shoulder to shoulder measurement plus 1.25″. (The sleeve measurements were rounded to the nearest 0.25″ so the back opening measurement will only be an approximation.)
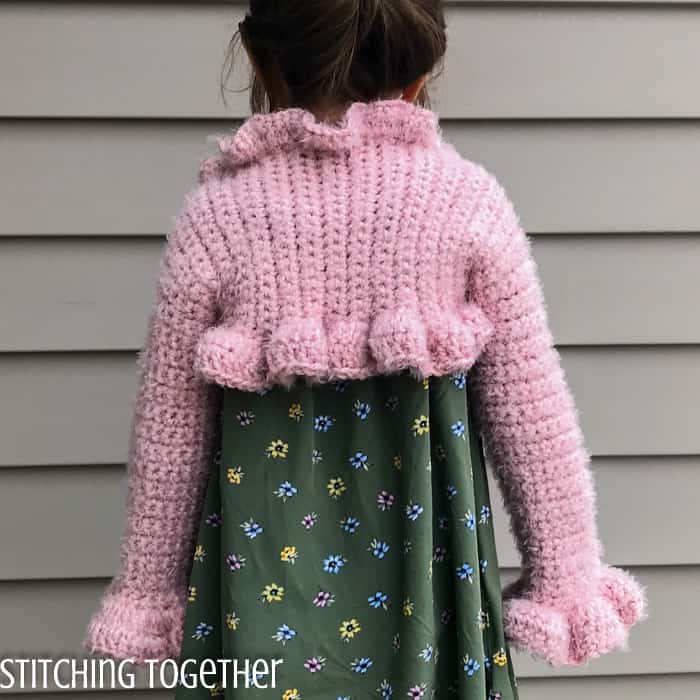
To make the shrug stay on and fit comfortably, the sleeves need to be sewn right up to the armpit, which allows the bolero to fit snugly across the back.
Pattern instructions
Ch 19 (20, 21, 22, 23, 24, 25)
Row 1: sc in the 2nd ch from the hook, sc in each ch to the end of the row, turn. (18, 19, 20, 21, 22, 23, 24 scs)
Row 2: ch 1, sc in each st to the end of the row, turn. (18, 19, 20, 21, 22, 23, 24 scs)
Repeat Row 2 for a total of 96 (105, 111, 120, 132, 144, 150) rows.
Fold the rectangle in half length-wise. Starting from the outer corner, sew the sleeves 32 (36, 38, 42, 47, 52) rows toward the center. The mattress stitch works well for seaming the sleeves. (The tutorial below is from Heart Hook Home.)
Repeat for the other side.
Adding Ruffles to the crochet bolero for girls
Sleeves
Round 1: Join yarn to any stitch on the cuff (outer edge) of the sleeve, ch 2 (counts as 1 dc), 2 dc in same st, 3 dc in each st around, join with sl st to the top of the ch 2.
Round 2: ch 2 (counts as 1 dc), dc in each dc around, join with sl st to the top of the ch 2, fasten off.
Repeat for the other sleeve.
Around the opening
Top side:
Join yarn on the right side of the opening, ch 2 (counts as 1 dc), 2 dc in same st, 3 dc in each st across, fasten off.
Bottom side:
Row 1: Rotate the bolero so the side without the ruffles is at the top and join yarn on the right side of the opening, ch 2 (counts as 1 dc), 2 dc in same st, 3 dc in each st across, turn.
Row 2: ch 2, (counts as 1 dc), dc in each st across, fasten off.
Alternate method for adding ruffles around the opening:
Round 1: Join yarn on the right side of the opening, ch 2 (counts as 1 dc), 2 dc in same st, 3 dc in each st around the entire opening, join with a sl st to the top of the ch 2.
Round 2: ch 2 (counts as 1 dc), dc in each st across one side of the opening, fasten off.
Weave in all ends.
[question]
Would you share pics of your finished projects? You can do that several ways:
-
Tag Stitching Together on Instagram with @stitching_together and use the #stitchingtog
-
Upload your picture in the Tried It section of this pin
-
Save your project on Ravelry and link it to this pattern
-
Share your work in the Stitching Together Community.
[/question]
This is adorable! Love to have a pattern for adults. Your designs are wonderful! Thank you for sharing.aa
Thanks Alice!