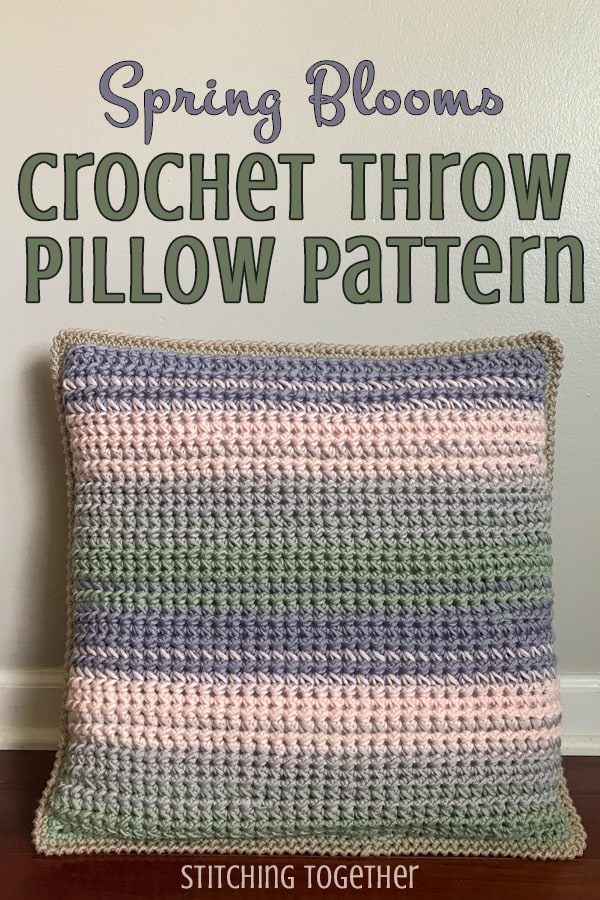
Spring Blooms Crochet Throw Pillow Pattern
Disclosure: This post may contain affiliate links. As an Amazon Associate, I earn from qualifying purchases. Please visit my Privacy Policy for disclosures and more information.
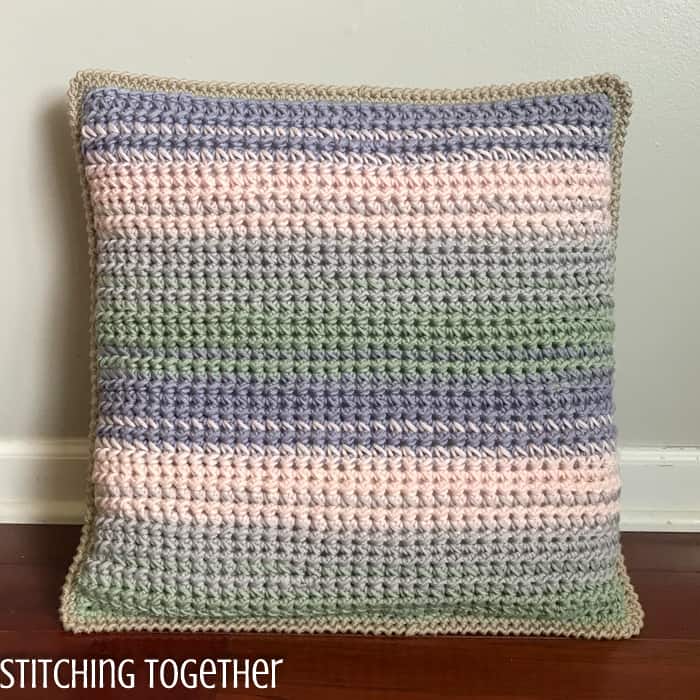
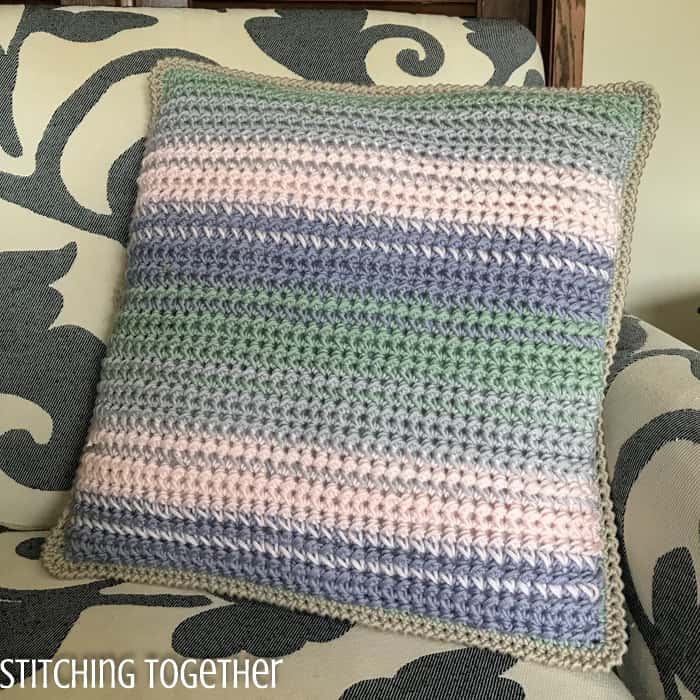
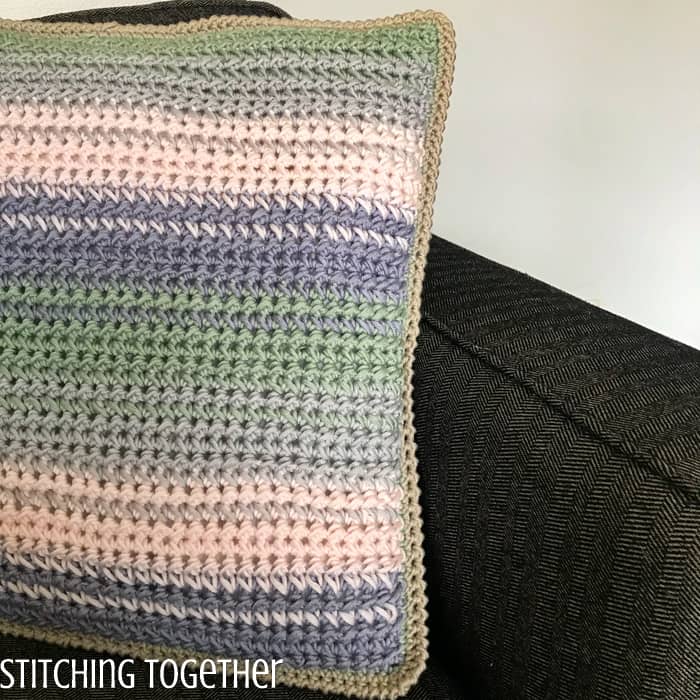
A beautiful crochet throw pillow pattern inspired by the soft spring blooms we long for each winter! Enjoy the free pattern you can find below or purchase a printable version for a small fee.
Don’t you just love the first hints of spring? Birds start chirping, trees bud, and here, in Minnesota, we actually start to see the sun regularly. It’s just a wonderful season of fresh beginnings!
The colors in this pillow are perfect for adding a little spring to your space! They aren’t too bright but will surely brighten up your space.
Related: Cactus Crochet Pillow Pattern
There are quite a few notes and stitch instructions to cover for this throw pillow pattern so please be sure to read them before getting started on the pattern.
Related: Geo Crochet Pillow Pattern

What about the yarn for the Spring Blooms Crochet Throw Pillow?
To get this absolute gorgeous blending of colors I used Caron x Pantone yarn, which is such a fun yarn concept! You get five coordinating colors all perfectly matched so you don’t even have to think about it.
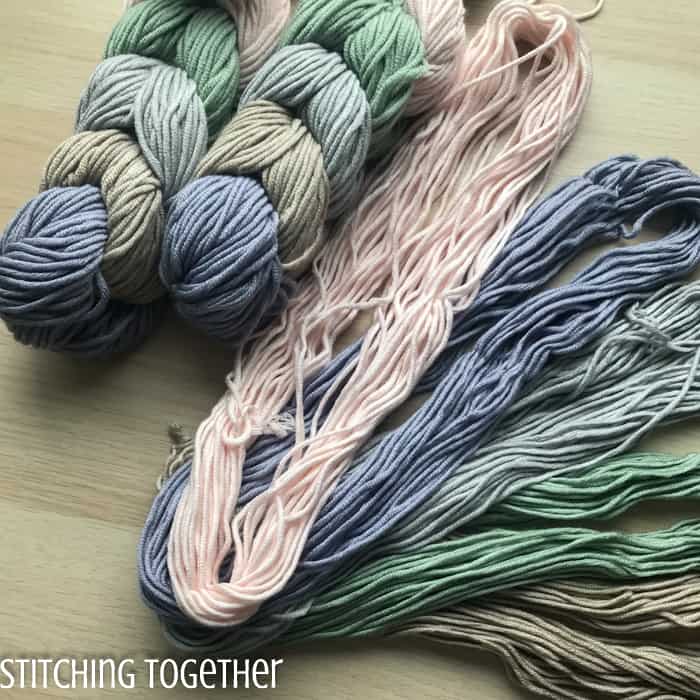
The yarn itself it a merino blend (20% Merino, 20% Nylon, and 60% Acrylic) which is soft and easy to work with. It is probably one of the thinnest, category 5 bulky yarns that I have ever used, so keep that in mind if you are looking to use a different yarn.
In each braid (each grouping of 5 mini skeins) you get 3.5 ounces total of yarn, which is 0.7 ounces per mini skein.
That’s PERFECT for a small project! Think hats or mittens.
But every time I design a new pillow cover, especially if it is has been awhile since the last one, I manage to forget they aren’t really small projects. Combine that fact with the fact that the modified half double crochet takes more yarn than a normal hdc, and you have a project that take significantly more yarn than what is in those mini skeins.
I found the regular Pantone yarn on clearance at Michaels as they are clearing it out to bring in the new Pantone Bamboo line which made using this yarn a more affordable option for me.
Related: Spring Patterns to Crochet
If you don’t want to deal with all the color changes from the mini skeins (not to mention that at least 1 mini skein in each braid had a knot in it too) or the price, using regular full size skeins of another yarn like Red Heart Soft or Vanna’s Choice would probably be easier!
Save the Spring Blooms Crochet Throw Pillow on Pinterest
Spring Blooms Crochet Throw Pillow Pattern
Skill level: Easy/Intermediate
Materials:
5 braids of Caron x Pantone (100g/3.5 oz, 116 meters / 127 yards)
- Sample used 3 braids of Caron x Pantone in Whistfully and 2 braids in Mushroom Greige.
US size J/10 6.0 mm crochet hook (My favorite hooks are available in a nice set on Amazon)
US size L 8.0 mm crochet hook (optional – you can get this great ergonomic hook right on Amazon)
20″ x 20″ pillow insert
Large Eye Tapestry Needle (These are the best and you can have them shipped to your door from Amazon!)
Gauge:
Front Side: 4″ x 4″ = 9 mhdcs by 9 rows
Back Side: 4″ by 4″ = 11 hdcs by 10.5 rows
Finished Size:
Approximately 20″ x 20″
Notes:
The ch 1 to start each row is NOT counted as a stitch.
The crochet pillow cover is worked in three different parts. The front panel is done in one piece using the modified half double crochet and multiple colors. Once the front panel is completed, a simple sc border is added around the entire edge which makes it easier to join to the back panels.
The back side is done in two different panels, which overlap to allow an opening to remove the pillow from the cover. Both back panels are done in half double crochet in a solid color. The panels are overlapped and then joined by single crocheting around the entire edge.
Once both sides are done, they are placed on top of each other with the right sides facing out then joined by single crocheting them together. Using stitch markers to hold the panels in place, first the two back panels and then the front and back sides, while adding the single crochet border helps to keep them correctly aligned.
Finally a crab stitch border is added to finish it off.
Both the front and back sides should be approximately 18″ x 18″ before adding the borders to ensure a snug fit around a 20″ by 20″ pillow.
Stitch Instructions:
Modified half double crochet: insert hook into the same stitch of the last completed stitch, pull up a loop, yo and insert hook into the next stitch pull up a loop, yo and pull through all four loops on the hook. See the Striped hdc dishcloth for pictures of how to crochet the modified half double crochet.
Modified half double crochet while pulling a different color: insert hook into the same stitch of the last completed stitch, pull up a loop of the contrasting color, yo with the main color and insert hook into the next stitch pull up a loop, yo and pull through all four loops on the hook. Crochet over the working end of the contrasting color as you complete the stitch.
Abbreviations:
ch(s): chain(s)
hdc(s): half double crochet(s)
mhdc(s):modified half double crochet(s)
fhdc(s): foundation half double crochet(s)
sl st: slip stitch
The following abbreviations are used to indicate the colors used
C1: light purple
C2: light pink
C3: silver
C4: light green
C5: tan (mushroon greige)
Spring Blooms Pillow Pattern Instructions
Front Pillow Panel
with C1 and L hook ch 41
switch to J hook
R1: hdc in 2nd ch from hook, mhdc in each ch to the end of the row, turn
R2: ch 1, hdc in the first st, mhdc in each st to the end of the row, turn
R3: ch 1, hdc, mhdc in each st to the end of the row, turn
R4: ch 1, hdc, mhdc-puling C2 (see stitch instructions) in each st to the end of the row, turn
R5: ch 1, hdc, mhdc in each st to the end of the row, turn
R6: ch 1, hdc, mhdc-puling C2 in each st to the end of the row, turn
R7: with C2 ch 1, hdc, mhdc in each st to the end of the row, turn
R8: ch1, hdc, mhdc in each st to the end of the row, turn
R9: ch1, hdc, mhdc in each st to the end of the row, turn
R10: ch 1, hdc, mhdc-puling C3 in each st to the end of the row, turn
R11: ch 1, hdc, mhdc in each st to the end of the row, turn
R12: ch 1, hdc, mhdc-puling C3 in each st to the end of the row, turn
R13: with C3 ch 1, hdc, mhdc in each st to the end of the row, turn
R14: ch1, hdc, mhdc in each st to the end of the row, turn
R15: ch1, hdc, mhdc in each st to the end of the row, turn
R16: ch 1, hdc, mhdc-puling C4 in each st to the end of the row, turn
R17: ch 1, hdc, mhdc in each st to the end of the row, turn
R18: ch 1, hdc, mhdc-puling C4 in each st to the end of the row, turn
R19: with C4 ch 1, hdc, mhdc in each st to the end of the row, turn
R20: ch1, hdc, mhdc in each st to the end of the row, turn
R21: ch1, hdc, mhdc in each st to the end of the row, turn
R22: ch 1, hdc, mhdc-puling C1 in each st to the end of the row, turn
R23: ch 1, hdc, mhdc in each st to the end of the row, turn
R24: ch 1, hdc, mhdc-puling C1 in each st to the end of the row, turn
R25: with C1, ch 1, hdc, mhdc in each st to the end of the row, turn
R26: ch 1, hdc, mhdc in each st to the end of the row, turn
R27: ch 1, hdc, mhdc in each st to the end of the row, turn
R28: ch 1, hdc, mhdc-puling C2 in each st to the end of the row, turn
R29: ch 1, hdc, mhdc in each st to the end of the row, turn
R30: ch 1, hdc, mhdc-puling C2 in each st to the end of the row, turn
R31: with C2 ch 1, hdc, mhdc in each st to the end of the row, turn
R32: ch1, hdc, mhdc in each st to the end of the row, turn
R33: ch1, hdc, mhdc in each st to the end of the row, turn
R34: ch 1, hdc, mhdc-puling C3 in each st to the end of the row, turn
R35: ch 1, hdc, mhdc in each st to the end of the row, turn
R36: ch 1, hdc, mhdc-puling C3 in each st to the end of the row, turn
R37: with C3 ch 1, hdc, mhdc in each st to the end of the row, turn
R38: ch1, hdc, mhdc in each st to the end of the row, turn
R39: ch1, hdc, mhdc in each st to the end of the row, turn
R40: ch 1, hdc, mhdc-puling C4 in each st to the end of the row, turn
R41: ch 1, hdc, mhdc in each st to the end of the row, turn
R42: ch 1, hdc, mhdc-puling C4 in each st to the end of the row, turn
R43: with C4 ch 1, hdc, mhdc in each st to the end of the row, turn
R44: ch1, hdc, mhdc in each st to the end of the row, turn
R45: ch1, hdc, mhdc in each st to the end of the row, turn
Border: with C4, ch 1, sc around the entire edge of the front panel placing a sc, ch 1, sc in each corner, join with a sl st to the first sc . When working along the top and bottom edges add 9 stitches by putting 2 sc in the same stitch approximately every 3 stitches. (Adding stitches makes it easier to attach to the back panel.)
Back Pillow Panels
Back Panels – make 2
Using C5, ch 52 or fhdc 51
R1: hdc in the 2nd ch from hook and in each ch to the end of the row, turn
R2: ch 1, hdc in each st, turn
Repeat row 2 for a total of 27 rows or until panel measures approximately 10″ long
Border: Overlap the 2 panels so the entire length of the overlapping panels is approximately 18″. Ch 1, sc around the entire edge of the back side placing a sc, ch 1, sc in each corner, join with a sl st to the first sc.
Final Border:
Round 1: Place the front side and back side together with the right sides facing out. Join C5 through both sides, ch 1 and sc around the entire edge through both sides, join with a sl st to the first sc.
Round 2: ch 1, reverse sc (crab stitch) in each st, join with sl st to the first st of the round.
Would you share pics of your finished projects? You can do that in several ways:
-
Tag Stitching Together on Instagram with @stitching_together and use the #stitchingtog
-
Upload your picture in the Tried It section of this pin
-
Save your project on Ravelry and link it to this pattern
-
Share your work in the Stitching Together Community.