How to Crochet the Crab Stitch or Reverse Single Crochet
Disclosure: This post may contain affiliate links. As an Amazon Associate, I earn from qualifying purchases. Please visit my Privacy Policy for disclosures and more information.
Have you been wanting to learn how to crochet the crab stitch (reverse single crochet), but think it looks a bit too complicated? It really isn’t difficult and with this step-by-step photo tutorial, you can learn the crab stitch. If you can single crochet, you can do it in reverse!
What does RSC mean in Crocheting?
RSC stands for reverse single crochet and is a great border technique for your crochet projects.
The crab stitch is also known as a reverse single crochet because you are literally working in the opposite direction you would normally work.
So for right-handed crocheters, you will be working from left to right and left-handed crocheters will be working from right to left. That’s it – the basic stitch is still a single crochet, just worked in the reverse direction.
It does take a bit of practice to get used to, but once you do, this will be one of your favorite crochet stitches.
The crab stitch is great for borders. It adds unique texture and detail without being complicated or frilly. (Not that there is anything wrong with frilly but sometimes you just want to keep it simple!)
The stitch is also dense so it is great if you are looking for a border that does not have holes.
How do you do a Reverse Single Crochet?
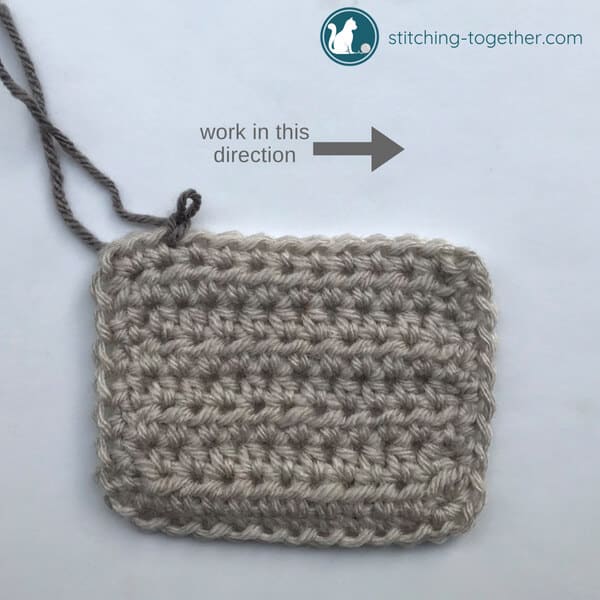
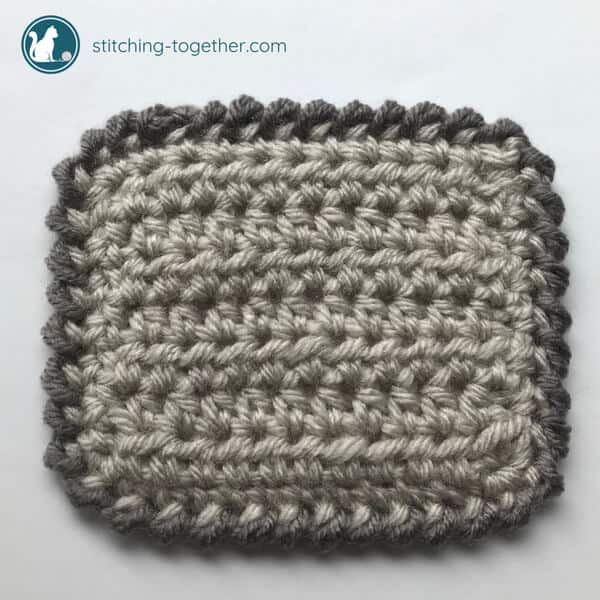
To get started I’ve crocheted a little rectangle with a single crochet stitch border around the entire outside edge.
If you are using the crab stitch as a border around something like a dishcloth or a blanket (see the Diamond Lace Baby Blanket or the Easy Crochet Baby Blanket), doing a round of regular single crochets before adding the reverse single crochet border can make the entire process much easier.
Below you’ll find step-by-step photo tutorials for both right-handers and left-handers.
Don’t forget to save this tutorial on Pinterest so you can come back to it later!

How to Crochet the Crab Stitch | Right-Handed Tutorial
(The following section is for righties. Lefties, scroll down to find your photo tutorial.)
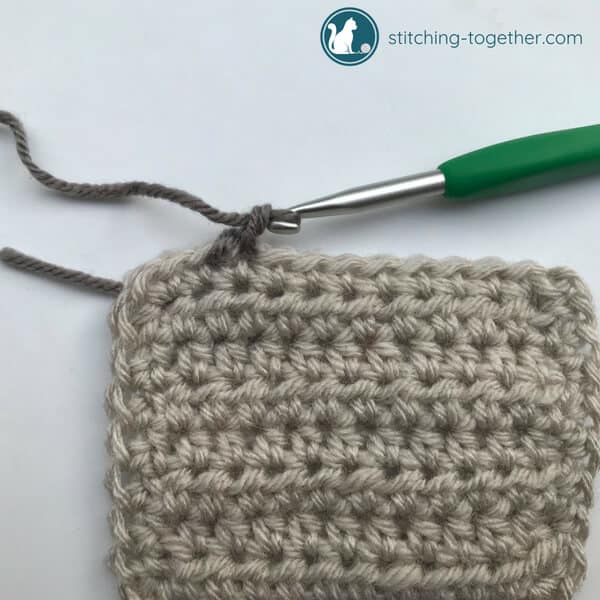
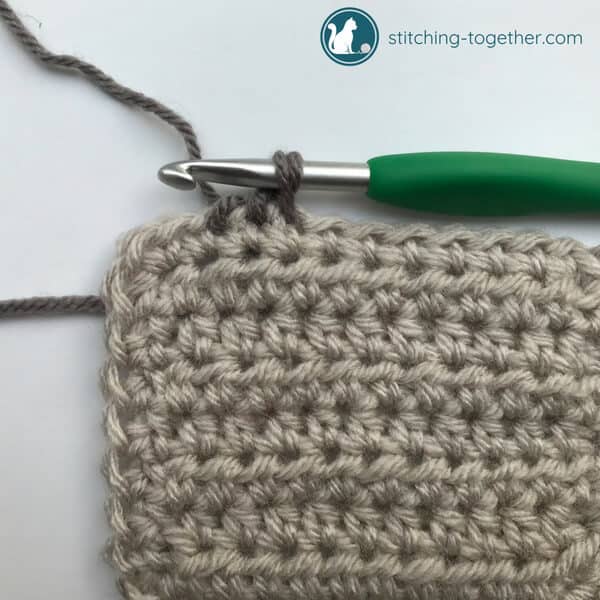
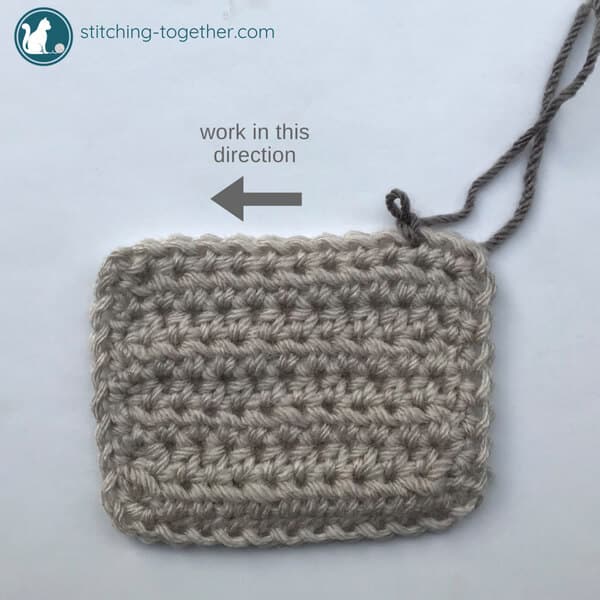
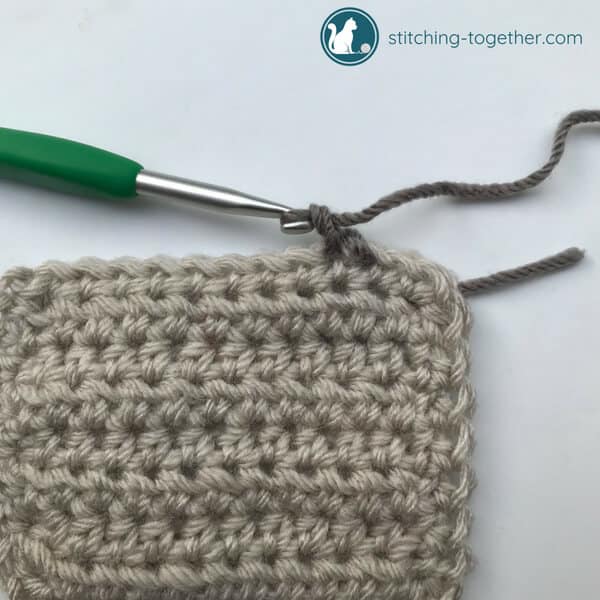
Making sure the right side is facing you, join yarn and chain 1 or just ch 1 if you are using the same yarn as the body of your project. The reason the crab stitch is also called the reverse single crochet is because you are working in the opposite direction you normally work. Instead of going into the stitch to the left (when you are looking at it) you are going to work into the stitch to the right.
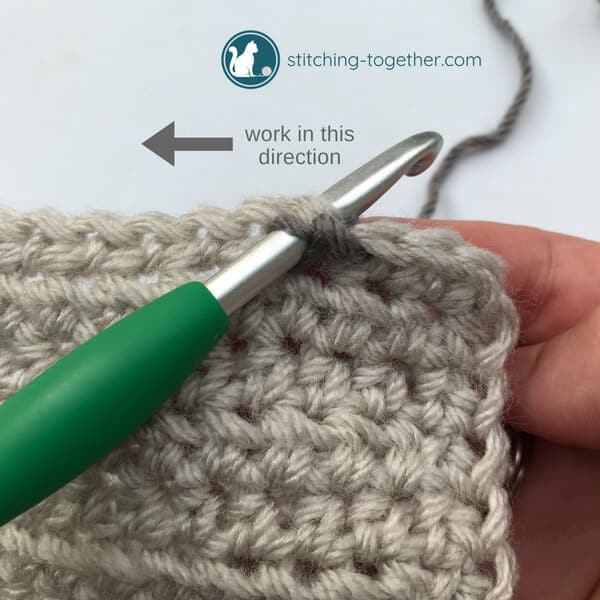
Insert your hook into the stitch to the right of your chain.
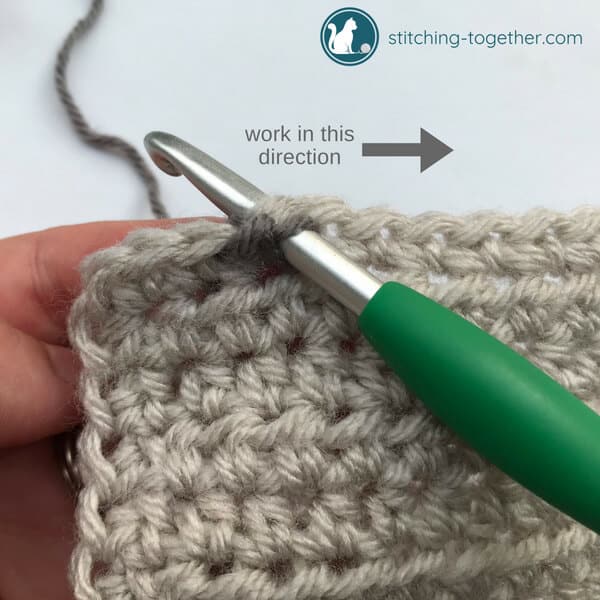
Yarn over and pull up loop like a normal single crochet except, as you can see, your stitches will be twisted.

Yarn over and pull through both loops on hook.
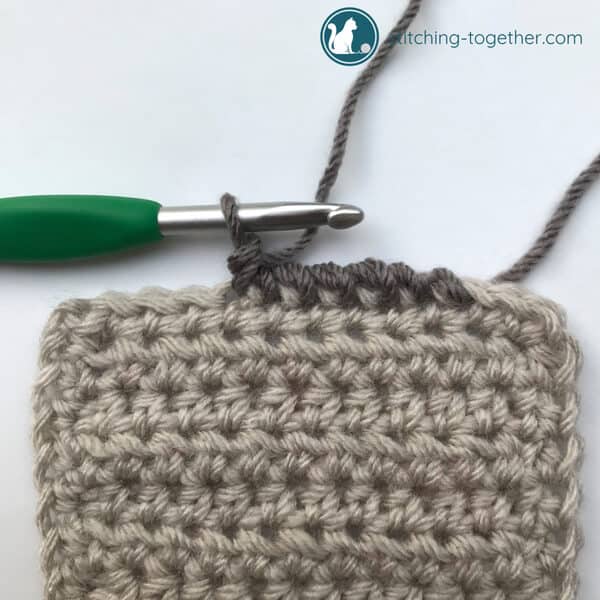
Continue, inserting your hook in the next stitch to the right, yarn over and pull up loop. When you pull up the loop, it is helpful to hold your hook horizontal the the previous stitch so you are creating the same height with each stitch. Yarn over and pull through both loops on hook.
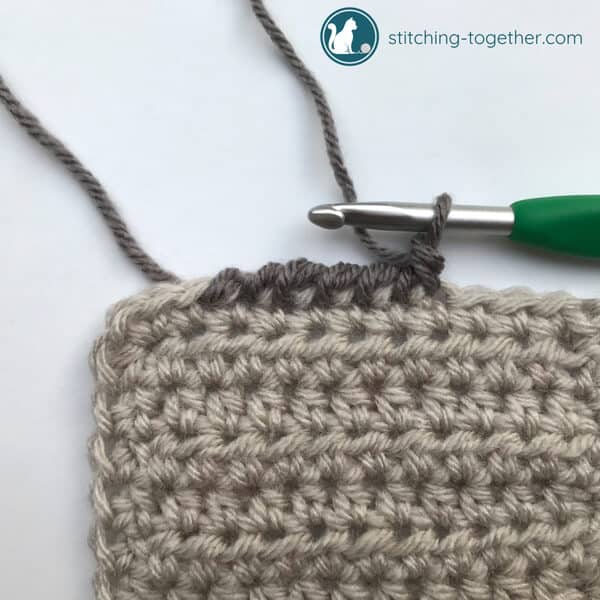
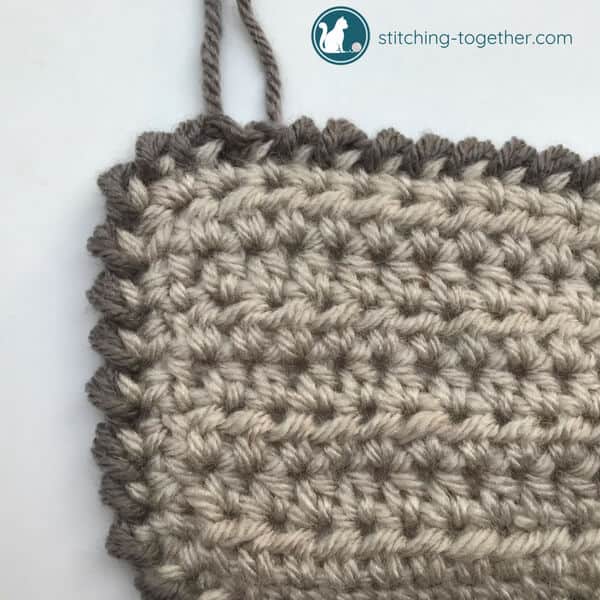
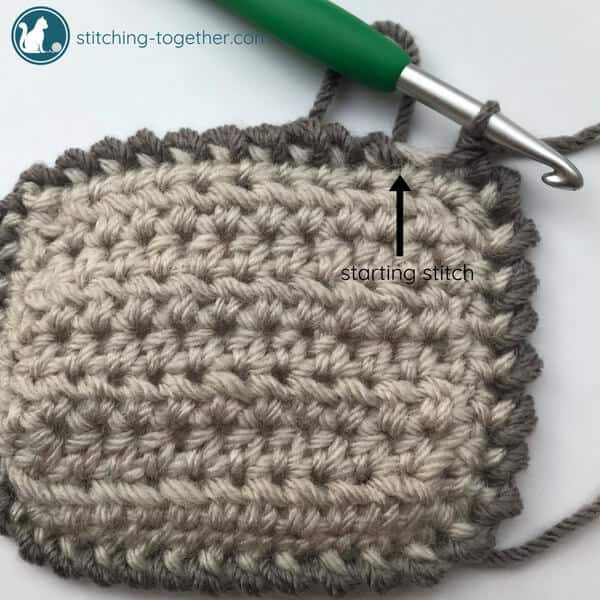
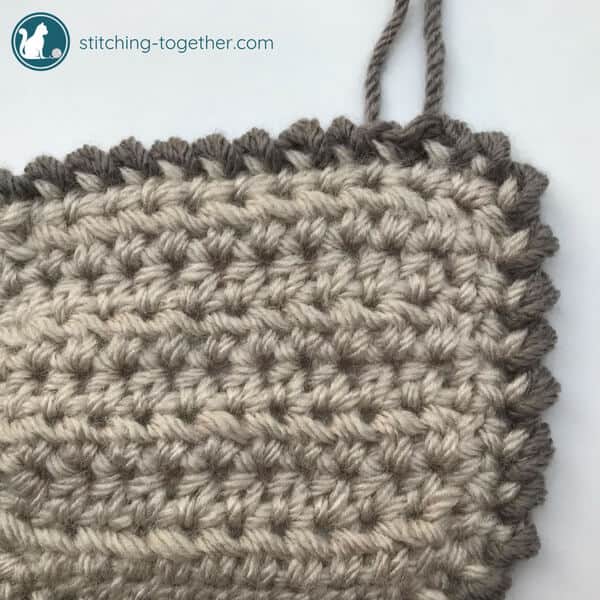
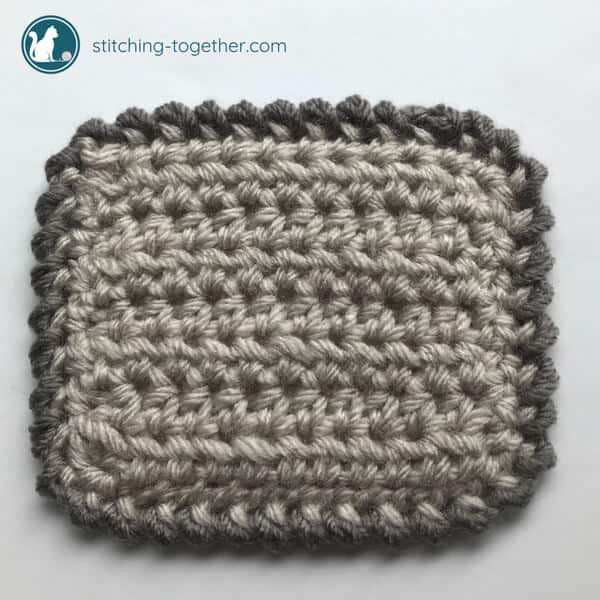
As you add more stitches, you can see the twisted stitches forming the solid crab stitch border. Continue to reverse single crochet around the entire edge putting a crab stitch in each stitch below.
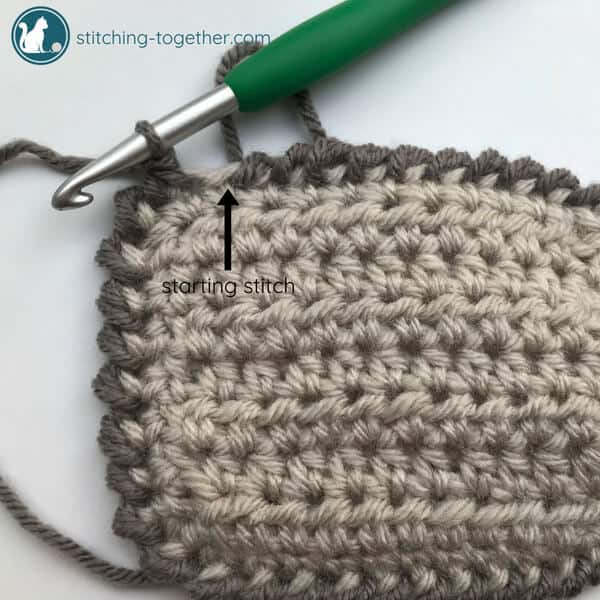
To complete your crab stitch border, stop when you’ve reached the stitch you started in.
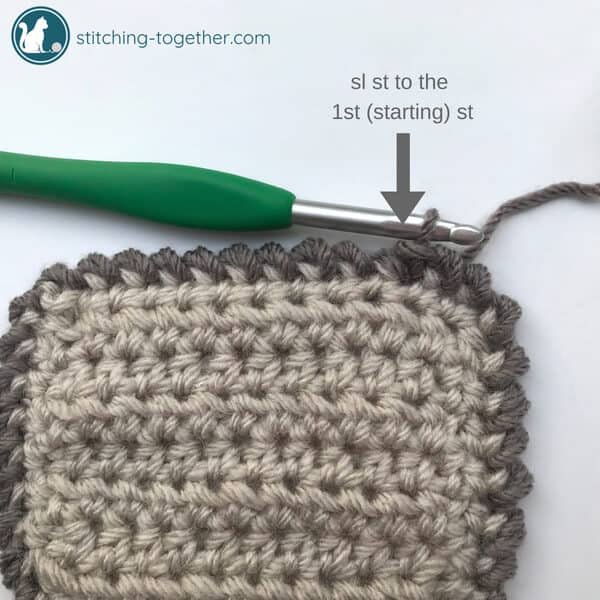
Instead of adding a crab stitch in that starting stitch, slip stitch into the same stitch you started in.
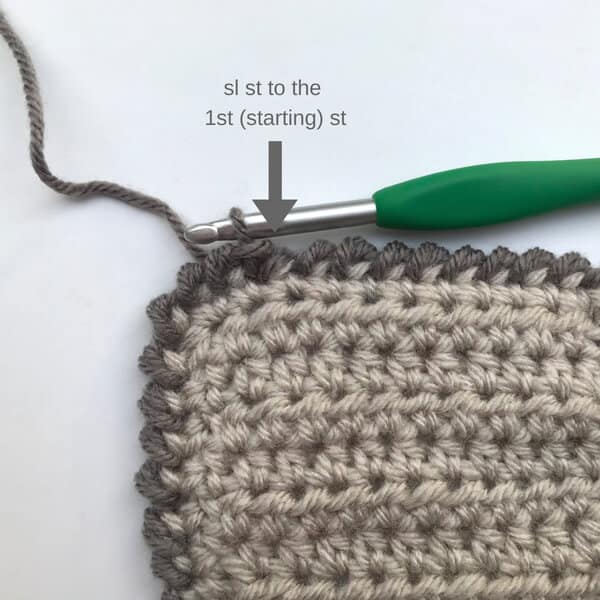
Cut your yarn and pull through. When you weave in your ends, you’ll want to weave the tail through the stitches to the right.
There you go! Now you know how to crochet the crab stitch! Where will you use it?
Don’t forget to check out these crochet projects where you can use the crab stitch border:
Mini Hanging Basket
Diamond Lace Crochet Baby Blanket
Easy Crochet Baby Blanket Pattern for a Girl
How to Crochet the Crab Stitch | Left-Handed Tutorial
(This section is for left handed crocheters. Scroll up to see right hand specific photos.)
Making sure the right side is facing you, join yarn and chain 1 or just ch 1 if you are using the same yarn as the body of your project.
The reason the crab stitch is also called the reverse single crochet is because you are working in the opposite direction you normally work. Instead of going into the stitch to the right (when you are looking at it) you are going to work into the stitch to the left.
Insert hook into the stitch to the left of your chain.
Yarn over and pull up loop like a normal single crochet except, as you can see, your stitches will be twisted.

Yarn over and pull through both loops on hook.
Continue, inserting your hook in the next stitch to the left, yarn over and pull up loop.
When you pull up the loop, it is helpful to hold your hook horizontal the the previous stitch so you are creating the same height with each stitch. Yarn over and pull through both loops on hook.

As you add more stitches, you can see the twisted stitches forming the solid crab stitch border. Continue to reverse sc around the entire edge putting a crochet crab stitch in each stitch below.
To complete the crab stitch border, stop when you’ve reached the stitch you started in.
Instead of adding a crab stitch in that starting stitch, slip stitch into the same stitch you started in.
Cut your yarn and pull through. When you weave in your ends, you’ll want to weave the tail through the stitches to the left.
There you go! Now you know how to crochet the crab stitch! Where will you use it?
Don’t forget to check out these free patterns where you can use the crab stitch border:
Mini Hanging Basket
Diamond Lace Crochet Baby Blanket
Easy Crochet Baby Blanket Pattern
Save the crab stitch tutorial on Pinterest