Crochet Christmas Tree Pillow Cover
Disclosure: This post may contain affiliate links. As an Amazon Associate, I earn from qualifying purchases. Please visit my Privacy Policy for disclosures and more information.
This modern crochet Christmas tree pillow will liven up your favorite space for the holidays. Make it in traditional greens or branch out to other colors for an even more unique look.
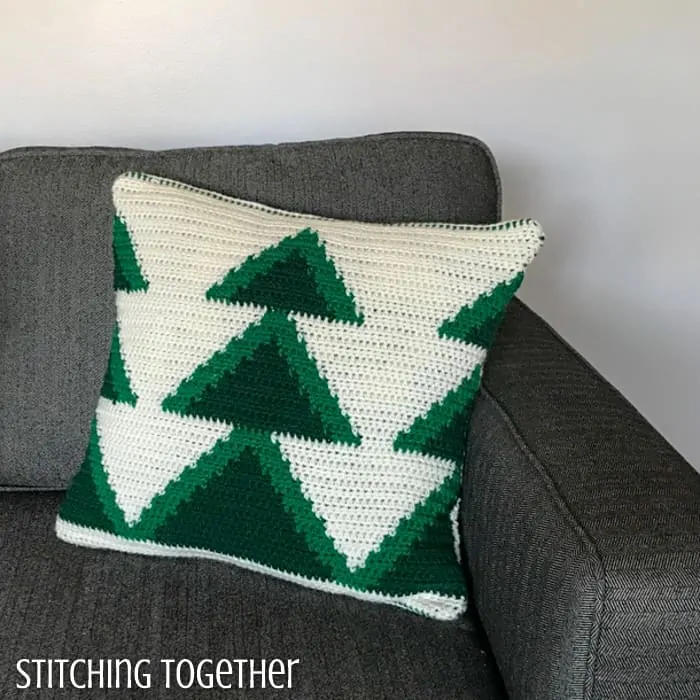
This sweet crochet Christmas tree pillow reminds me of one of my favorite holiday traditions from when I was younger.
Each year my mom and I would bundle up, drive to the tree farm (yes, tree farm), hike through the snow to find our perfect Christmas tree.
She would then proceed to cut it down with a tiny hacksaw (there had to be a better way, right?) and we’d drag it back to our car.
Decorating a tree, which you cut down yourself (or your BA mom cut down while you jumped up and down trying to stay warm), adds an extra layer of excitement to the entire season.
I’m so excited for the traditions we will start or continue with our children.
I wonder what their favorite traditions will be when they are older and reflect on their childhood. What about you? What are your favorite Christmas tradition memories?
Well, you don’t have to cut down your own tree to spruce up your space for Christmas! This simple Christmas Tree throw pillow cover is quick to crochet.
How to Crochet a Christmas Tree Pillow
These pillow covers are envelope covers so they are easily removable. You don’t have to store the entire pillow after Christmas!
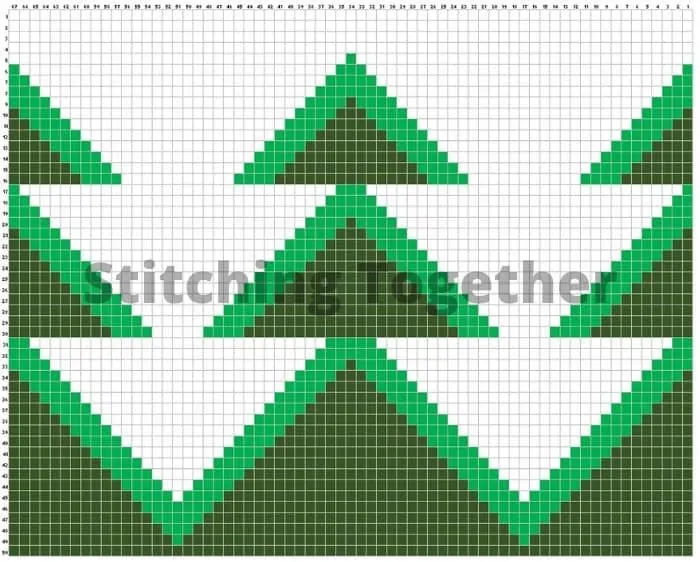
You’ll make the front panel by following the graph (more on that below) and then make 2 back panels following the pattern. All three panels are held together and then single crocheted together. It is very simple!
The pillow cover was made for a throw pillow that is 20” x 20”.
About the Stitches and the Graph for the Christmas Crochet Pillow
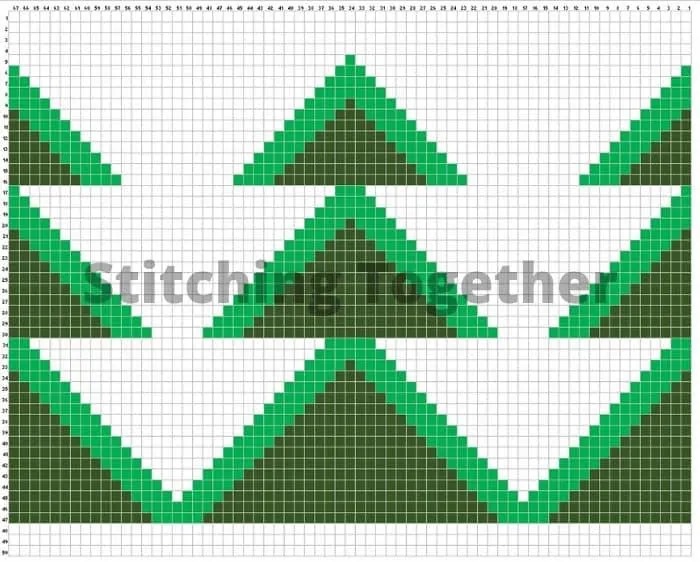
If you’ve never crocheted from a graph before, don’t be intimidated by it! Using a graph is actually super easy. Each square represents one stitch. By following the graph back and forth, line by line, you end up with a beautiful pattern.
I’ve included two graphs for the pillow cover. The first graph is the one I used which has a strip of the Aran yarn at the bottom to start the pattern.
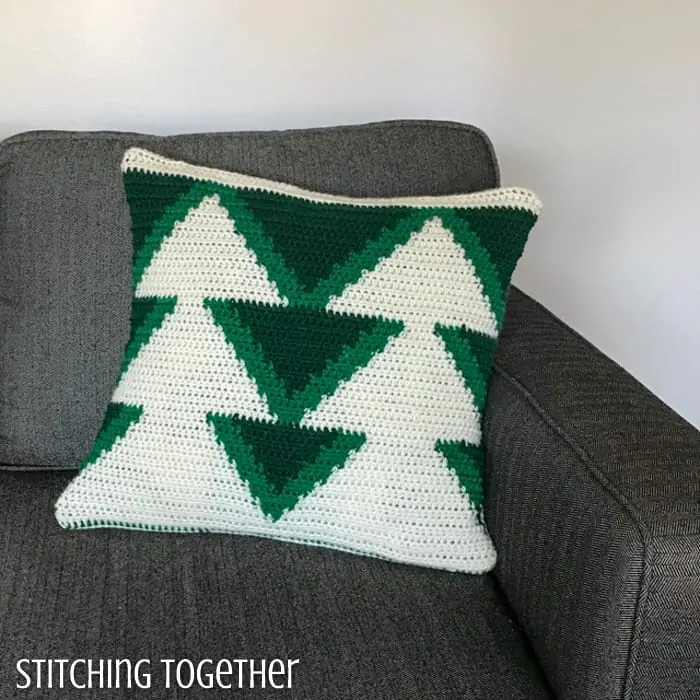
I think it will look a bit better if the trees go all the way to the bottom, which is how I modified the second graph, but the choice is yours! Plus if you use the modified graph it will be even harder to decide which way is up!
Save the Christmas Tree Crochet Pillow Pattern on Pinterest
Crochet Christmas Tree Pillow Pattern
Materials:
Size J/6.0 mm crochet hook
Red Heart Super Saver 7 oz (198g), 364 yds (333 m)
*2 skeins Red Heart Super Saver in Aran
*1 skein Red Heart Super Saver in Hunter Green
*1 skein Red Heart Super Saver in Paddy Green
20″ x 20 ” Pillow
.
Everything you need for this project can be order right on Amazon.
Save time and shop online!
.
Abbreviations:
hdc: half double crochet
fhdc: Foundation half double crochet
sc: single crochet
Notes:
Each square represents one hdc. It is easiest to start with the bottom row as a foundation hdc row but you can also start with a chain. Row 1 will be your first row of hdc.
As you start working the different colors, pick a side to be the wrong side and you don’t have to worry about weaving in any ends!
Note on the color of panel 1: in the instructions it says to use Aran for both of the panels. You will notice in my pictures that one of my panels has a strip of Paddy. I ran out of Aran as I had used the same skein for another project. A full skein will be enough to complete the back panels.
Gauge:
4” x 4”: 12 hdc by 11 rows
Front Panel:
Follow graph to create the front of the pillow – each square is one hdc
Back Panels:
Panel 1 (shorter panel)
Row 1: with Aran fhdc 67
Row 2- 25: ch 1, hdc in each hdc (67)
Panel 2 (longer panel)
Row 1: with Aran fhdc 67
Rows 2-35: ch 1, hdc in each hdc (67)
Joining:
Place panel 2 on top of the RIGHT side of the front panel lining it up with the top of the front panel. Place panel 1 on top of panel 2 and the front panel lining it up with the bottom of the front panel.
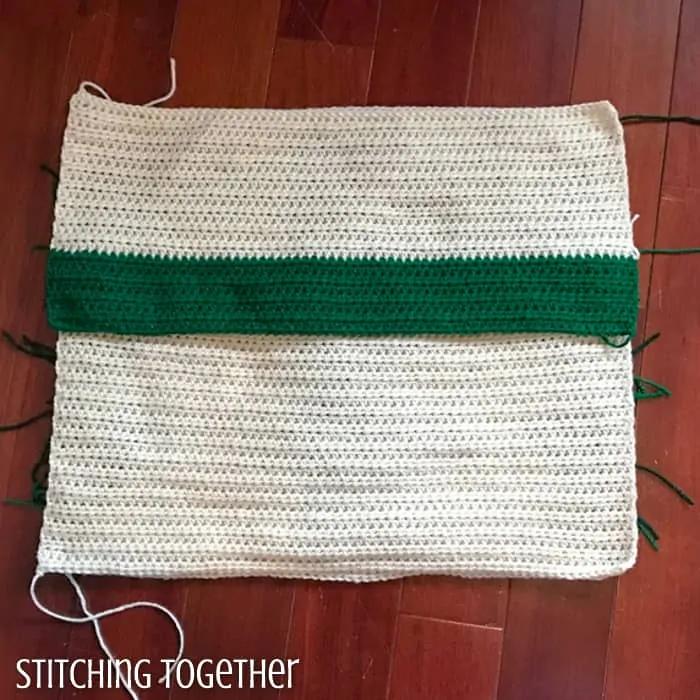
Sc around the entire edge of pillow cover, attaching the back panels to the front panel. I used the paddy green to join the panels, which shows through and adds a cute detail. If you don’t want the scs to show through, use Aran.
Turn inside out and insert pillow.
Will you share pictures of your finished projects?
- Tag Stitching Together on Instagram with @stitching_together and use the #stitchingtog
- Upload your picture in the Tried It section of this pin
- Share your work in the Stitching Together Community.
