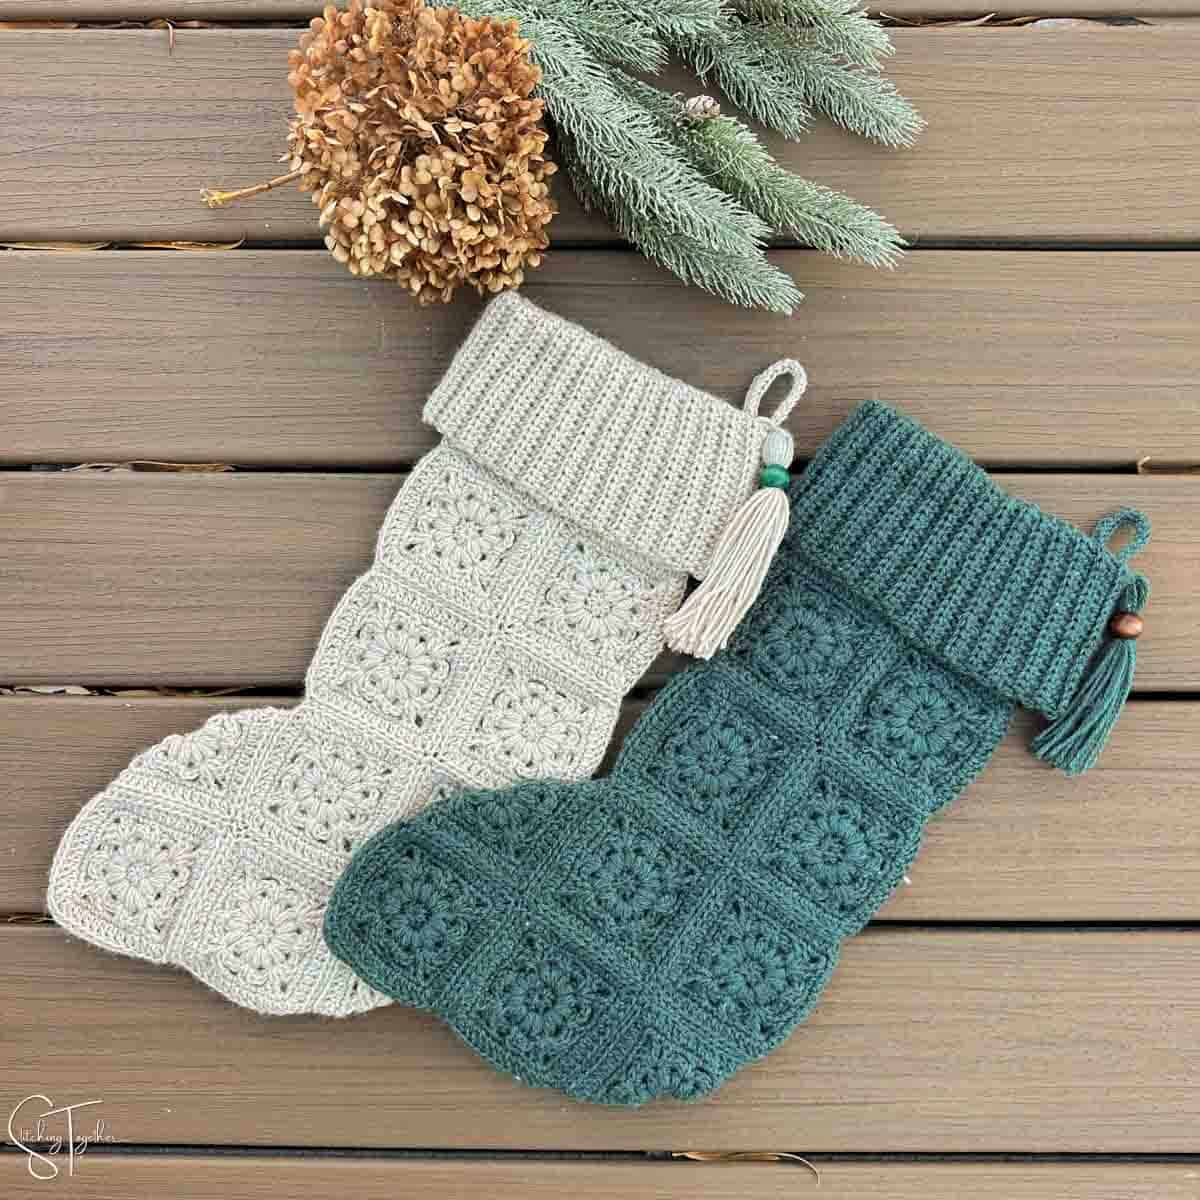
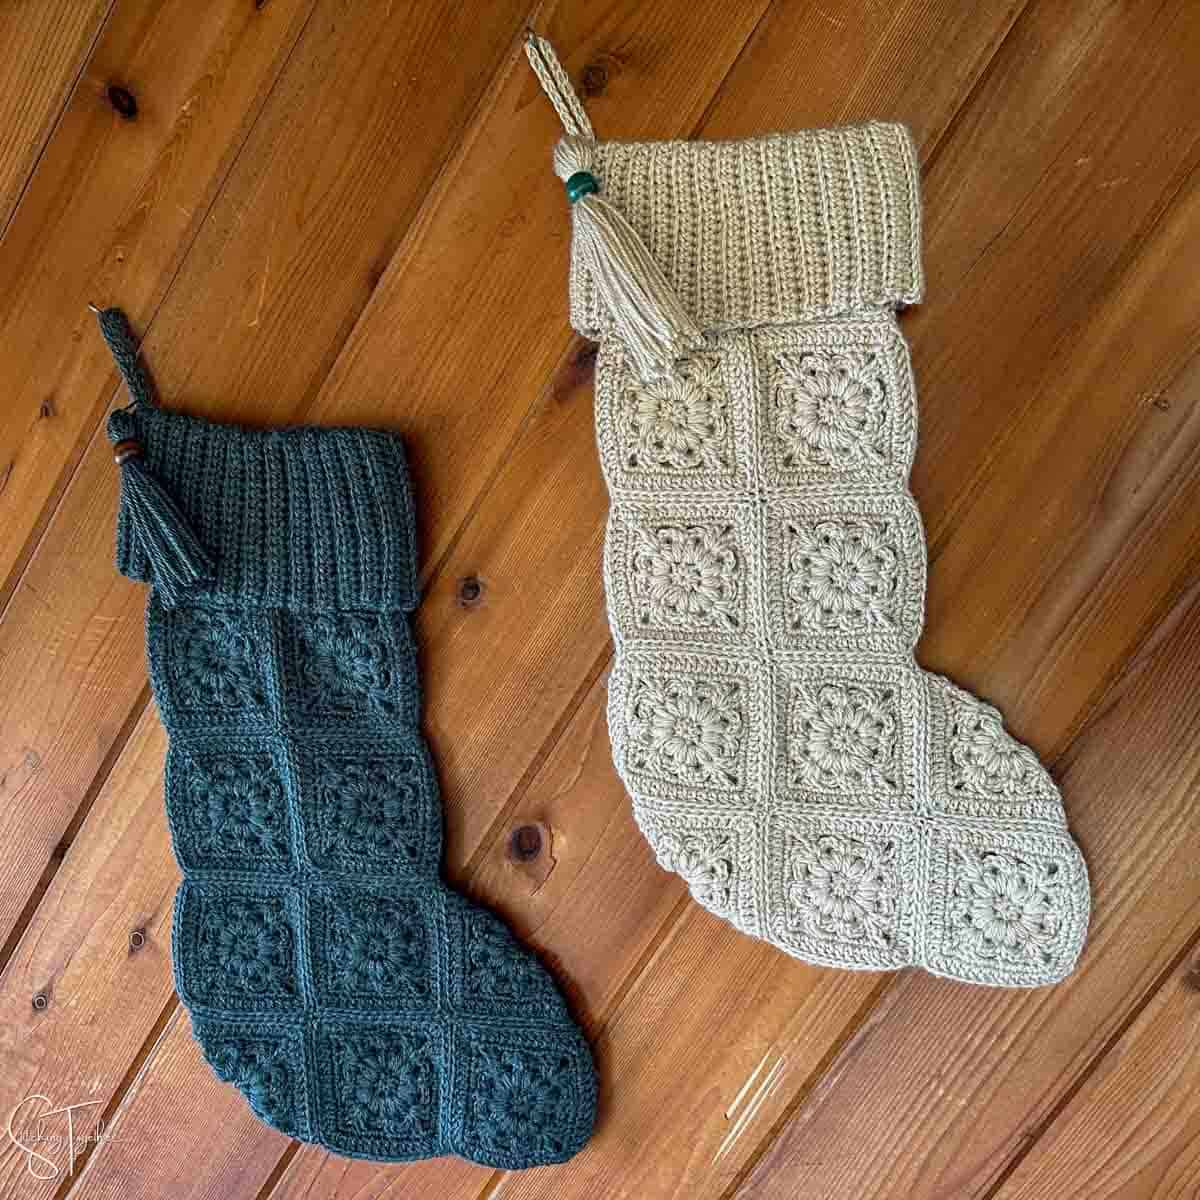
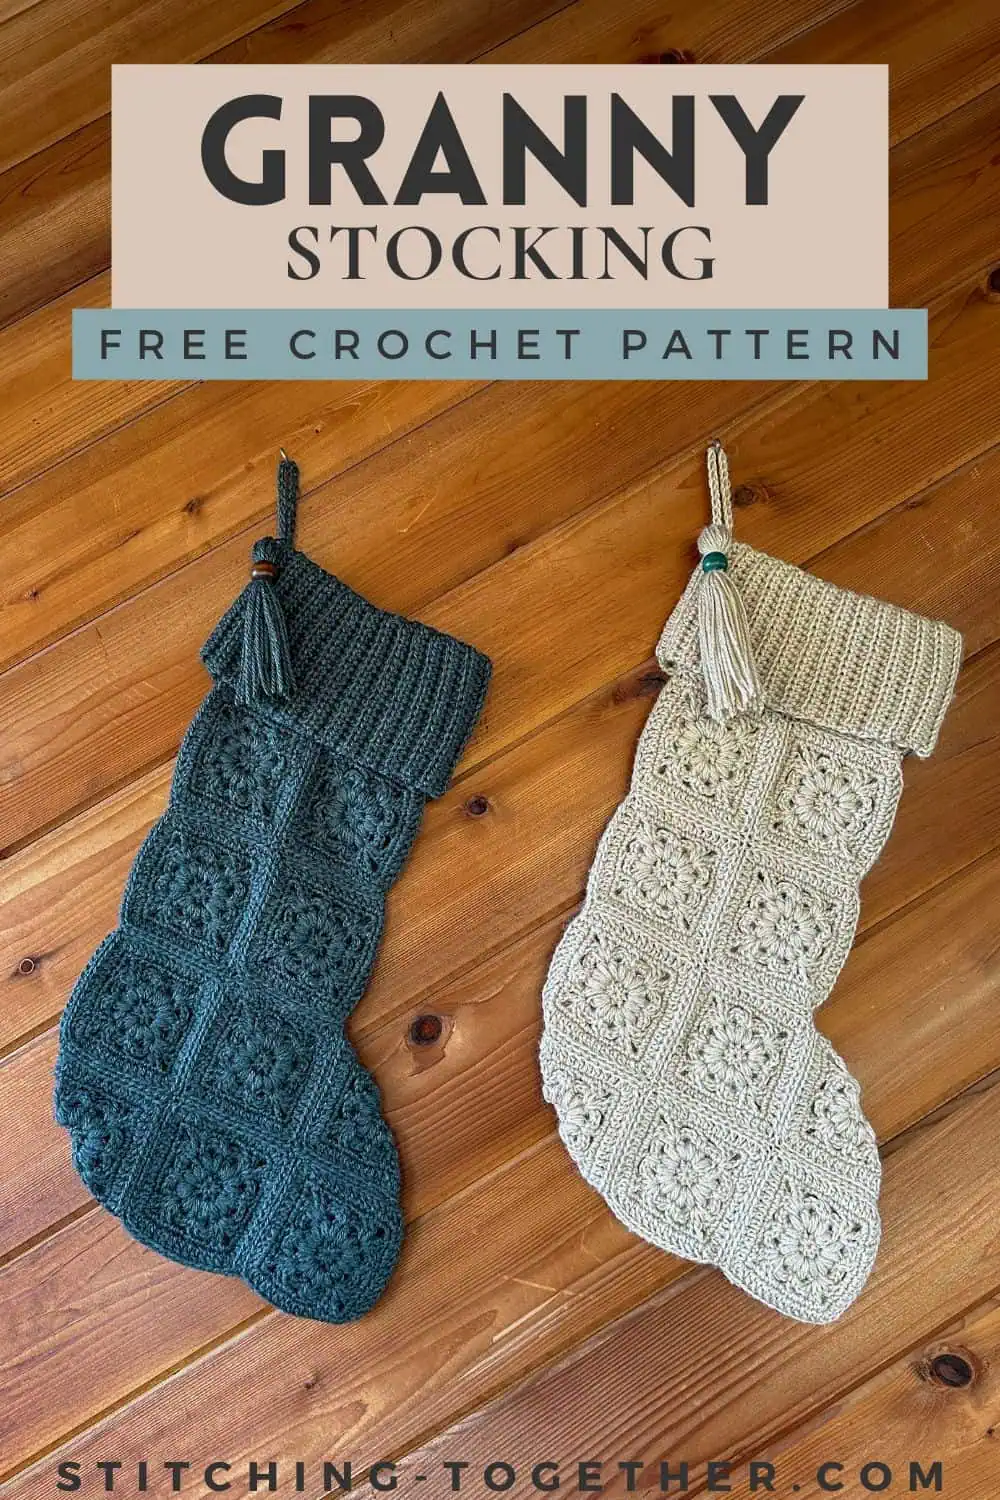
Fountain Flower Granny Square Crochet Stockings Free Pattern
Disclosure: This post may contain affiliate links. As an Amazon Associate, I earn from qualifying purchases. Please visit my Privacy Policy for disclosures and more information.
This granny square stocking combines a unique take on a classic crochet motif with festive cheer to create a beautiful handmade stocking that’s perfect for hanging on your mantle or gifting to someone special.
Do you like bold, bright colors or prefer a more neutral, modern look? Either way, this pattern is easy to customize to fit your holiday decor. Plus, it’s a fun project that works up quickly, so you’ll have plenty of time to make a whole set for the family!
Ready to add some vintage-inspired coziness to your holiday crafting? Keep reading for the free online version and all the pattern details or you can purchase the ad-free PDF version here.
Stitches
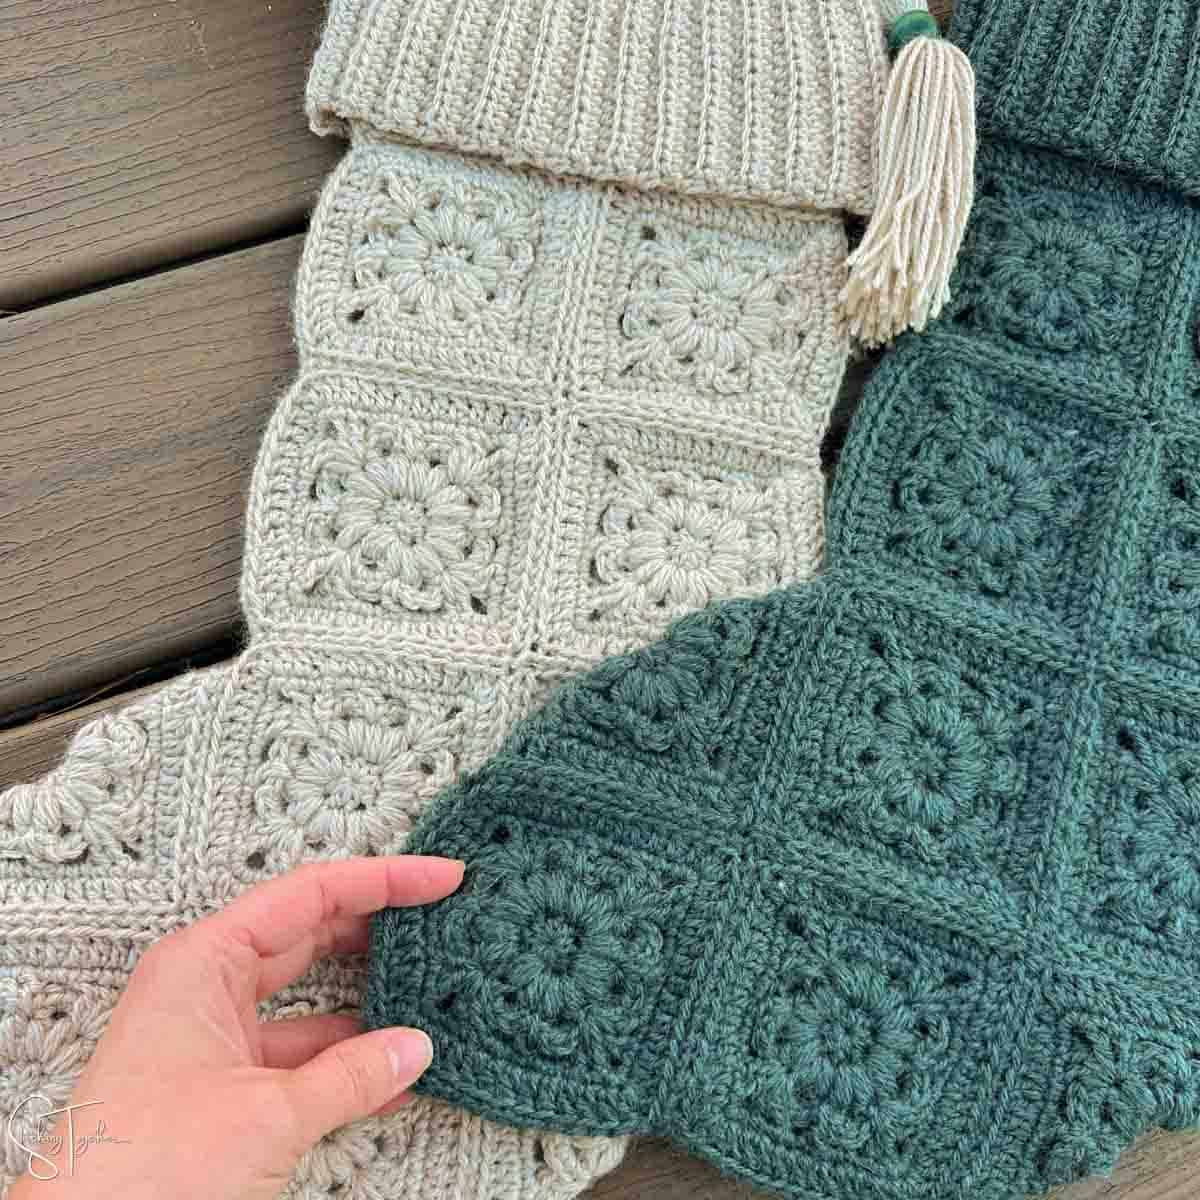
The main body of the stocking uses the Fountain Flower Granny Square, which is a fun and unique granny square pattern with a subtle floral motif. I think it makes for a lovely, elegant-looking stocking.
You can head to the Fountain Flower Granny Square post to read more about the stitches used to make the square and a step-by-step photo tutorial. The pattern for the square is included in the online version below and the PDF version has the pattern, photo tutorial and a stitch graph.
The simple cuff is made by working half double crochet stitches in the back loop only. You’ll join the cuff as you go so it works up quickly without extra steps. Overall, this is an easy stocking pattern, but the squares themselves are more at an intermediate skill level.
Related: Country Crochet Stocking Pattern
Yarn
I used Lion Brand Re-Spun yarn for this stocking pattern. I am pretty sure it is the first time that I have used the worsted weight Re-Spun yarn, but I have used the Thick & Quick version.
Overall I liked this yarn. It’s a thinner worsted weight yarn made from recycled plastic with a feel and look that reminded me a lot of Touch of Alpaca yarn.
As far as I can tell, it is only sold in the Bonus Bundle size which was fine with me because I had more than enough to make one stocking from each skein.
Yarn Substitution Ideas
Touch of Alpaca by Lion Brand
Premier Just Yarn Value by Premier Yarns
Brava Worsted by Knit Picks
Related: Granny Tree Ornament
Skill Level
Overall this stocking is super easy to put together. Joining the squares and adding the ribbing are skills probably at an advanced beginner/easy skill level.
The Fountain Flower Squares are rated at an Intermediate Skill Level. They require a bit more knowledge of stitches and stitch placements. Once you understand the pattern, they are super quick and easy to make though.
If you aren’t sure where your skill level is at, I would head over to the photo tutorial and try making one square to see how that goes. If it is easy for you, then you’ll have no problems working this pattern.
Granny Square Stocking Crochet Pattern
Purchase the ad-free PDF version
Skill Level: Intermediate
Gauge: 1 square = 3.75” by 3.75”
Finished Size: 19.5” L by 11” at widest point
Supplies
US size 7, 4.5 mm crochet hook
US size G/6, 4.0 mm crochet hook
Lion Brand Re-Spun Bonus Bundle yarn (category 4, worsted weight yarn, 658 yds/602 m, 10 oz/284 g)
- Sample used approx. 467 yds (7.1 ounces) in Alpine or Parchment
Large Eye Yarn Needle
Scissors
Save Time and Shop Online
Abbreviations
ch: chain
hdc: half double crochet
sl st: slip stitch
sc: single crochet
beg: beginning
fsc: foundation single crochet
puff: puff stitch (see special stitches)
st(s): stitch(es)
dc: double crochet
sp(s): space(s)
blo: back loop only
Notes
Brackets [ ] are used to indicate the instructions within the brackets will be repeated the specified number of times.
The ch 1 at the beginning of a round or row does not count as a stitch. The ch 2 that starts rounds 4 and 6 does count as a stitch.
The ch 1 to start each row does not count as a stitch.
You’ll be working your hdcs in the back loop only of each row which is the loop farthest away from you as you work.
Special Stitches
puff stitch: [yo, pull up a loop] 3 times (7 loops on the hooks), yo, pull through all 7 loops on the hook.
Pattern Instructions
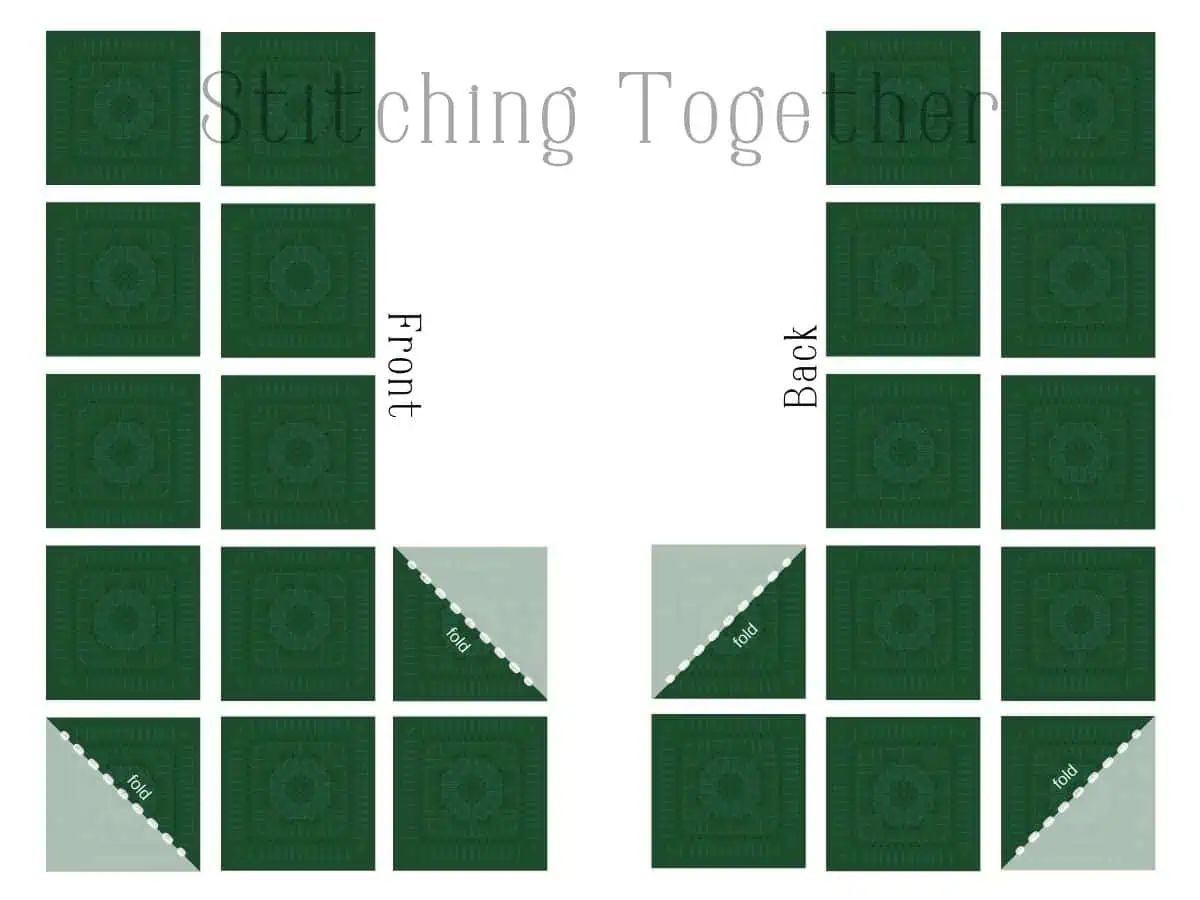
Make 22 Squares
Begin with a Magic Circle
Round 1: Ch 1, (does not count as a st here and throughout), 8 hdc in magic circle, tighten to close, join with a sl st to beg hdc. (8 hdc)
Round 2: Ch 1, [puff, ch 3 puff, ch 1] in each st around. (16 puff sts, 8 ch-3 sp, 8 ch-1 sp).
Round 3: [Sl st to ch-3 sp, 3 sc in ch-3 sp, sl st in ch-1 sp between next 2 puff sts] 8 times (24 sc)
For the next round you will be working all stitches in the ch-1 sps between 2 puff stitches made in Round 2. You will work over the sl sts made in Round 3.
Round 4: Ch 2 (counts as a st here and throughout), (dc, ch 3, 2 dc) in same sp (between puff sts), [ch 2, skip 3 sc, dc in ch-1 sp between puff sts, ch 2, skip 3 sc (2 dc, ch 3, 2 dc) in next ch-1 sp] 3 times, ch 2, skip 3 sc, dc in ch-1 sp between puff sts, ch 2, skip 3 sc, join with a sl st to beg ch 2 (20 dc, 4 ch-3 sps)
Round 5: Ch 1, [sc in next 2 sts, 3 sc in ch-3 sp, sc in next 2 sts, 2 sc in ch-2 sp, sc in dc, 2 sc in ch-2 sp] 4 times, join with a sl st to beg sc (48 sc)
Round 6: Ch 2, dc in next 2 sts, (dc, ch 1, dc) in next st, [dc in next 11 sts, (dc, ch 1, dc) in next st] 3 times, dc in next 8 sts, join with a sl st to beg ch 2 (52 dc)
Fasten off and weave in ends.
Join the Squares
With the right side of the squares facing out, join the squares following the layout using a whip stitch through the front loops. Or use whatever joining method you’d like!
Add the Cuff
Join yarn anywhere on the top of the stocking.
Ch 1, sc in each st around, join with a sl st to beg sc,
Switch to G/4.0 mm hook. You’ll now work the ribbing on the cuff which you will join to the top of the stocking as you go.
Ch 20,
Row 1: sc in 2nd ch from hook and in each st across, join with a sl st in the next st at the top of the stocking, sl st to the next st, turn (19)
Row 2: sc, in the blo of each st of the previous ribbing row, turn (19)
Row 3: ch 1, sc in the blo of ea st across, join with a sl st in the next st at the top of the stocking, sl st to the next st, turn (19)
Repeat Rows 2 and 3 around. Slip stitch to join the last row with the first row. Fasten off a weave in ends.
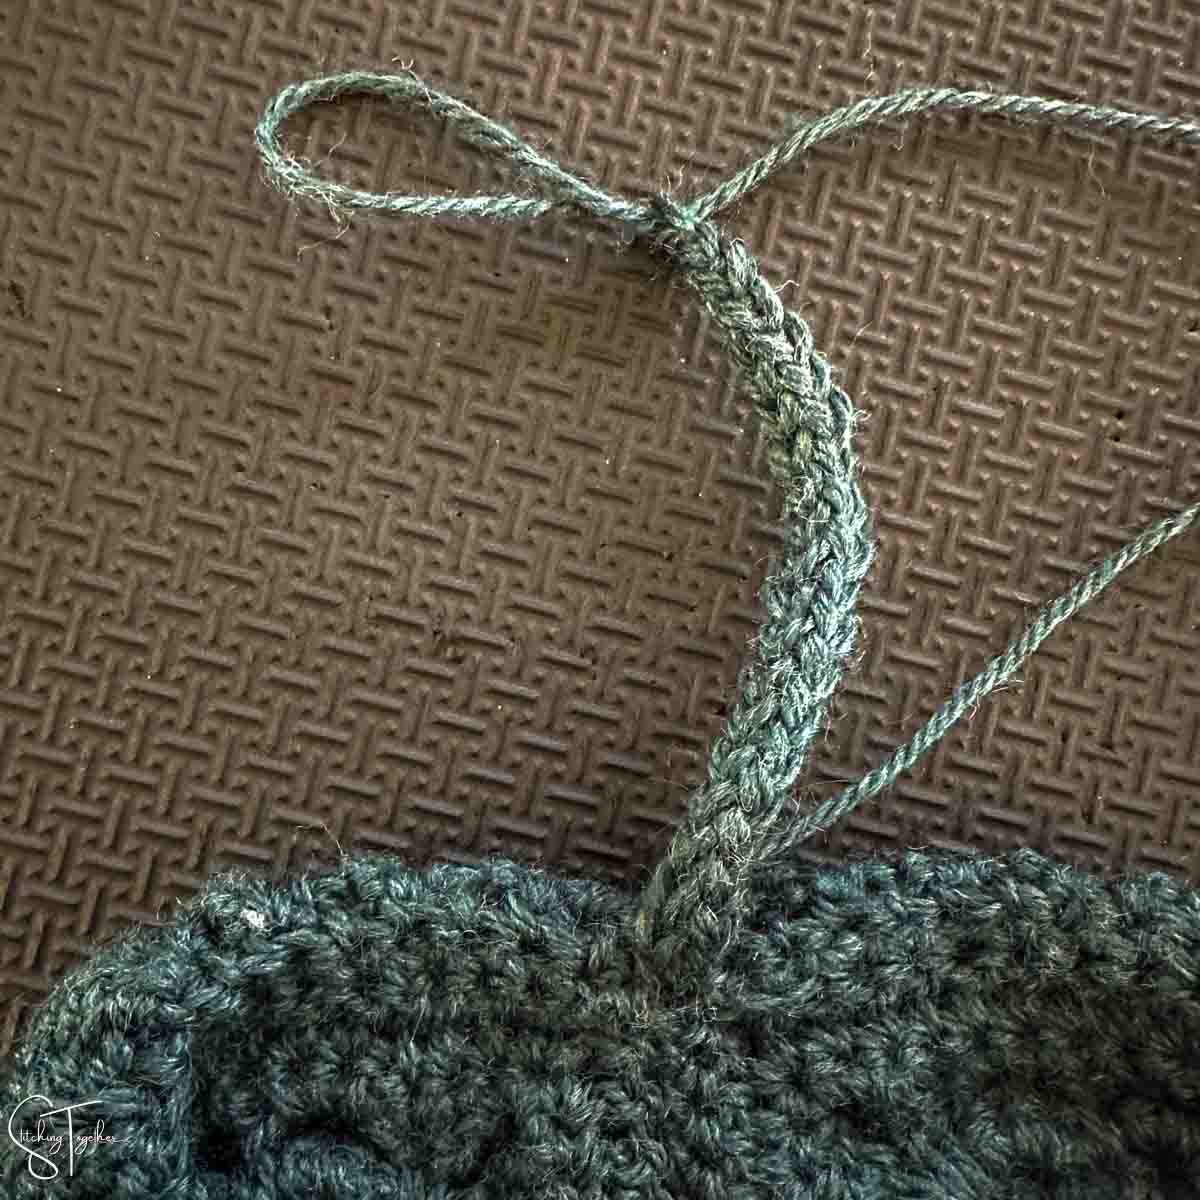
Add a Loop
Join yarn at the top of the granny square part of the stocking, below the cuff, wherever you’d like to have a loop to hang the stocking.
Fsc 20, join with a sl st in the same spot where you started the loop. Fasten off and weave in ends.
Will you share pictures of your finished projects?
- Tag Stitching Together on Instagram with @stitching_together and use the #stitchingtog
- Upload your picture in the Tried It section of this pin
- Share your work in the Stitching Together Community.