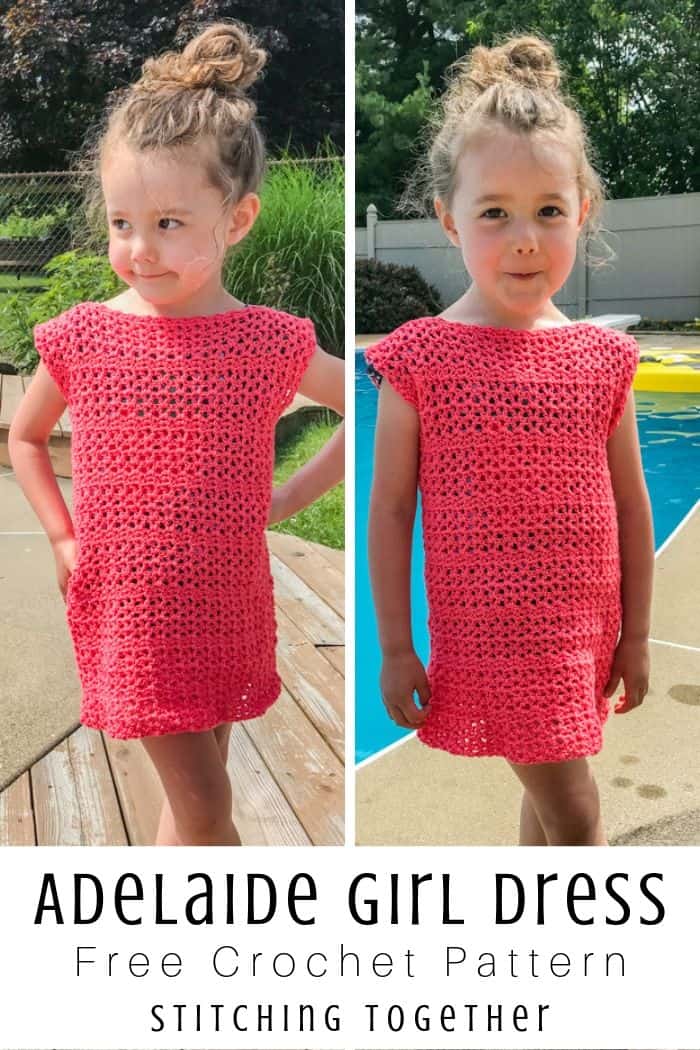
Adelaide Easy Crochet Girl Dress
Disclosure: This post may contain affiliate links. As an Amazon Associate, I earn from qualifying purchases. Please visit my Privacy Policy for disclosures and more information.
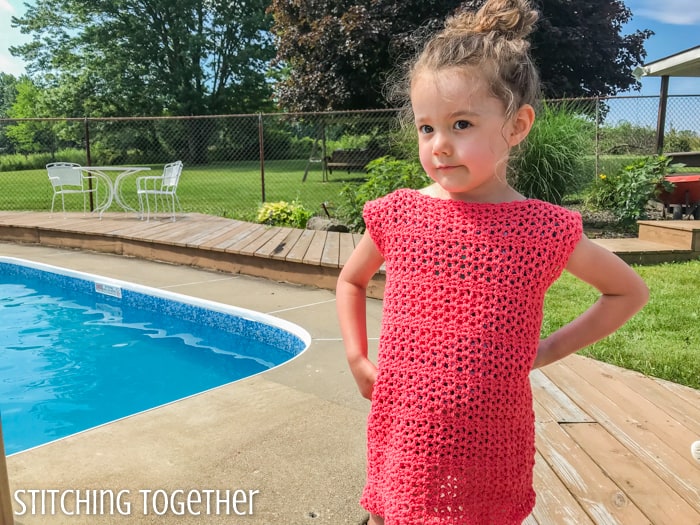
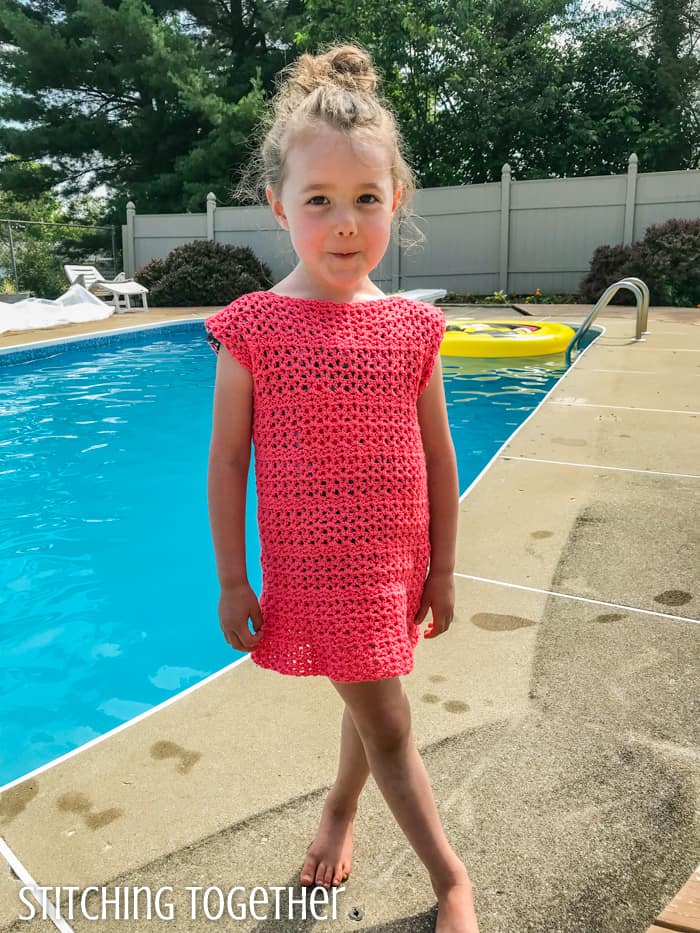
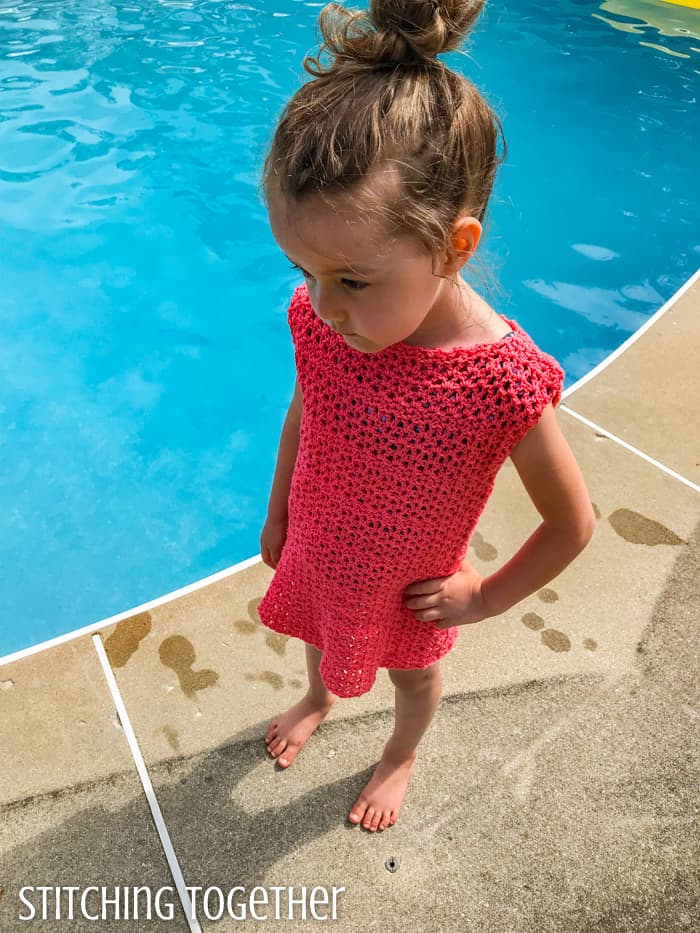
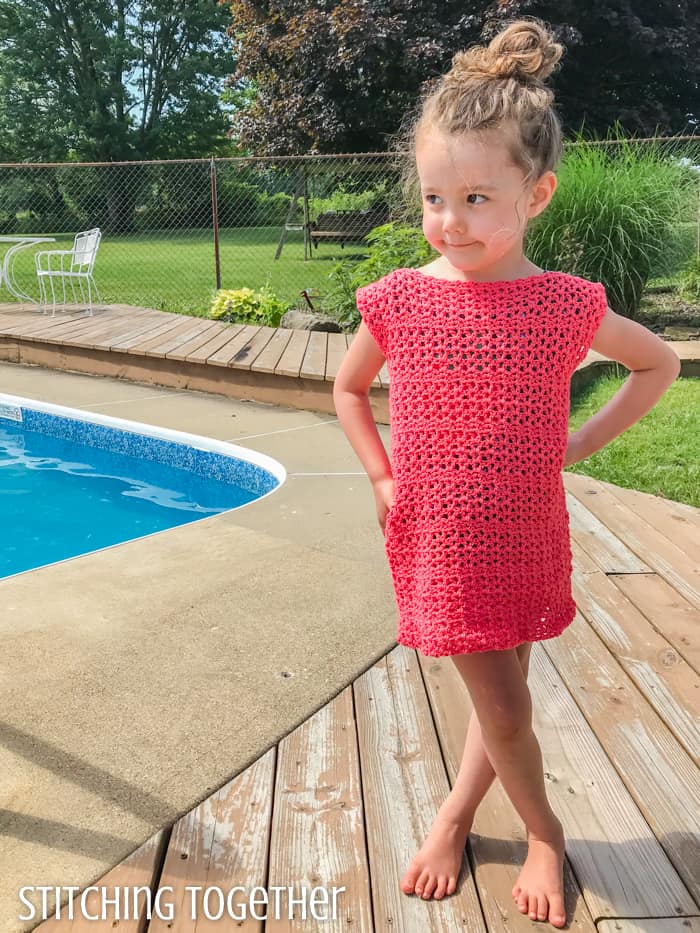
Look no further for an easy crochet girl dress. Two rectangles, two different stitch patterns, two skeins of yarn and you have yourself this adorable dress available in sizes for 2 year-olds to 10 year-olds. Keep scrolling for the free crochet pattern or you can purchase the ad-free PDF right here in my shop!
Making kids clothes is so fun and rewarding. Kids clothing takes less time, less yarn….. let’s be honest… less risk! Clothing can be so intimidating but it doesn’t have to be.
The Adelaide Girls will likely take you less time to make than a scarf. It is THAT quick and easy.
About the Adelaide Easy Crochet Girl Dress
I love easy! Especially easy that doesn’t look like it was too easy. Does that make sense?
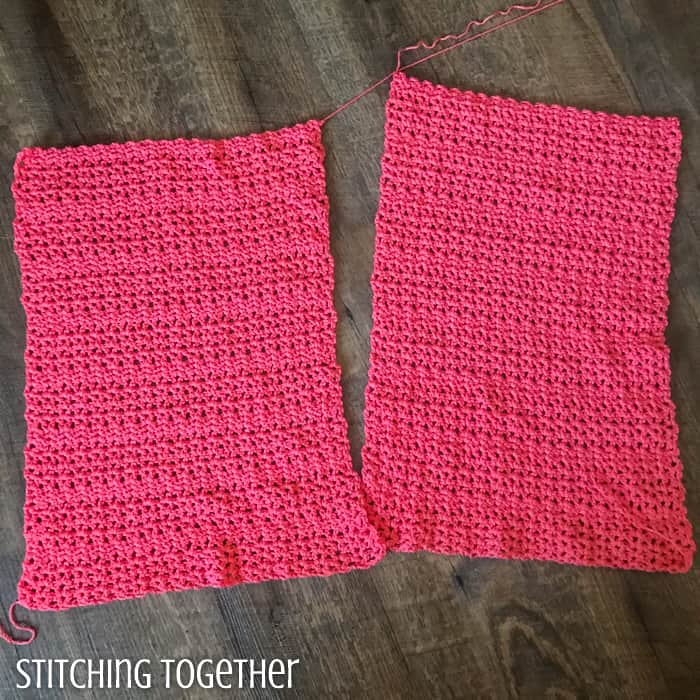
This dress is EASY. It is two identical rectangles with 2 different but similar stitch patterns involved. There’s some simple seaming and viola – you have a dress.
The length can easily be adjusted by adding or subtracting rows from each rectangle so you can easily shorten it for a shirt or add length for a longer dress.
I pictured it styled over leggings but it also worked great as a swim cover by the pool.
The hardest part about making this dress will be the gauge. Because you start with a double crochet v-stitch and then work single crochets, the bottom four rows are wider than the rest of the dress. But that extra wideness gives it the cute little flair at the bottom.
Please make sure you read through the gauge instructions and be patient with yourself.
Related: Softer than Suede Toddler Dress
Does twist matter?
ZZ Twist yarn is twisted in the opposite direction of most plied yarn.
Plied yarns usually have an S twist that can come untwisted as we crochet causing the yarn to split very easily. I’ve been working with a lot of loosely twisted yarns that split lately (they are soft and gorgeous so it has been worth it) so it was nice to have a yarn that just stayed together while I crocheted!
Besides it not splitting, I didn’t find it any easier to crochet with than normal yarn until I grabbed my Furls Odyssey hook. The combo of that hook and this yarn was a definite win!
The Furls hooks aren’t as smooth for me when I pull through a stitch, but with this yarn each stitch was smooth and quick.
The yarn itself has a bit of a rope-like feel but much softer and it produced a fabric that has great drape.
Related: Toddler Cocoon Shrug
Adelaide Easy Crochet Girl Dress
Do you prefer printing your patterns? Get the printable PDF right here.
Skill Level: Easy
Materials:
- US size J/10, 6.0 mm (I used my Furls Odyssey for this one!)
- ZZ Twist by Lion Brand Yarn
- 4 Medium Acrylic 5oz/100g, 246yds/225m
- 2 skeins in Coral for 4-5 year-old size
- Large Eye Yarn Needle (My favorite yarn needles can be ordered on Amazon)
Abbreviations:
ch(s): chain(s)
dc(s): double crochet(s)
sc(s): single crochet(s)
sk: skip
sp(s): space(s)
Gauge: 3” x 4” = 5 dc v-stitches by 10 rows done in stitch pattern (4 rows of dc v-stitches and 2 rows of sc, ch 2, sc v-stitches)
Because the first 4 rows are dc v-stitches, which are wider than the sc, ch 2, sc stitches, the bottom of the dress is wider with a looser gauge than the top. Gauge and width are measured in the middle of the dress.
You can expect the bottom rows to be around 2” wider than the body of the dress.
Finished Size: Each rectangle measure approximately:
2 yo: 11.5” by 17.5”
4 yo: 12.5” by 18.5”
6 yo: 13.5” by 19.5”
8 yo: 14.25” by 21.5”
10 yo: 15” by 23”
Notes:
The ch 3 at the beginning of the rows counts as your first dc and ch 1 or sc and ch 2.
The chain spaces are made by the ch 1 between two double crochets or the ch 2 between 2 single crochets.
The counts are given for the smallest size (2 yo) with the following sizes in parenthesis (4 yo, 6 yo, 8 yo, 10 yo).
Pattern Instructions:
Ch 58 (61, 64, 67, 70) (multiple of 3+1)
R1: dc in 4th ch from hook, *sk 2 ch, (dc, ch 1, dc) in next ch, repeat from * to end of row, turn.
R2: ch 3, dc in first ch sp, (dc, ch 1, dc) in each ch sp to end of row, turn.
R3: ch 3, dc in first ch sp, (dc, ch 1, dc) in each ch sp to end of row, turn.
R4: ch 3, dc in first ch sp, (dc, ch 1, dc) in each ch sp to end of row, turn.
R5: ch 3, sc in 1st ch sp, (sc, ch 2, sc) in each ch sp to end of row, turn.
R6: ch 3, sc in 1st ch sp, (sc, ch 2, sc) in each ch sp to end of row, turn.
R7: ch 3, dc in first ch sp, (dc, ch 1, dc) in each ch sp to end of row, turn.
R8: ch 3, dc in first ch sp, (dc, ch 1, dc) in each ch sp to end of row, turn.
R9: ch 3, dc in first ch sp, (dc, ch 1, dc) in each ch sp to end of row, turn.
R10: ch 3, dc in first ch sp, (dc, ch 1, dc) in each ch sp to end of row, turn.
Continue to repeat rows 5-10 until you’ve completed a total of 46 rows (48, 50, 54, 58)
Repeat to make a second rectangle.
With the two rectangles held together sew sides up from the bottom 12.75” (13.5”, 14.25”, 15.75”, 16.75”) leaving 4.75” (5”, 5.25” 5.75”, 6.25”) open for armholes.
Sew the top in from the corner at the shoulders 2.25” (2.75”, 3.25”, 3.5”, 3.75”). Repeat from the other corner leaving a neck hole of 7” (7”, 7”, 7.25”, 7.5”).
Fasten off and weave in ends.