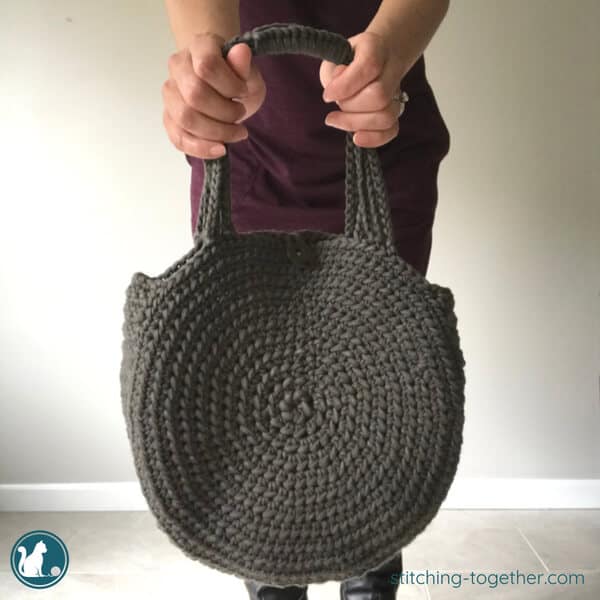
Free Belmont Crochet Shoulder Bag Purse Pattern to Make
Disclosure: This post may contain affiliate links. As an Amazon Associate, I earn from qualifying purchases. Please visit my Privacy Policy for disclosures and more information.
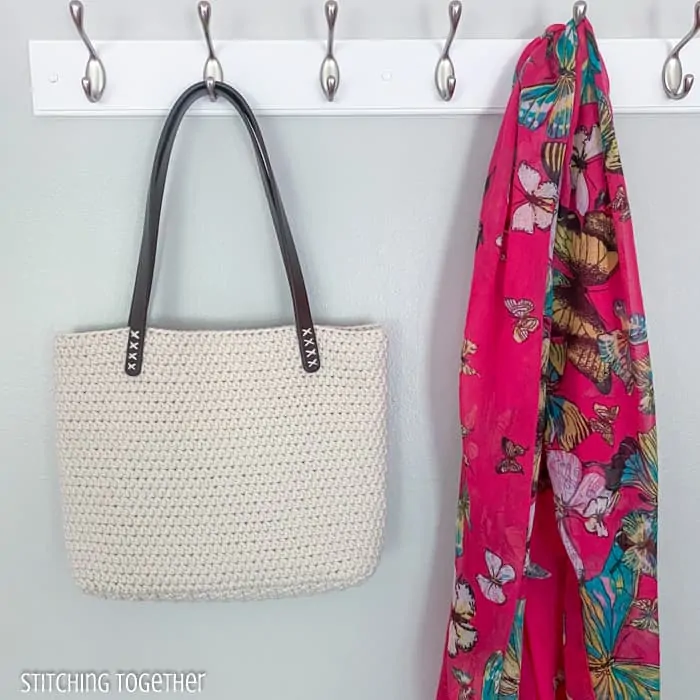
Sometimes simple is best and the Belmont Crochet Shoulder Bag is no exception. The stitches are simple, the construction is simple, the details are simple but you’ll make a bag that’ll have people going, “YOU MADE THAT?”
Keep reading for the free crochet pattern or you can purchase the ad-free PDF right here in my shop.
Crocheted bags make great gifts and are perfect for summer projects since they are light and quick to make.
How to Crochet a Shoulder Bag
It’s so much fun to crochet purse patterns and as promised, the construction of this bag is simple.
First, you’ll work in rows and crochet a long rectangle with all single crochets. Then you’ll work all the way around the rectangle in single crochets. After that, work the rest of the bag with a modified half double crochet in joined rounds.
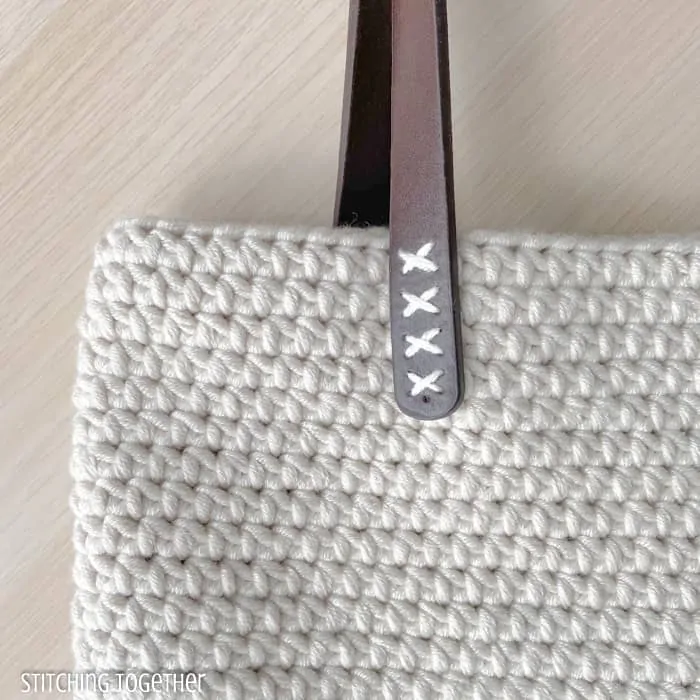
Add faux leather straps (I ordered these from Amazon) for a finished look or crochet your own matching straps. It doesn’t take long to have a beautiful bag that’s ready for everyday use.
Yarn used for the Shoulder Bag
If you haven’t worked with Bernat Beyond Yarn yet, you are in for a treat! I love the stitch definition you can get with this super bulky yarn that’s a blend of nylon and acrylic yarns.
The yarn itself is an S on S plied yarn which means single strands are twisted together to make 2 ply strands which are then twisted together to make the yarn. This gives you a dense yarn that still has some bounce and movement.
Unfortunately, it looks like Bernat Beyond has been discontinued which is such a shame. It’s a beautiful yarn.
The bag will look lovely in pretty much any super bulky yarn, so you can customize your own bag in different colors and textures.
If you want your beautiful crochet handbag to look similar to the bag I made, you’ll want to substitute a yarn that is smooth and doesn’t have loose fibers.
You could probably hold together 2 strands of medium-weight cotton yarn to achieve a similar look, but I haven’t tried this yet to verify how similar the sizing would be.
Yarn Substitution Ideas
Anti-Pilling Everyday Bulky – Premier Yarn
Ribbon – Premier Yarn
Yarn Bee True Colors – Hobby Lobby
Panda Soft Cotton Chunky – Etsy
Stitches used for the Belmont Crochet Shoulder Bag
Look closely at those stitches. Can you identify them?
What if I told you they are half double crochets with just a slight modification? It’s true!
The main part of the bag is made with half double crochets where you yarn under first instead of yarning over. That’s it! Once you get the rhythm of working the stitch a little differently, it works up just as fast as a regular hdc.
As mentioned earlier, the base of the bag is a simple rectangle of single crochets.
While you’re working the bag, stitch markers are definitely your friends. In order to avoid having a noticeable, slanting seam on that bag, you’ll alternate skipping the first stitch and working the last stitch of every other round into the slip stitch of the previous round.
This technique makes the seam almost imperceptible but it can be easy to forget which round you are on.
You can use stitch markers at the end of each round to mark where the last stitch of the next round will be, or you can use different colored stitch markers to indicate if you are on an odd or even row.
You can always count your rounds if you lose track, but it’s nice to have a few tricks to speed things up.
Save the Belmont Crochet Shoulder Bag Pattern on Pinterest
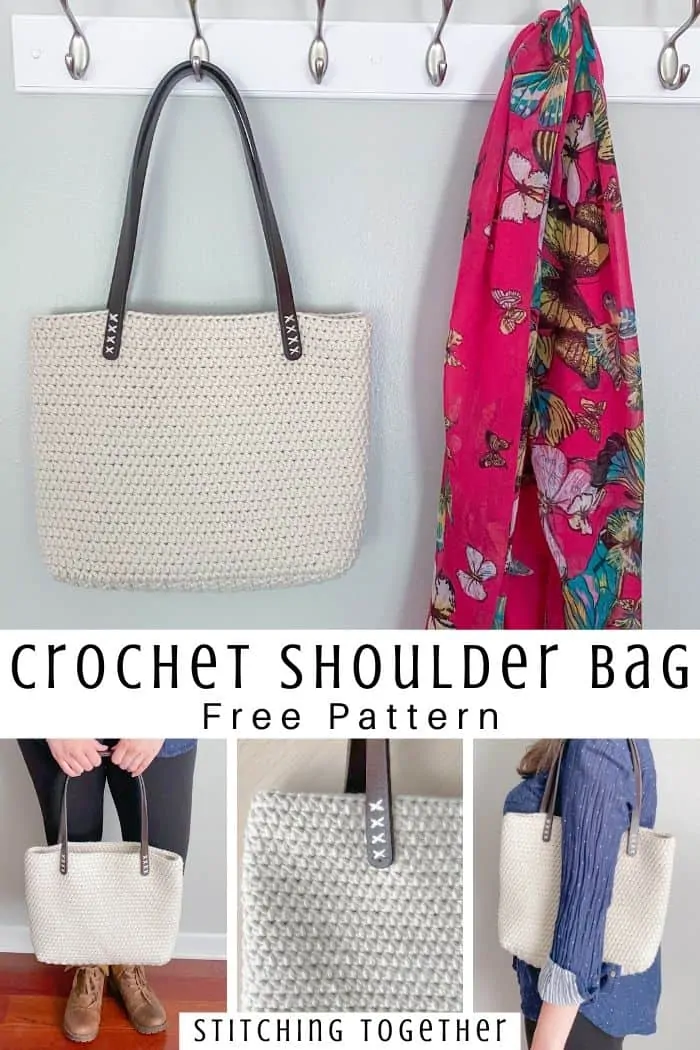
Belmont Crochet Shoulder Bag Pattern Free
Skill Level: Easy
Materials:
US size J/10, 6.0 mm crochet hook
Bernat Beyond Yarn (Category 6 Super Bulky Yarn – 80 yds/4.2 oz)
- 3 skeins in Cream (approximately 120 yds)
Large Eye Yarn Needle
Faux Leather Bag Straps (optional)
Hand Needles (optional)
.
Everything you need for this project can be ordered right online.
Save time and shop from home!
Large eye yarn needles (great for bulky yarn)
.
Abbreviations:
ch(s): chain(s)
sc: single crochet
sts: stitch(es)
sl st: slip stitch
mhdc: modified half double crochet (see notes)
Gauge: 4” x 4” = 13 mhdc by 11 rows
Finished Size: approx 14.25” wide by 10” tall
Notes:
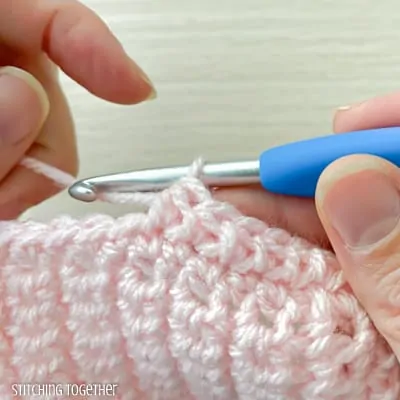
modified half double crochet (mhdc): yarn under, insert hook into stitch, pull up a loop, yarn over, pull through all three loops on the hook. See photo tutorial
Yarn under: wrap yarn around hook from front to back instead of back to front like a yarn over.
Use stitch markers to mark where the last stitch of the next row will be placed. When working even number rounds you’ll place a stitch marker in the final slip stitch as the last stitch of the next row is worked into that slip stitch. On odd number rows, place the stitch marker in the last single crochet.
Modified half double crochet photo tutorial
Yarn under – bring working yarn from the front of the hook to the back (instead of wrapping back to front)
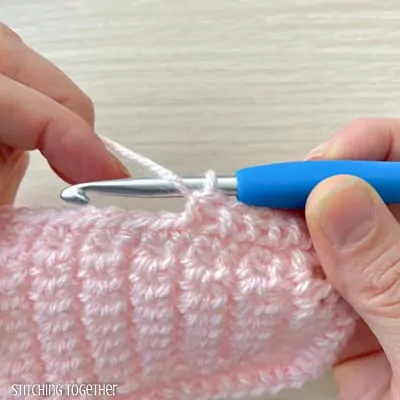
insert hook into stitch

pull up a loop
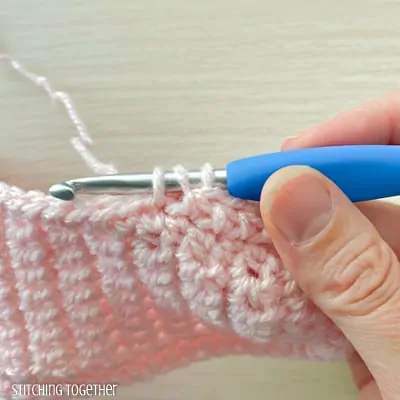
yarn over and pull through all three loops on the hook.
Crochet Shoulder Bag Pattern Instructions
Base
Ch 9
Row 1: sc in the 2nd st from the hook and in each st across, turn (8)
Row 2: ch 1, sc in each st across (8)
Row 3-32: repeat row 2
Start working around the base:
Round 1:
Side 1: ch 1, sc in the next 7 sts, 3 sc in the last st (10)
Side 2: skip the 32nd row, sc at the end of each row (31)
Side 3: 3 sc in the 1st ch, sc in the next 6 chs, 3 sc in last ch (12)
Side 4: sc at the end of each row, skip the 32nd row (31)
Side 1: 2 sc in the same st as the first st of side 1, join with a sl st to the first sc
Round 2: ch 1, mhdc (see notes and photo tutorial) in each st, join with a sl st to the first mhdc (86) (tip: use a stitch marker to mark the sl st)
Round 3: ch 1, skip first st, mhdc in each st, mhdc in sl st of previous round, join with a sl st to the first mhdc (86) (tip: use a stitch marker to mark the last sc)
Rounds 4-28: Repeat rounds 2-3
Fasten off and weave in ends.
Add Bag Straps
To attach the faux leather straps, I cut approximately 50” of yarn and separated the strands of yarn. Use one strand to attach each side of the strap. Attach each leather strap approximately 3.25” from each side of the bag.
Don’t you think this fun crochet bag pattern is a great way to make special gifts? You may just love this free pattern so much that you make several for yourself in your favorite colors to accessorize your wardrobe.
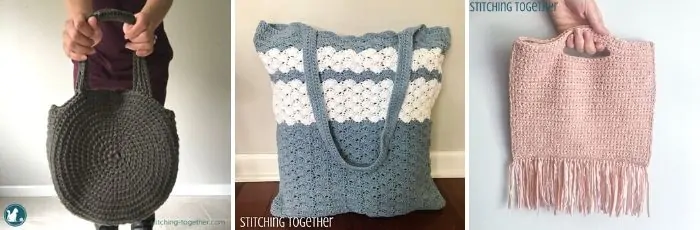
If you want more great free crochet bags, check out the Granny Square collection of free crochet bag patterns which features market bags, beach bags, and more all made with granny squares.
Do you prefer printing your patterns? You can purchase the ad-free PDF of this pattern in the following places:
Will you share pictures of your finished projects?
- Tag Stitching Together on Instagram with @stitching_together and use the #stitchingtog
- Upload your picture in the Tried It section of this pin
- Share your work in the Stitching Together Community.