Uma Beautiful Butterfly Crochet Pattern
Disclosure: This post may contain affiliate links. As an Amazon Associate, I earn from qualifying purchases. Please visit my Privacy Policy for disclosures and more information.
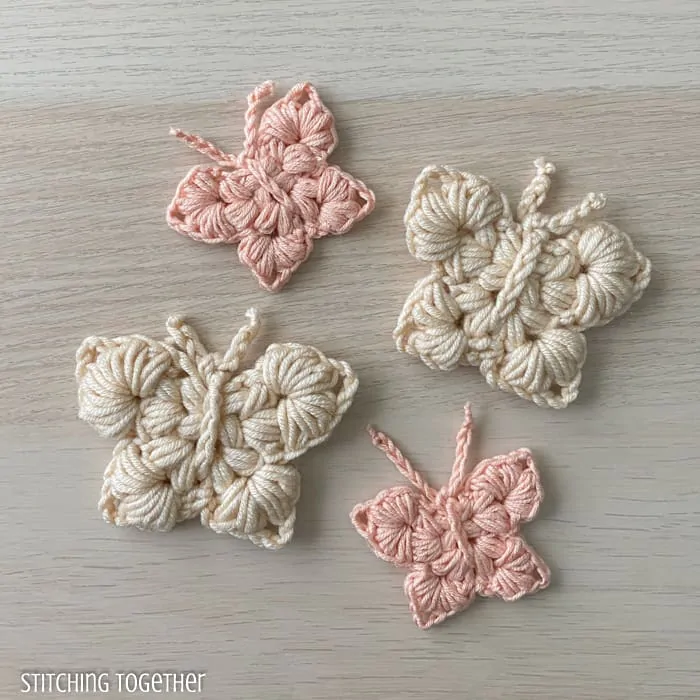
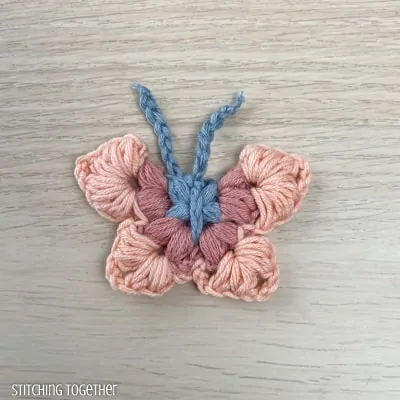
You’ll love making this beautiful crochet butterfly with the free step-by-step crochet pattern. If you prefer to print your patterns, you can get PDF formatted for easy printing right here.
About the Crochet Butterflies
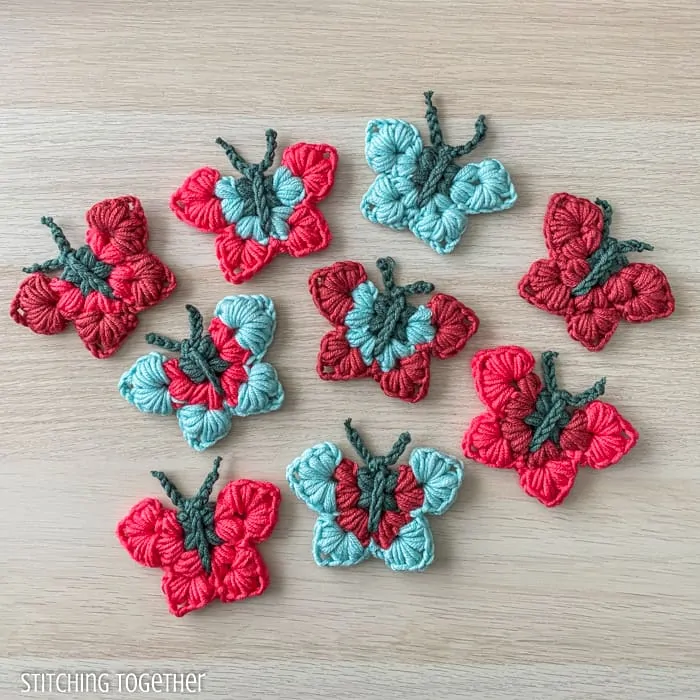
Aren’t they just the cutest?
I got the idea to crochet butterflies as I realized my daughter’s room has inadvertently become butterfly-themed.
It’s fun to add touches of crochet to our home decor so I set out to make butterflies that I can string as a garland and hang on her wall.
I’m not sure if I have had any other patterns go through as many iterations as this pattern did, but I think all the trial and error was worth it, don’t you?
They’ve become one of those projects, like the hearts, stars, and flowers, that I just keep making over and over again.
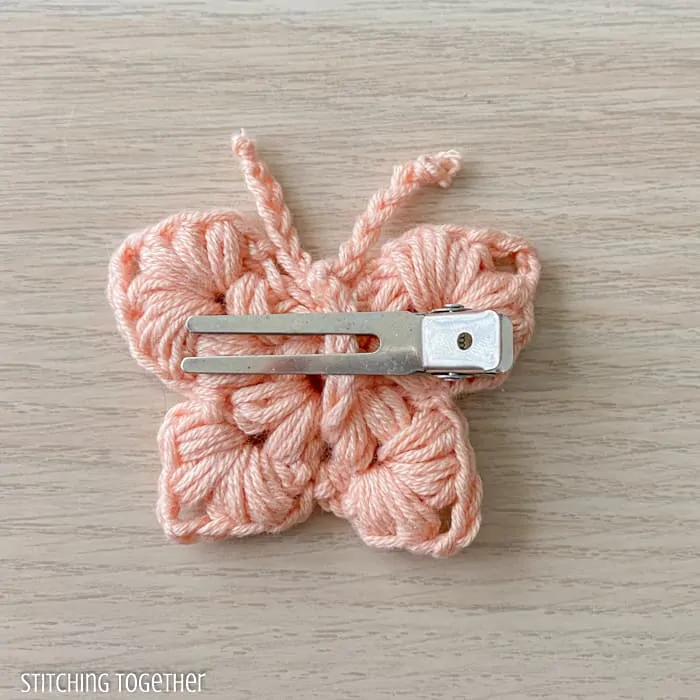
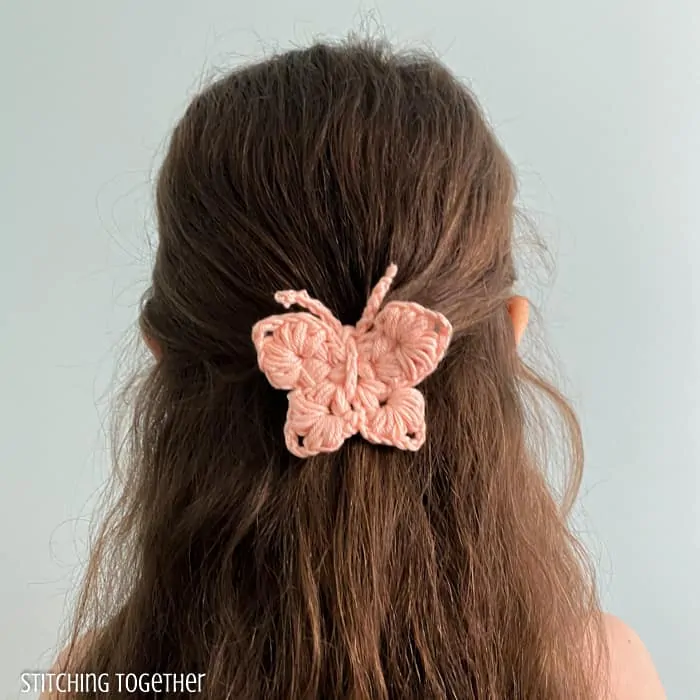
Besides being used for garlands, these butterflies will work great as an applique, magnets, and hair clips. I am sure there are more great uses that I am just not thinking of right now.
If you’d like to use the crochet butterflies as hair accessories, I paired them with these clips available on Amazon.
You can place a little hot glue to hold them on the hair clip or simply secure the crochet butterfly by using the chain at the back of it.
These craft magnets on Amazon have good reviews overall and look like they’d work perfectly to make crochet butterfly magnets.
Yarn for the Crochet Butterflies
The great thing about these butterflies is that they don’t take much yarn (scrap amounts) and they can be made with almost any yarn in any color.
For the multicolored butterflies, I used Caron X Pantone yarn which is so perfect for this project! I was able to make 11 butterflies – 9 multicolored and 2 neutral.
It was so nice to not have to stress over color combos for the butterflies since it was already done for me.
The small crochet butterfly was made with Premier Cotton Fair in Coral using a F/5-3.75 mm hook and came out to be about 2″ tall by 2.5″ wide.
Stitches used for the Crochet Butterfly
As you can tell, the butterfly is quite puffy and, as you guessed it, is made mostly of puff stitches.
Chains, slip stitches, and one single crochet also make importance appearances in this pattern.
If you don’t already know how to do a magic circle, I would highly encourage you to learn that first. I have a great magic circle tutorial that’ll get you started.
You can try chaining 2 and working the first round in the 2nd chain from the hook if you aren’t a fan of the magic circle. I haven’t tried this yet but I don’t see why it wouldn’t work.
You will have a hole in the center of the stitches but as long as it isn’t too large, it’ll be covered by the chain that makes the body of the butterfly.
Before you forget, save the Uma Crochet Butterfly Free Pattern on Pinterest
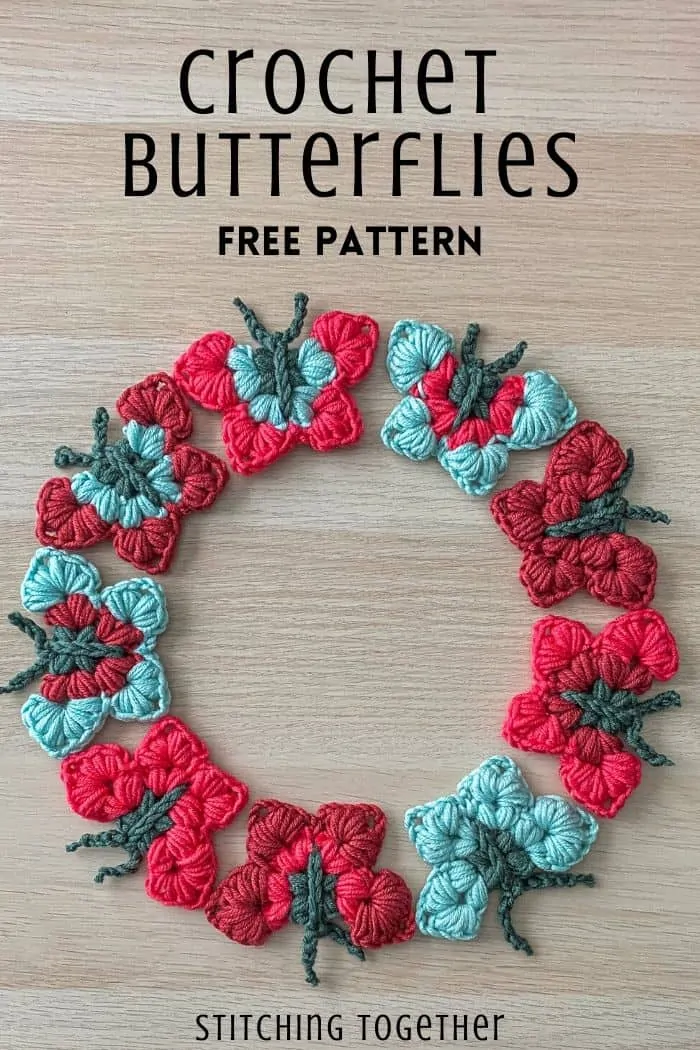
Uma Beautiful Butterfly Free Crochet Pattern
Skill Level: Easy
Materials:
US size H/8, 5.0 mm crochet hook
0.3 oz Caron X Pantone (5 Bulky) in Strawberry Chill
Large Eye Yarn Needle
.
Everything you need for this project can be ordered right on Amazon
Save time and shop online!
Caron X Pantone (5 Bulky) in Strawberry Chill
You’ll love these Large Eye Needles!
..
Abbreviations:
ch (s): chain(s)
st(s): stitch(es)
puff: see notes
sl st: slip stitch
MC: Main color
CC1: Contrasting color 1
CC2: Contrasting color 2
sp: space
sc: single crochet
Gauge: gauge is not critical
Finished Size: approx. 3.75” wide by 2.5” tall
Notes:
Puff st: (yarn over, insert hook into the st and pull up a loop) 3 times, yarn over and pull through all 7 loops on the hook.
You will not chain 1 to close each puff stitch. If “ch 1” is not written after the puff stitch, then you will leave the puff stitch open and start the next puff stitch.
The smaller butterflies were made with Premier Cotton Fair yarn in Coral using a F/5-3.75 mm hook.
Crochet Butterfly Pattern Instructions:
Start with a magic circle with MC
Round 1: ch 2, puff st, ch 1, puff st, ch 3, puff st, ch 1, puff st, ch 1, sl st in ring- do not join, tighten to close. (4 puff sts)
Round 2:
Wing 1 – worked in chain 1 space between the first 2 puff stitches of round 1
Join CC1 in ch-1 sp, (puff st, ch 2, 2 puff sts, ch 1) in ch-1 sp,
Wings 2 and 3 – worked in chain 3 space between puffs 2 and 3 of round 1
(sl st, puff st, ch 2, puff st, ch 2, sc, ch 2, puff st, ch 2, puff st, ch 1) in ch-3 sp,
Wing 4 – worked in chain 1 space between the last 2 puff stitches of round 1
(sl st, 2 puff sts, ch 2, puff st, ch 1, sl st) in ch-1 sp.
(10 puff sts)
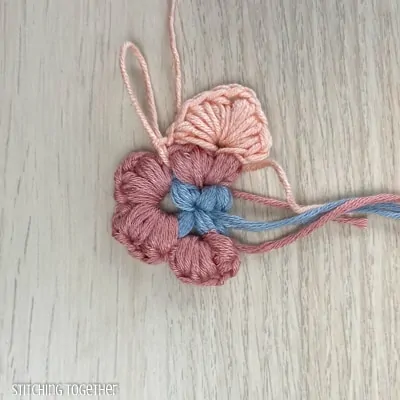
Round 3:
Wing 1– worked in chain 2 space between puffs 1 and 2 of round 2
Join CC2 in ch-2 sp, (3 puff sts, ch 3, 3 puff sts, ch 1) in ch-2 sp,
sl st in ch-1 sp (between puffs 3 and 4),
Wing 2– worked in chain 2 space between puffs 4 and 5 of round 2
(sl st, 2 puff sts, ch 3, 2 puff sts) in ch-2 sp,
ch 2, sl st in sc, ch 2,
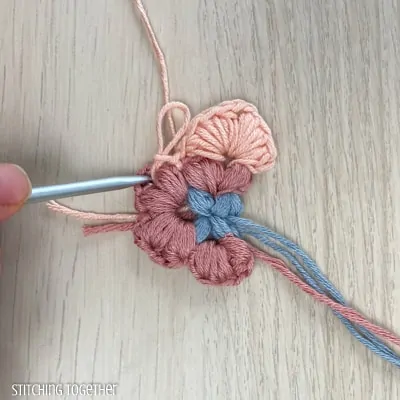
Wing 3– worked in chain 2 space between puffs 6 and 7 of round 2
(sl st, 2 puff sts, ch 3, 2 puff sts, ch 1) in ch-2 sp,
sl st in ch-1 sp (between puffs 7 and 8),
Wing 4– worked in chain 2 space between puffs 9 and 10 of round 2
(sl st, 3 puff sts, ch 3, 3 puff sts, ch 1, sl st) in ch-2 sp.
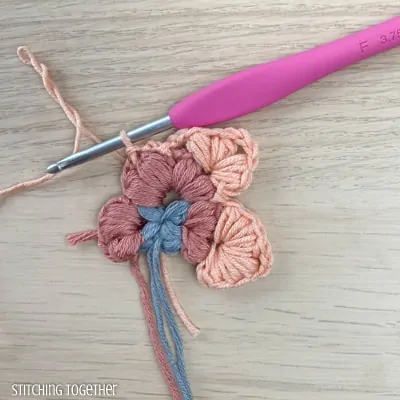
(20 puff sts)
Fasten off and weave in ends
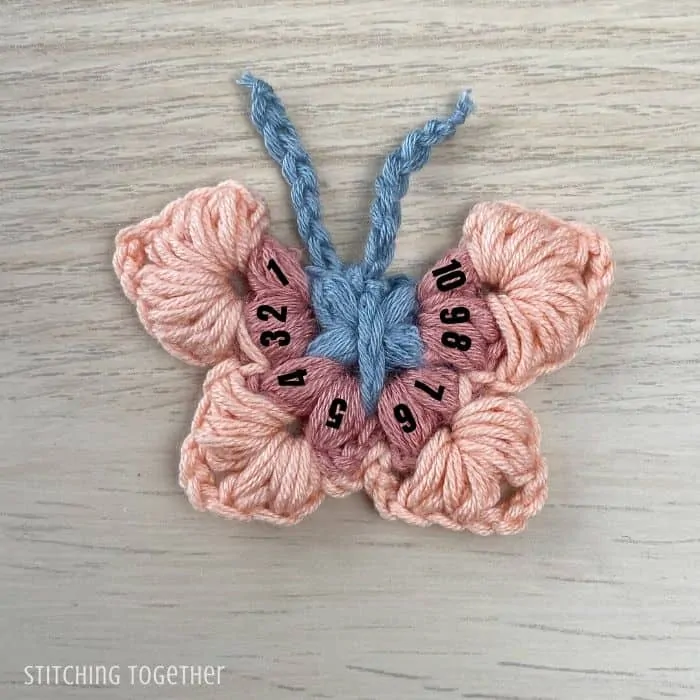
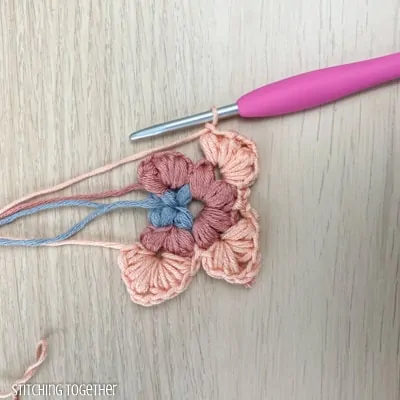
Body: with MC, ch 24, secure ends of chains with knots. Pull the chain between puffs 5 and 6 of round 2 and line up so the ends are even at the top of the butterfly.
Tie/knot chain and cut ends.
Optional: pin antennae and in the ch-3 spaces and lightly steam block being careful not to melt your yarn if you are using acrylic yarn.
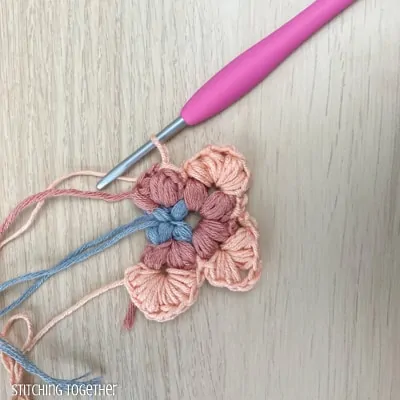
How to crochet a butterfly photo tutorial
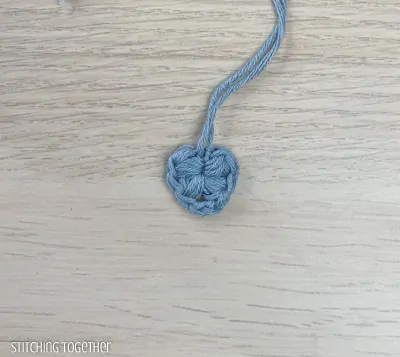
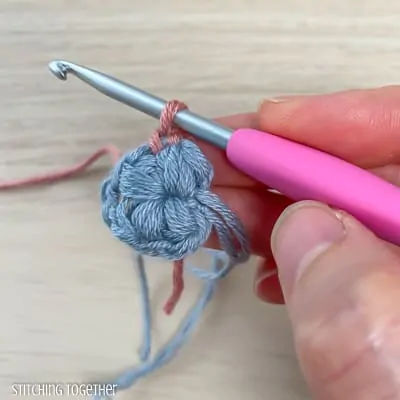
Round 1: Magic circle, ch 2, puff st, ch 1, puff st, ch 3, puff st, ch 1, puff st, ch 1, sl st in ring- do not join, tighten to close. (4 puff sts)
Round 2:
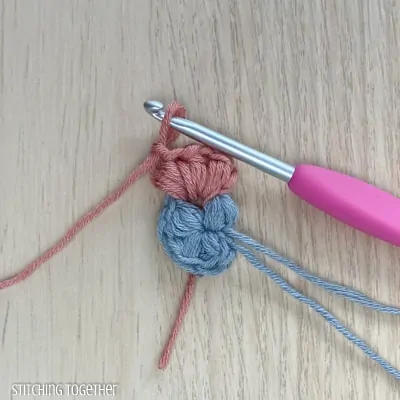
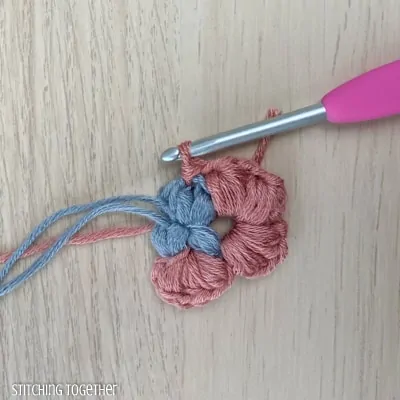
Wing 1 – worked in chain 1 space between the first 2 puff stitches of round 1
Join CC1 in ch-1 sp,
(puff st, ch 2, 2 puff sts, ch 1) in ch-1 sp,
Wings 2 and 3 – worked in chain 3 space between puffs 2 and 3 of round 1
(sl st,
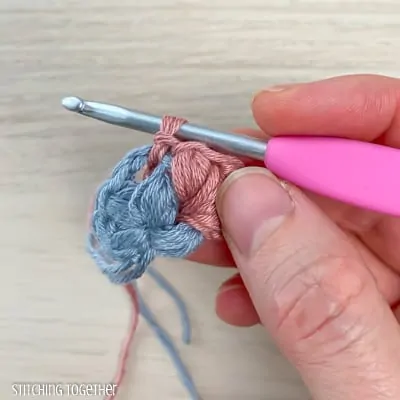
puff st, ch 2, puff st,
ch 2, sc,

ch 2, puff st, ch 2, puff st, ch 1) in ch-3 sp,
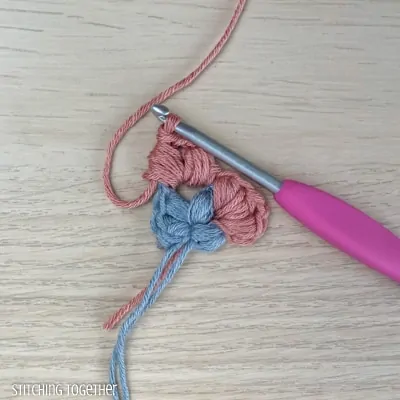
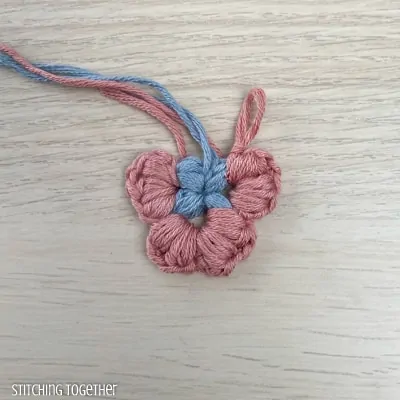
Wing 4 – worked in chain 1 space between the last 2 puff stitches of round 1
(sl st,
2 puff sts, ch 2, puff st, ch 1, sl st) in ch-1 sp.
(10 puff sts)
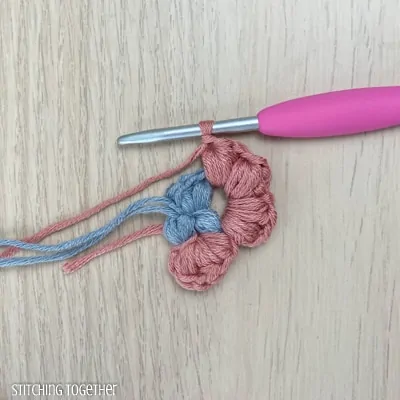
Round 3:
Wing 1– worked in chain 2 space between puffs 1 and 2 of round 2
Join CC2 in ch-2 sp,
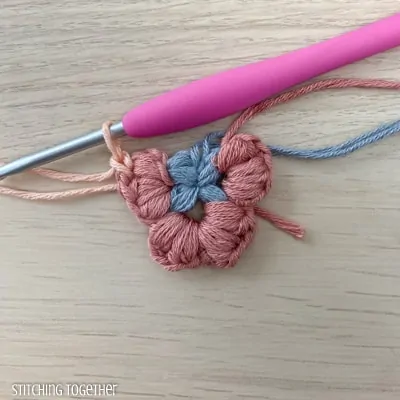
(3 puff sts, ch 3, 3 puff sts, ch 1) in ch-2 sp,
sl st in ch-1 sp (between puffs 3 and 4),
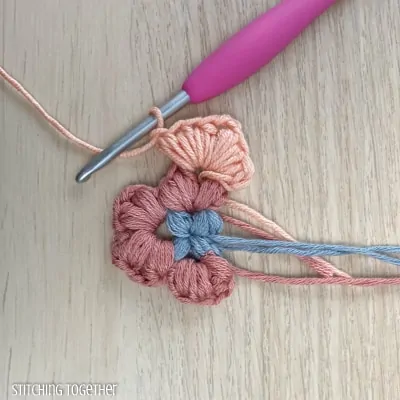
Wing 2– worked in chain 2 space between puffs 4 and 5 of round 2
(sl st,
2 puff sts, ch 3, 2 puff sts) in ch-2 sp,

ch 2, sl st in sc, ch 2,
Wing 3– worked in chain 2 space between puffs 6 and 7 of round 2
(sl st,
2 puff sts, ch 3, 2 puff sts, ch 1) in ch-2 sp,
sl st in ch-1 sp (between puffs 7 and 8),
Wing 4– worked in chain 2 space between puffs 9 and 10 of round 2
(sl st,
3 puff sts, ch 3, 3 puff sts, ch 1, sl st) in ch-2 sp.
(20 puff sts)
Weave in ends.

Body: with MC, ch 24, secure ends of chains with knots. Pull the chain between puffs 5 and 6 of round 2 and line up so the ends are even at the top of the crochet butterfly.

Tie/knot chain and cut ends
Purchase the ad-free PDF of this crochet butterfly pattern in the following places:
Will you share pictures of your finished projects?
- Tag Stitching Together on Instagram with @stitching_together and use the #stitchingtog
- Upload your picture in the Tried It section of this pin
- Share your work in the Stitching Together Community.
You may also like these simple crochet patterns:

Super cute. Thank you for sharing
Wow…They look so beautiful ☺️☺️🥰🥰🥰love them…. Thanks for the pattern.
They are beautiful.will share the pictures once i make them
Thanks Arti!