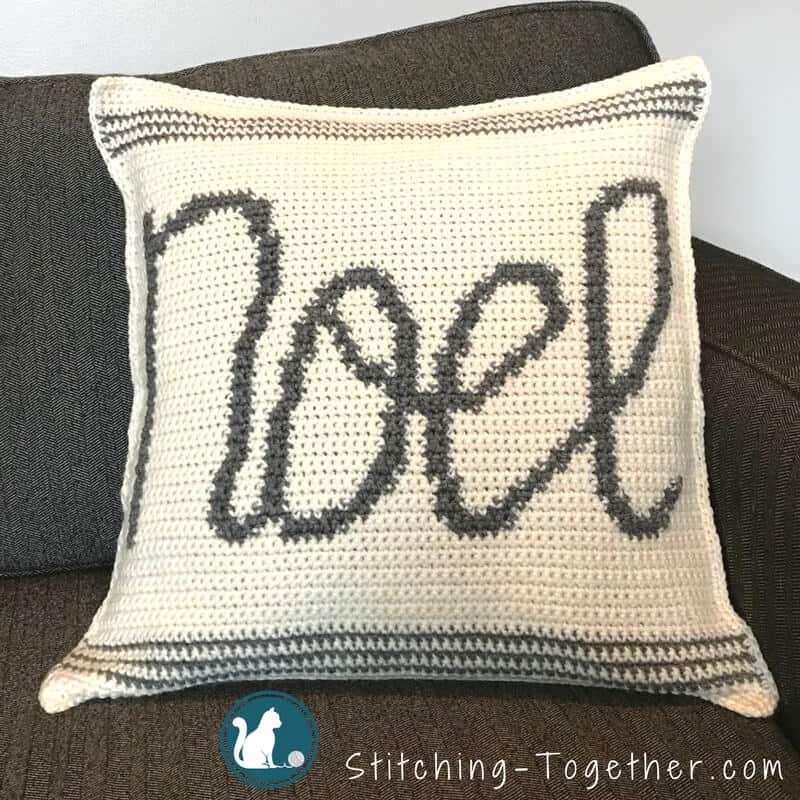
Noel Christmas Crochet Pillow Cover
Disclosure: This post may contain affiliate links. As an Amazon Associate, I earn from qualifying purchases. Please visit my Privacy Policy for disclosures and more information.
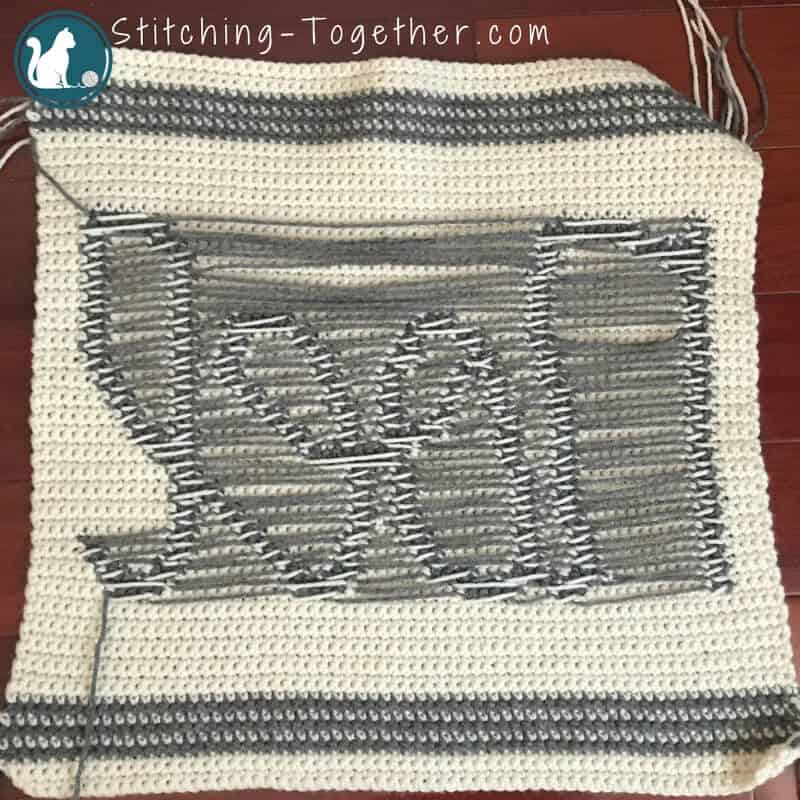
Wouldn’t this cute Christmas Crochet Pillow Cover with the word Noel across the front be a great addition to your holiday decor? You can cover your existing throw pillows and then easily pack it away when the holiday season is over.
What does Noel mean to you?
I must be honest, I love the word but when I planned this Noel crochet pillow cover, I couldn’t remember what exactly Noel means.
The word brings to mind other words like peace, calm and night but the exact meaning escaped my memory. So I did the only logical thing there was to do: I asked professor Google. (If you are thinking I grabbed a dictionary, you are sadly mistaken. Now that I think about it, I don’t even know if we own a dictionary anymore! My how times have changed.)
Related: Crochet Joy Pillow Cover
Google led me to a site that went into about 8 different etymological explanations for the word Noel, which normally I love learning, but I was looking for the simple answer.
Turns out that this peaceful, calming, sweet sounding word is just another way to say Christmas. So, without further ado, Merry Noel and Happy New year!
(The short etymology, if you are wondering: Noel comes from a French word which came from a Latin word that meant “season of birth”. How appropriate.)
Related: Crochet Christmas Tree Pillow Cover
How to Crochet the Noel Christmas Pillow
The construction of this pillow is so simple. You’ll make a front panel (the one with the word “noel” and then 2 back panels.
Then you’ll join all three panels and single crochet them together. The panels on the back overlap and create an envelop which allows you to remove the pillow cover and store it during the off season. No need to store and entire bulky Christmas pillow.
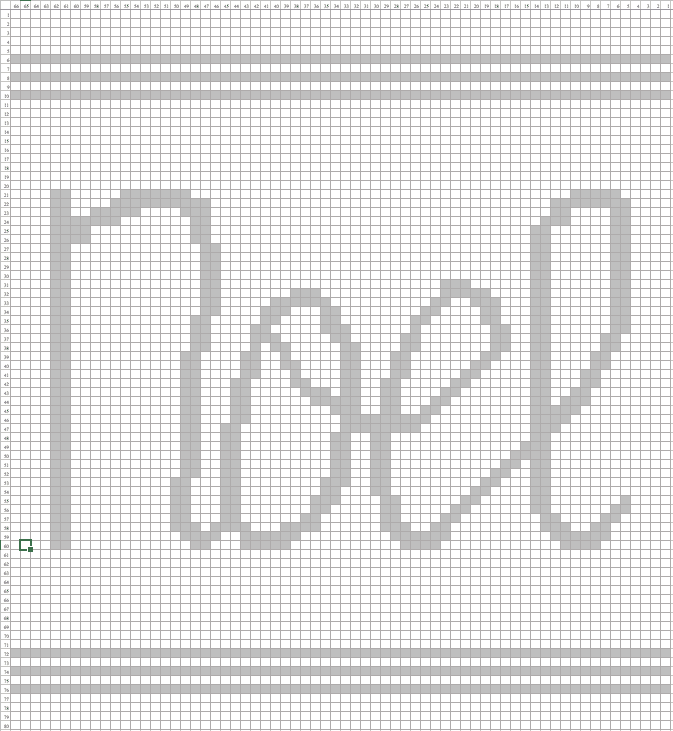
About Stitches and Graph
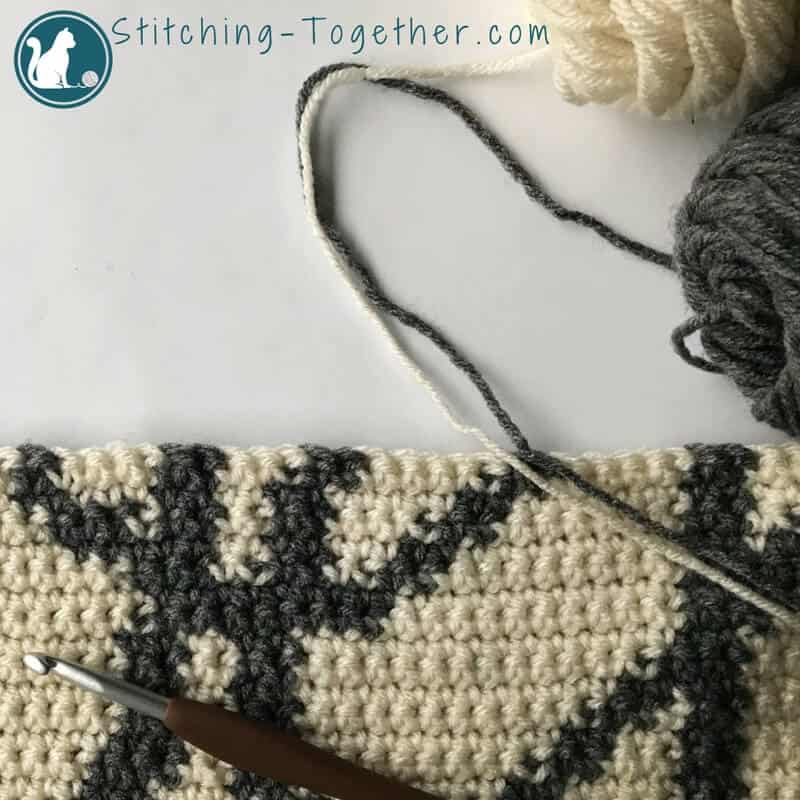
You’ll start by working the front panel by following the graph. Each square of the graph represents one single crochet so you just follow the graph line by line, working back and forth in rows.
You’ll want to be familiar with single crochets and changing colors.
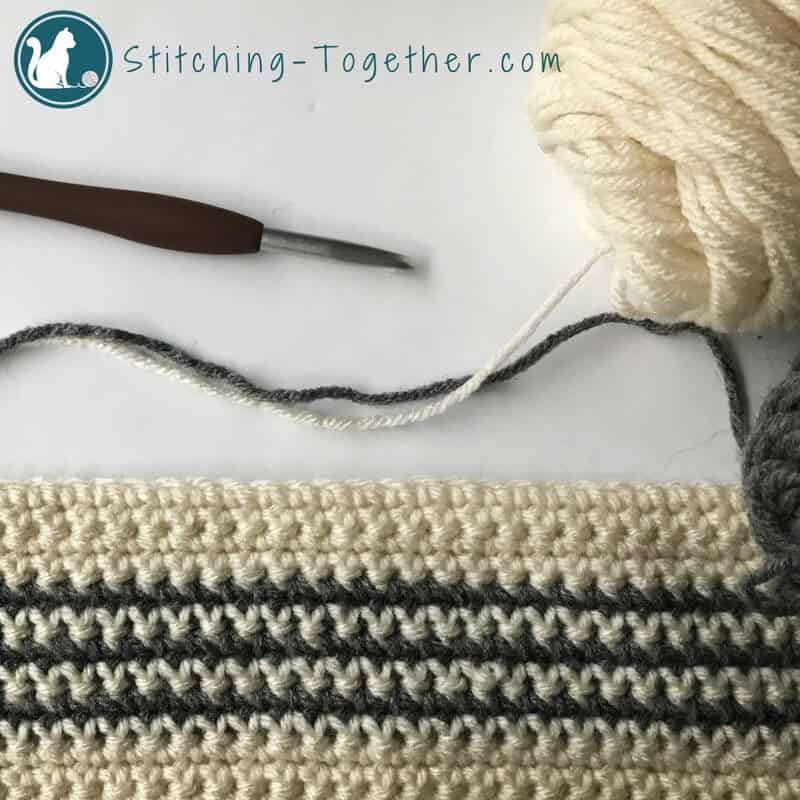
To work the back of the pillow, you will make 2 panels, a larger one and a smaller one that are all double crocheted.
After all three panels are completed, the last step is to single crochet all three panels together.
Since you are crocheting one panel that has all single crochets to 2 panels that have all double crochets, it’s a good idea to put stitch markers in the corners and where the panels overlap as you join the panels together.
Save the Noel Crochet Cushion Cover on Pinterest
Noel Crochet Pillow Cover
Materials:
I/5.5 mm crochet hook
J/6.0 mm crochet hook
Red Heart Super Saver 7 oz (198g), 364 yds (333 m)
*2 skein Red Heart Super Saver in Aran
*1 skein Red Heart Super Saver in Grey Heather
20″ x 20 ” Pillow
.
Everything you need for this project can be order right on Amazon.
Save time and shop online!
.
Abbreviations:
sc: single crochet
fsc: Foundation single crochet
dc: double crochet
fdc: foundation double crochet
ch: chain
Notes:
Each square represents one sc. It is easiest to start with the bottom row as a foundation sc row but you can also start with a chain. Row 1 will be your first row of sc.
As you start working the different colors, pick a side to be the wrong side and you don’t have to worry about weaving in any ends!
The ch 2 to start the rows of the back panel does not count as a stitch.
Gauge:
Front – 4” x 4”: 14 sc by 17 rows (size I hook)
Back – 4” x 4”: 12 dc by 8 rows (size J hook)
Front Panel:
5.5mm (size I/9) hook
Row 1: fsc 66 (alternately chain 65 and dc in the 2nd ch from the hook.)
Rows 2-80: Follow graph to create the front of the pillow – each square is one sc
Back of Pillow
6.0mm (size J/10) hook):
Panel 1 (shorter panel)
Row 1: with Aran fdc 60 (alternately chain 62 and dc in the 3rd ch from the hook.)
Row 2- 21: ch 2, dc in each dc (60)
Panel 2 (longer panel)
Row 1: with Aran fdc 60 (alternately chain 62 and dc in the 3rd ch from the hook.)
Rows 2-24: ch 2, dc in each dc (60)
Joining:
Place panel 1 on top of the wrong side of the front panel lining it up with the top of the front panel. Place panel 2 on top of panel 1 and the front panel lining it up with the bottom of the front panel. Sc around the entire edge of pillow cover, attaching the back panels to the front panel. Fasten off.
Insert pillow, fluff, and relax!