Easiest Crochet Ear Savers for Masks
Disclosure: This post may contain affiliate links. As an Amazon Associate, I earn from qualifying purchases. Please visit my Privacy Policy for disclosures and more information.
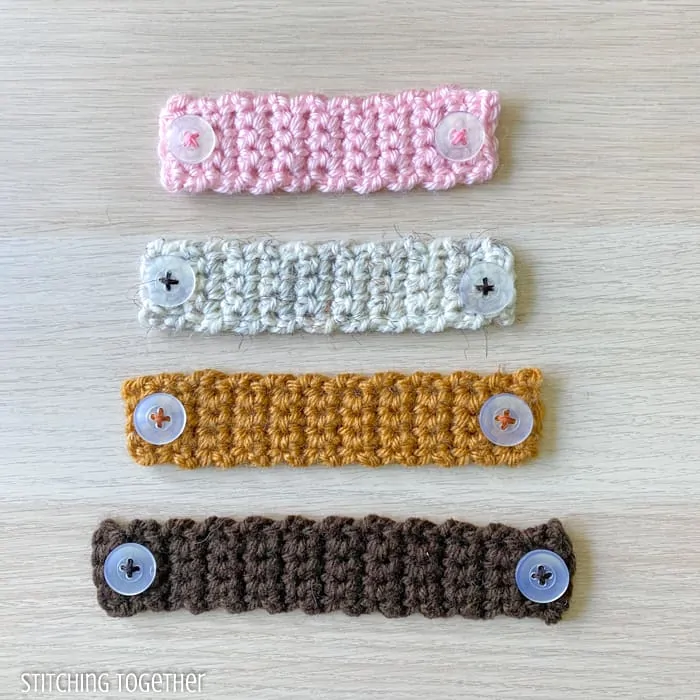
A quick and easy crochet ear saver pattern that’s perfect for beginners! If you already know how to crochet a rectangle with single crochets and sew on some buttons, you can easily make these. Keep reading for the free crochet pattern.
Earlier this week we had new cabinets delivered for the MIL suite which flooded last summer. As I watched the delivery guys unload their truck, I noticed one of them wearing a mask which was bending his ears over TERRIBLY.
I felt so bad for his ears. Who knows how many deliveries he had to make that day and how long he wore that mask without a break?
I sat watching him wishing a had a stash of crochet ear savers on hand so I could give him one and save his poor ears. I almost ran to grab some yarn, knowing I could come up with something quick but I had no idea how long the delivery would actually take.
They were done and on their way before I had much more time to think about it, but I decided I should make some to have on hand and I know they will be especially helpful if my kids need to go out and wear masks.
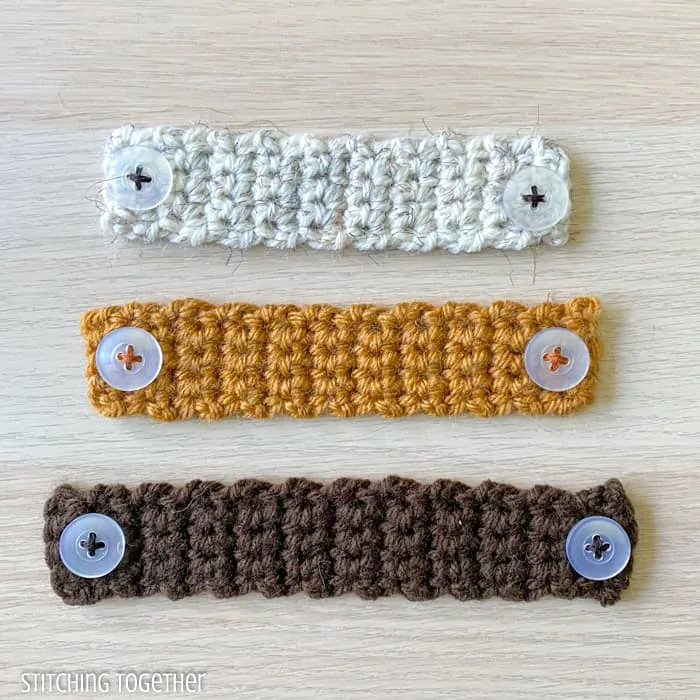
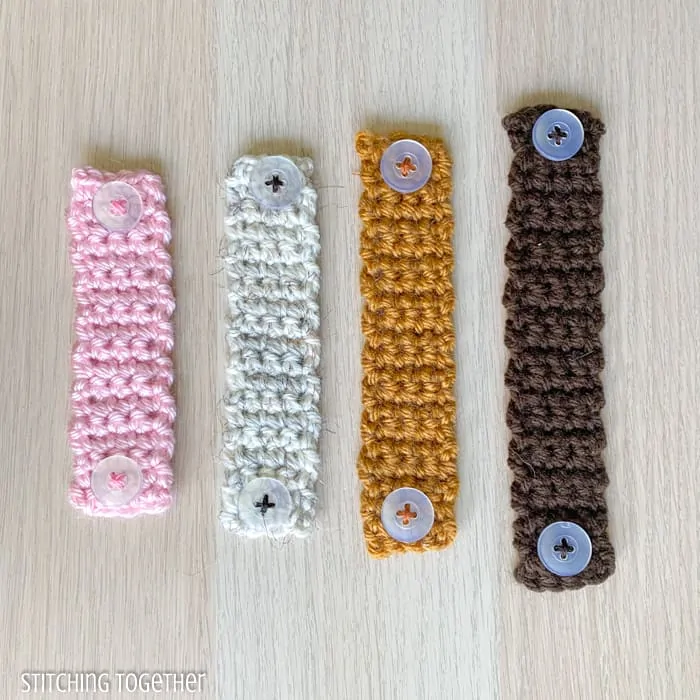
Most of the ear saver patterns out there are cute little oval ones, but I wanted to make some that were even more beginner friendly. As a beginner crocheter I always struggled with oval shapes but rectangles were easy to master.
How to Crochet an Ear Saver for Masks
This easy ear saver is worked back and forth in rows which allows you to adjust the size and use different yarns without worrying if your measurements will come out correctly.
It doesn’t matter if your ear saver is a little wider or narrower than mine, and by working the length by adding rows you can easily make different sizes.
Below you’ll find the row counts I used for each mask, but working from the measurements will make it easier to adjust for any differences in yarn size or crochet tension.
What size do I make the Ear Savers?
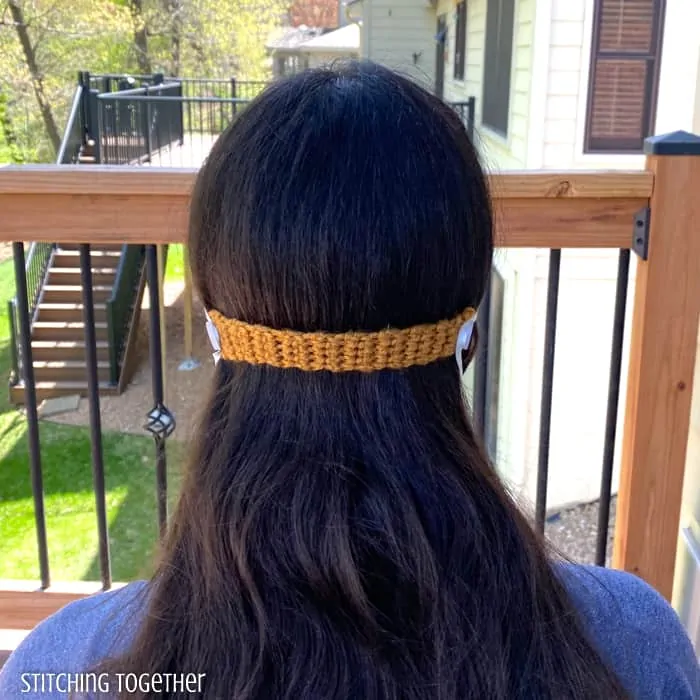
Since these ear savers are worked in rows, they DO stretch which I’ve taken into consideration when providing the measurements. It isn’t imperative that the sizes are exact but you’ll want the buttons of the ear savers to sit behind the ears in the hairline when you are wearing a mask.
There are four sizes provided: kids, small, medium, and large. They are each 0.5″ different in length which turns out to be approximately 2 rows of single crochets.
What yarn do I use?
The samples for the pattern provided below were designed using a basic acrylic worsted weight yarn like Vanna’s Choice yarn. The largest ear saver only took 0.1 oz of yarn with each of the other sizes taking less (obviously.)
You can grab those little leftover balls of yarn you haven’t known what to do with to make these ear savers. You’ll just want to make sure it is a comfortable yarn that isn’t itchy since it will be sitting on the backs of people’s heads and potentially coming in contact with skin. Acrylic or cotton yarns will work great.

If you are making these for health care professionals, you will want to check with them to see if there are specific material requirements for mask accessories.
Are the stitches easy? – I am just a beginner
I am so happy to say that the stitches are easy and this really is a perfect beginner project. So if you’ve just begun to crochet or you are dusting off old hooks and feel a little rusty, you should be able to jump right in and get started.
You’ll need to know how to chain, turn at the end of each row and single crochet. Counting your stitches and your rows is also a helpful skill to have and this is a great project to practice on.
It is so nice to be able to use and grow our skills to make something that is helpful in our crazy world right now.
Do you know other friends who know how to crochet? Please be sure to share this pattern with then and you can click here to save it on Pinterest.
Check out these cute templates by the Knotty Boss as a great way to package ear savers for gifting or selling.
Easiest Ear Saver Crochet Pattern
Get the inexpensive printable Ear Savers Crochet Pattern PDF here.
Skill Level:
Beginner
Materials:
-US size H/8, 5.0 mm crochet hook (these are my favorite crochet hooks and you can get them on Amazon)
-Scrap amounts of worsted weight yarn
-Large eye yarn needle (optional for weaving in ends – these are my favorite)
-2 buttons and thread
Abbreviations:
ch(s): chain(s)
sc: single crochet
Finished sizes and row counts: 1.125” wide by 4” (4.5”, 5”, 5.5”)
Kids: 4” long – 17 rows
Small: 4.5” long – 19 rows
Medium: 5” long – 21 rows
Large: 5.5” long – 23 rows
Notes:
You may need to add or subtract rows to match the measurements depending on the thickness of your yarn and the tightness of your stitches.
If your rectangles don’t lay flat, don’t worry, that’s normal and probably due to your tension. Once they are in use, you won’t notice that they didn’t lay flat but if it bugs you, there are a couple things you can do.
You can blast them with a little steam (be super careful if using acrylic that you don’t melt the yarn) or dampen them and smooth them flat to dry.
Of course you can use pins and a blocking mat to get perfect little rectangles, but who has time for that?
Pattern Instructions:
Ch 5
Row 1: sc in the 2nd ch from hook and in each stitch across, turn (4)
Row 2: ch 1, sc in each stitch across, turn (4)
Repeat row 2 until the ear saver reaches the desired length.
Weave in ends. Securely attach buttons to each end of the ear saver.
Purchase the ad-free printable PDF of this pattern in the following places:
Will you share pictures of your finished projects?
- Tag Stitching Together on Instagram with @stitching_together and use the #stitchingtog
- Upload your picture in the Tried It section of this pin
- Share your work in the Stitching Together Community.
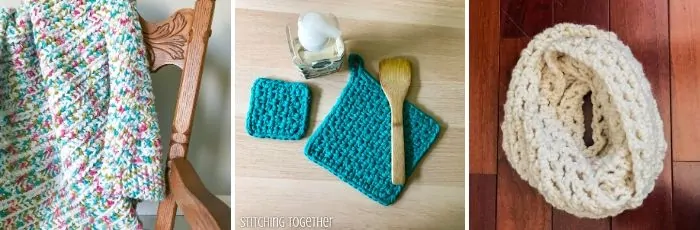
Here are other great beginner crochet patters to check out: