North Shore Hat – Crochet Toddler Hats
Disclosure: This post may contain affiliate links. As an Amazon Associate, I earn from qualifying purchases. Please visit my Privacy Policy for disclosures and more information.
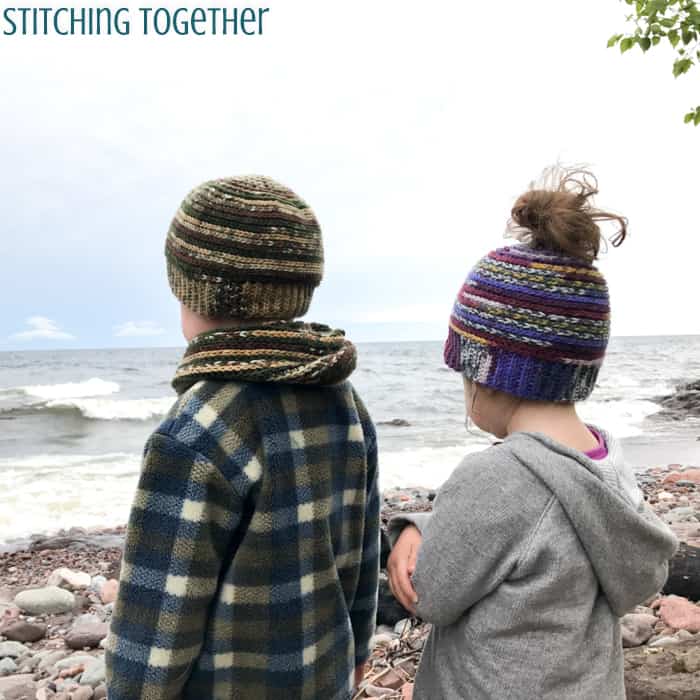
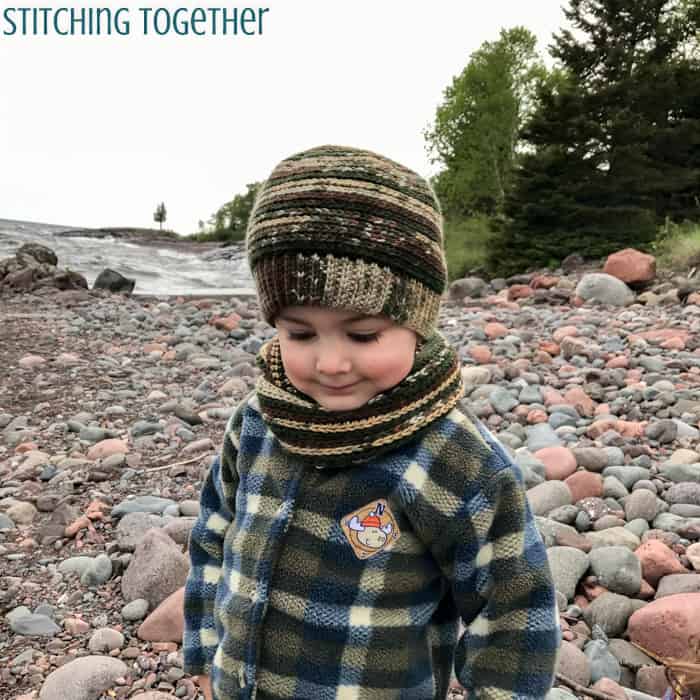
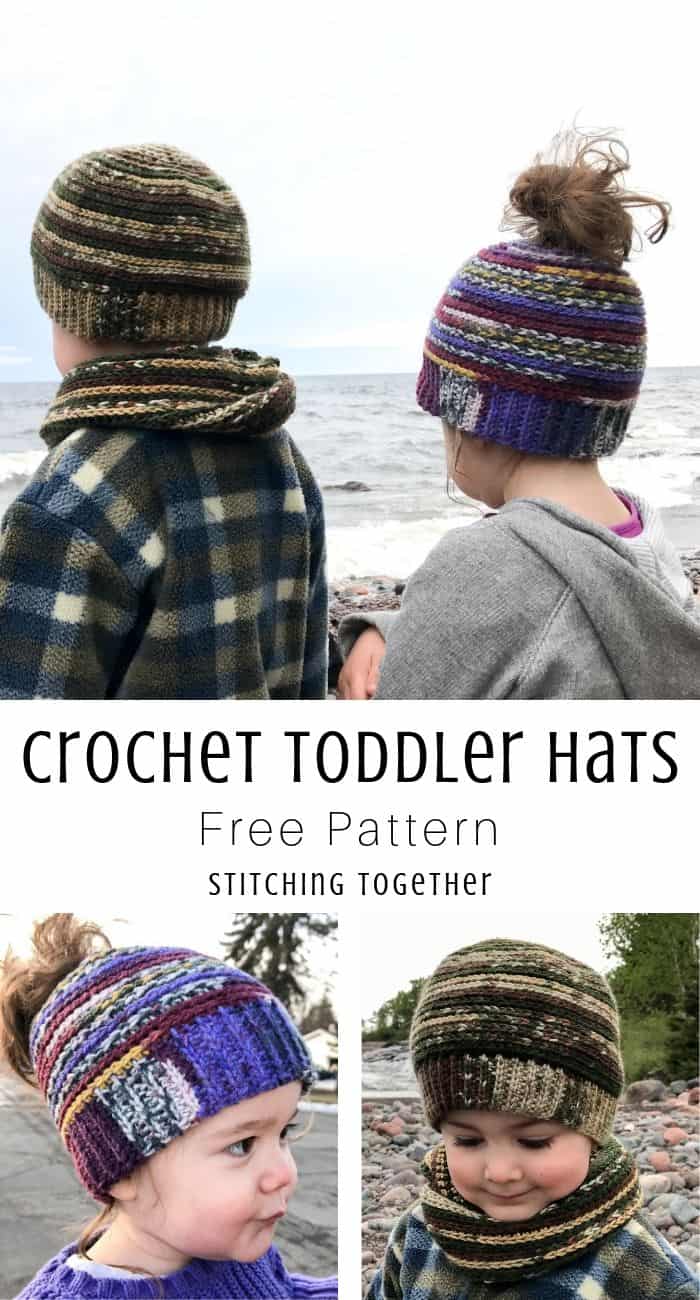
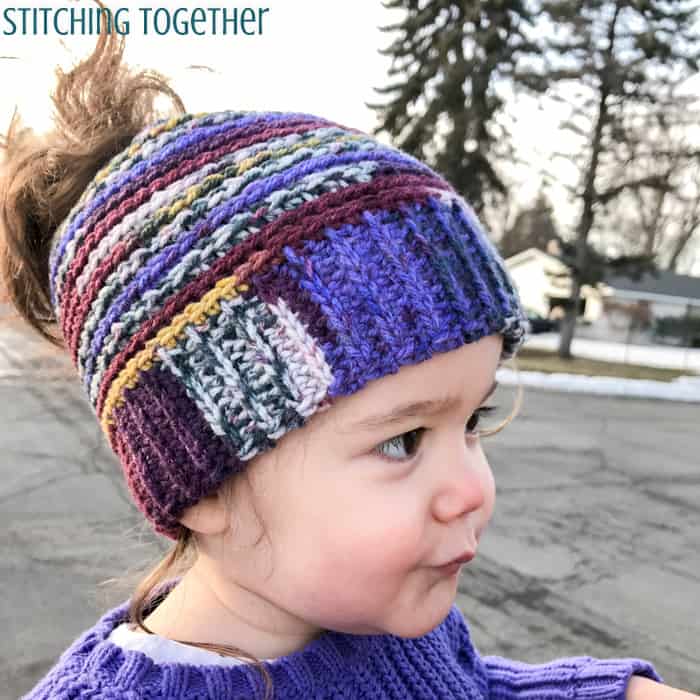
Looking for cute and easy crochet toddler hats? These hats, great for boys and girls, whip up quickly and only take one skein of yarn. The free pattern even comes with a messy bun option!
Have you ever visited the North Shore of Lake Superior? If you haven’t, you should consider adding it to your list of places to visit. It is absolutely gorgeous and the vastness of the lake baffles my mind.
This past week, we rented five cabins on the shore and enjoyed three (too short!) days with family. I kept saying to myself, as the waves crashed into the rocky shore, “who needs the ocean?”. (Sea creatures, that’s who.)
Related: North Shore Toddler Scarf
A majority of my extended family traveled here from around the country to enjoy the week together. It was such a fun and good time.
There was a beautiful storm one of the days, which cleared up enough for me to snap some pictures of the North Shore Hats and scarf, and kept the temperature cool enough that my kiddos were thankful to be wearing hats.
Related: North Shore Slouchy Hat
Related: Love This Chunky Yarn Crochet Hat Pattern
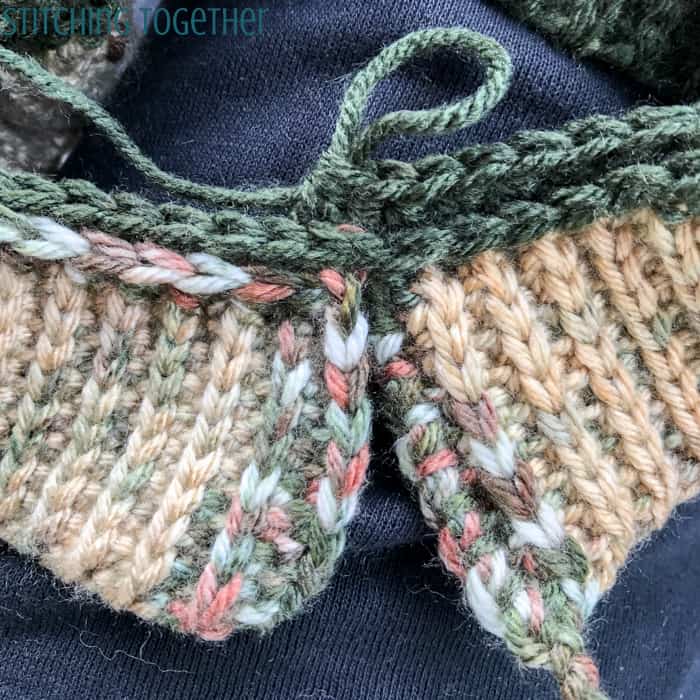
At first glance, the hat looks knitted, but it is all crochet! (I originally called this pattern the Not Knitted Knit Hat and then the I Can’t Believe It’s Not Knitted Hat – mouthfuls.)
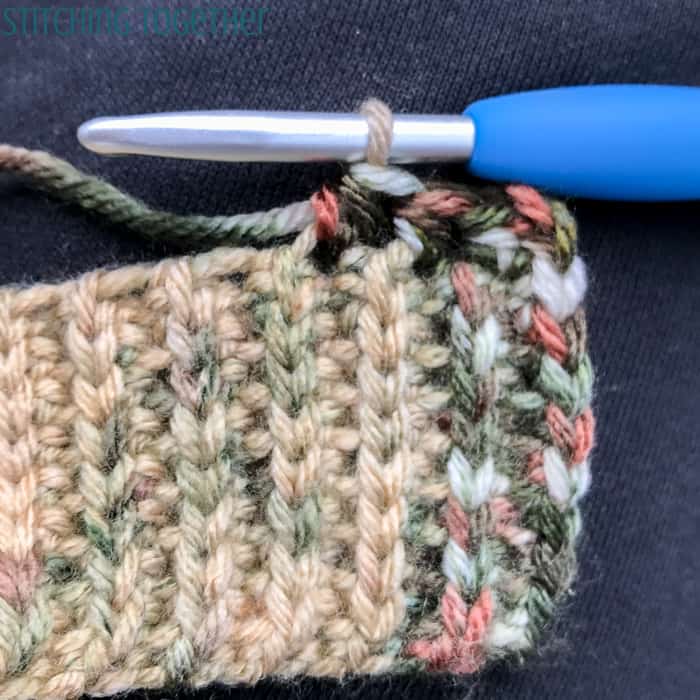
The band is worked by using the single crochet rib stitch which gives a look similar to a knitted/purled ribbing. It is an easy stitch to master, but it isn’t a super stitch. I think the look of that ribbing makes every stitch worth it though!
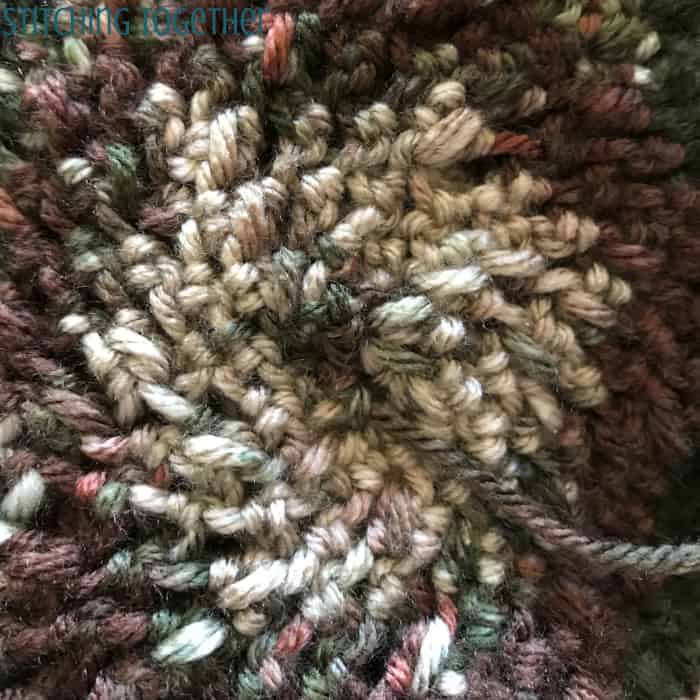
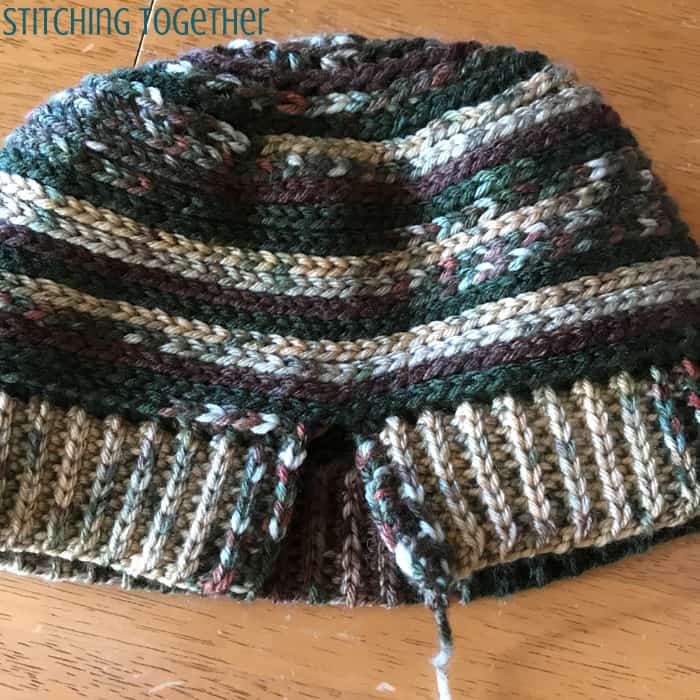
The rest of the hat is worked in a half double crochet through the third loop. Since you are working in the round, the top of the stitches in each row gets pushed forward giving it that knitted look. (Half double crochets are my fav!).
The hat is made by first working the band, then turning that on its side and working continuous rounds around the band.
Yarns used for the crochet toddler hats
I first made the messy bun toddler hat with unlabeled yarn I had in my stash. I thought FOR SURE I knew what the yarn was until I went to write up the pattern. It took me months to figure out what yarn it was.
Thanks to a sleepless night and random Craigslist scrolling for yarn, I found it! As I feared, it has been discontinued. (You can see pictures of it here.)
For the boy toddler hat, I turned to one of my favorite worsted weight yarns, Premier Everyday (Amazon) which comes in such a wide variety of colors and prints.
The Carnival print is really similar to the discontinued yarn I used for the messy bun hat!
Save the crochet toddler hat patterns on Pinterest!
North Shore Hat
Materials:
Please visit my Resources page to see why I recommend these tools and to see other recommendations. (Links below lead to Amazon.)
- US-Size H Crochet Hook
- 1 skein Premier Yarn Deborah Norville Collection Everyday Print Yarn in Oak Moss
- Large Eye Tapestry Needle
Abbreviations:
sl st: slip stitch
st(s): stitch(es)
ch(s): chain(s)
sc(s): single crochet(s)
hdc(s): half double crochet(s)
In the 3rd loop: half double crochets worked only in the 3rd loop of the hdc in the row below
hdc2tog(s): half double crochet 2 together camel stitch style
Stitch Instructions:
Single crochet rib stitch: work up through the loop (back bump) around the post of the sc in the row below.
half double crochet in the 3rd loop: work through the ridge/3rd loop loop of the hdc in the row below. (How to video by Red Heart here)
Note:
The sc rib stitch does not have as much stretch as a lot of other crochet ribbing. The band will be closer to the true measurement of the child’s head circumference instead of smaller to allow for stretch. See the ear warmer size chart for a guide on head circumference.
Instead of using row counts for the band, work the band to the desired length for the head circumference.
Pattern:
Band:
Ch 10, turn
Row 1: sc in 2nd ch from hook, sc in each ch across.
Row 2: ch 1, turn, sc rib stitch in each sc across. (See the tutorial for single crochet rib stitch)
Repeat row 2 until the band measures approximately 19” (used for both my almost 3 year old and 4.5 year old). Do not bind off. (You can sew the band together at this point or you can wait until the end which I find to be easier.)
Hat:
Round 1: From the band, ch 2. Turn band horizontally and hdc along the long edge of the band. Place 1 hdc at the end of each row of the band.
Join with sl st to the top of the ch 2 to form a circle (if you haven’t already joined the band)
Row 2-13: hdc in the 3rd loop of each hdc. Continue around – do not join rounds. Rounds can be easily counted by counting up from the band opening if you haven’t joined it yet.
Messy Bun Option:
Row 14-16: start decreases: hdc in the 3rd loop in the next 2 sts, hdc2tog in the 3rd loop, hdc in the 3rd loop in the next 2 sts
At the end of round 16, sc in next st then sl st into the next st. Bind off.
Regular hat:
Row 14: close of circle: hdc in the 3rd loop in the next 2 sts, hdc2tog in the 3rd loop, hdc in the 3rd loop in the next 2 sts until the hole closes (about 21 rounds). Bind off and use the tail to secure the hole.
Finish hat by sewing the band together. Weave in ends!
Who will you make these toddler hats for? It would be great if you share your finished work! You can do that in several ways:
- Tag Stitching Together on Instagram with @stitching_together and use the #stitchingtog
- Upload your picture in the Tried It section of this pin
- Save your project on Ravelry and link it to this pattern
- Share your work in the Stitching Together Community.
