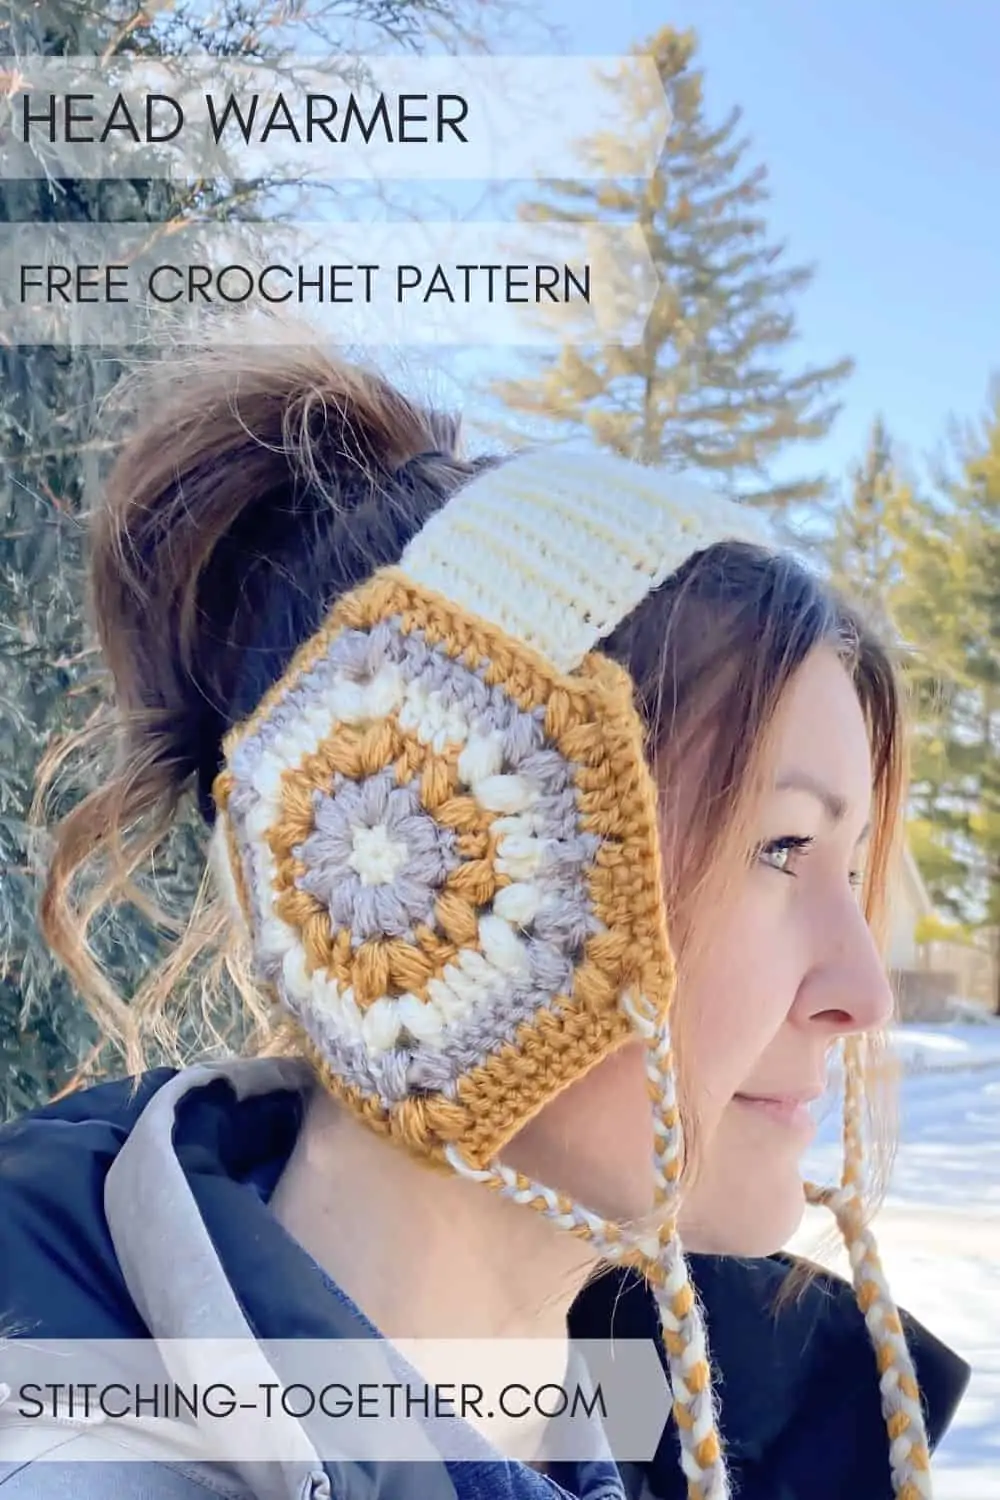
The Parker Crochet Head Warmer
Disclosure: This post may contain affiliate links. As an Amazon Associate, I earn from qualifying purchases. Please visit my Privacy Policy for disclosures and more information.
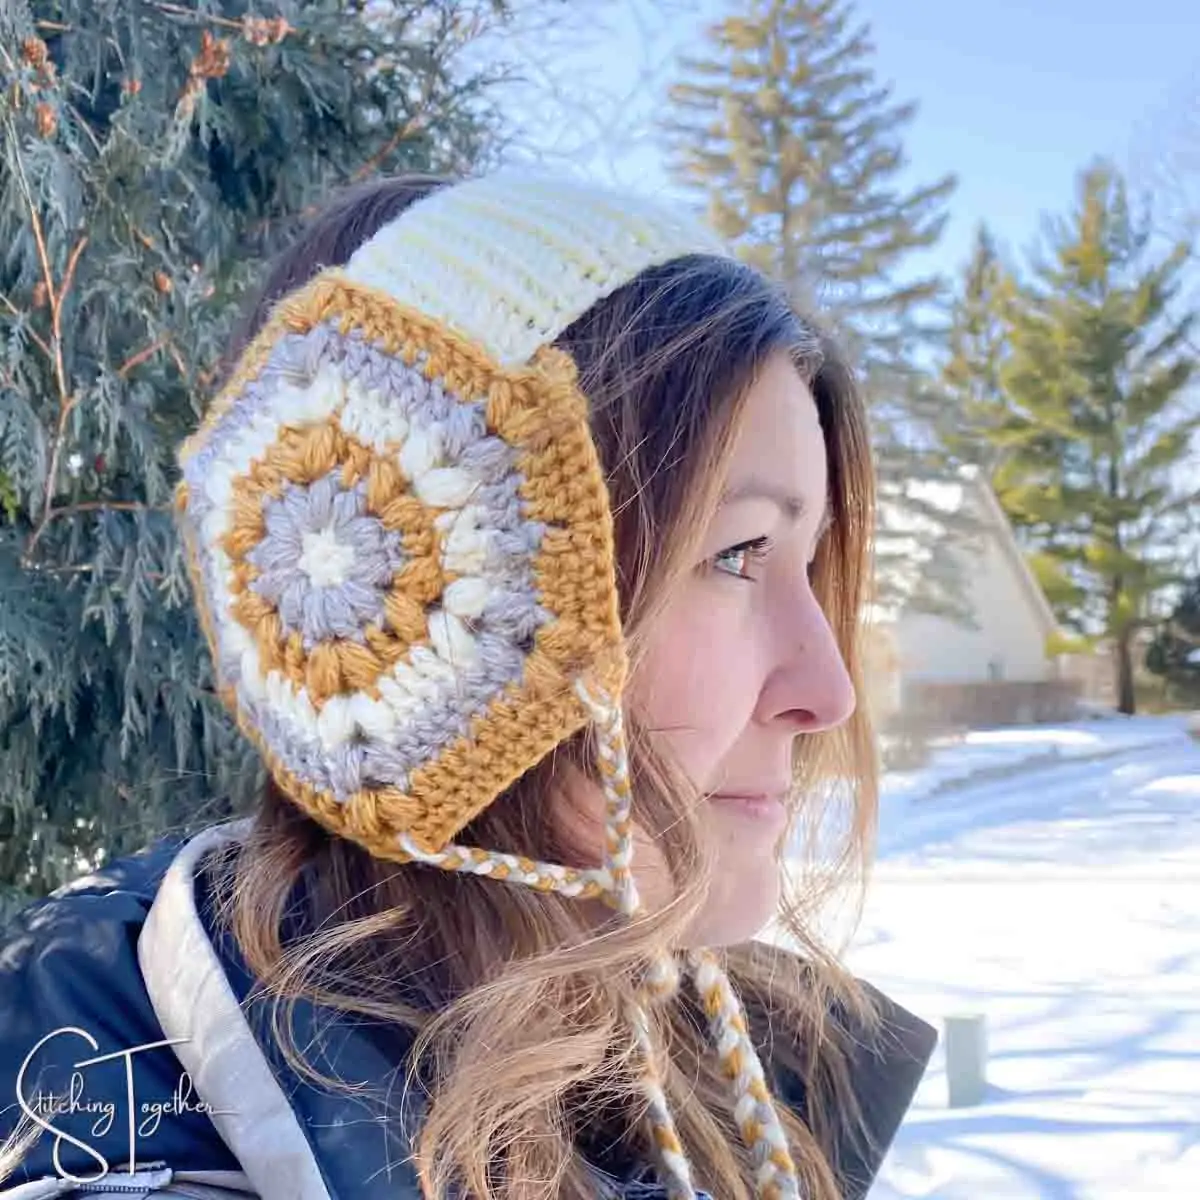
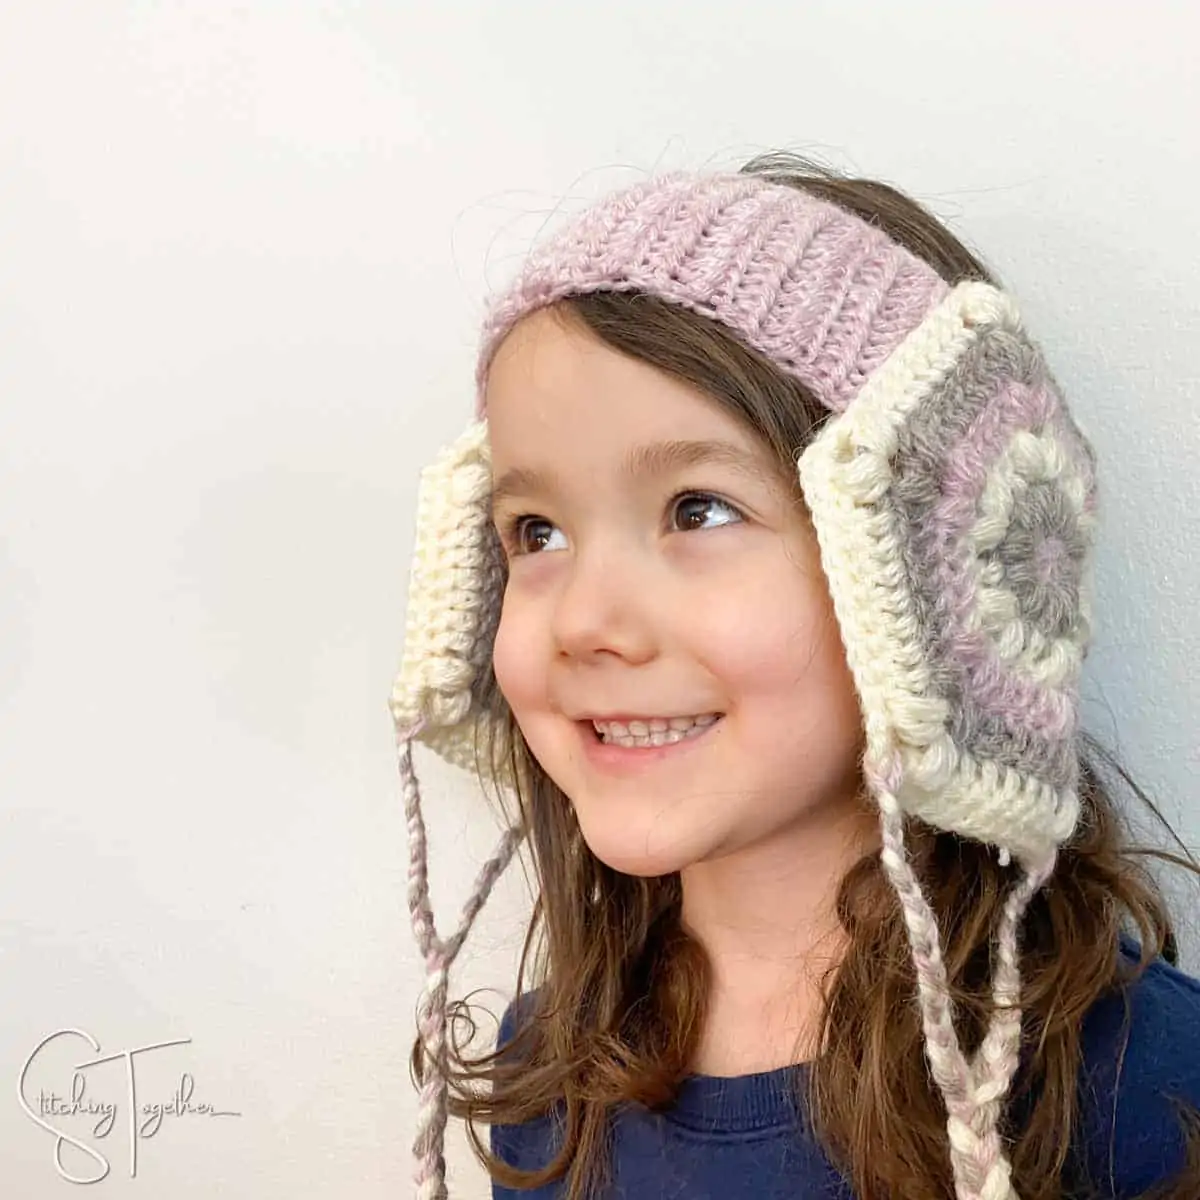
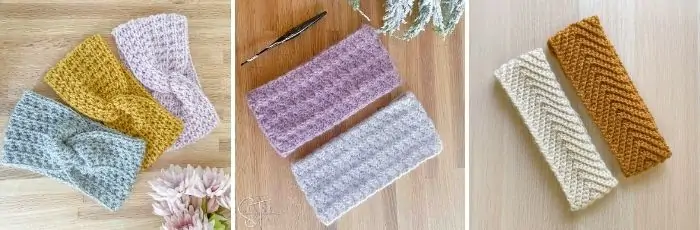
More than just a headband or ear warmer, the Crochet Head Warmer is a gorgeous and unique winter accessory. It’s the perfect handmade blend of a headband and earmuffs that’ll keep you warm through the cold winter months.
You can keep reading for the free crochet pattern or purchase the ad-free PDF right here.
I don’t usually pay too much attention to pop culture or pop fashion but crochet ALWAYS catches my eye and when some of the biggest pop icons in the world wear handmade accessories, I can’t help but notice.
The designer, MISU A BARBE, creates some amazing and unique knitwear, but I fell in love with her unique ear warmer concept so I wanted to design something similar that we can make. (If you want to order her gorgeous ear warmers, be sure to contact MISU A BARBE and ask about International Shipping.)
I love the idea of giving a regular ear warmer headband extra warmth by adding on ear flaps. They are like ear muffs, but better in my opinion.
Related: Chloe Crochet Ear Warmer Headband
How do you crochet a head warmer
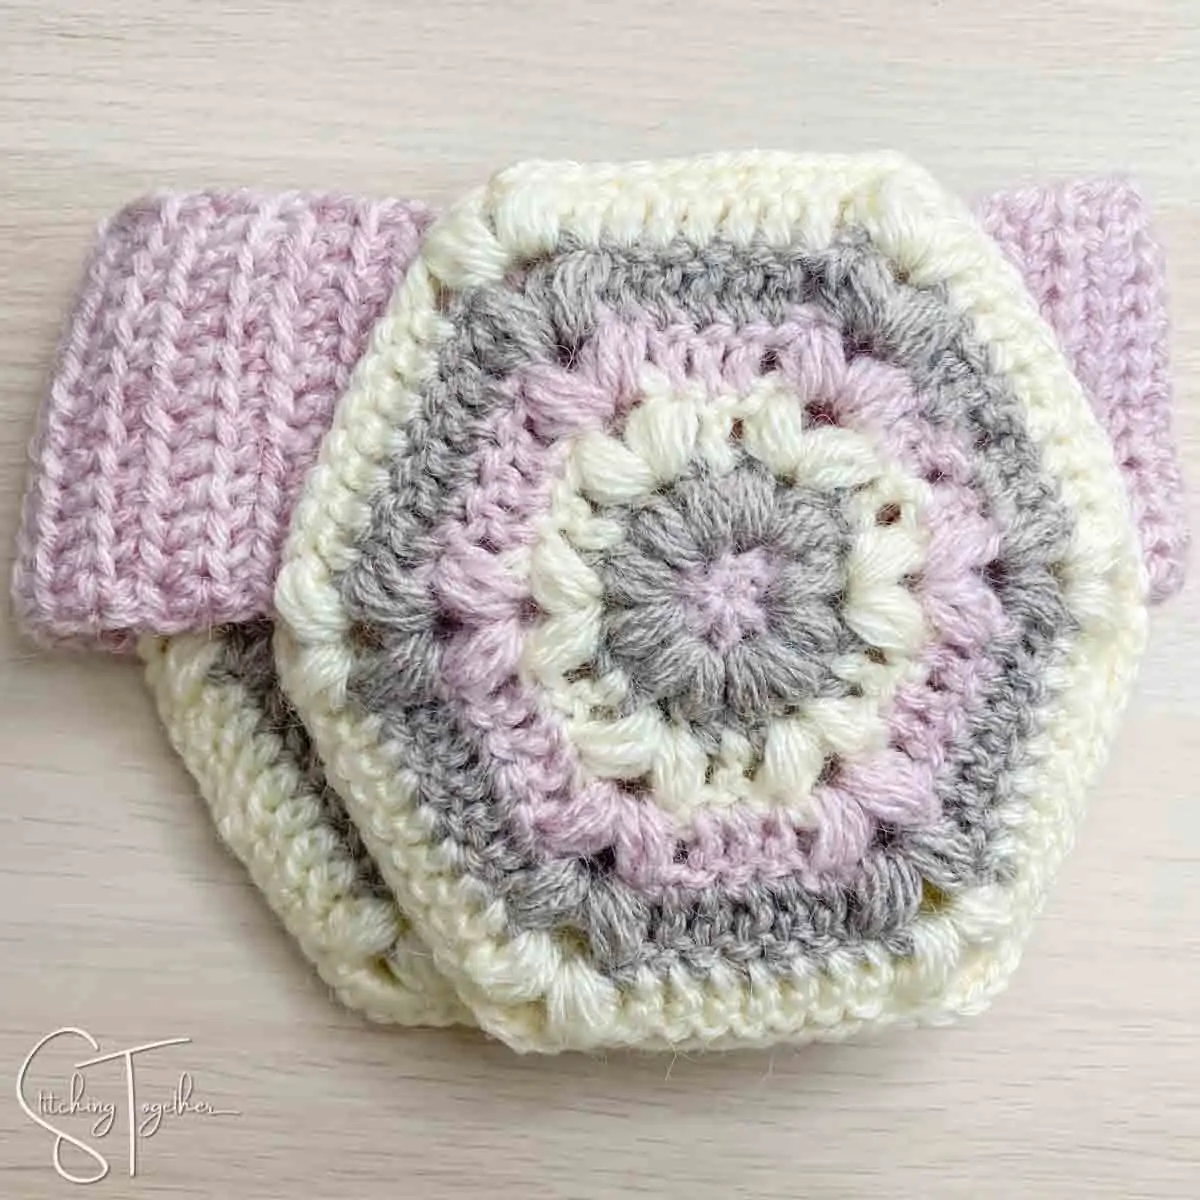
While this hexagon head warmer might look complicated, it really isn’t. First, you’ll want to crochet four identical hexagons then you’ll hold two of them together and attach them on 3 sides and then repeat the process for the other two hexagons.
The crochet headband is super simple and you can make it to fit anyone using the headband size chart. The headband is nice and stretchy so you’ll want to keep that in mind while deciding on the final measurements.
Once you’ve finished both the hexagons and the headband, you’ll take one set of hexagons and slide the headband in the opening between the two hexagons then crochet the top closed. Repeat for the other side.
To finish up the entire crochet head warmer pattern, you’ll add some cute ties. They look great braided but you could also use your hook and make chains or some type of crochet rope.
The Parker Head Warmer Crochet Pattern
Skill Level: Intermediate
Materials:
US size H/8, 5.0 mm crochet hook
Touch of Alpaca by Lion Brand Yarn (approximately 270 yds (3.5 oz) total for a woman’s size headband)
Large Eye Yarn Needle
.
Everything you need for this project can be ordered right on online.
Save time and shop from home!
Touch of Alpaca Yarn (Amazon)
Touch of Alpaca Yarn (Lion Brand)
.
Abbreviations:
CA: Color A (Blush or Cream)
CB: Color B (Taupe)
CC: Color C (Cream or Goldenrod)
yo: yarn over
ch: chain
hdc(s): half double crochet
sl st: slip stitch
puff: puff stitch (see notes)
dc(s): double crochet(s)
st(s): stitch(es)
flo: front loop only
sp: space
sc: single crochet
Gauge: 3” x 3” = 8 rows by 13 hdcs (taken from headband)
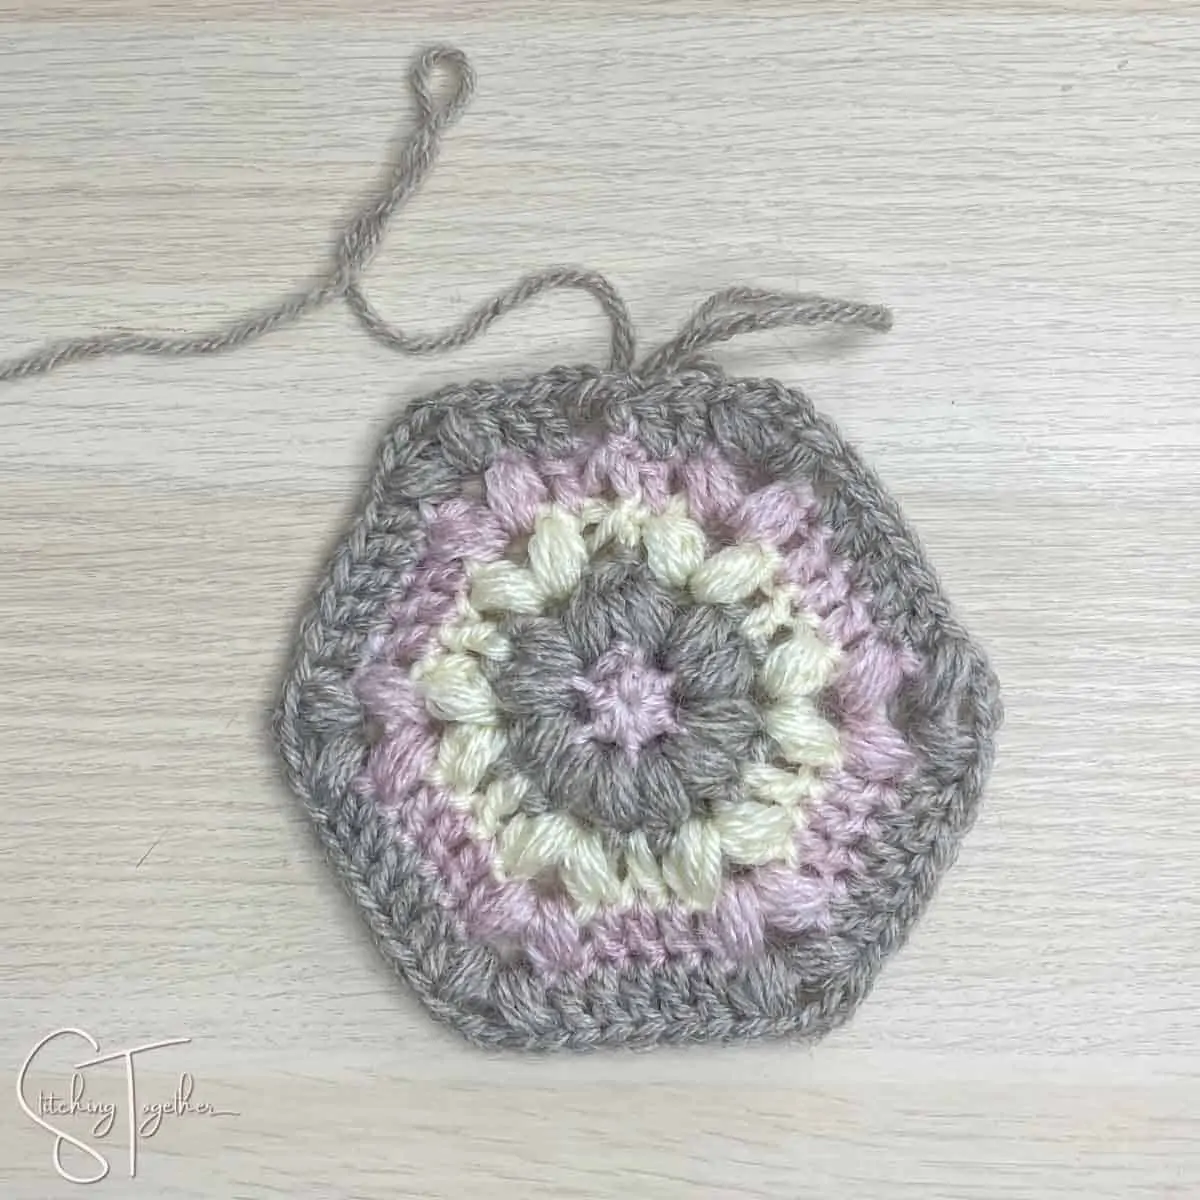
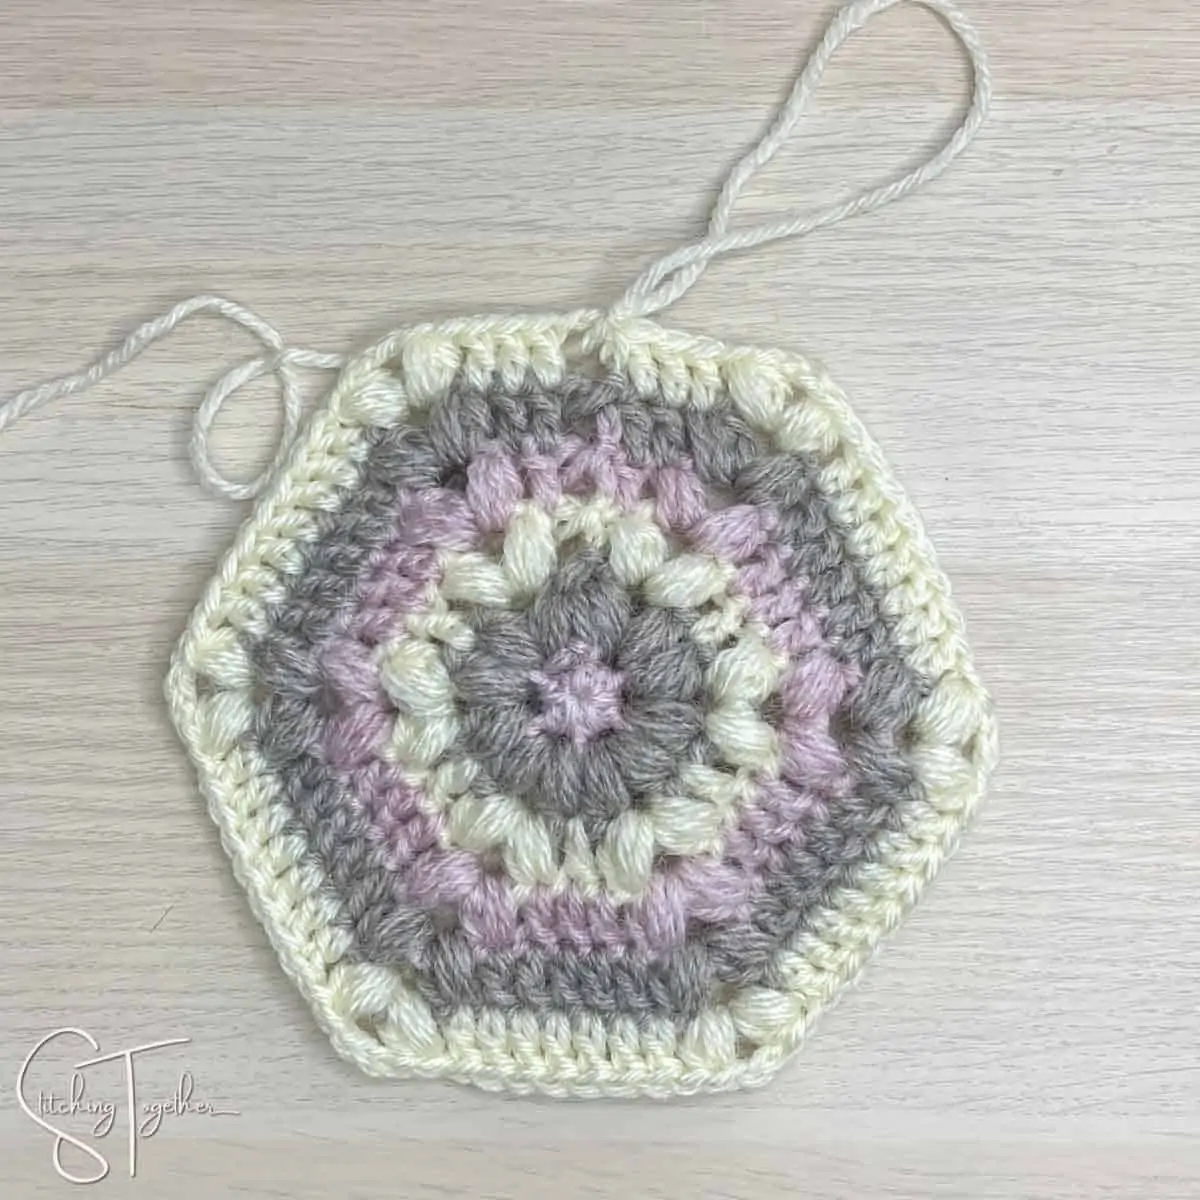
Finished Size: the hexagons measure about 6” across
Notes:
puff stitch: [yo, pull up a loop] 3 times (7 loops on the hooks), yo, pull through all 7 loops on the hook.
The chain 3 that starts rounds 3-6 counts as the first dc of the round.
After finishing the hexagons, you’ll want to measure one side of the hexagon and use that as a guide for how wide your headband should be. (One side of my hexagons measure approximately 3” so that is how wide I worked my headband.)
The finished headband is very stretchy, so you’ll want to use smaller sizes of each range when determining the length of the headband. (See the crochet ear warmer size chart)

Head Warmer Crochet Pattern Instructions:
Hexagons make 4 each
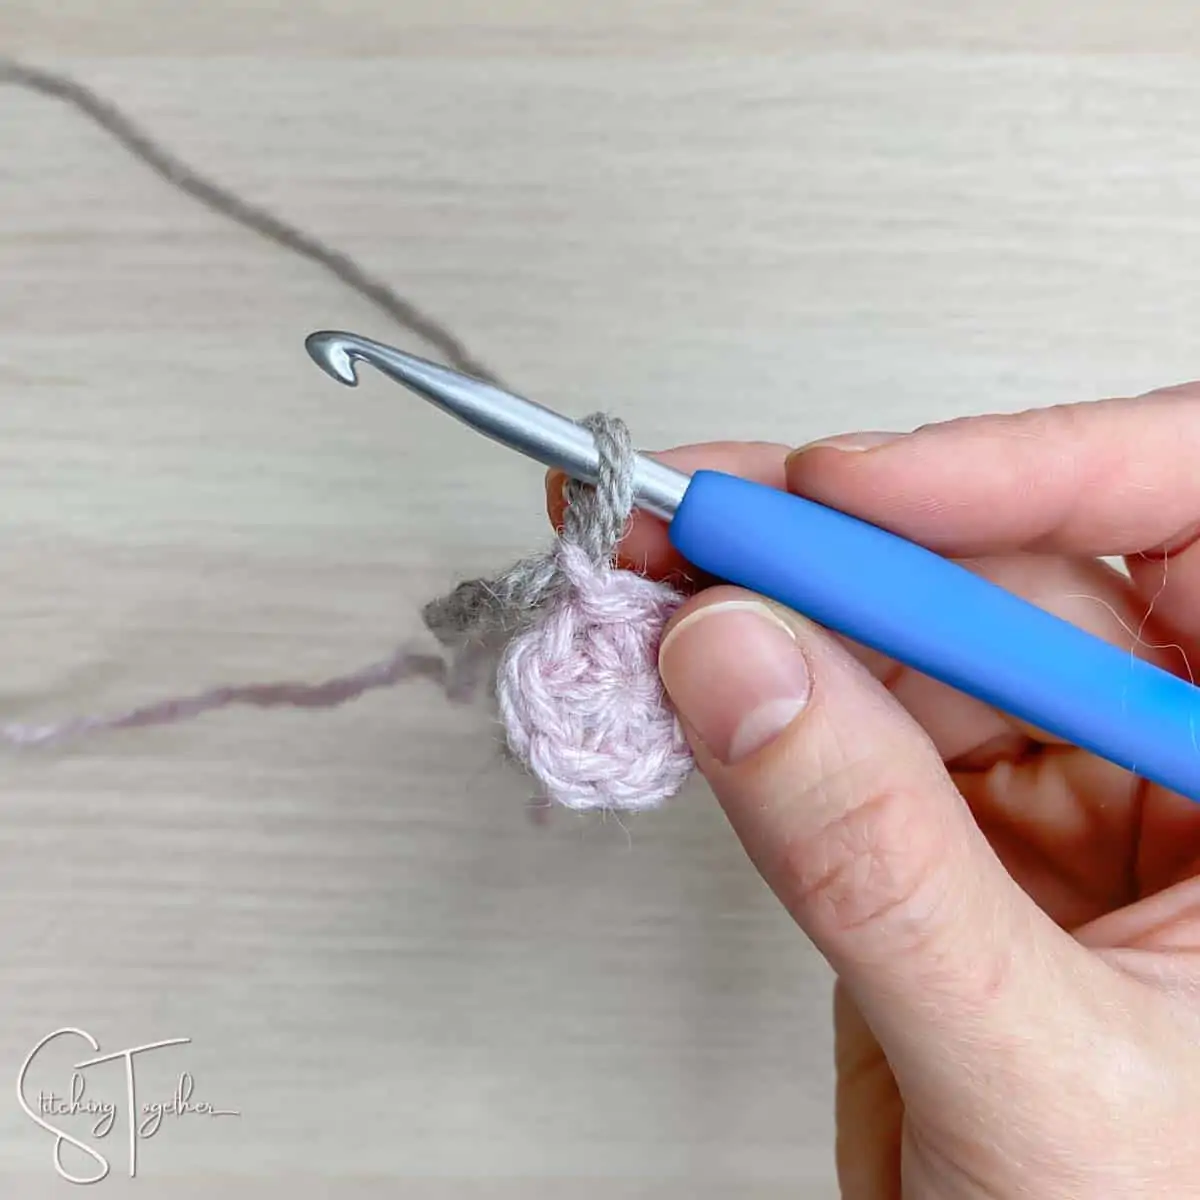
Start with a Magic Circle with CA
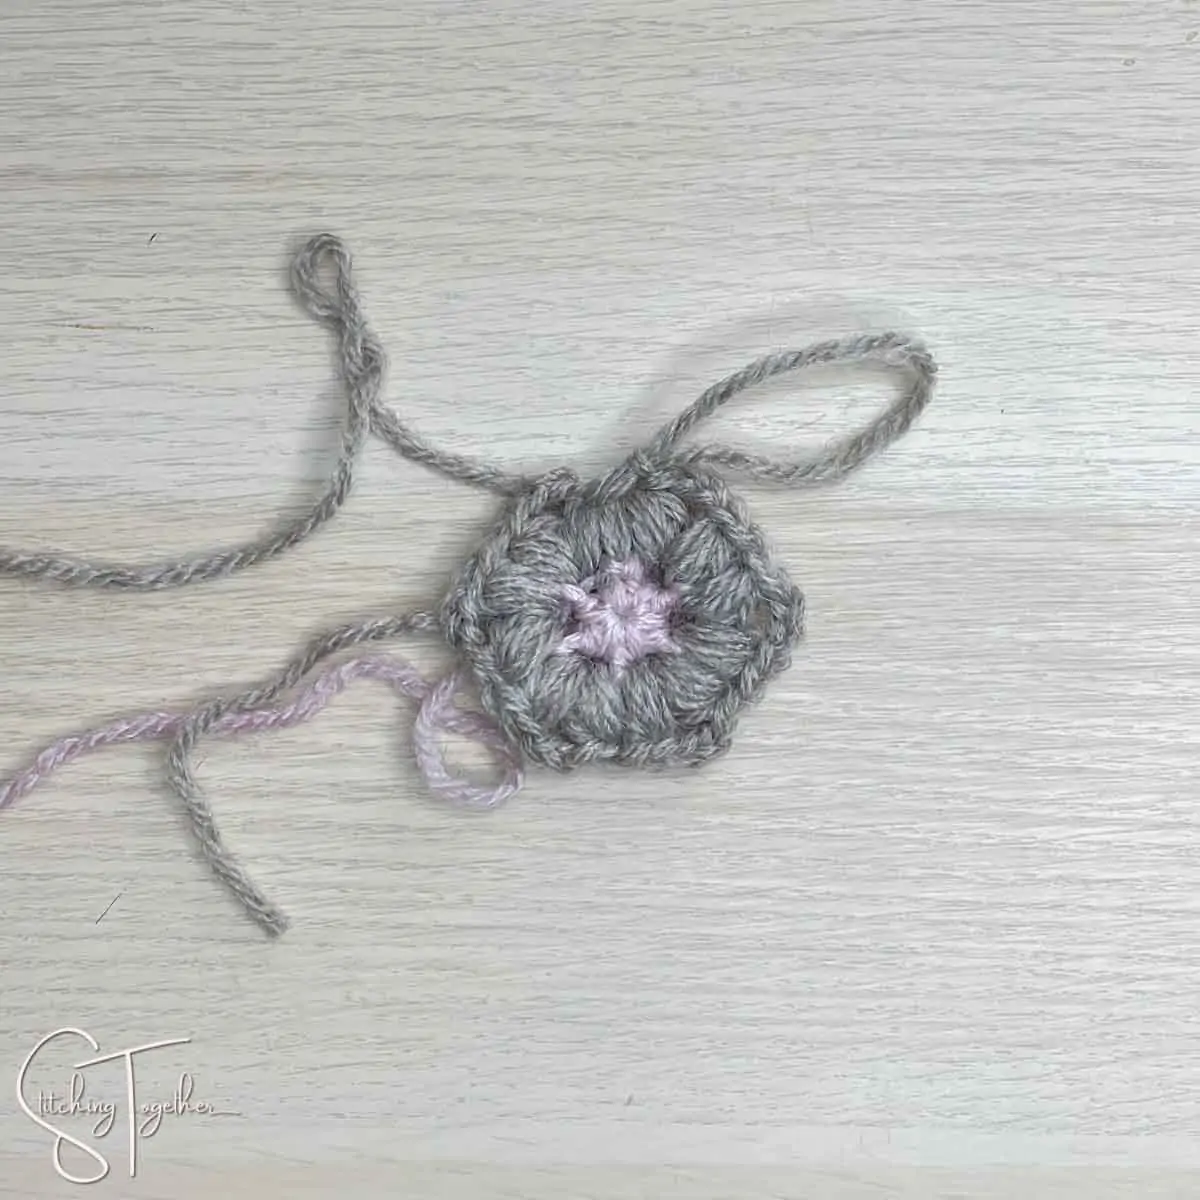
Round 1: Ch 1, 6 hdc in magic circle, tighten to close, join with a sl st in the 1st hdc. (6 hdcs)
Round 2: Join CB, ch 1, (puff, ch 3, puff, ch 1) in each hdc, join with the sl st in the 1st puff. (12 puffs)
Round 3: Join CC, ch 3, [(puff, ch 3, puff, ch 1) in ch-3 sp, dc space between the next 2 puffs] 5 times, (puff, ch 3, puff, ch 1) in ch-3 sp, join with a sl st around the ch 3 that started the round. (1 dc on each side and 2 puffs in each corner)
Round 4: Join CA, ch 3, dc in the next st, [(puff, ch 3, puff, ch 1) in ch-3 sp, dc in the next 3 sts] 5 times, (puff, ch 3, puff, ch 1) in ch-3 sp, dc, join with a sl st around the ch 3 that started the round. (3 dcs on each side and 2 puffs in each corner)
Round 5: Join CB, ch 3, dc in the 2 next sts, [(puff, ch 3, puff, ch 1) in ch-3 sp, dc in the next 5 sts] 5 times, (puff, ch 3, puff, ch 1) in ch-3 sp, dc in the next 2 sts, join with a sl st around the ch 3 that started the round. (5 dcs on each side and 2 puffs in each corner)
Round 6: Join CC, ch 3, dc in the 3 next sts, [(puff, ch 3, puff, ch 1) in ch-3 sp, dc in the next 7 sts] 5 times, (puff, ch 3, puff, ch 1) in ch-3 sp, dc in the next 3 sts, join with a sl st around the ch 3 that started the round. (7 dcs on each side and 2 puffs in each corner)
Band
ch 14,
Row 1: hdc in each ch across, turn (13 hdcs)
Row 2: ch 1, hdc flo in the next 12 sts, hdc in both loops for the last st of the row, turn (13 hdcs)
Repeat Row 2 until the headband reaches the desired length. (See the crochet ear warmer size chart). Sew or stitch the short ends together to form a circle. (The join can be covered by one of the hexagons so you can use a slip stitch or sc to join or you can use needle and yarn to whip stitch. Whatever works best for you!)
Joining the Hexagons
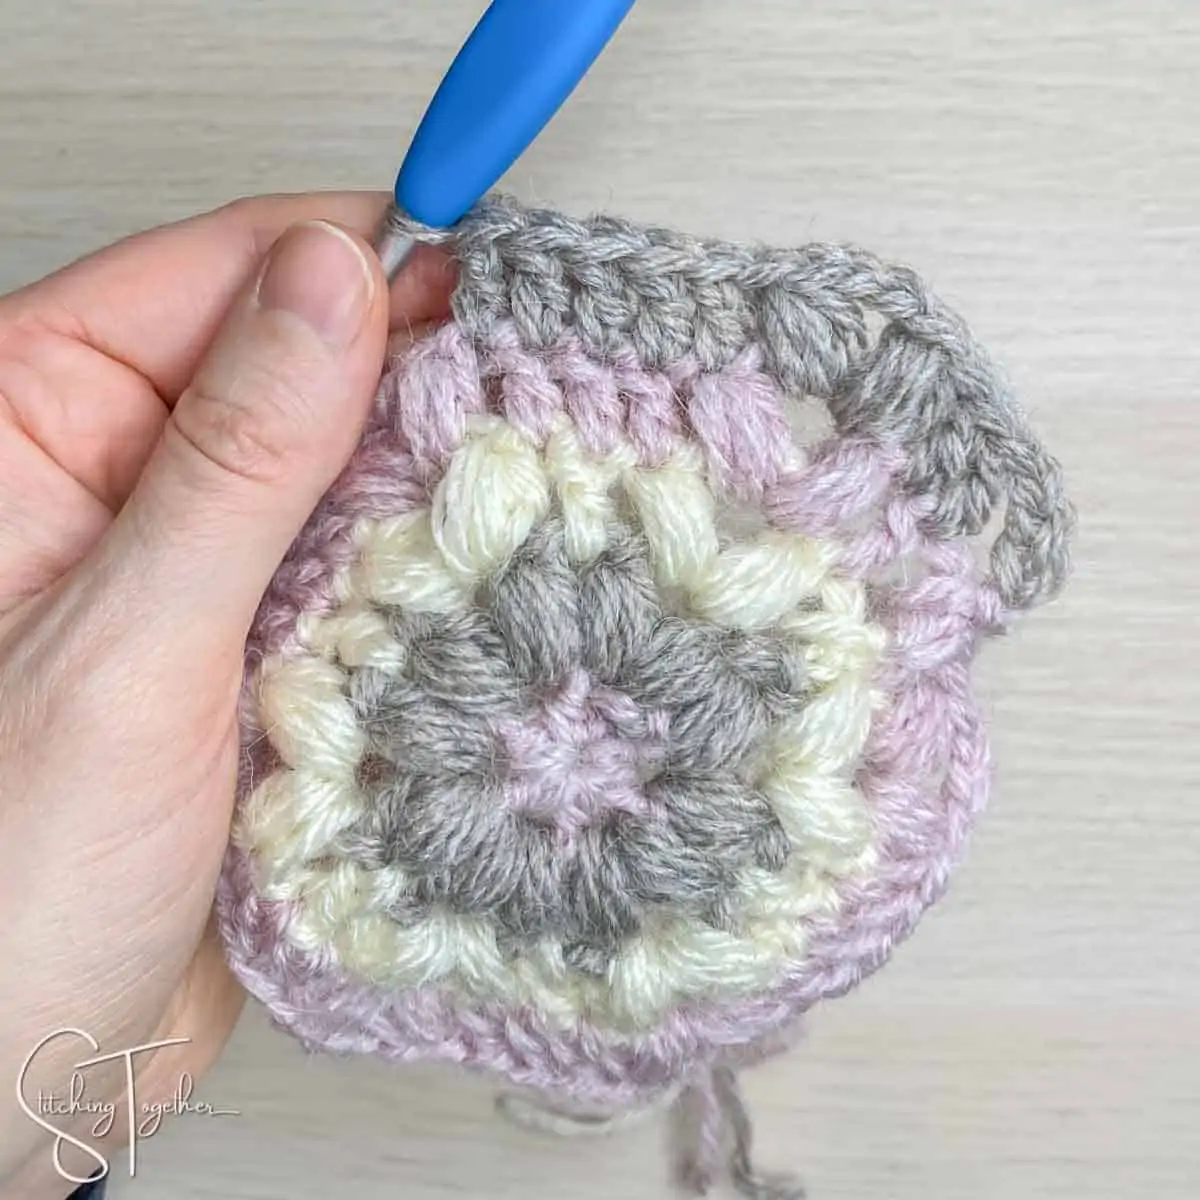
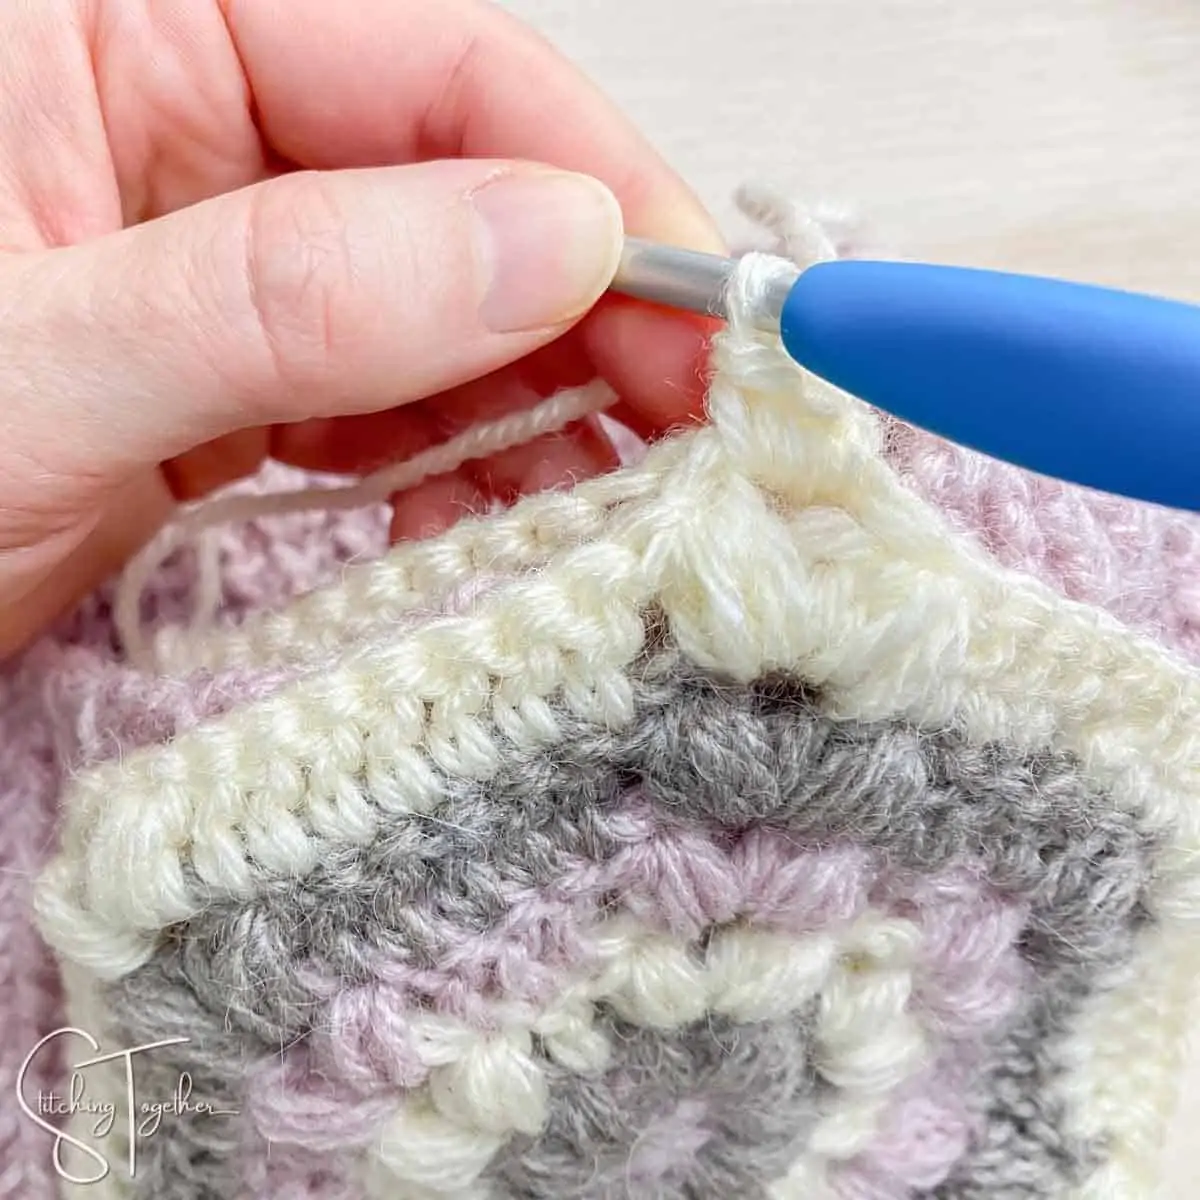
Hold 2 of the hexagons with the wrong sides together. Join CC through a ch-3 sp of both hexagons. 2 sc in ch-3 sp, [sc in the next 10 sts, 4 sc in ch-3 sp] 2 times, sc in the next 10 sts, 2 sc in ch-3 sp. Fasten off and weave in ends. Repeat for the 2 remaining hexagons.
Adding hexagons to the headband
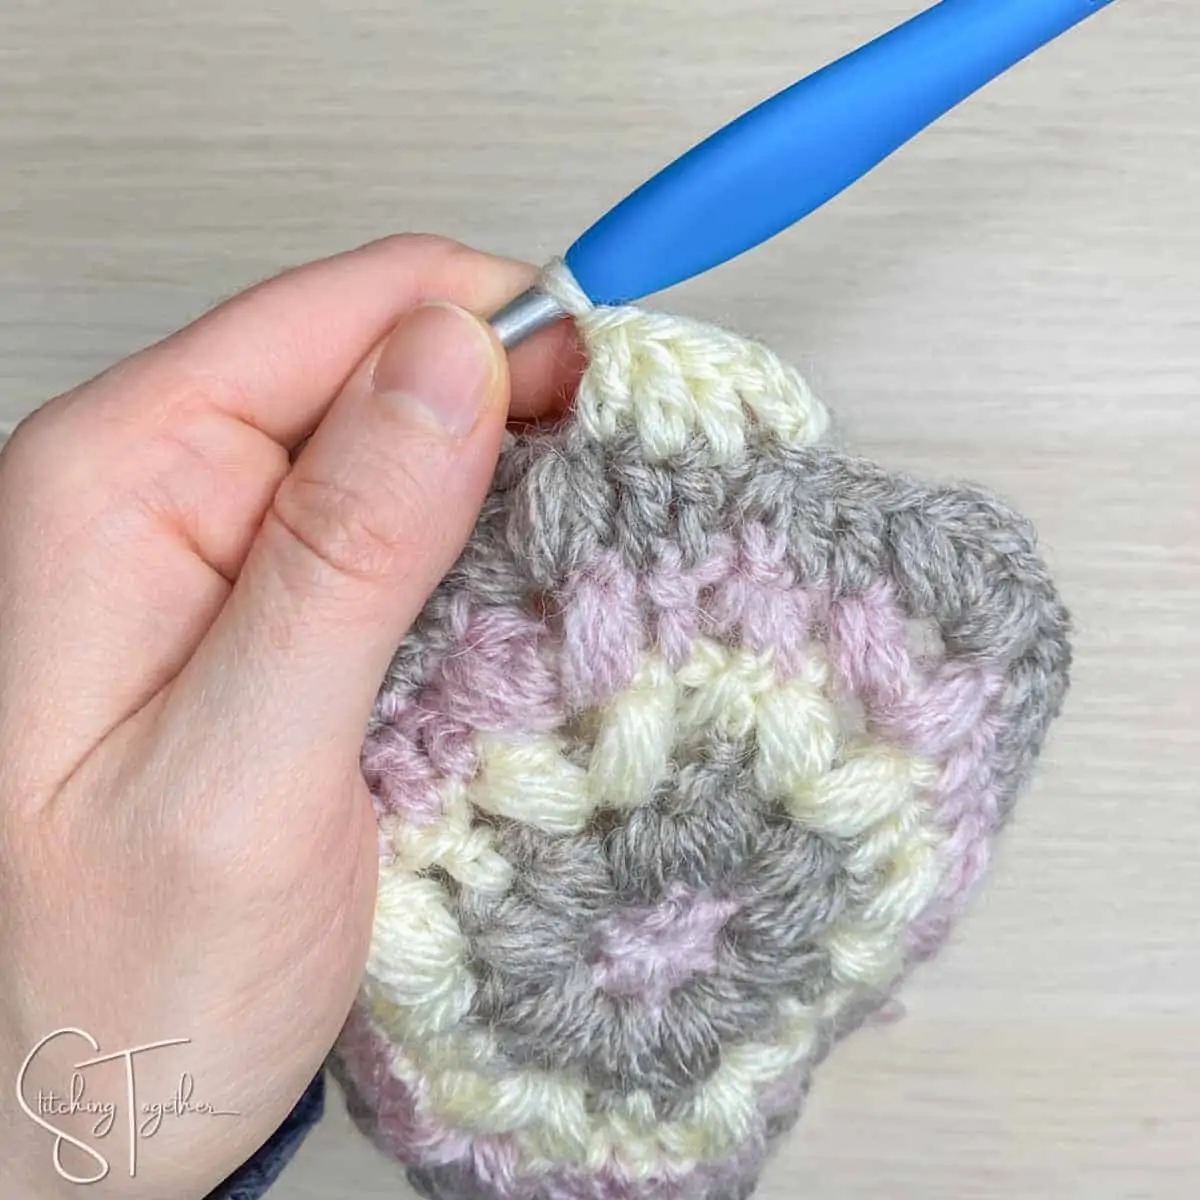
Place one side of the headband in the opening of joined hexagons. Join CC in ch-3 sp, 2 sc in ch-3 space, sc in the next 10 sts, 2 sc in ch-3 sp. Fasten off and weave in ends. Repeat on other side of the headband.
Adding Ties
Cut 4 strands of yarn from each color approximately 50” long.
Take one strand of each color (3 strands total) and put them through one of the ch-3 spaces at the bottom of the hexagon. Holding strands of the same color together, braid until the braid reaches about 2.5”. Repeat on the other side of the same hexagon. Join all the same colors together from both braids into one braid and then continue braiding until the braid reaches around 18”. Wrap/tie a 6” strand of yarn around the end of the braid to secure it. Cut fringe ends to the same length and optionally comb them out.
Crochet Head Warmer Pattern Photo Tutorial
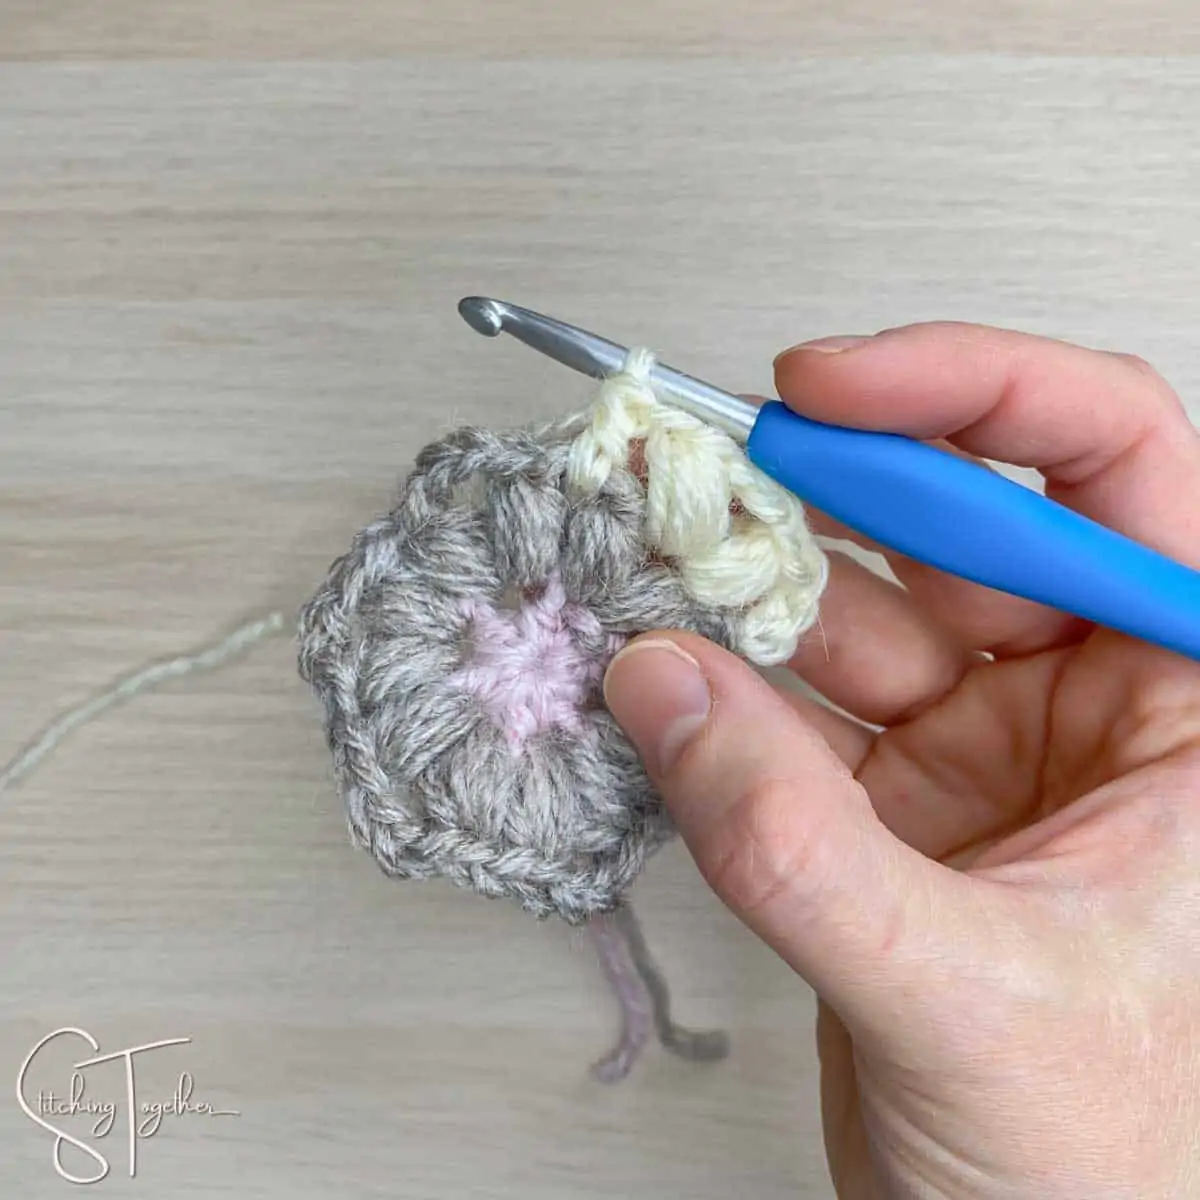
To change colors, complete the round, then pull the new color through the loop left on the hook. Tighten the loop of the previous color and continue with the next round using the new color.
Rounds 1 and 2 completed.
Round 3: Join CC, ch 3, [(puff, ch 3, puff, ch 1) in ch-3 sp, dc space between the next 2 puffs] 5 times, (puff, ch 3, puff, ch 1) in ch-3 sp, join with a sl st around the ch 3 that started the round. (1 dc on each side and 2 puffs in each corner)
Rounds 1-3 completed.
Round 4: Join CA, ch 3, dc in the next st, [(puff, ch 3, puff, ch 1) in ch-3 sp, dc in the next 3 sts] 5 times, (puff, ch 3, puff, ch 1) in ch-3 sp, dc, join with a sl st around the ch 3 that started the round. (3 dcs on each side and 2 puffs in each corner)
Rounds 1-4 completed.

Round 5: Join CB, ch 3, dc in the 2 next sts,
[(puff, ch 3, puff, ch 1) in ch-3 sp, dc in the next 5 sts] 5 times, (puff, ch 3, puff, ch 1) in ch-3 sp, dc in the next 2 sts, join with a sl st around the ch 3 that started the round. (5 dcs on each side and 2 puffs in each corner)
Rounds 1-5 completed.
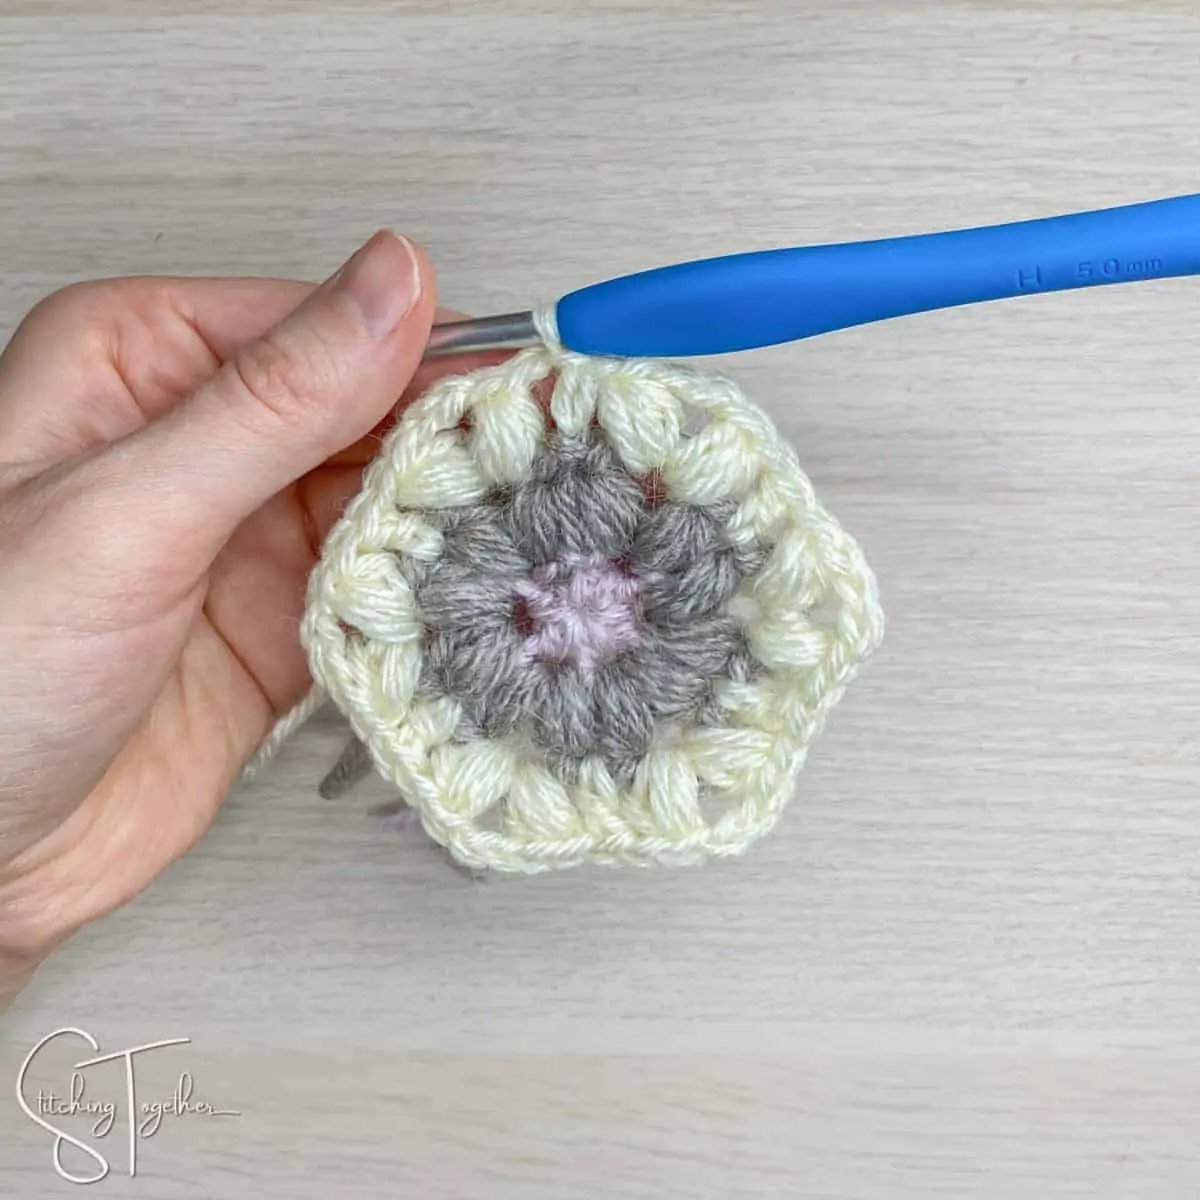
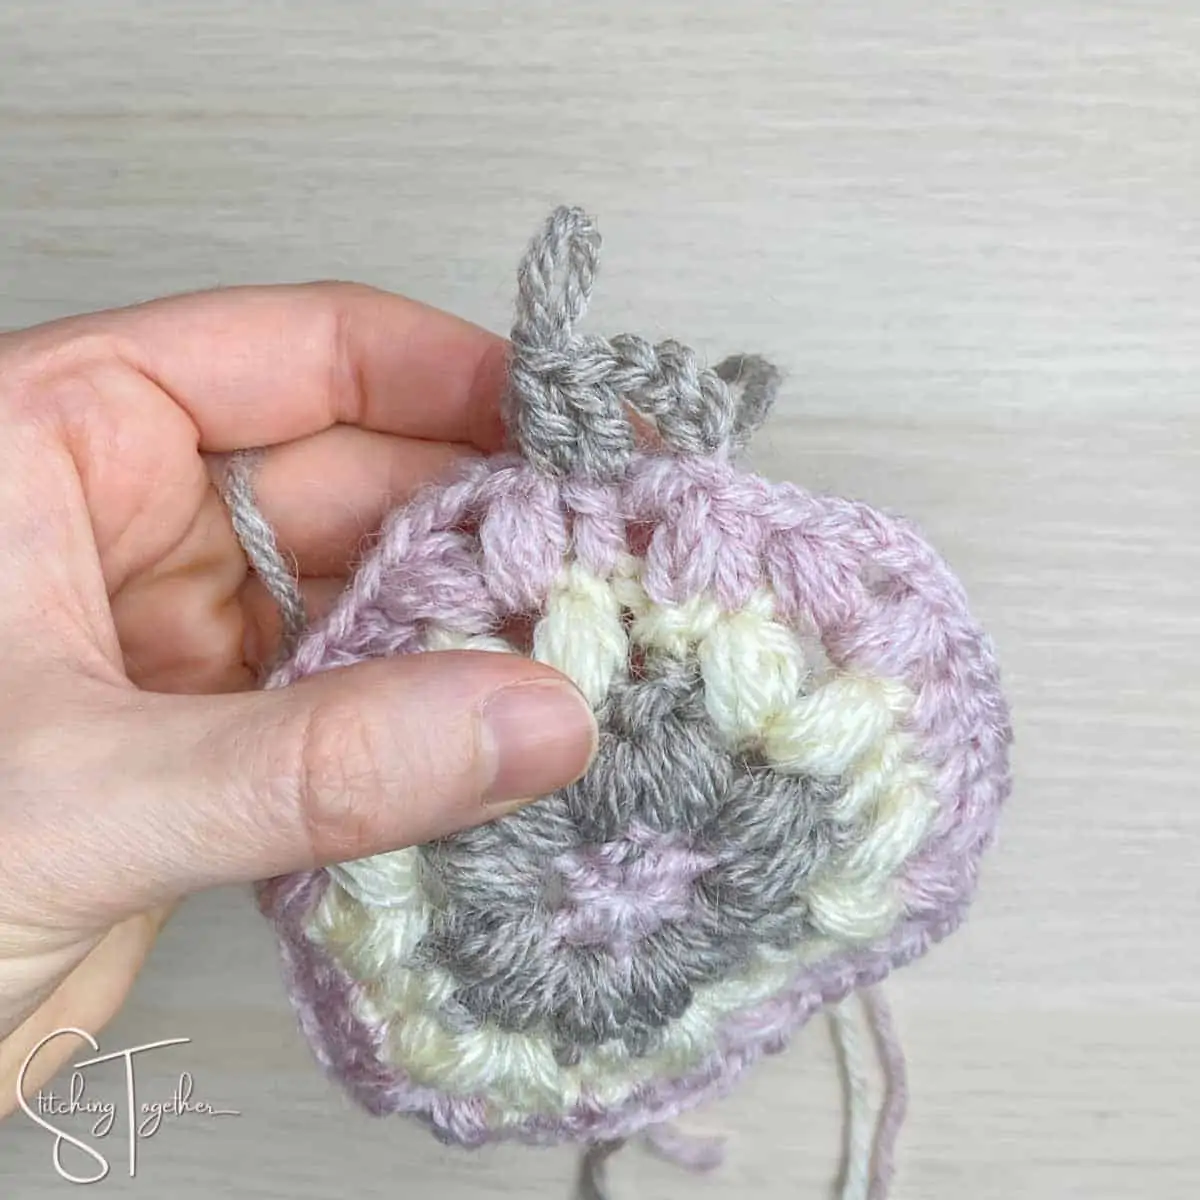
Round 6: Join CC, ch 3, dc in the 3 next sts, [(puff, ch 3, puff, ch 1) in ch-3 sp, dc in the next 7 sts] 5 times, (puff, ch 3, puff, ch 1) in ch-3 sp, dc in the next 3 sts, join with a sl st around the ch 3 that started the round. (7 dcs on each side and 2 puffs in each corner)
Rounds 1-6 completed.
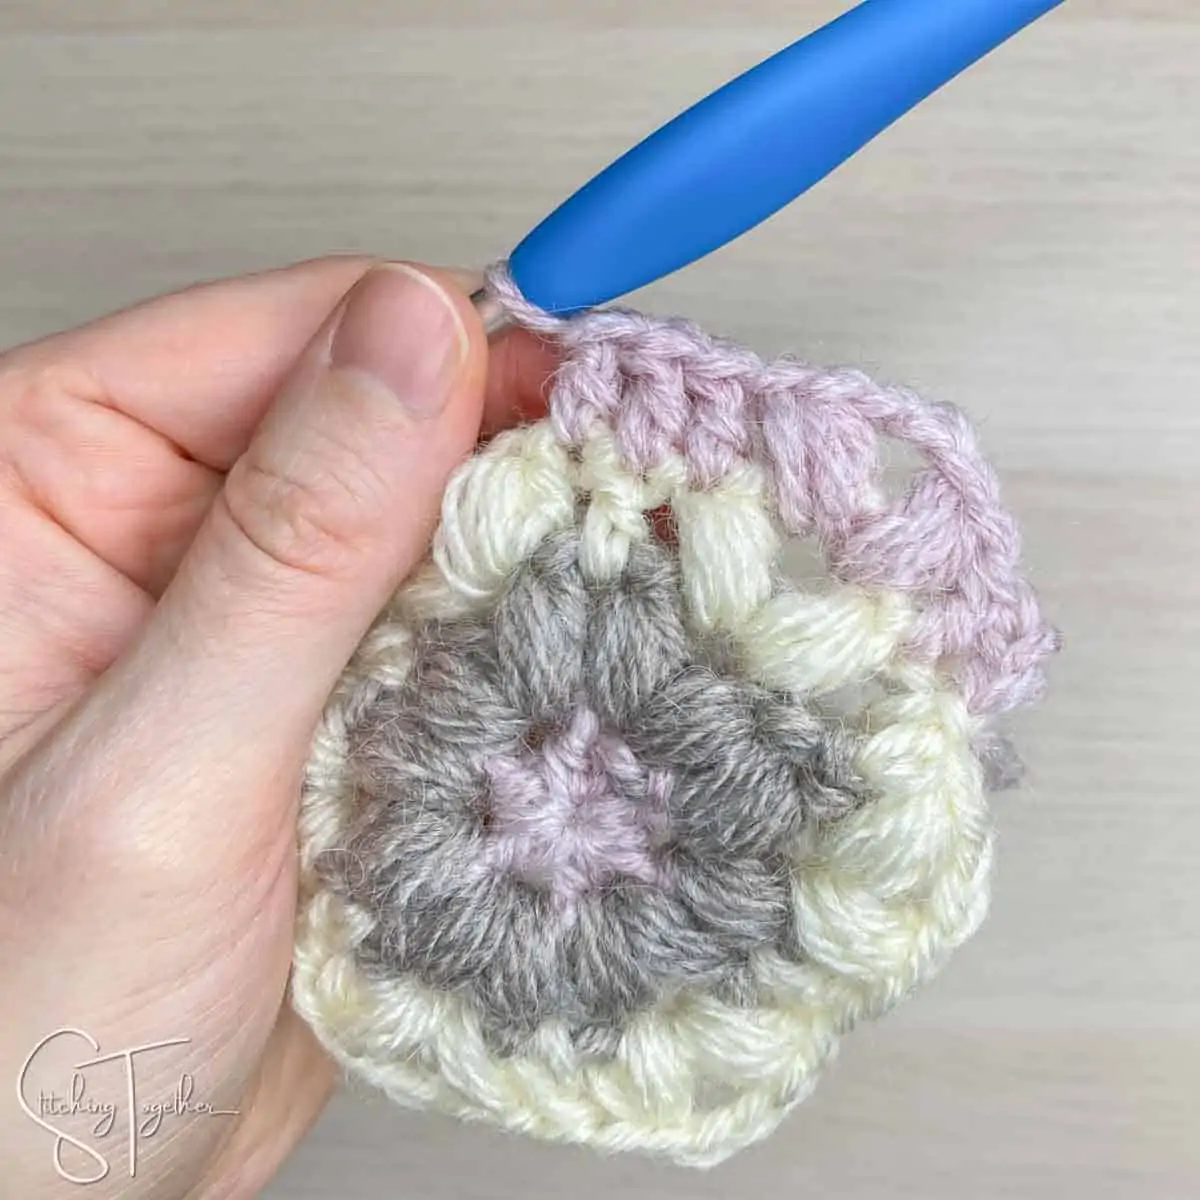
Joining the Hexagons Hold 2 of the hexagons with the wrong sides together. Join CC through a ch-3 sp of both hexagons.
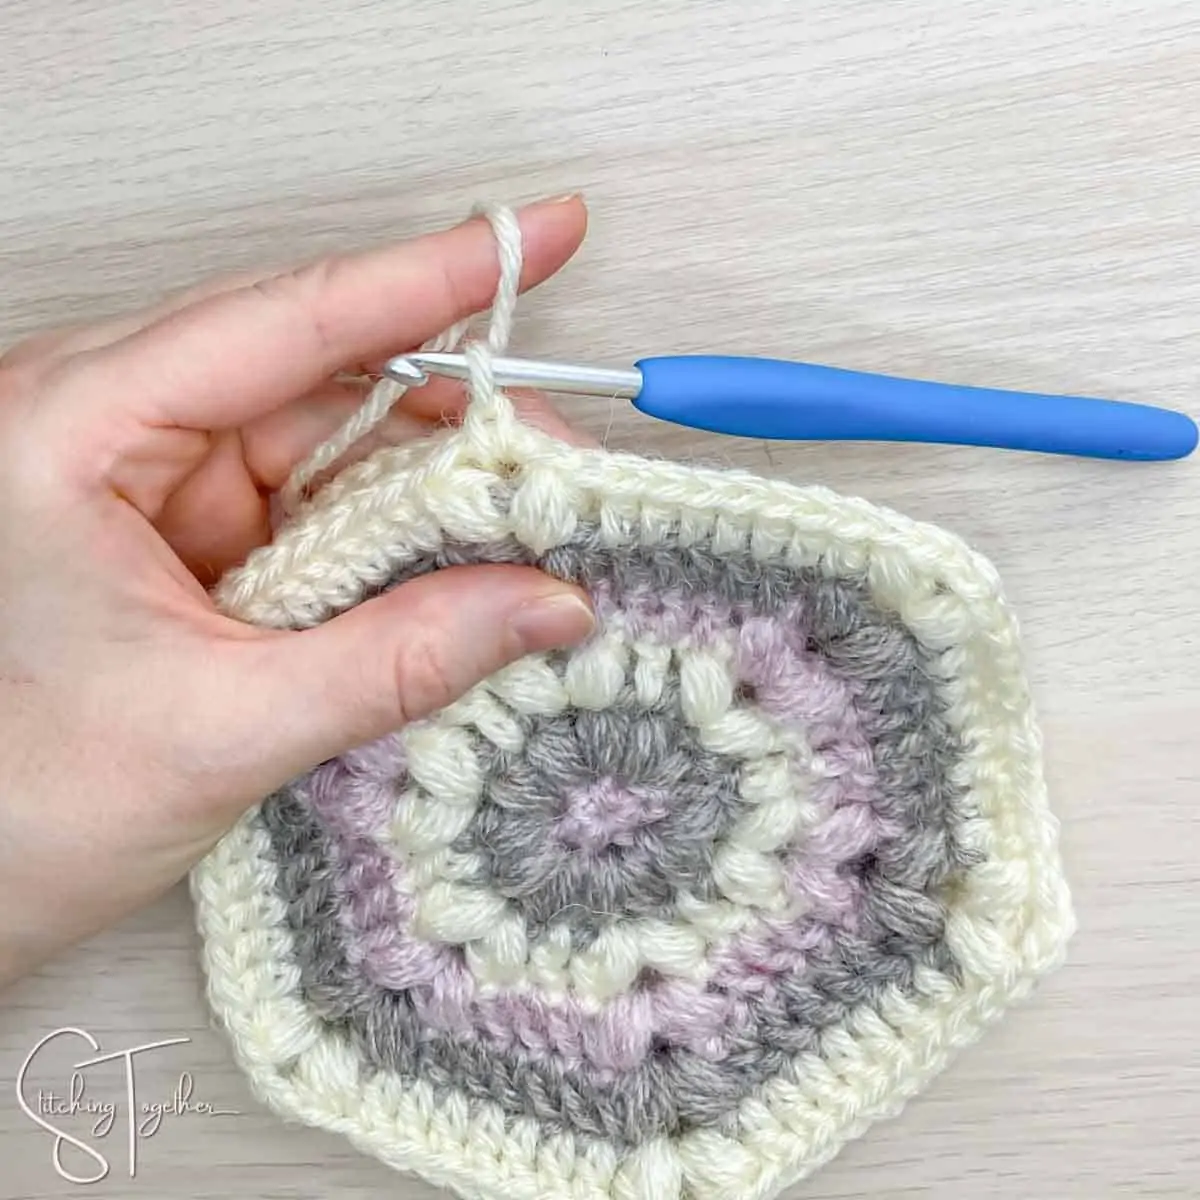
2 sc in ch-3 sp, [sc in the next 10 sts, 4 sc in ch-3 sp] 2 times, sc in the next 10 sts, 2 sc in ch-3 sp. Fasten off and weave in ends. Repeat for the 2 remaining hexagons.
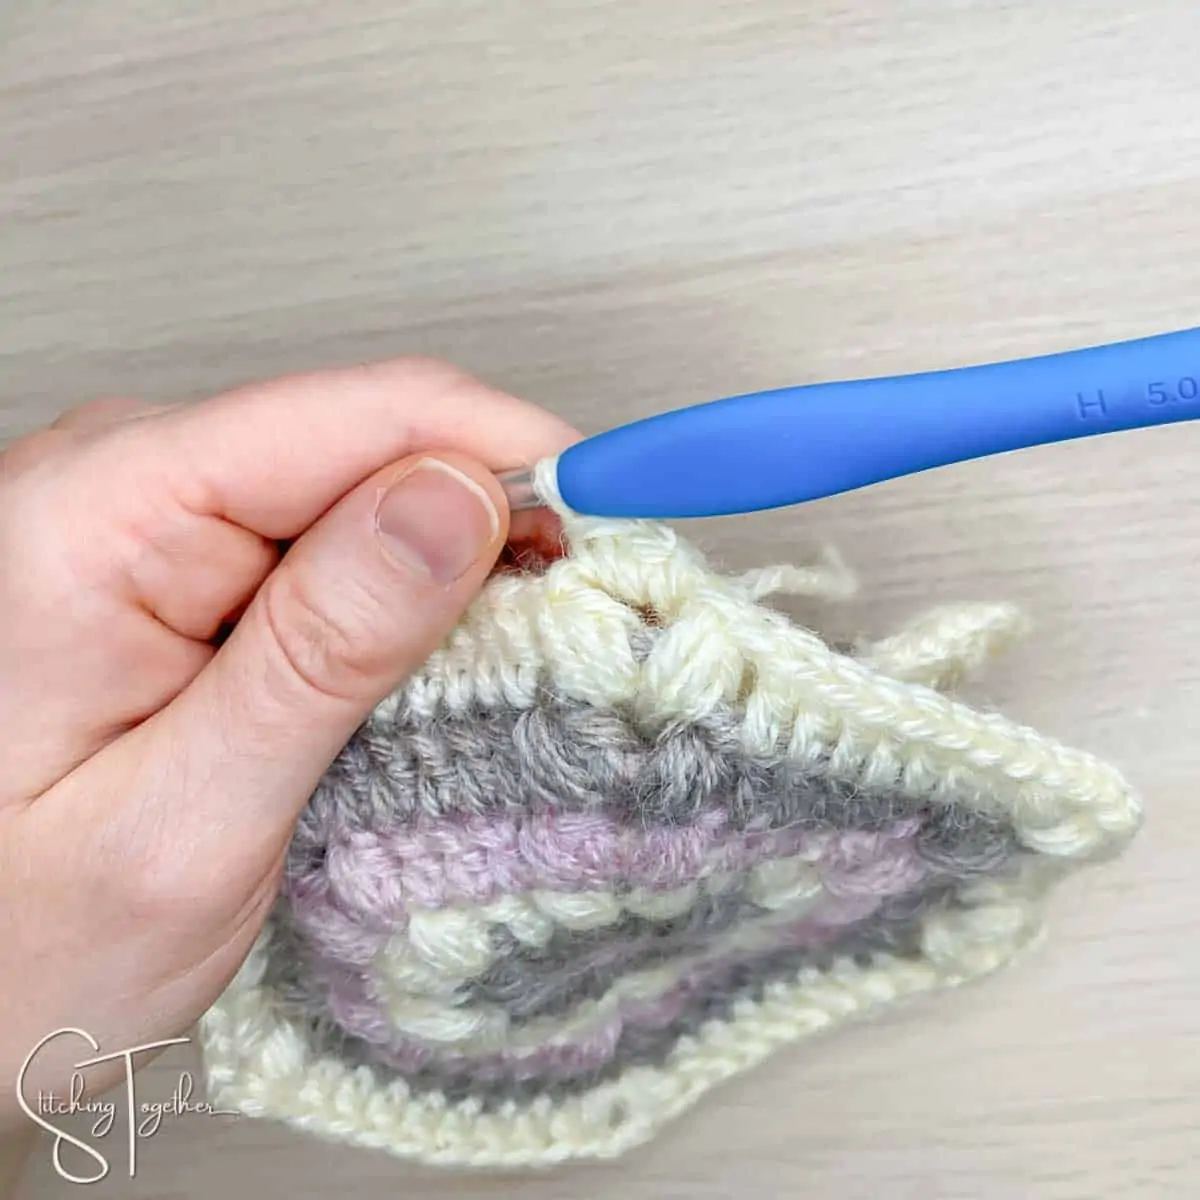
Place one side of the headband in the opening of joined hexagons.
Join CC in ch-3 sp, 2 sc in ch-3 space,
sc in the next 10 sts, 2 sc in ch-3 sp. Fasten off and weave in ends. Repeat on other side of the headband.
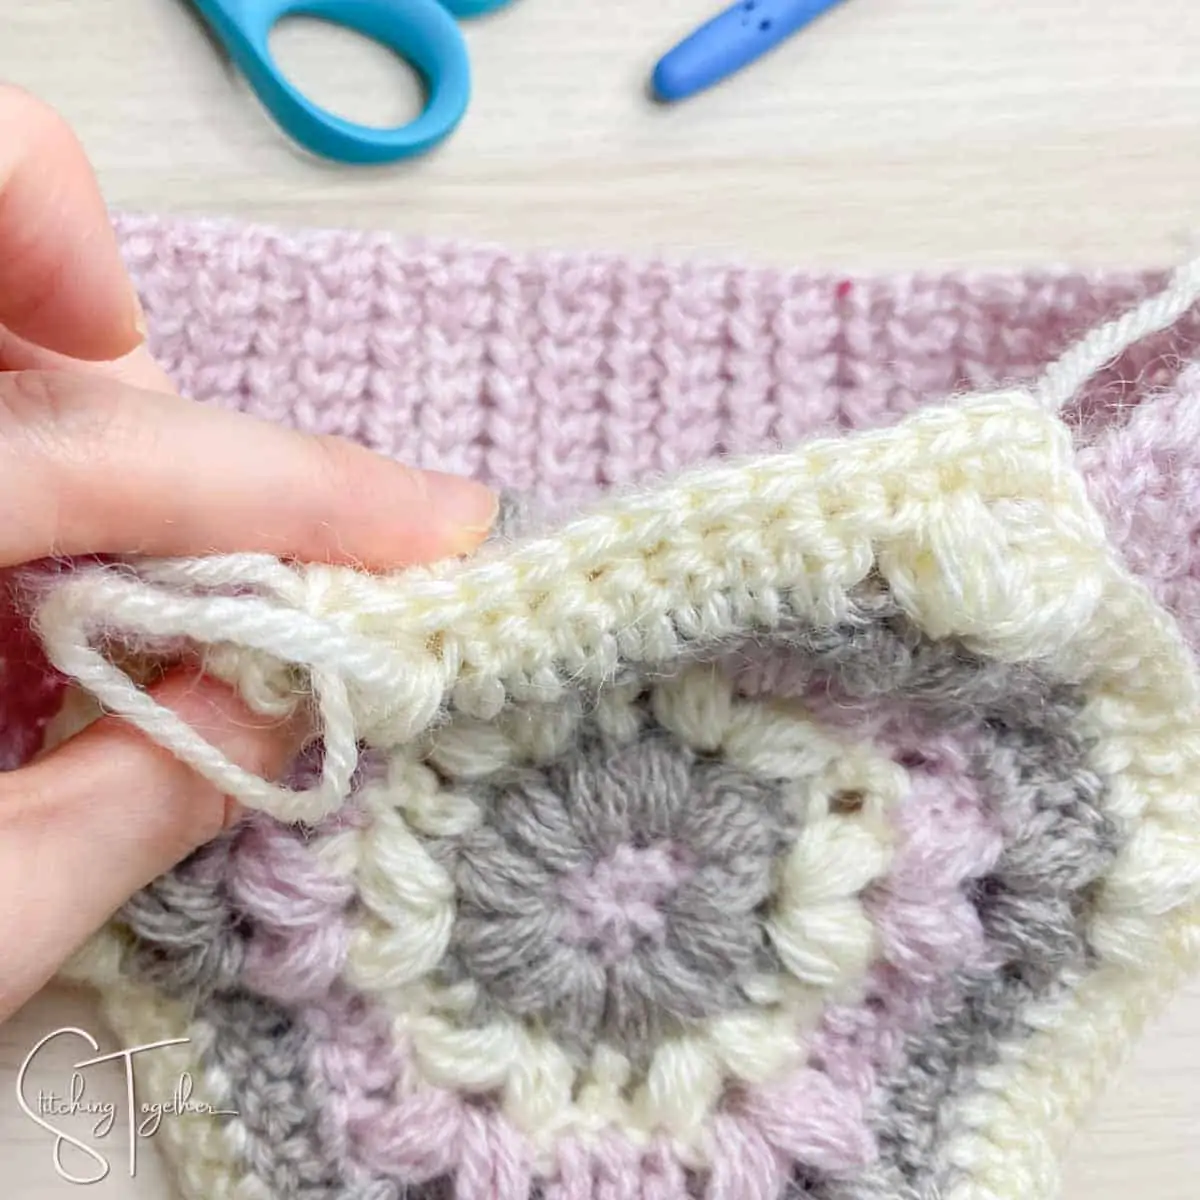
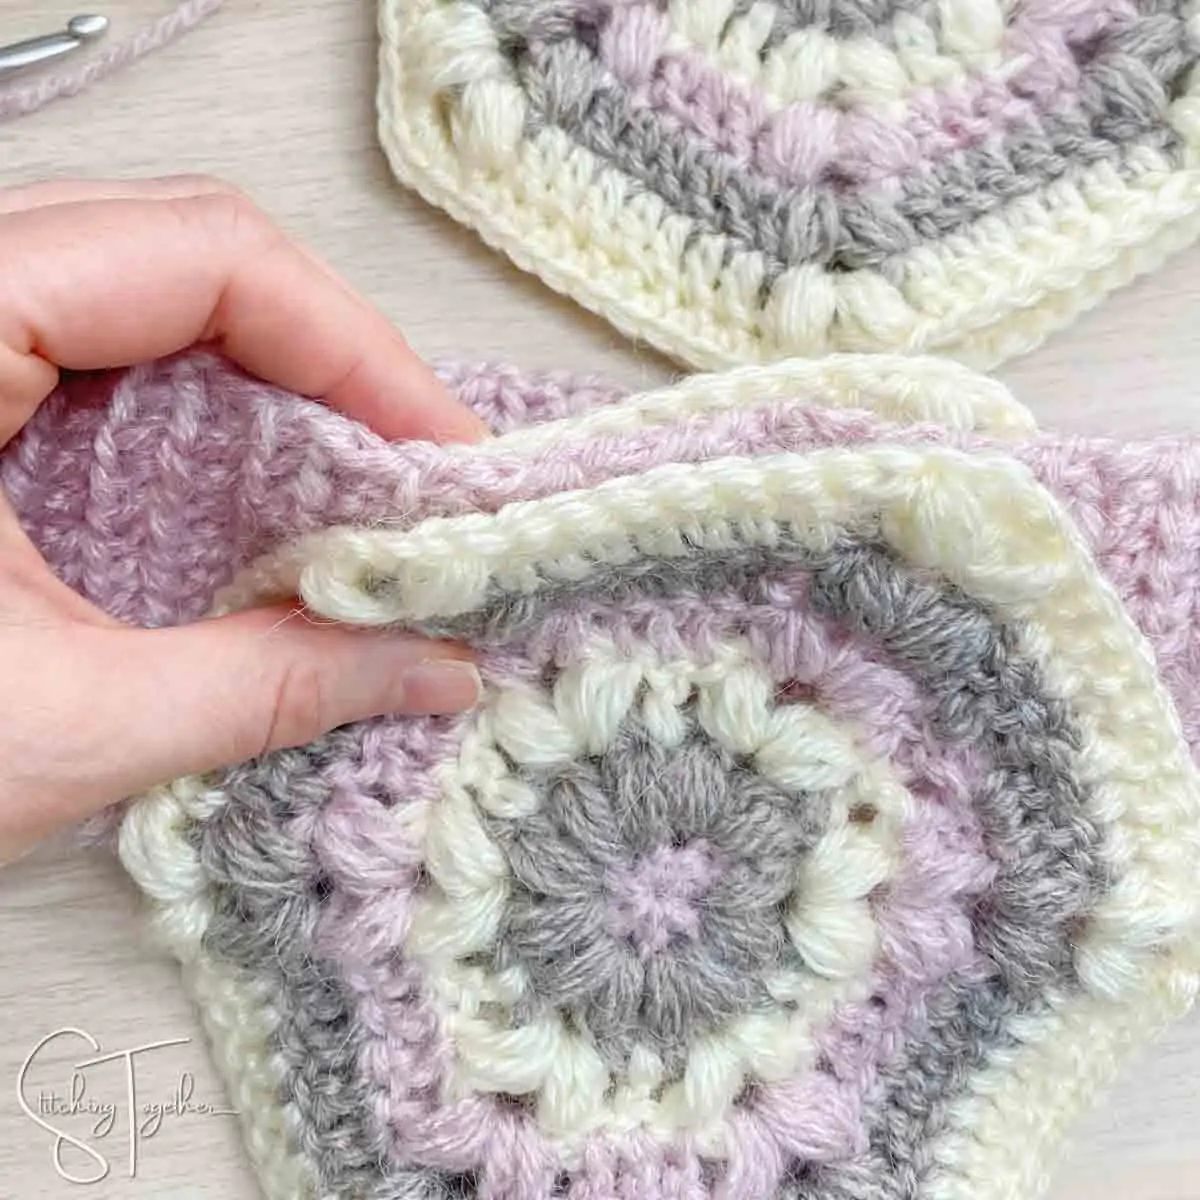
Hexagons joined to the headband!
Adding Ties
Cut 4 strands of yarn from each color approximately 50” long. Take one strand of each color (3 strands total) and put them through one of the ch-3 spaces at the bottom of the hexagon.
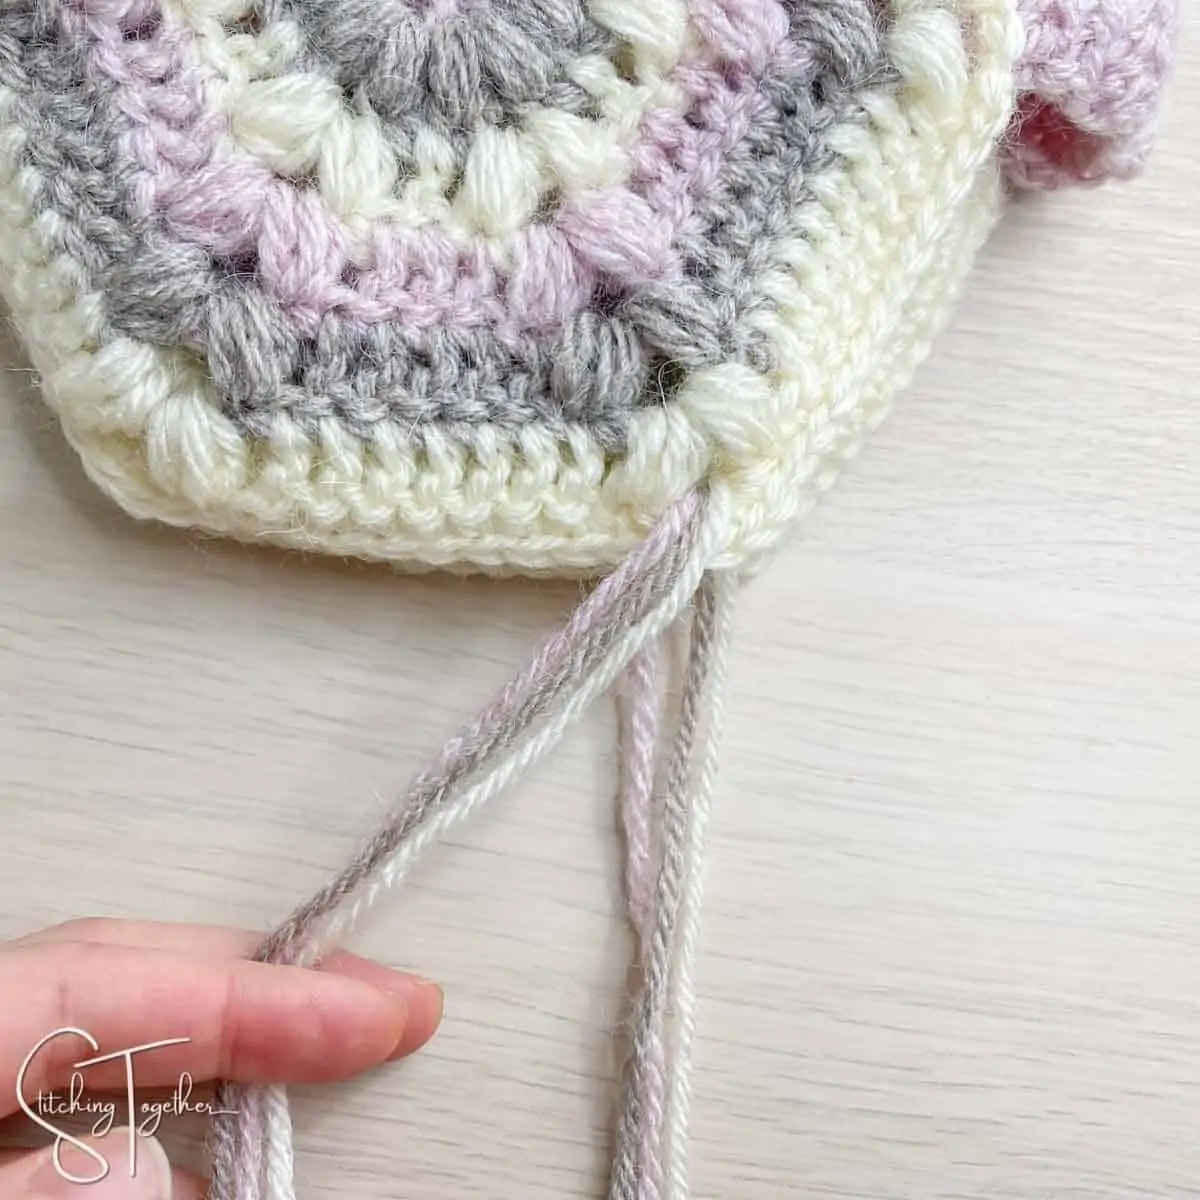
Holding strands of the same color together,
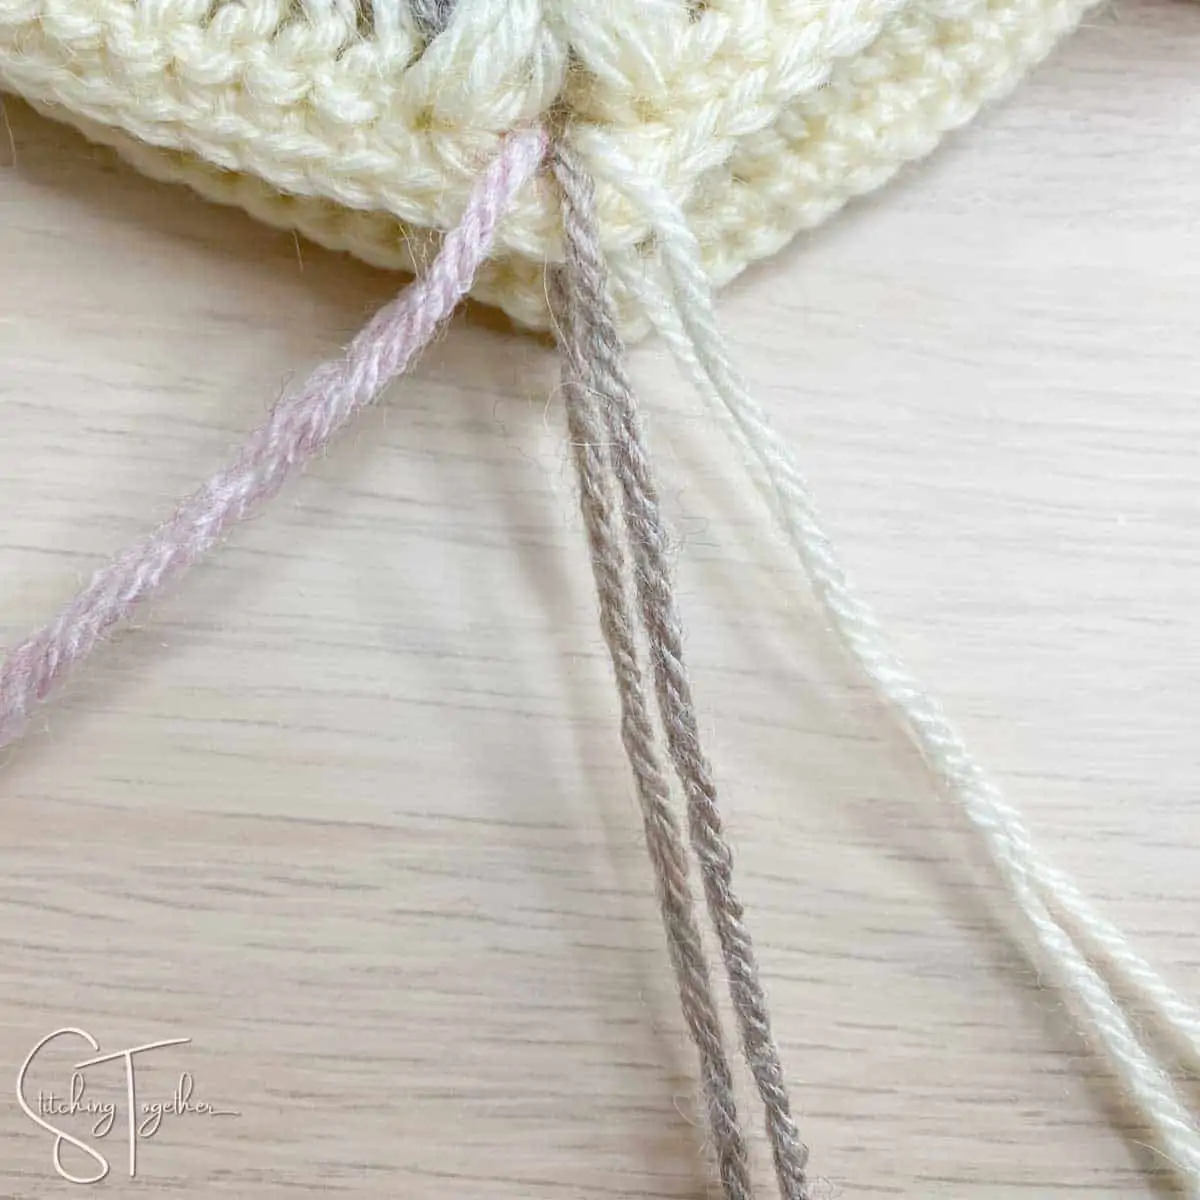
braid until the braid reaches about 2.5”. Repeat on the other side of the same hexagon.
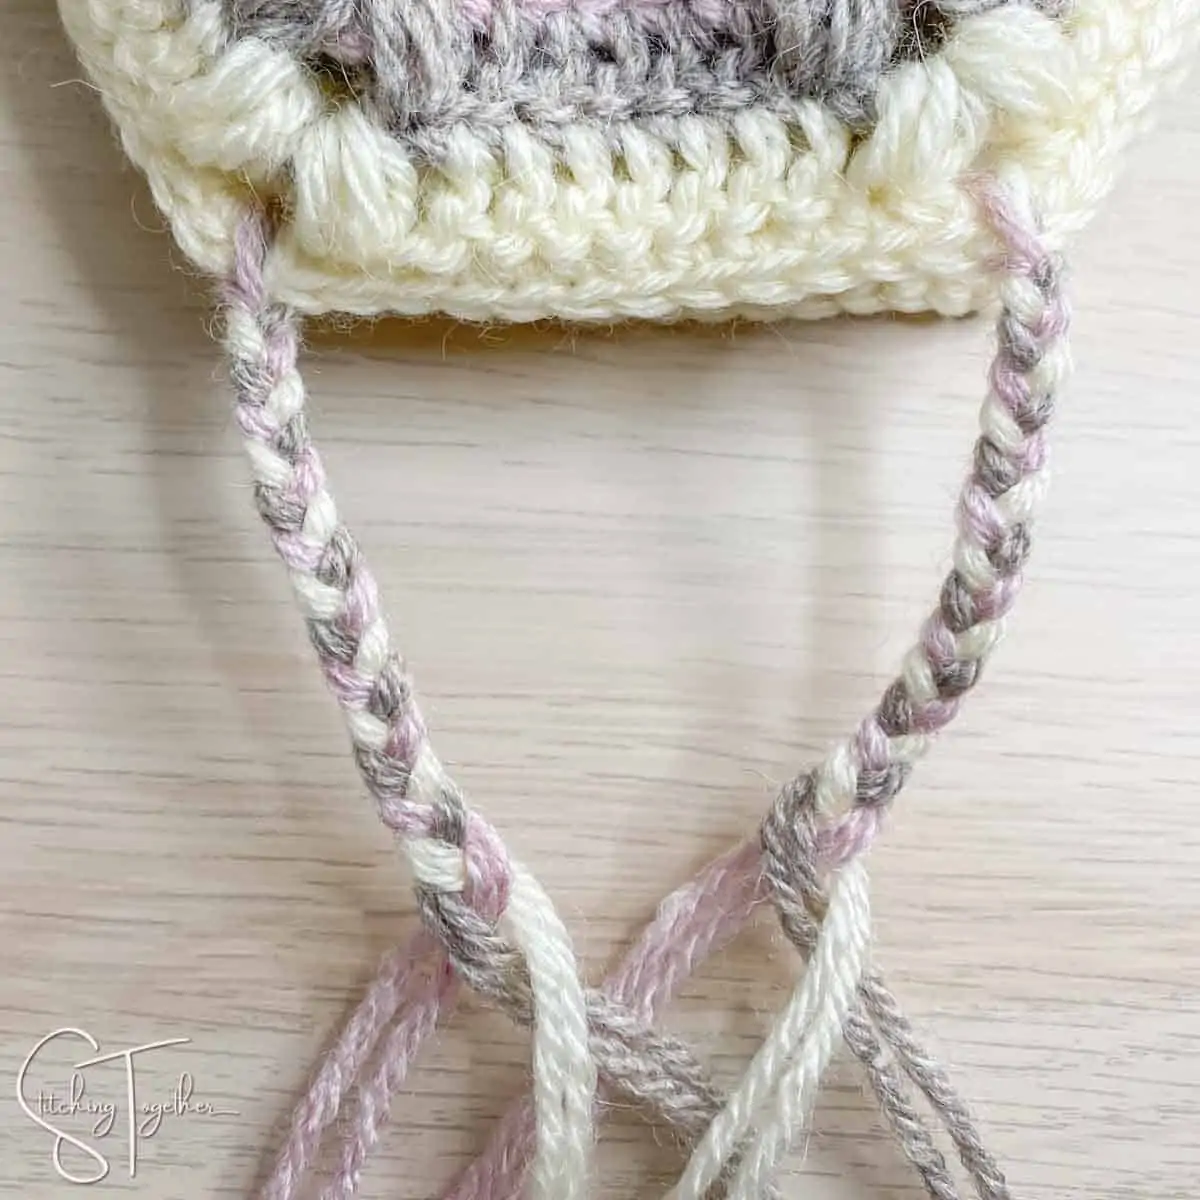
Join all the same colors together from both braids into one braid and then continue braiding until the braid reaches around 18”.
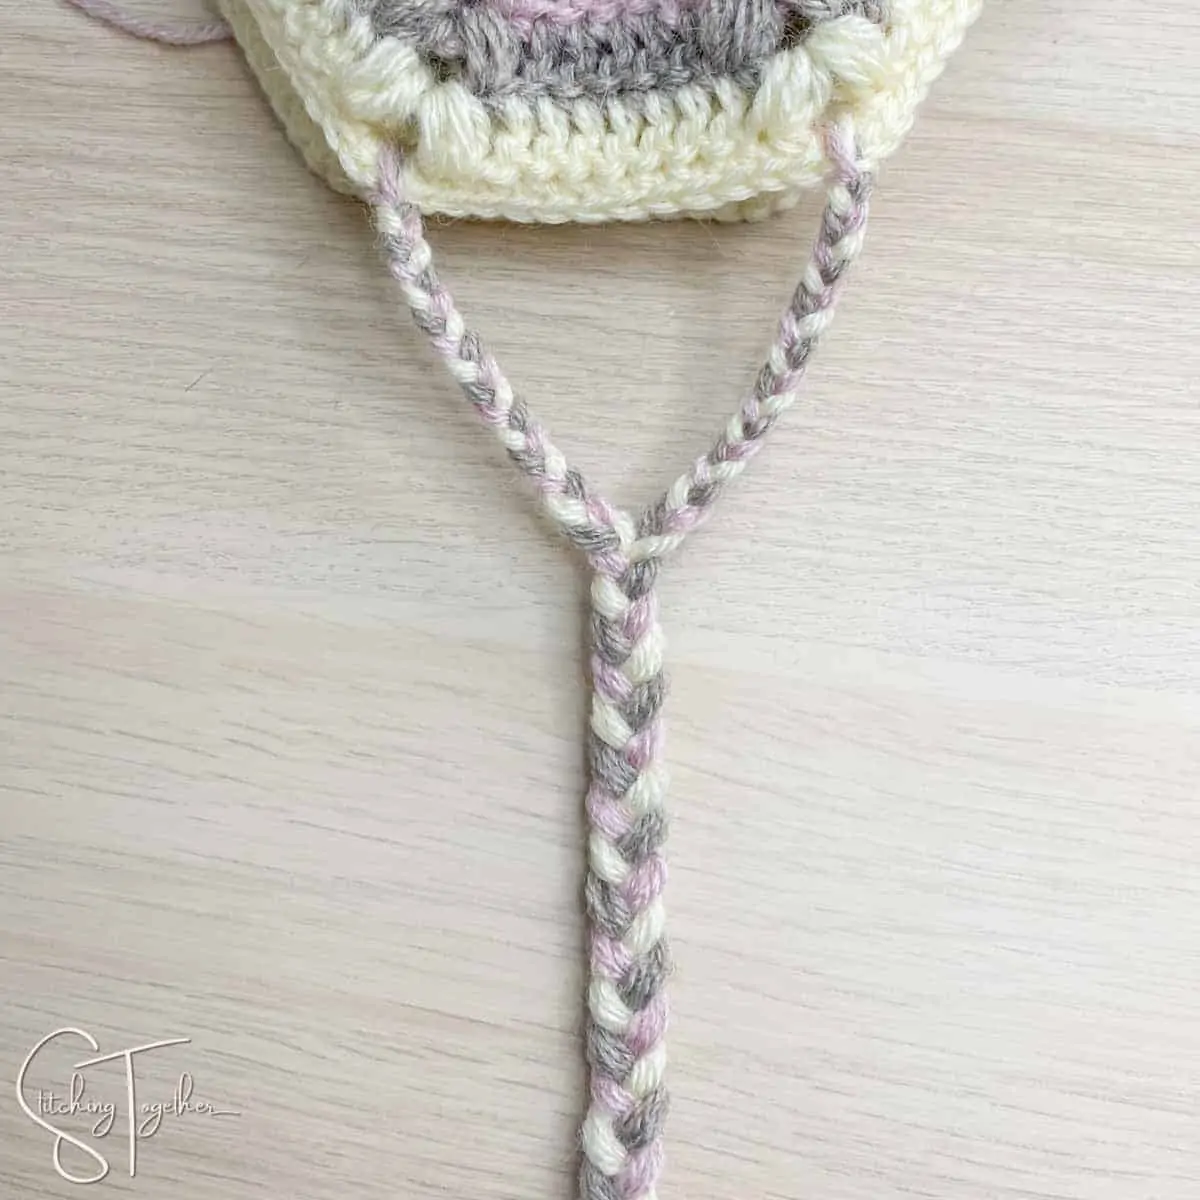
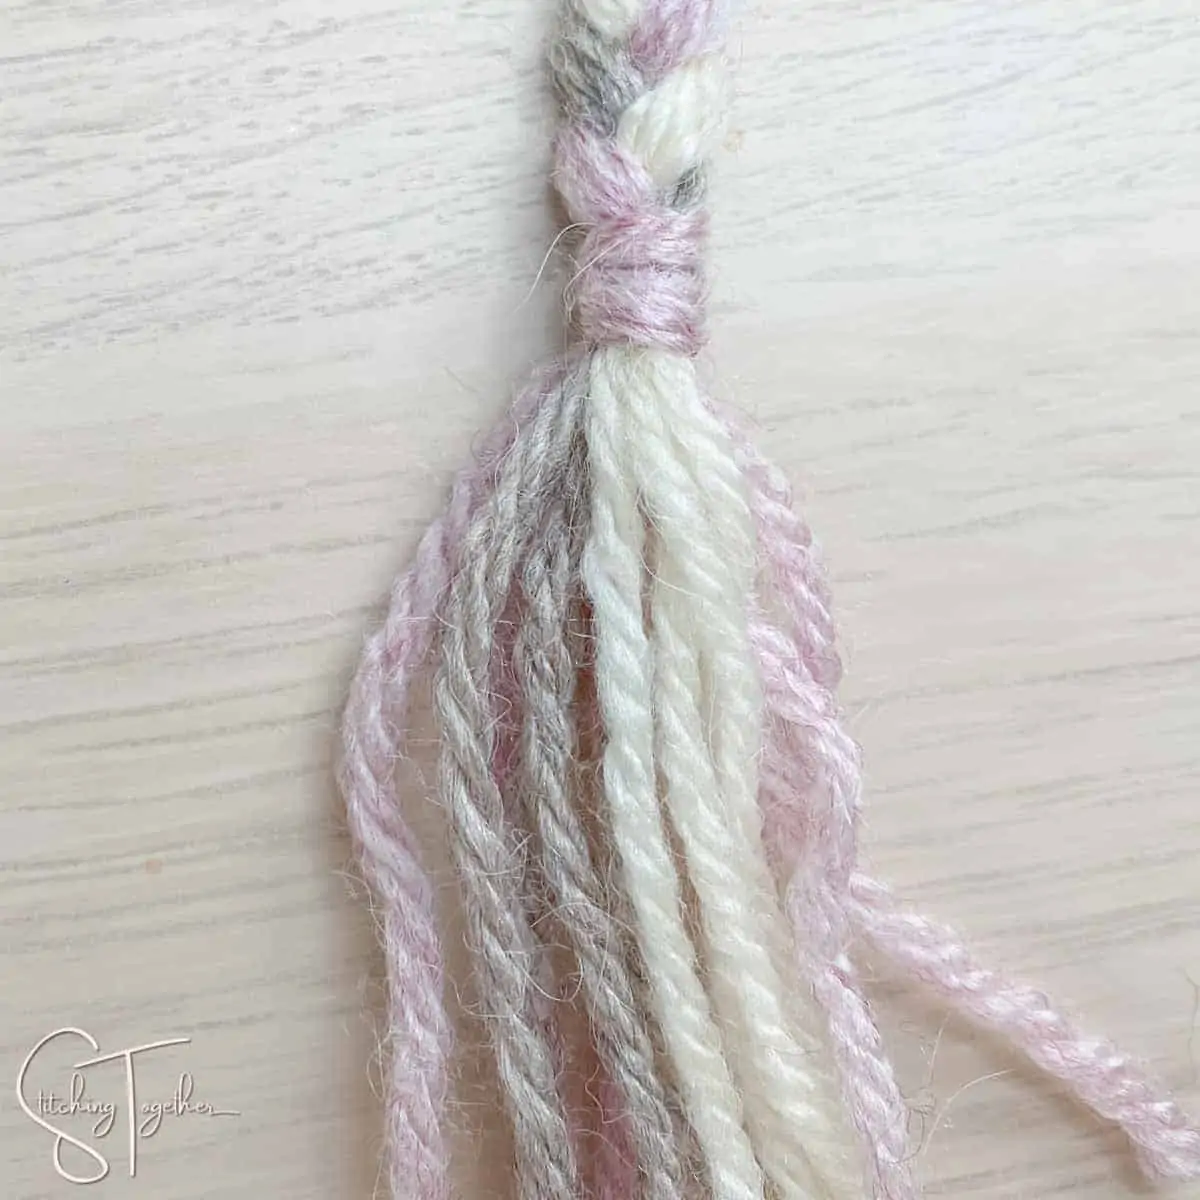
Wrap/tie a 6” strand of yarn around the end of the braid to secure it. Cut fringe ends to the same length and optionally comb them out.
Will you share pictures of your finished projects?
- Tag Stitching Together on Instagram with @stitching_together and use the #stitchingtog
- Upload your picture in the Tried It section of this pin
- Share your work in the Stitching Together Community.
.
If you like easy to print patterns, this pattern can be purchased in the following places:
Thanks for your support!
.
Love these hexagons? Don’t miss them used as part of the Granny Square Bucket Hat Crochet Pattern.
Hello! I would really love to make this! It’s so beautiful! However, my daughters like to stretch things-could I use merino wool yarn? would it be warm enough? or even cotton? or should I stick with alpaca?
I think wool would work wonderfully.